Table of Contents
Advertisement
Quick Links
®
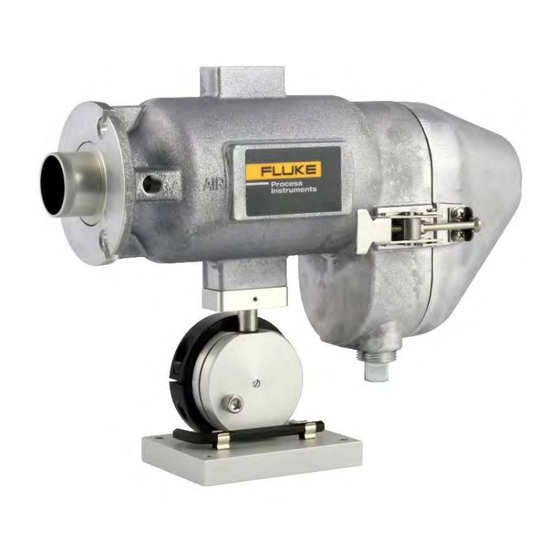
ThermoJacket
Protective Enclosure
Users Manual
PN 4993999, English, Rev. 1.1, Jan 2019
© 2019 Fluke Process Instruments. All rights reserved. Printed in Germany. Specifications subject to change without notice.
All product names are trademarks of their respective companies.
info@Raytek-Direct.ca
1.800.561.8187
Advertisement
Table of Contents

Summary of Contents for Fluke ThermoJacket
- Page 1 ThermoJacket Protective Enclosure Users Manual PN 4993999, English, Rev. 1.1, Jan 2019 © 2019 Fluke Process Instruments. All rights reserved. Printed in Germany. Specifications subject to change without notice. All product names are trademarks of their respective companies. info@Raytek-Direct.ca 1.800.561.8187...
-
Page 2: Table Of Contents
Warranty The manufacturer warrants this instrument to be free from defects in material and workmanship under normal use and service for the period of two years from date of purchase. This warranty extends only to the original purchaser. This warranty shall not apply to fuses, batteries, or any product which has been subject to misuse, neglect, accident, or abnormal conditions of operation. -
Page 3: Table Of Contents
Table of Contents Chapter Page ..............................3 ABLE OF ONTENTS ............................... 5 IST OF ABLES ..............................6 IST OF IGURES ............................7 OMPLIANCE TATEMENT ............................... 8 AFETY NFORMATION ................................10 ONTACTS ............................... 11 ESCRIPTION ..............................12 ECHNICAL 2.1 General Specifications ....................................12 2.2 Dimensions ........................................ - Page 4 ............................ 37 XEMPLARY NSTALLATION 6.1 Air Purging ........................................37 6.2 Water Cooling ......................................... 37 6.3 Additional Components....................................37 info@Raytek-Direct.ca 1.800.561.8187...
-
Page 5: List Of Tables
List of Tables Table Page Table 2-1: Ambient Temperatures versus Coolant Flow ..................12 info@Raytek-Direct.ca 1.800.561.8187... - Page 6 Figure 4-13: Water Flow Regulator (A-TJ-WFR) ....................31 Figure 4-14: Dimensions ............................32 Figure 4-15: Air Flow Regulator (A-TJ-AFR) ......................33 Figure 4-16: Dimensions ............................34 Figure 4-17: Air Pressure Regulator (A-TJ-APR) ....................35 Figure 6-1: Installation of the ThermoJacket inside an Oven ................38 info@Raytek-Direct.ca 1.800.561.8187...
-
Page 7: Compliance Statement
Compliance Statement The device complies with the requirements of the European Directives: EC – Directive 2011/65/EU – RoHS II EN 50581: 2012 Technical documentation for the evaluation of electrical products with respect to restriction of hazardous substances (RoHS) info@Raytek-Direct.ca 1.800.561.8187... -
Page 8: Safety Information
Acceptable Operation This instrument is intended only as accessory for selected Fluke infrared point sensors. The instrument operates reliably in demanding conditions, such as in high environmental temperatures, as long as the documented specifications are adhered to. -
Page 9: Contacts
To prevent possible electrical shock, fire, or personal injury follow these guidelines: • Read all safety Information before you use the product. • Use the product only as specified, or the protection supplied by the product can be compromised. • Carefully read all instructions. •... -
Page 10: Description
Sensing heads can be installed or removed from the ThermoJacket housing in its mounted position. All necessary mounting accessories are supplied with the ThermoJacket for your sensing head. -
Page 11: Technical Data
ThermoJacket Users Manual, Rev. 1.1, Jan 2019 2 Technical Data 2.1 General Specifications 35 – 48 l / min (1.24 to 1.7 foot³ / min.) Air purge flow Ambient temperatures water cooling 315°C (600°F) air cooling 115°C (240°F) Coolant pressure (min./max.) water cooling 2.7 bar (40 psi) to 8.6 bar (125 psi) -
Page 12: Dimensions
Technical Data Dimensions 2.2 Dimensions Figure 2-1: Dimensions for the ThermoJacket Air Purge IN ¼” NPT 3 x Ø 7.9 (.31) thru hole with 6.6 (.26) wide slot thru with Ø 14.6 (.575) cbore x 0.05 DP ON Ø 3.00 BC ¾”... -
Page 13: Scope Of Delivery
ThermoJacket Users Manual, Rev. 1.1, Jan 2019 2.3 Scope of Delivery The following items are supplied with the ThermoJacket: 2x Swage lock fittings (Parker Hannifin Corp. 5FSC4N- 316) 1/4” NPT metric adapter (for air purge) 3/4” NPT cable compression gland fitting for cable diameter between 5 to 12 mm (0.2 to 0.47 in.) -
Page 14: Installation
ThermoJacket body. Attach compression body to ThermoJacket. Tighten cap to body. Connect and tighten the cable connector to the sensing head, and slide the head into the ThermoJacket body cavity, lens first. For Endurance sensors: Make sure the connector post on the sensing head is touching or nearly touching the low end of the cam ramp located on the inside of the ThermoJacket body. -
Page 15: Disassembly
ThermoJacket Users Manual, Rev. 1.1, Jan 2019 3.2 Disassembly Thermalert 4.0 Endurance Removal of the sensor is the reverse of installation. To aid removal, firmly rotate the head so the head To aid removal, firmly rotate the head so the head connector post slides across (up) the cam ramp. -
Page 16: Water Cooling
Care should be taken to properly insulate coolant lines! 3.3.1 Installation of the Tube Fittings The following steps explain the installation of the tube fittings to the cooling tubes of the ThermoJacket. Insert tubing into the Swagelok tube fitting. Make sure that the tubing rests firmly on the shoulder of the tube fitting body and that the nut is finger-tight. -
Page 17: Reassembly Of The Tube Fittings
46 l / min (1.6 foot³ / min) and filtered through a pressure regulator with an integral filter to prevent oil and contaminant build-up on the sensor lens. Connect the air flow regulator between the ThermoJacket and the air pressure regulator. To ensure leak-free connections, use Teflon tape or equivalent pipe sealant. -
Page 18: Accessories
(equivalent to previous E-CAFR) • Air Pressure Regulator (A-TJ-APR) (equivalent to previous E-AR) • Conversion Kit for Thermalert 4.0 (A-TJ-T40-CKIT), makes the Thermalert 4.0 suitable in an existing ThermoJacket, consists of nose adapter, spacer ring, rear adapter, O-ring, hex key info@Raytek-Direct.ca 1.800.561.8187... -
Page 19: Mounting Flange (A-Tj-Mf)
Users Manual, Rev. 1.1, Jan 2019 4.1 Mounting Flange (A-TJ-MF) The mounting flange accessory can be used independently to mount the ThermoJacket to walls, existing ports or flanges. This mounting flange has a variety of mounting holes to accommodate various mounting configurations. -
Page 20: Adjustable Mounting Base (A-Tj-Mb)
Unscrew the setscrew (item 2) with a screwdriver. Remove the adapter (item 1) from the journal. Attach the adapter (item 1) to the ThermoJacket either bottom or top with two screws (1/4” 20 UNC or M6x1) (item 7). Insert the ThermoJacket with adapter (item 1) attached back into the journal (item 4). -
Page 21: Figure 4-3: Installation Of The Adjustable Mounting Base
ThermoJacket Users Manual, Rev. 1.1, Jan 2019 Figure 4-3: Installation of the Adjustable Mounting Base Adapter Setscrew Capscrew (for horizontal adjustment) Journal Flathead screw Snapring Collar (for vertical adjustment) Base Clip Holder 10. Drive screw 11. Hex key 1/4” info@Raytek-Direct.ca... -
Page 22: Adjustable Pipe Adapter (A-Pa-A)
Accessories Adjustable Pipe Adapter (A-PA-A) 4.3 Adjustable Pipe Adapter (A-PA-A) The adjustable pipe adapter accessory can be permanently placed on a surface and aimed in any direction within a 45° radius. The accessory kit includes two mounting flanges, a circular pipe adapter, a 2” pipe nipple, a mounting flange for sighting tube, and all necessary bolts and washers. -
Page 23: Sighting Tube (A-St-Xx)
The sighting tube is used in environmental conditions where reflected energy is a problem. The sighting tube is to install in conjunction with the mounting flange (A-MF-ST). Fix the mounting flange directly to the ThermoJacket face. Screw the desired sighting tube into the mounting flange. -
Page 24: Figure 4-7: Available Sighting Tubes
Accessories Sighting Tube (A-ST-xx) Figure 4-7: Available Sighting Tubes Sighting Tube Ceramic (A-ST-CER) Sighting Tube Stainless Steel (A-ST-SS) Sighting Tube Carbon Steel (A-ST-CS-45) Note When using a customer supplied sighting tube, use caution in specifying the inside diameter and length. Your sensing head determines what diameter/length combinations are possible without impeding the optical field of view! info@Raytek-Direct.ca... -
Page 25: Mounting Flange For Sighting Tube (A-Mf-St)
Users Manual, Rev. 1.1, Jan 2019 4.5 Mounting Flange for Sighting Tube (A-MF-ST) The mounting flange is used to adapt different kind of sighting tubes to the ThermoJacket. The mounting flange has an inner thread to screw in and fix a selected sighting tube. -
Page 26: Figure 4-10: Extraction Tool And Endurance Sensor
Accessories Extraction Tool for Endurance (E-TJET) Figure 4-10: Extraction Tool and Endurance Sensor Metal wedge Sensor Snap lock M16 socket Extraction tool Correctly positioned Endurance sensor to Mounted extraction tool on the sensor’s easily mount the extraction tool M16 socket to be forced left to extract the sensor info@Raytek-Direct.ca 1.800.561.8187... - Page 27 Users Manual, Rev. 1.1, Jan 2019 Sequence to extract the sensor out of the ThermoJacket • Open the snap locks, release the rear ThermoJacket cover and leave the rear cover hang down, supported by flexible wire rope. • Unscrew all top cable grommet compression seal nuts and push them downwards along the cables.
-
Page 28: Blast Gate (A-Tj-Gtx)
The blast gate is equipped with a window and a metal shutter. Use the blast gate accessory to protect the sensor, and perform tasks without exposure to hot or explosive target areas. Close the blast gate’s metal shutter to perform maintenance, change the sensor or sensor settings, or remove the sensor and/or ThermoJacket. Two versions are available: •... -
Page 29: Figure 4-12: Mounting
ThermoJacket Users Manual, Rev. 1.1, Jan 2019 Figure 4-12: Mounting ThermoJacket Mounting Flange Blast Gate Open Close Quartz or Amtir window (with 2 washers) Air Purging Mounting Flange (1/8“ NPT) (to pipe adapter or wall) info@Raytek-Direct.ca 1.800.561.8187... -
Page 30: Water Flow Regulator (A-Tj-Wfr)
Accessories Water Flow Regulator (A-TJ-WFR) 4.8 Water Flow Regulator (A-TJ-WFR) The water flow regulator is used to control the water cooling. • Max. water pressure: 8.6 bar (125 psi) • Max. water temperature: 54°C (130°F) • Ambient temperature: 1 to 52°C (33 to 125°F) •... -
Page 31: Figure 4-14: Dimensions
ThermoJacket Users Manual, Rev. 1.1, Jan 2019 Figure 4-14: Dimensions info@Raytek-Direct.ca 1.800.561.8187... -
Page 32: Air Flow Regulator (A-Tj-Afr)
Accessories Air Flow Regulator (A-TJ-AFR) 4.9 Air Flow Regulator (A-TJ-AFR) The high capacity cooling air flow regulator is used to control the cooled air flow. • Max. air pressure: 6.9 bar (100 psi) • Max. air temperature: 38°C (100°F) • Ambient temperature: 1 to 52°C (33 to 125°F) •... -
Page 33: Figure 4-16: Dimensions
ThermoJacket Users Manual, Rev. 1.1, Jan 2019 Figure 4-16: Dimensions info@Raytek-Direct.ca 1.800.561.8187... -
Page 34: Air Pressure Regulator (A-Tj-Apr)
Accessories Air Pressure Regulator (A-TJ-APR) 4.10 Air Pressure Regulator (A-TJ-APR) The air pressure regulator is used to control the air purging. • Max. air pressure: 10 bar (150 psi) • Max. air temperature: 50°C (122°F) • Ambient temperature: 4 to 52°C (40 to 125°F) •... -
Page 35: Maintenance
The air purge sleeve requires cleaning only if water and/or oily build-up appear on the air purge sleeve or within the sighting tube. Follow these steps to access the air purge sleeve: Remove the adjustable mounting flange (or sighting tube mounting flange) from the ThermoJacket face. Unscrew the black air purge sleeve. - Page 36 In an environment with periodic changes, such as an oven, it’s important to manage the temperature of the ThermoJacket. If water flow and oven heaters are shut off at the same time, the residual oven heat may quickly destroy the instrument. If water flow is not shut off, over-cooling may develop, resulting in condensation that may damage the sensor.
-
Page 37: Figure 6-1: Installation Of The Thermojacket Inside An Oven
ThermoJacket Users Manual, Rev. 1.1, Jan 2019 Figure 6-1: Installation of the ThermoJacket inside an Oven info@Raytek-Direct.ca 1.800.561.8187...
Need help?
Do you have a question about the ThermoJacket and is the answer not in the manual?
Questions and answers