Table of Contents
Advertisement
Advertisement
Table of Contents
Troubleshooting

Related Manuals for Masimo Radius-7


Summary of Contents for Masimo Radius-7
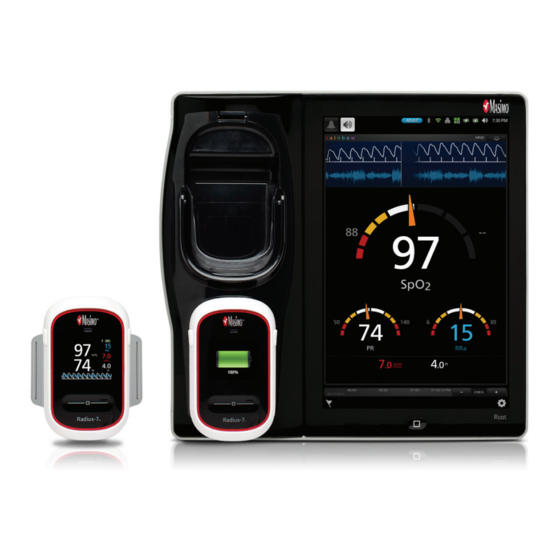
- Page 1 Operator's Manual ® Radius-7 Wearable Pulse ® CO-Oximeter...
- Page 3 These operating instructions provide the necessary information for proper operation of all models of the Radius-7. There may be information provided in this manual that is not relevant for your system. General knowledge of pulse oximetry and an understanding of the features and functions of Radius-7 are prerequisites for its proper use.
- Page 4 Acoustic Monitoring™, RAM™, SpOC™, and X-Cal™ are trademarks of Masimo Corporation. All other trademarks and registered trademarks are property of their respective owners. The use of the trademark Patient SafetyNet™ is under license from University HealthSystem Consortium. © 2017 Masimo Corporation www.masimo.com...
-
Page 5: Table Of Contents
Unpacking and Inspection -------------------------------------------------------------------------- 35 Preparation for Use ----------------------------------------------------------------------------------- 35 Charging the Radius-7 Battery Module ------------------------------------------------------------ 36 Connecting Radius-7 to Root via Bluetooth ------------------------------------------------------ 36 Connecting Radius-7 to Patient SafetyNet -------------------------------------------------------- 37 Securing Radius-7 to Patient ------------------------------------------------------------------------- 37 Removing Radius-7 from Patient ------------------------------------------------------------------- 40... - Page 6 Radius-7 Contents Navigating Radius-7 Main Menu -------------------------------------------------------------------- 42 Navigating Radius-7 Settings on Root ------------------------------------------------------------- 43 Parameter Settings ------------------------------------------------------------------------------------ 46 Trends ---------------------------------------------------------------------------------------------------- 61 Chapter 5: Alarms and Messages ----------------------------------------------------------------------- 63 About Alarms ------------------------------------------------------------------------------------------- 63 3D Alarms ----------------------------------------------------------------------------------------------- 64 Messages ------------------------------------------------------------------------------------------------ 66...
- Page 7 Radius-7 Contents Safety Checks ------------------------------------------------------------------------------------------ 96 Repair Policy -------------------------------------------------------------------------------------------- 97 Return Procedure --------------------------------------------------------------------------------------- 97 Contacting Masimo ----------------------------------------------------------------------------------- 98 Appendix: Concepts of Alarm Response Delay ------------------------------------------------------ 101 Concepts of Alarm Response Delay --------------------------------------------------------------- 101 Index ------------------------------------------------------------------------------------------------------- 103 www.masimo.com Masimo...
-
Page 9: About This Manual
About this Manual This manual explains how to set up and use the Radius-7® Wearable Pulse CO-Oximeter®. Important safety information relating to general use of the Radius-7 appears in this manual. Read and follow any warnings, cautions, and notes presented throughout this manual. The following are explanations of warnings, cautions, and notes. -
Page 11: Product Description, Features And Indications For Use
Product Description, Features and Indications for Use Product Description The Radius-7® Wearable Pulse CO-Oximeter® is a noninvasive device that measures arterial oxygen saturation (SpO , pulse rate (PR), perfusion index (Pi), and Pleth Variability Index (PVi®) along with optional measurements of hemoglobin (SpHb®), carboxyhemoglobin (SpCO®), total oxygen content (SpOC™), methemoglobin (SpMet®), and Acoustic Respiration... -
Page 13: Safety Information, Warnings And Cautions
WARNING: Do not adjust, repair, open, disassemble, or modify the Radius-7. Damage to the device may result in degraded performance and/or patient injury. WARNING: Do not start or operate the Radius-7 unless the setup was verified to be correct. Improper set-up of this device may result in degraded performance and/or patient injury. -
Page 14: Performance Warnings And Cautions
Performance Warnings and Cautions General WARNING: Radius-7 should not be used as the sole basis for medical decisions. It must be used in conjunction with clinical signs and symptoms. WARNING: The Radius-7 and Accessories are not intended to be used as the sole basis for making diagnosis or treatment decisions related to suspected carbon monoxide poisoning;... - Page 15 WARNING: Variation in hemoglobin measurements may be profound and may be affected by sample type, body positioning, as well as other physiological conditions. As with most hemoglobin data, Radius-7 trend data should be scrutinized in light of a specific patient condition. Any results exhibiting inconsistency with the patient's clinical status should be repeated and/or supplemented with additional data.
- Page 16 Radius-7 Safety Information, Warnings and Cautions • Extremely low arterial perfusion. • Excessive induced motion. • Hemoglobinopathies (qualitative defects including sickle cell) and Hemoglobin synthesis disorders (Quantitative defects such as Thalassemias). WARNING: Inaccurate SpHb and SpOC readings may be caused by: •...
- Page 17 CAUTION: Do not place the Radius-7 near electrical equipment that may affect the device, preventing it from working properly. CAUTION: Failure to charge Radius-7 promptly after a Low Battery alarm may result in the device shutting down. CAUTION: If using Radius-7 during full body irradiation, keep the sensor out of the radiation field.
- Page 18 Note: Before securing Radius-7 onto the patient, make sure the Battery Module is sufficiently charged. Note: Always charge Radius-7 when it is not in use to ensure that the Radius-7 Battery Module remains fully charged. Note: All batteries lose capacity with age, thus the amount of run time at Low Battery will vary depending upon the age of the Battery Module.
-
Page 19: Cleaning And Service Warnings And Cautions
WARNING: Do not attempt to remanufacture, recondition or recycle the Radius-7 as these processes may damage the electrical components, potentially leading to patient harm. WARNING: To avoid electric shock, do not attempt to service the Radius-7 or the Battery Module. Servicing of the Radius-7 should be done by qualified personnel only. - Page 20 Radius-7 Safety Information, Warnings and Cautions • Reorient or relocate the receiving antenna. • Increase the separation between the equipment and receiver. • Connect the equipment into an outlet on a circuit different from that to which the receiver is connected.
-
Page 21: Chapter 1: Technology Overview
(sometimes referred to as noise). Masimo SET pulse oximetry utilizes parallel engines and adaptive filtering. Adaptive filters are powerful because they are able to adapt to the varying physiologic signals and/or noise and separate them by looking at the whole signal and breaking it down to its fundamental components. - Page 22 SpO and pulse rate. Functional Oxygen Saturation (SpO2) The Radius-7 is calibrated to measure and display functional oxygen saturation (SpO ): the amount of oxyhemoglobin expressed as a percentage of the hemoglobin that is available to transport oxygen.
- Page 23 Radius-7 Chapter 1: Technology Overview General Description for Pulse Rate (PR) Pulse rate (PR), measured in beats per minute (BPM) is based on the optical detection of peripheral flow pulse. General Description for Perfusion Index (Pi) The Perfusion Index (Pi) is the ratio of the pulsatile blood flow to the non-pulsatile or static blood in peripheral tissue.
-
Page 24: Rainbow Pulse Co-Oximetry Technology
Radius-7 Chapter 1: Technology Overview Fu Q., Mi W.D., Zhang H. Stroke Volume Variation and Pleth Variability Index to Predict Fluid Responsiveness during Resection of Primary Retroperitoneal Tumors in Hans Chinese. Biosci Trends. 2012 Feb;6(1):38-43. Haas S., Trepte C., Hinteregger M., Fahje R., Sill B., Herich L., Reuter D.A. J. - Page 25 The Radius-7 utilizes a sensor with various light-emitting diodes (LEDs) that pass light through the site to a diode (detector). Signal data is obtained by passing various visible and infrared lights (LEDs, 500 to 1400nm) through a capillary bed (for example, a fingertip, a hand, a foot) and measuring changes in light absorption during the blood pulsatile cycle.
- Page 26 Radius-7 Chapter 1: Technology Overview Once Radius-7 receives the signal from the sensor, it utilizes proprietary algorithms to calculate the patient’s functional oxygen saturation (SpO [%]), blood levels of carboxyhemoglobin saturation (SpCO [%]), methemoglobin saturation (SpMet [%]), total hemoglobin concentration (SpHb [g/dL]) and pulse rate (PR). The SpCO, SpMet and SpHb...
- Page 27 Radius-7 Chapter 1: Technology Overview Successful Monitoring for SpHb A stable SpHb reading is associated with correct sensor placement, small physiological changes during the measurement and acceptable levels of arterial perfusion at the measurement site. Physiological changes at the measurement site are mainly caused by fluctuations in the oxygen saturation, blood concentration and perfusion.
-
Page 28: Rainbow Acoustic Monitoring™ (Ram™)
Cautions on page 11. SpCO, SpMet, and SpHb Measurements During Patient Motion The Radius-7 displays measurements of SpCO, SpMet, and SpHb during patient motion. However, because of the changes in the physiological parameters such as blood volume, arterial-venous coupling, etc. that occur during patient motion, the accuracy of such measurements may not be reliable during excessive motion. - Page 29 Radius-7 Chapter 1: Technology Overview rainbow Acoustic Monitoring Architecture The following figure illustrates how a respiratory sound produced by a patient can be turned into a numerical measurement that corresponds to a respiratory parameter. Patient Sensor Acquisition System Respiratory airflow to sound...
- Page 30 Radius-7 Chapter 1: Technology Overview Signal Processing The digital signal produced by the acquisition system is converted into a measurement that corresponds to the respiratory parameter of interest. As shown in the previous figure, this can be performed by, for example, determining the digital signal envelope or outline which in turn may be utilized to determine the respiratory rate.
-
Page 31: Chapter 2: System Components
The Battery Charging Adapter docks onto the Root to function as both a charger and holder for the Radius-7. The Battery Module snaps onto the Instrument Module and together they can be strapped onto a patient's arm using the Armband. -
Page 32: Radius-7 Instrument Module
The key allows for proper positioning of the Armband used to secure Radius-7 to the patient. rainbow SET Sensor A rainbow SET sensors can be connected to Radius-7 via this Connector connector. CAUTION: Refer to the Directions for Use for the sensor before applying it on patients. -
Page 33: Radius-7 Battery Module
The following table describes the features of the Battery Module: Ref. Feature Description Speaker Radius-7 is provided with a speaker to provide alarms in the event the communication to secondary display is lost. Release These buttons are used to release the Battery Module from the Buttons Instrument Module and Battery Charging Adapter. -
Page 34: Radius-7 Armband
Chapter 2: System Components Radius-7 Armband The Armband is used to secure Radius-7 to the patient. The Armband comes in three different sizes; small (11.9”), medium (16.4”) and large (25.4”). The Instrument Module and Armband are keyed so that they can only be connected properly in the right orientation. See Radius-7 Armband on page 32. -
Page 35: Radius-7 Battery Charging Adapter
The following table describes the features of the Battery Charging Adapter: Ref. Feature Description Battery Pocket The Battery Pocket can be used to store the entire Radius-7 or Instrument Module separately. Battery Module The Battery Module Connector allows for docking and charging of the Battery Module. -
Page 37: Chapter 3: Setting Up
If anything is missing or damaged, contact the Technical Service Department. See Chapter 8: Service and Maintenance on page 95. Preparation for Use Prior to setting up the Radius-7 for monitoring, perform the following steps: Confirm that you have all system components: •... -
Page 38: Charging The Radius-7 Battery Module
In order connect the Radius-7 to Root via Bluetooth connection perform the following steps: Enable Bluetooth Connectivity on Root. See Operator's Manual for Root. Dock the Battery Module of the Radius-7 to the Root that you intend to make the Bluetooth connection. -
Page 39: Connecting Radius-7 To Patient Safetynet
About the Main Screen on page 42. Icon Description A gray icon indicates Radius-7 wireless radio is on, but it is not connected to a wireless network. A blue icon indicates Radius-7 is connected to a wireless network, but not communicating with Patient SafetyNet. - Page 40 Radius-7 Chapter 3: Setting Up To secure the Radius-7 to a patient, follow the instructions below with the help of the visual aid: www.masimo.com Masimo...
- Page 41 Connect the Battery Module securing the Armband Adapter between the Battery Module and the Instrument Module. Select a site on the patient's arm to secure Radius-7. Place the Radius-7 on the arm with the Masimo logo on the top and making sure the Armband fabric is between the Radius-7 and the arm.
-
Page 42: Removing Radius-7 From Patient
Undo the key of the armband plastic and slide the Instrument Module away from the Armband. Note: Do not to dispose of the Radius-7 instrument module when changing the replaceable armband. Dispose of the armband according to local laws and regulations. -
Page 43: Chapter 4: Operation
Chapter 4: Operation Using the Touchpad The Touchpad on the Radius-7 is located below the display panel on the Battery Module. Note: The display panel is not a touch screen. Using the gestures described below, the user is able to view all parameters and measurements, navigate through menu options, and silence/acknowledge alarms on Radius-7. -
Page 44: About The Main Screen
Displays SIQ and the pleth waveform with the respiration waveform Field (blue) in the background. Navigating Radius-7 Main Menu From the Main Screen, touch and hold the Touchpad on the Battery Module screen to access the Main Menu. Use the Touchpad Swipe gesture to scroll through the Main Menu Options. Use the Touch gesture on the Touchpad to select the Main Menu Option that is centered in th window. -
Page 45: Navigating Radius-7 Settings On Root
The Radius-7 settings may be configured with Root when connected via Bluetooth. See Connecting Radius-7 to Root via Bluetooth on page 36 for information on how to pair Radius-7 with Root. For general information on Root, see Operator’s Manual for Root. - Page 46 Note: After approximately 10 seconds without interaction, the Action Menu will retract. Sensitivity Modes Overview Three sensitivity levels enable a clinician to tailor the response of Radius-7 to the needs of the particular patient situation. Sensitivity Modes are accessed through the Action Menu or through Additional Settings.
- Page 47 Radius-7 Chapter 4: Operation rainbow Parameter Settings The rainbow menu allows the user to view and customize settings for rainbow parameters: Parameter Settings See Parameter Settings on page 46. 3D Alarms See 3D Alarms on page 64. Additional Settings See Additional Settings on page 45.
-
Page 48: Parameter Settings
Radius-7 Chapter 4: Operation Parameter Settings Only parameters that have been loaded onto the system will be visible. To access any of the available parameter setting screens: From the Parameter Settings screen, to access the desired parameter, flick the on-screen icons left or right. - Page 49 Radius-7 Chapter 4: Operation SpO2 Alarms From the Alarms screen, change any of the following options: Option Description Alarm Factory User Priority Default Configurable Settings Options High High Limit is the upper threshold that Medium Off 2% to 99% in Limit triggers an alarm.
- Page 50 When Radius-7 is set to FastSat On, the averaging algorithm evaluates all saturation values, providing an averaged saturation value that is a better representation of the patient’s current oxygenation status.
- Page 51 Radius-7 Chapter 4: Operation PR Alarms From the PR Alarms screen, change any of the following options: Option Description Alarm Factory User Configurable Priority Default Options Settings High Limit High Limit is the upper threshold High 140 bpm 35 bpm to 235 that triggers an alarm.
- Page 52 Radius-7 Chapter 4: Operation Pi Alarms From the Alarms screen, change any of the following options: Option Description Alarm Factory User Configurable Priority Default Options Settings High Limit High Limit is the upper threshold Medium Step size: that triggers an alarm.
- Page 53 Radius-7 Chapter 4: Operation Additional Settings for Pi From the Additional Settings screen, change the following option: Options Description Factory User Configurable Default Settings Settings Averaging The length of time over which the Long Short or Long Time system calculates the average of all data points.
- Page 54 Radius-7 Chapter 4: Operation PVi Alarms From the Alarms screen, change any of the following options: Option Description Alarm Factory User Priority Default Configurable Settings Options High Limit High Limit is the upper threshold Medium 2 to 99 in steps of that triggers an alarm.
- Page 55 Respiration Rate (RR) Settings Radius-7 can determine Respiration Rate (RR) either by the acoustic signal (RRa). For more information, see: RRa Settings on page 53 From the RR Settings screen, change any of the following options:...
- Page 56 Radius-7 Chapter 4: Operation From the RR Settings screen, access any of the following screens: RRa Alarms on page 54 Additional Settings for RRa on page 55 About Parameter Information on page 60 RRa Alarms From the Alarms screen, change any of the following options:...
- Page 57 Radius-7 Chapter 4: Operation Additional Settings for RRa From the Additional Settings screen, change any of the following options: Options Description Factory User Configurable Default Settings Settings Averaging The length of time over which the Slow Trending, No Time system calculates the average of all Averaging, Fast, data points.
- Page 58 Radius-7 Chapter 4: Operation SpHb Alarms From the Alarms screen, change any of the following options: Option Description Alarm Factory User Configurable Priority Default Options Settings High High Limit is the upper High 17.0 g/dL 2.0 g/dL to 24.5 g/dL in...
- Page 59 Radius-7 Chapter 4: Operation Option Description Alarm Factory User Configurable Priority Default Options Settings Provides an early indicator 2.0 g/dL Off or 0.1 g/dL to 2.5 Caution for a parameter approaching g/dL in increments of 0.1 Range the low limit threshold (mmol/L) Off or 0.1 mmol/L to 1.5...
- Page 60 Radius-7 Chapter 4: Operation SpOC Settings From the SpOC Settings screen, access any of the following screens: SpOC Alarms on page 58 About Parameter Information on page 60 Trends on page 61 SpOC Alarms From the Alarms screen, change any of the following options:...
- Page 61 Radius-7 Chapter 4: Operation SpMet Settings From the SpMet Settings screen, access any of the following screens: SpMet Alarms on page 59 About Parameter Information on page 60 Trends on page 61 SpMet Alarms From the Alarms screen, change any of the following options:...
- Page 62 Radius-7 Chapter 4: Operation SpCO Settings From the SpCO Settings screen, access any of the following screens: SpCO Alarms on page 60 About Parameter Information on page 60 Trends on page 61 SpCO Alarms From the Alarms screen, change any of the following options:...
-
Page 63: Trends
Radius-7 Chapter 4: Operation To access additional information about parameters: From the Parameter Settings screen, touch the About icon. The following is an example for SpO An About screen appears for the selected parameter and displays information about the parameter. - Page 64 Radius-7 Chapter 4: Operation Option Description Factory Default User Configurable Settings Setting 0.1 to 25.0 g/dL in Y-axis Max 20.0 g/dL increments of 0.1 0.0 to 15.4 mmol/L in Y-axis Min 3.1 mmol/L increments of 0.1 SpHb mmol/L 0.1 to 15.5 mmol/L in Y-axis Max 12.4 mmol/L...
-
Page 65: Chapter 5: Alarms And Messages
Visual alarms will continue to display on Radius-7 until the alarm condition has been addressed. Note: In the event of temporary loss of power to Radius-7, the Root will restore alarm setting to Radius-7 through the re-established Bluetooth connection. If the Radius-7 is used without www.masimo.com... -
Page 66: 3D Alarms
Radius-7 Chapter 5: Alarms and Messages a Bluetooth connection to Root, then the alarm settings will be restored to the factory default. 3D Alarms 3D Alarms, accessible from the Main Menu, include the following: Desat Index on page 65 About Desat Index on page 64... - Page 67 Pi Delta audibly and visually alerts the user to important changes in a patient's perfusion, as compared to the patient’s baseline Pi rate. The baseline is set by Radius-7 once the user has enabled the alarm and represents 30 seconds of currently averaged Pi. To set a Pi Delta alarm, see Pi Delta on page 66.
-
Page 68: Messages
Radius-7 Chapter 5: Alarms and Messages Pi Delta From the Pi Delta menu screen, change any of the following options: Options Description Factory User Configurable Default Settings Settings Sets the Perfusion Index (Pi) value to be On or Off Baseline used as the baseline. - Page 69 Replace Sensor • Sensor is non-functional. • Defective sensor. (RAM) Replace Sensor • • Not a compatible Masimo Replace with a compatible (Pulse CO-Ox) sensor. Masimo sensor. Incompatible Sensor • • Sensor is attached to a device Use a compatible sensor.
- Page 70 Alarm Message Description Next Step Adhesive Sensor • • Sensor is attached to a device Use a compatible sensor. without an appropriate Contact your local Masimo parameter installed. Representative to learn (RAM) more about optional Incompatible parameter upgrades. Adhesive Sensor •...
- Page 71 See the directions for use (Pulse CO-Ox) sensor initialization/pulse provided with your sensor. Only Mode search routine or during Use a Masimo light shield to monitoring. cover the sensor and adjust the sensor. • • Signal strength is too weak.
- Page 72 • Check connection between the Instrument Module and Battery Module. • Re-dock the Battery Module on Root to re-establish Bluetooth connectivity. • • Device requires service. Contact Masimo Tech Speaker Failure Support. See Contacting Masimo on page 98. www.masimo.com Masimo...
-
Page 73: Chapter 6: Troubleshooting
• Excessive motion. restricted. • Check the placement of the sensor. Re-apply sensor or move to a different site. • Minimize or eliminate motion at the monitoring site. • Shield the sensor from excessive or strobing light. www.masimo.com Masimo... - Page 74 Radius-7 Chapter 6: Troubleshooting Symptom Potential Causes Next Steps • • SpCO parameter may have not Allow time for parameter SpCO reading stabilized. reading to stabilize. displays as dashes. • Verify Sensor type and size and re-apply sensor. See Directions for Use for Sensor.
-
Page 75: Troubleshooting Radius-7
Bluetooth on page 36. Verify the Mac address on Radius-7 matches the one on Root. The Mac address on Radius-7 can be found by accessing the About panel on the Main Menu of Radius-7. For information on accessing the Mac address listed on Root refer to Operator's Manual for Root. -
Page 76: Radius-7 Error Codes
Chapter 6: Troubleshooting Radius-7 Error Codes The following section lists possible Radius-7 error codes and potential causes. Contact Masimo Service if any of these error codes appear. See Contacting Masimo on page 98. Code Name Instrument Module (IB) Crystal fault... -
Page 77: Chapter 7: Specifications
0 ml of O /dL to 35 ml of O /dL of blood Accuracy (ARMS*) Oxygen Saturation (SpO ) [1] No Motion [1] Adults, Pediatrics (SpO from 60% to 80%) No Motion [2] Adults, Pediatrics (SpO from 70% to 100%) www.masimo.com Masimo... - Page 78 Radius-7 Chapter 7: Specifications Motion [3] from 70% to 100%) Adults, Pediatrics (SpO Low perfusion [4] from 70% to 100%) Adults, Pediatrics (SpO Pulse Rate (PR) Range 25 to 240 bpm No motion Adults, Pediatrics 3 bpm Motion [5] Adults, Pediatrics 5 bpm...
-
Page 79: Arms Performance Specifications
The tables below provides A (Accuracy Root Mean Square) values measured using the Masimo rainbow SET Technology, which is included in the Radius-7, with Masimo rainbow sensors in clinical studies under no motion conditions. This SpO data is representative of data obtained from Masimo rainbow SET Technology and compatible Masimo sensors. - Page 80 Radius-7 Chapter 7: Specifications Measurement Arms Values for rainbow Reuse (DCI) Sensors Accuracy Range (%) Arms (%) 70-80 1.88 80-90 1.72 90-100 1.21 70-100 1.63 Figure 2: rainbow Reuse Sensors (Arms 70-100%) www.masimo.com Masimo...
- Page 81 Radius-7 Chapter 7: Specifications Measurement Arms Values for rainbow Adhesive (R1 Series) Sensors Accuracy Range (%) Arms (%) 60-70 3.42 70-80 2.49 60-80 2.99 Figure 3: rainbow R1 Series (Arms 60-80%) www.masimo.com Masimo...
-
Page 82: Resolution
Radius-7 Chapter 7: Specifications Measurement Arms Values for rainbow Adhesive (R1 Series) Sensors Accuracy Range (%) Arms (%) 70-80 2.47 80-90 1.80 90-100 1.57 70-100 1.98 Figure 4: rainbow R1 Series (Arms 70-100%) Resolution Parameter Resolution 1 bpm 1 bpm SpHb 0.1 g/dL... -
Page 83: Electrical
Electrical Radius-7 Battery Module Type Lithium ion Run Time ≥ 12 hours (continuous Masimo SET monitoring, Display off, Bluetooth on, Wi-Fi off) Charging ≤ 6 hours Time Note: For information on Root Battery see Specifications in the Operator's Manual for Root... -
Page 84: Physical Characteristics
Radius-7 Chapter 7: Specifications For Environmental Specifications for Root with Battery Charging Adapter see Operator's Manual for Root. Physical Characteristics Item Description 4.7” x 2.5” x 1.1” Dimensions (119.5 mm x 63.2 mm x 27.2 mm) Weight Battery Module 0.21 lbs. (93g) Instrument Module 0.15 lbs. -
Page 85: Display Indicators
Radius-7 Chapter 7: Specifications Display Indicators Item Description Data Update Rate 1 second Type OLED Pixels 160 X 128 Dot Pitch 0.073 (W) mm X 0.219 (H) mm EMC Compliance EMC Compliance IEC 60601-1-2:2007, Class B Safety Standards Compliance Safety Standards Compliance ANSI/AAMI ES 60601-1:2005 CAN/CSA C22.2 No. -
Page 86: Wireless Specifications
Radius-7 Chapter 7: Specifications Equipment Classification per IEC 60601-1 Type of Protection Internally powered (battery powered) Degree of Protection against Defibrillation Proof Type BF-Applied Part Electrical Shock Protection against harm from IP24 (Protection from solid foreign objects ≥12.5 mm Water and Particulate Matter... - Page 87 Security and Authentication Encryption 64/128-bit WEP, Dynamic WEP, WPA-TKIP, WPA2-AES Authentication Open System, Shared Key, Pre-Shared Key (PSK), 802.1X: LEAP, PEAP< TTLS, TLS, EAP-FAST Radio Compliance FCC ID: VKF-MWM1 Model: Radius-7 Canada* IC: 7362A-MWM1 IC Model: MWM1 RSS-247 www.masimo.com Masimo...
-
Page 88: Guidance And Manufacturer's Declaration- Electromagnetic Emissions
Radius-7 Chapter 7: Specifications Radio Compliance Europe EN 301 489-17: EN 300 328 V2.2.0 EN 301 489-1 V2.1.1 EN 301 489-17 V3.1.1 EN 301 893 V2.0.7 R & TTE Directive * The Per RSS-Gen, Section 8.4 This device complies with Industry Canada license-exempt RSS standard(s). -
Page 89: Guidance And Manufacturer's Declaration- Electromagnetic Immunity
Radius-7 Chapter 7: Specifications Guidance and Manufacturer's Declaration- Electromagnetic Immunity Guidance and Manufacturer's Declaration - Electromagnetic Immunity The ME Equipment is intended for use in the electromagnetic environment specified below. The customer or the user of the ME Equipment should assure that it is used in such an environment. - Page 90 Radius-7 Chapter 7: Specifications Guidance and Manufacturer's Declaration - Electromagnetic Immunity (m). Field strengths from fixed RF transmitters, as determined by an electromagnetic site survey, should be less than the compliance level in each frequency range Interference may occur in the vicinity of equipment marked with the following symbol: Note 1: At 80 MHz and 800 MHz, the higher frequency range applies.
-
Page 91: Recommended Separation Distances
Radius-7 Chapter 7: Specifications Recommended Separation Distances Recommended Separation Distance Between Portable and Mobile RF Communication Equipment and the ME Equipment The ME Equipment is intended for use in an electromagnetic environment in which radiated RF disturbances are controlled. The customer or the user of the ME Equipment can help... -
Page 92: Symbols
Radius-7 Chapter 7: Specifications Symbols The following symbols may appear on the product or product labeling: Symbol Description Symbol Description Follow instructions for use Consult instructions for use Mark of conformity to European medical device UL LLC certification directive 93/42/EEC... - Page 93 Not made with natural rubber Manufacturer latex Date of manufacture Catalog number (model number) YYYY-MM-DD Storage temperature range Masimo reference number Keep dry Serial number Storage humidity limitation Fragile, handle with care Atmospheric pressure Do not use if package is limitation...
-
Page 94: Citations
0.9% SpMet. Contact Masimo for testing specifications. [2] The Masimo rainbow SET technology with Masimo sensors has been validated for no motion accuracy in human blood studies on healthy adult male and female volunteers with light to dark skin pigmentation in induced hypoxia studies in the range of 70%-100% SpO against a laboratory CO-Oximeter and ECG monitor. - Page 95 Radius-7 Chapter 7: Specifications [4] The Radius-7 has been validated for low perfusion accuracy in bench-top testing against a Biotek Index 2TM* simulator and Masimo's simulator with signal strengths of greater than 0.02% and transmission of greater than 5% for saturations ranging from 70%-100%. This variation equals ±1 standard deviation.
-
Page 97: Chapter 8: Service And Maintenance
The Radius-7 is a reusable device. The device is supplied and used non-sterile. The Radius-7 should be cleaned before and after it has been applied to a patient and/or in accordance with local and governmental regulations to minimize the risk of cross-contamination. -
Page 98: Safety Checks
If the device appears or is suspected to be damaged, return for Servicing. To conduct Safety Checks follow the procedure outlined in this chapter. If Radius-7 fails any of the described tests, discontinue its use and refer to the Troubleshooting section. -
Page 99: Repair Policy
Warranty information, a copy of the invoice or other applicable documentation must be included. • Purchase order number to cover repair if the Radius-7 is not under warranty, or for tracking purposes if it is. • Ship-to and bill-to information. -
Page 100: Contacting Masimo
12 months and any batteries for six (6) months from the original date the Product was obtained by the end-user purchaser. Masimo’s sole obligation under this warranty is the repair or replacement, at its option, of any defective Product or software media that is covered under the warranty. - Page 101 Radius-7 Chapter 8: Service and Maintenance loss of use of any Products or Software. In no event shall Masimo’s liability arising from any Product or Software (under contract, warranty, tort, strict liability, or otherwise) exceed the amount paid by purchaser for the Product or Software. The above limitations do not preclude any liability that cannot legally be disclaimed by contract.
-
Page 103: Appendix: Concepts Of Alarm Response Delay
Delay is the time from the onset of an alarm condition to the generation of its alarm signal. The graphic below is a simplified illustration of the concept of alarm response delay and does not reflect actual lengths of delays. Reference Definition Alarm Limit Displayed SpO Alarm Signal Generation Saturation Time www.masimo.com Masimo... - Page 104 Radius-7 Appendix: Concepts of Alarm Response Delay The Alarm Condition Delay is graphically represented as t – t in the figure above to show the delay due to processing and averaging. The Alarm Signal Generation Delay is graphically represented as t –...
-
Page 105: Index
Connecting Radius-7 to Root via Alarms • 82 Bluetooth • 36, 43, 73, 96 Appendix Contacting Masimo • 70, 73, 74, 97, 98 Concepts of Alarm Response Delay • 101 Contraindications • 9 ARMS Performance Specifications • 77 Desat Index • 46, 64, 65 Battery Operation and Maintenance •... - Page 106 Masimo SET® DST • 20 Functional Oxygen Saturation (SpO2) • Measurement Range • 75 Messages • 66 General • 12 Navigating Radius-7 Main Menu • 36, 42, General Description for Carboxyhemoglobin (SpCO) • 25 Navigating Radius-7 Settings on Root • General Description for Methemoglobin (SpMet) •...
- Page 107 SpO2 Settings • 45, 46, 96 Recommended Separation Distances • SpOC Alarms • 58 SpOC Settings • 46, 58 Removing Radius-7 from Patient • 40 Successful Monitoring for SpCO • 25 Repair Policy • 97 Successful Monitoring for SpHb • 25, 69 Resolution •...
- Page 110 39121/LAB-9767A-1117...
Need help?
Do you have a question about the Radius-7 and is the answer not in the manual?
Questions and answers