Table of Contents
Advertisement
Quick Links
Advertisement
Table of Contents

Subscribe to Our Youtube Channel
Related Manuals for progeo Tekna Tilt


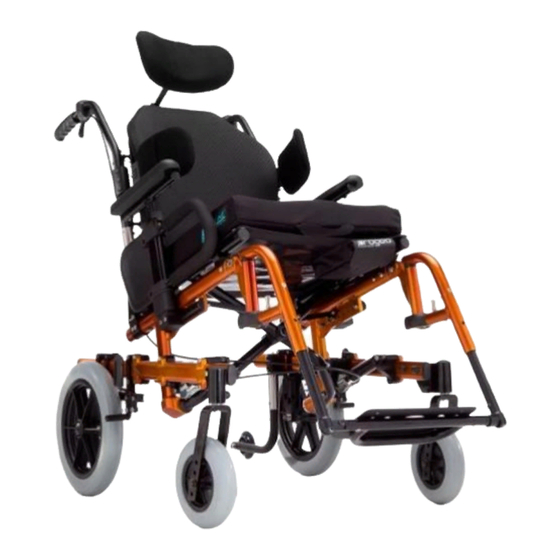
Summary of Contents for progeo Tekna Tilt
- Page 1 TEKNA TILT USER’S MANUAL ENGLISH TEKNA TILT REV.1 – 30-03-10/ENG...
- Page 2 TEKNA TILT...
-
Page 3: Table Of Contents
Safety belts and harness Index: General information Adjustments Introduction General Guide to symbols List of parts in standard set up General characteristics of the wheelchair Backrest height adjustment Backrest angle adjustment General advises Seat depth adjustment Seat height adjustment Safety Front frame angle Movements: getting in and out of the wheelchair Footplate height adjustment... - Page 4 1.3 G eneral characteristics of the wheelchair Guide to symbols The Progeo® TEKNA TILT wheelchair presents a new concept in In this manual you will often see the following symbols which are tilting and folding frame. used to highlight points which are of particular interest or importance Simplicity and maximum personalization are but a few of the important characteristics of this model.
- Page 5 THIS MANUAL AND ANY SUCH ACTIVITY WILL gradient and acid environments. RESULT IN THE IMMEDIATE CANCELLATION OF THE MANUFACTURER'S WARRANTY . Its compact size and structure make the TEKNA TILT wheelchair ideal for use by both child and adult. Movements: getting wheelchair 1.5 General advises...
- Page 6 Get the user’s feet off the footplate (see chapter 2.8 “Footplate”) when getting out, and bring them close to the The tilt in space of the TEKNA TILT works with two independent footplate when getting in. gas springs. Thus, it is necessary that the attendant presses the ...
- Page 7 The tilt in space function can not be performed if Fig. 2 only one lever is pressed. In fact the not working gas spring inhibits the function. We strongly discourage to force the tilt in space function in order to avoid damage to the gas springs or to the wheelchair.
- Page 8 While driving downhill, tilt the seat as much as the step. necessary to prevent the user from slipping out of After the descent, tip the chair forward so that the front wheels the wheelchair; while driving uphill, we suggest to are once again touching the ground turn the anti tip wheels so as to let them work as emergency device (see chapter 6.14 “Ant tip wheels).
- Page 9 While going over steps, stairs, curbs, etc., deal with these occur while the seat is at its maximum inclination, the stability the situation very carefully. of the wheelchair may not be enough. Never drive the wheelchair over steps or obstacles This is why the wheelchair is always provided with two anti tip wheels (see chapter 6.14 “Anti tip wheels”) that will work as over 20 cm.
- Page 10 Table 1: rear wheel tyre pressure TYRE PRESSURE Fig.6 High pressure 7 BAR 700 kPA High pressure profile 7 BAR 700 kPA Marathon Plus 10 BAR 1000 kPA Anti puncture Mako Does not require inflation Low pressure 300mm 2,4 BAR 240 kPA Low pressure 400mm 2,8 BAR...
-
Page 11: Backrest Opening Check
(see chapter 5.2 and 5.3 “Opening/closing Footplate system”), carefully For the model TEKNA TILT four kinds of footplates are available: check that the seat “A” Double plastic footplate (STD) (fig. 10) tubes well One piece flip-up plastic footplate (fig. 11) leant on the supports ... - Page 12 Should the wheelchair be equipped with double footplate (see fig. Fig. 12 10), make sure that both plates are totally down before using the chair. Fig. 13 Fig.13a Fig. 10 With one piece plastic flip-up footplate (fig. 11) make sure that the locking tooth “A”...
- Page 13 2.11 Desk armrests The model TEKNA TILT is provided, as standard, with the Desk armrests(figure 15). 2.12 Fasteners After each maintenance cycle ensure that all nuts, bolts Fig.
- Page 14 (see chapter 6.10 “Brake adjustment”) Under normal daily use the PROGEO® wheelchair has a lifetime of 5 years provided that it receives careful maintenance at the When using the brakes a great care should be taken correct intervals.
- Page 15 (see figures16, 17, 18, 19, 20, 21) Fig. 16 Fig. 17 The lightness and reducibility of the TEKNA TILT are very important because they allow the wheelchair to be moved easily and to be located even in little room. The examples hereafter reported shows a wheelchair equipped with a complete posture system (rigid backrest, headrest and cushion).
- Page 16 12). - one piece flip-up in aluminium - one piece flip-up in carbon fiber 26 Footplate tubes with pre drilled holes for height adjustment 27 Calf strap TEKNA TILT General description of the wheelchair parts General description ( figure 22)
- Page 17 5.2 Opening system (figures 23, 24, 25, 26) The examples hereafter reported show a wheelchair The TEKNA TILT is a tilting wheelchair with high precision folding equipped with a complete posture system (rigid backrest, crossbar system. Its new standards of convenience, adaptability...
- Page 18 position of use (figure 24). Repeat the same operation for the other Unfolding the crossbar: tube. To open the wheelchair, lean the palm of your hand on at the front of one seat tube (as shown in figure 26) and push it down. In case the rigid backrest support creates interference Fig.
- Page 19 Before getting the two seat profiles close to each other, we suggest It is possible to fold the backrest both with the crossbar open (figure to set the seat cloth within them and looking downward as shown in 29) and with crossbar folded (figure 30). In both cases we suggest figure 28.
- Page 20 To reduce the encumbrance at most, we suggest to fold wheelchair to facilitate this action. Remove the rear wheels (see chapter 5.5 “Quick release rear wheels”) to the wheelchair with its seat at the minimum inclination (see charter 5.7 “Tilting the seat”) . reduce the weight and close the backrest (see chapter 5.3 “Closing system”) in order to have a better balance when lifting the wheelchair (see chapter 5.5 “Complete...
- Page 21 Removal and replacing of the wheel must always be carried out with the brakes released. Ensure that the quick-release axels are completely locked in place. Check this by taking hold of the wheel at the spokes close to the axel bush and pulling firmly outwards.
-
Page 22: Tilting The Seat
Press the two levers at the same time(figure 36) and keeping The optimum position for the brake with respect to the tyre is about 0.5 cm between the tyre and the brake rod them pressed, push the backrest tubes frontward/upward until (0.6 cm if puncture-proof tyres are fitted) (see chapter the seat reaches its minimum inclination (figures 37, 35). -
Page 23: Safety Belts And Harness
NEVER FORCE THE TILT-IN-SPACE MOVEMENT IF The harness system is fastened to the wheelchair with four ONLY ONE LEVER IS PRESSED OR IN ANY OTHER anchorage points: two at the rear of the frame and two on the CASE WHERE THE MOVEMENT IS BLOCKED . If this backrest tubes . -
Page 24: Adjustments
® PROGEO TEKNA TILT wheelchair is a medical the wheelchair itself. device based on the patient detailed specifications that are reported on the original order form filled in After every adjustment made to the wheelchair, check by qualified personnel. -
Page 25: List Of Parts In Standard Set Up
6.2 List of parts in standard set up Fig. 44 TEKNA TILT TEKNA TILT... - Page 26 Pos. Description Quantity Tilt-in-space axle Cross brace B 10 Flat washer 6x16x1.5 nylon Wheelchair base frame B 11 Bolt TCEI 8.8 6x30 short head WZ Tilt-in-space unit 1dx+1sx B 12 Washer IGUS 6x9x0.5 Backrest tube - aluminium Wheelchair base frame Backrest tube –...
-
Page 27: Backrest Height Adjustment
When adjusting the backrest height make sure that the 6.3 Backrest height adjustment (figure 45) height on the left is the same as the on the right. After carrying out the adjustment make sure that the It is possible to adjust the back height in 1.5cm intervals. Remove the screws and nuts are securely tightened backrest upholstery (if present) and slide up or down the protecting sleeves along the tube until the fixing screws are accessible. -
Page 28: Seat Depth Adjustment
The bolt “A” should not be tightened much because it The backrest inclination affects the wheelchair has to allow the rotation of the backrest while point of balance. With an open angle, the folding/unfolding it . wheelchair will tip back more easily and it may become risky to the user. -
Page 29: Front Frame Angle
“P” and the lower side of the horizontal tube of the frame (see figure 48). 6.7 Front frame For the model TEKNA TILT four types of front frame are available: Fig. 48 With removable and swing away footplates - standard... - Page 30 The front frame angle adjustment is optional for this model and it To elevate (change inclination) the footplate, hold it on its lower side, pull it up until the desired position. The lock unit “C” will keep has to be requested when purchasing the wheelchair. This adjustment allows to find a more adequate posture or to re-adapt it the desired position.
- Page 31 To swing the footplate outwardly, to remove and insert them, refer footplate is locked. Removing and replacing the footplate: push the pin “A” forward to the instructions on the standard frame, the system, in fact, is the same. (see squares figure 45) and pull the footplate up to remove it. To replace the footplate, put the footplate frame axle “P”...
-
Page 32: Footplate Adjustment
(see chapter 6.19 “Footplate adjustment”) The TEKNA TILT model can be provided with four different kinds of footplate: double footplate (figure 48), one piece flip-up plastic Remove bolts and nuts “A” and corresponding nuts and footplate (figure 50) also available with multi function rotative washers (3 mm Allen key and an 8 mm spanner). - Page 33 2)The footrest distance (DIST) must not exceed for wheelchairs used by children Footplate type Here below the correct footrest sizes based on seat width are detailed Model Tekna Tilt Seat width Footplate size 140 x 160 Fig. 52 150 x 160...
- Page 34 Rotative system support This kind of support (figure 54) allows a greater adjustment of the footplate. It can be applied only to the plastic footplate. To adjust the inclination and the position of the footplate, loosen the bolts “A”, “A1” and “B” (4 and 5mm Allen key) (figure 54) helping yourself with a 10mm spanner for the nut matched to the bolt “A1”.
-
Page 35: Brake Adjustment
Position of the one-piece footplate Position of the one piece footplate If requested on the order form the one-piece carbon fibre footplate If requested on the order form the one-piece aluminium footplate can be mounted in four different positions: completely internal can be mounted in two different positions: completely internal (figure 57a) -
Page 36: Rear Wheel Adjustment
bolts “V”). Make sure that the bolts are securely tightened. The brake tube “F” (figure 63) can fixed orientated either to Check the correct functioning of the brakes by the front (as shown in figures 60, 61) or to the rear of the conducting specific brake tests. -
Page 37: Backrest Upholstery Adjustment
the backrest is longer (more stability) or shorter (more compact)”. When the rear wheels are moved forward, the (figure 64 shows an adjustment that makes the wheelchair wheelchair becomes less stable and the risk of compact). tipping back increases. Always check the stability of the wheelchair before sitting the patient on the wheelchair. -
Page 38: Armrest Adjustment And Removal
To adjust the armrest position: 6.14 Armrest adjustment and removal Remove the two bolts “V” (5mm Allen key) located in the This model is provided as standard with the Desk armrests. inner side of the frame (the nuts “D” are embedded in the They include, as integral part, a straight skirt guard. -
Page 39: Anti Tip Wheels
Never use the armrest as as a hand hold for pulling The adjustment of the height is carried out as follows: Remove the fixing screw “A” (using a 3 mm Allen key and a 8 the chair up. mm spanner). ... -
Page 40: Accessories
The wheelchair TEKNA TILT can be equipped with other go over small steps easily. With one foot, press down on the plastic... -
Page 41: Drum Brakes
When the levers “B” are released, the drum brake is 7.6 Other accessories released, too. Other accessories available for the Tekna Tilt: The drum brake can also work as parking brake. In fact when the lever “B” and pushed the toothed lever “C” (located in the lower Fig. -
Page 42: Maintenance
Within 6 months from purchase, we recommend to go which must be used in conjunction to an authorized PROGEO dealer for a complete with armrests (fig. 78) check up of your wheelchair. The manufacturer will accept no responsibility in case of non compliance... -
Page 43: Replacement Of Worn Parts
For any questions relating to the adjustment and maintenance of your PROGEO wheelchair, the experienced technical staff at Fig. 79 RehaTEAM are at the complete disposal of all our clients. You can contact us directly at the address below: ®... - Page 44 washers (do not tighten too much, it may prevent the gas spring To perform the adjustment, we suggest to pay attention because at from rotating on the bolt “A” while tilting the seat and thus it may the beginning screwing the gas spring results easy, but when the point “P”...
-
Page 45: Inspection Of Components
To re-fit an inner tube and tyre onto the wheel rim it is necessary to 8.3 Troubleshooting guide partially inflate the inner tube. Next, insert the valve into the hole on the rim and, using both hands With constant and prolonged use of the wheelchair, or after the and bicycle tyre levers, insert the inner tube into the tyre and work adjustment of any part, a number of “defects”... -
Page 46: Technical Data
9.0 Technical data Backrest angle Backrest height Total length Seat width from 78° to 94° to the seat 95 cm approx. Adult 33-36-39-42-45-48cm from 35 to 72,5cm adjustable (75cm without footplates) Junior adjustable 27-30-33-36-39cm (std conf.) Wheelchair weight Front frame angle - adult Total width Seat depth 17,5 kg approx. -
Page 47: Warranty
the replacement of the part itself. 10.0 Warranty The authorised distributor in cases of simple repairs may take action independently to eliminate the defect or bring the defect to the The warranty agreement exists only between RehaTEAM s.r.l. and attention of RehaTEAM s.r.l. in specific cases. its authorised dealers. -
Page 48: Certification
The manufacturer REHATEAM s.r.l. premises in Vicolo Negrelli, 4 – 31040 Castagnole di Paese (TV) Italia declares that the product defined as WHEELCHAIR FOR DISABLED PERSONS , PROGEO series, model: TEKNA TILT which this declaration refers to, is in conformity with the guidelines as laid down by European Union... - Page 49 In compliance with article 13 of Italian law 675/96, at any moment you have the right to access, modify, delete or simply oppose the use of such information held by sending an email to the following address: progeo@rehateamprogeo.com TEKNA TILT...
- Page 50 TEKNA TILT...
- Page 51 direction.
- Page 52 Vicolo Negrelli, 4 – 31040 Castagnole di Paese (TV) Italy Tel. +39 0422 484657 ra Fax +39 0422 484661 http//www.rehateamprogeo.com progeo@rehateamprogeo.com MANUFACTURER Certified company TÜV Rheinland directive UNI/EN/ISO/9001 Rehateam® s.r.l. reserves the right to carry out modification and/or improvements to its products without prior notice.
Need help?
Do you have a question about the Tekna Tilt and is the answer not in the manual?
Questions and answers