Table of Contents
Advertisement
CONVERSION KIT INSTRUCTION MANUAL
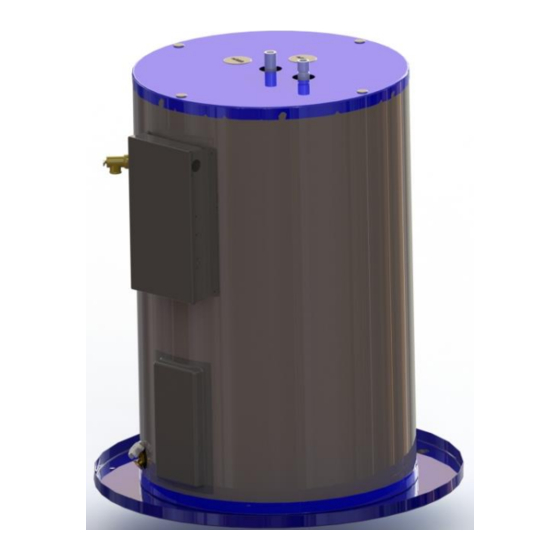
COMMERCIAL ELECTRIC WATER HEATER
Models: LCE6-1, LCE12-1, LCE20-1, LCE20-2, LCE30-2, LCE40-2, LCE50-2
This conversion kit shall be installed by a qualified service agency
in accordance with the manufacturer's instructions and all
applicable codes and requirements of the authority having
jurisdiction. The information in these instructions must be
followed to minimize the risk of fire or explosion or to prevent
property damage, personal injury or death. The qualified service
agency is responsible for the proper installation of this kit. The
installation is not proper and complete until the operation of the
converted appliance is checked as specified in the manufacturer's
instructions supplied with this kit.
Advertisement
Table of Contents

Related Manuals for Bock Water heaters LCE6-1


Summary of Contents for Bock Water heaters LCE6-1
- Page 1 CONVERSION KIT INSTRUCTION MANUAL COMMERCIAL ELECTRIC WATER HEATER Models: LCE6-1, LCE12-1, LCE20-1, LCE20-2, LCE30-2, LCE40-2, LCE50-2 This conversion kit shall be installed by a qualified service agency in accordance with the manufacturer’s instructions and all applicable codes and requirements of the authority having jurisdiction.
-
Page 2: Table Of Contents
Table of Contents 1.0 General Information ......................1 2.0 Required Materials ......................1 3.0 Approved Conversion Kits ....................2 3.1 Single Element Models ...................2 3.2 Dual Element Models 120/277V ................3 3.3 Dual Element Models 208/240/480V ..............4 4.0 Conversion Instructions ......................5 4.1 Voltage or Wattage Conversion ................6 4.2 Phase Conversion ....................8 4.3 Operating Mode Conversion ...................8 4.4 Replace Components ....................9... -
Page 3: General Information
1.0 General Information Installation of this conversion kit must be performed by a qualified service agency. A qualified service agency is any individual, firm, corporation or company which either in person or through a representative is engaged in and is responsible for the connection, utilization, repair or servicing of electric equipment or accessories;... -
Page 4: Approved Conversion Kits
3.0 Approved Conversion Kits 3.1 Single Element Models The conversion kits in this section only apply to models LCE6-1, LCE12-1, and LCE20-1. In the table below, use the voltage and wattage for the required water heater to select the proper conversion kit number. -
Page 5: Dual Element Models 120/277V
3.2 Dual Element Models – 120/277 V The conversion kits in this section apply to models LCE20-2, LCE30-2, LCE40-2, and LCE50-2 that were built for 120 V or 277 V supply voltage. In the table below, use the voltage and wattage for the required water heater to select the proper conversion kit number. -
Page 6: Dual Element Models 208/240/480V
3.3 Dual Element Models – 208/240/480 V The conversion kits in this section apply to models LCE20-2, LCE30-2, LCE40-2, and LCE50-2 that were built for 208 V, 240 V, or 480 V supply voltage. In the table below, use the voltage and wattage for the required water heater to select the proper conversion kit number. -
Page 7: Conversion Instructions
4.0 Conversion Instructions Prior to starting the conversion, confirm that the conversion kit number matches the number shown in this manual for the original heater and the required heater. The kit contains the necessary parts to change the voltage, wattage, phase, and element operating mode (simultaneous or non-simultaneous). To access the water heater without disassembling the packaging, a 2-sided flap must be cut from the front and right side of the cardboard box. -
Page 8: Voltage Or Wattage Conversion
safe area. All parts must be returned to their 4.1 Voltage or Wattage Conversion (i.e. original position. Element Replacement) 4.1.4 Use a Phillips (#2) screwdriver to loosen 4.1.1 Remove the screws (2x) from the top and the two screws on the element and remove the bottom of the access panel with a Phillips (#2) wires. - Page 9 4.1.6 Obtain the required element and new O- 4.1.7 Insert the bare wire ends under each screw ring gasket. Turn the element into the threaded terminal. If necessary, use a pair of rounded tank fitting by hand until the gasket contacts the pliers to redirect the wires to the screw fitting.
-
Page 10: Phase Conversion
4.2.3 At the jobsite, the power supply will be 4.2 Phase Conversion connected to L1 and L2. Dual element models are factory wired for connection to a three-phase delta branch circuit. 4.3 Element Operating Mode Conversion The phase may be converted to single-phase by adding a jumper to the terminal block. -
Page 11: Replace Components
4.5.2 The converted ratings label (on single 4.4 Replace Components element models) will appear as shown below. The red box shows the converted ratings. PRIOR TO INSTALLING ALL COMPONENTS TO THEIR ORIGINAL LOCATIONS, CHECK ALL WATER AND ELECTRICAL CONNECTIONS FOR TIGHTNESS. LOOSE CONNECTIONS ARE A FIRE HAZARD. - Page 12 4.5.3 Dual element models only - With a black 4.5.5 Dual element models only - If a jumper permanent marker, place an “x” over the “total was added, cover the original wiring diagram connected wattage” rating that DOES NOT (located on inside of junction cabinet door) with match the rating of the converted water heater.
-
Page 13: Close The Box
4.5.6 With a black permanent marker, cross-out the original heater ratings on the box and write the converted ratings as applicable. 4.6 Close the Box Close the flap on the box and seal the cut with filament tape. -
Page 14: Appendix A - Approved Element Ratings
APPENDIX A... -
Page 15: Appendix B - Wiring Diagrams
APPENDIX B...
Need help?
Do you have a question about the LCE6-1 and is the answer not in the manual?
Questions and answers