Table of Contents
Advertisement
Point
Description
No.
0
1
1.1
1.2
1.3
1.4
1.4.1
1.4.2
1.5
1.5.1
1.5.1.1
1.5.1.2
1.5.1.3
1.5.2
1.6
2
3
4
5
6
7
8
8.1
8.2
8.3
8.4
8.5
9
9.1
9.1.1
9.2
9.3
9.3.1
9.4
9.5
10
10.1
10.2
10.3
Contents
Page
Point
Description
No.
No.
1
10.4
10.5
1
10.6
1
1
11
2
11.1
3
11.2
3
11.2.1
4
11.2.2
4
11.2.2.1
4
11.2.2.2
5
11.3
5
11.3.1
7
11.4
7
11.5
7
11.6
Dynamic balancing of pump rotor
7
12
Assembly of pump
12.1
Preparations prior reassembly
8
12.2
Assembling the pump body
8
12.3
Assembly of shaft seal
8
12.3.1
Pump construction with soft-packed
stuffing box
8
12.4
9
12.4.1
12.4.2
9
13
9
13.1
9
13.2
9
13.3
10
14
10
15
11
15.1
15.2
11
15.3
11
15.4
12
15.5
12
12
16
13
components
13
13
13
13
14
WK
Page
No.
14
15
15
15
15
15
15
16
16
17
17
17
17
19
20
20
20
20
22
22
23
23
23
25
25
25
26
27
28
28
28
28
28
28
29
31
Advertisement
Table of Contents

Related Manuals for KSB WK Series


Summary of Contents for KSB WK Series
-
Page 1: Table Of Contents
Contents Point Description Page Point Description Page Introduction 10.4 Shutting the pump down 10.5 Preserving the pump Pump construction 10.6 Sending the pump back to our Works Casing Rotor Dismantling the pump Bearing arrangement 11.1 Preparations prior to dismantling Lubrication 11.2 Dismantling the bearing 1.4.1... -
Page 2: Introduction
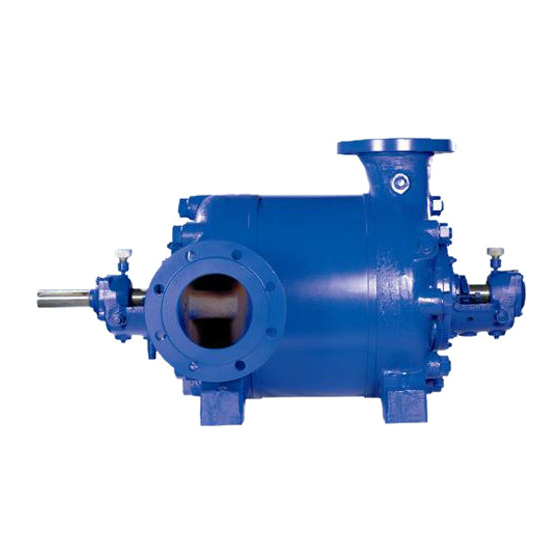
water compartment, which is sealed off against atmosphere by the stuffing box housing cover (165) with flat gasket (400.3) and O-ring (412.4) (See Fig. 2) 7A/7E 400.3 400.3 524.2 (524.1) Fig. 1 412.3 412.4 461.1 Introduction Fig. 2 Stuffing box housing with cooling compartment cover WK pumps are High Pressure Horizontal Centrifugal Pumps. -
Page 3: Bearing Arrangement
5412 and standard bearing bracket (No adaptor sleeve provided on pump size 150). End side : 1 deep groove ball bearing in accordance with DIN 625 and standard bearing housing (see Figs. 7 and 8). Heavy Duty Bearing Construction : Drive end : Same as atandard bearing construction. -
Page 4: Lubrication
Standard Construction Pump size Drive end : cylindrical roller bearing NU 206 K NU 207 K NU 207 K NU 208 K NU 208 K NU 210 K NU 410 designation in accordance with DIN 5412 Adaptor sleeve in H 206 H 207 H 207 H 208... -
Page 5: Grease Lubrication
Oil Quality : Machinery oil possessing good air release Portable (mobile) pumps, and pumps installed on board ship properties and corrosion prevention characteristics; kinematic have grease-lubricated bearings (See Fig. 14). Use a good viscosity 36 cSt approx. = 4.8 E at 50 C;... -
Page 6: Cooling Liquid For Stuffing Boxes
Soft-packed stuffing box, ‘‘Standard’’ (N) construction. 10A/10E Standard construction with 4 packing rings (461.1) used for 400.3 400.3 temperatures of the fluid pumped up to 105 C. The stuffing box compartment cannot be cooled. Fluids pumped : Operation under vacuum 400.3 or pumping of malodorous fluids (ammonia and... - Page 7 Fig. 20 Cutting the packing rings of length. To cut the packing rings to correct length, use a suitable wooden cutting jig (we can supply same on request), to ensure that the packing rings are of the correct length and that their ring butts Fig.
-
Page 8: Packing Material
A newly packed stuffing box should leak profusely at first. If this leakage does not cease of its own accord after a relatively short period of operation, the nuts on the gland should be tightened slowly and evenly while the pump is running, until the stuffing box only drips tightened evenly and not askew, as otherwise the shaft protection sleeves (524.1/.2) might be damaged (see Fig. -
Page 9: Drive
Fig. 35 Characteristics for constant pump rotational speed Fig. 36 Slinging the ropes under the pump and driver mounted on a combine baseplate As can be seen in the Fig. 35 the power absorbed by the pump does not decrease proportionately with decreasing rate of flow, Painting but remains relatively high at the pump shut-off point (capacity Q = 0). -
Page 10: Accessories
Our erection staff will check the correct orientation of the foundations in relation to the space axis after c;earamce fpr erection has been given. The site management is responsible for the zero point marking of the foundation (see ‘‘Conditions of Erection’’). The areas for the packing plates (shims) should now be marked out and trued up in accordance with the foundation drawing. -
Page 11: Grouting In The Baseplate
Spacer type coupling Wrong Max. clearance 0.04 mm Right Fig. 39 Mounting the coupling Straight edge Fig. 42 Coupling alignment jig The coupling can be considered correctly aligned with the aid of the jigs illustrated if the difference measured does not exceed 0.04 mm both in the radial and axial directions, measurements being taken in 4 planes at 90 intervals. -
Page 12: Piping
Piping The main piping should be connected to the pump without transmitting any stresses or strains onto the latter. Any appreciable piping forces which are transmited to the base- plate via the PUMP can detrimentally affect the alignment and the running of the pump. Such forces should therefore be kept Correct to a minimum at all costs. -
Page 13: Isolating Valves
1. Strainer holder 2. Fine strainer 3. Coarse strainer 4. Pump min. max. Fig. 46 Conical strainer Fig. 47 Conical strainer with for suction head line monitoring of pressure drop. Isolating Valves An isolating valve (gate valve) should be provided in the suction lift line, to enable the supply of fluid to a pump to be shut off if ‘‘Construction with manual necessary. -
Page 14: Final Coupling Check
Lever Even a relatively short start up run in reverse rotation may Taper grooved dowel pin result in damage to the pump. The overspeed trip check Bottom spider of the turbine or turbine driven pumps should also be Top spider carried out with the turbine disconnected from the pump. -
Page 15: Operation And Supervision Of Pump
smoothly and lightly, and check that the pump bearings When filling the boiler, the operating limits specified in 1 are being supplied with oil. The pump rotor must not stop and 2 above should not be exceeded i.e. the discharge with a sudden jerk. -
Page 16: Sending The Pump Back To Our Works
10.6 Sending the Pump back to our Works If the pump is sent back to our Works for repairs or overhaul, it should be despatched completely assembled in order to prevent any possible damage to the sealing faces during transport. All pipe connections and flanges should be plugged or blanked off, after the pump has been drained. -
Page 17: Dismantling The End Side Bearing
Fig. 58 Forcing out the inner components of the cylindrical roller bearing Pull out inner race of cylindrical roller bearing (322) together with adaptor sleeve (52.1) from bearing housing (350) (see Figs. 58 and 59) Fig. 61 Removing the bearing housing (350) together with outer race of cylindrical roller bearing (322) Fig. -
Page 18: Heavy Duty Bearing Construction
bearing (321) by means of loan forcing screws until the bearing housing and bearing can be pulled off the shaft without effort. Inspect condition of deep groove ball bearing (321) and if necessary remove it form bearing housing (350). Strip splash ring (507) off the shaft. 11.2.2.2 Heavy Duty Bearing Construction Remove bearing end cover (361) including O-ring (412.7). - Page 19 Fig. 72 Slackening and removing the stage casing Fig. 69 Forcing off the stage casing When the last stage casing (108) has been dismantled, pull shaft (210) together with last impeller (230), spacer sleeves (525.1) and shaft protection sleeve (524.1) out of the suction casing (see Fig.
-
Page 20: Assembly Of Bearings
Fig. 76 Inserting the outer race of the roller bearing Observe the greatest cleanliness when mounting the bearings (322). If the existing bearings are to be used again, they should be cleaned with petrol gasoline or benzol. After washing, they should immediately be Fig. - Page 21 case of chrome steel construction throughout the latter reverse sequence to the assembly described above. and provided with inter stage bushes (541) should all be examined for signs of radial galling (seizure). The spacer sleeve (525.1) should be examined for signs of galling in the suction casing (see Fig.
- Page 22 Fig. 81 Shaft with first stage impeller Insert shaft (210) together with spacer sleeve (525.1) and impeller (230) into discharge casing (106) (see Fig. 82). Fig. 84 Mounting the stage casings After assembly of each individual stage, check the total axial clearance ‘‘Sa 1 + Sa 2’’...
- Page 23 by hand with a standard short spanner to ensure intimate Size Number Torque Number Torque contact of the stage casings (108) at their sealing faces. of stages of stages 1-10 7.5 kpm 11-16 8.0 kpm 11. Slip the spacer sleeve onto the shaft until it abuts against the hub of the last stage impeller.
-
Page 24: Assembly Of End Side Bearing
Slip the stuffing box gland (452) loosely on shaft (210) Slip spacer sleeve (525.5) onto the shaft until it abuts but do not insert it in the stuffing box compartment. against circlip (932). Slip splash ring (507) onto the shaft. Slip inner guide bush (508) and lubricating (644) onto the shaft. - Page 25 Mount bearing housing (350) together with outer race of Bend down the tabs on the locking washer (see Fig. 114). cylindrical roller bearing (322) and tighten hex. nuts (920.2) evenly (see Fig. 111). Mount bearing cover (360) and flat gasket (400.4) (see Fig.
-
Page 26: Operating Troubles, Causes And Remedies
Mount coupling hub on the shaft with the aid of a pusher Faults at the Suction End device. Pump not properly vented, air pocket in suction line, vapour bubble at suction end, lines not properly vented. Align pump at the coupling (see section 8.3, ‘‘Coupling Alignment’’). -
Page 27: Suggested Remedies
29. Dirt or sand in cooling liquid fed to stuffing box gland Cause 11. Check operation of minimum flow device. Refer to causes scoring of shaft protection sleeve. manufacturer. 30. Excessively high axial thrust. Cause 12. Check condition of individual machines. Refer to manufacturer. -
Page 28: Spare Parts
14. Spare Parts Cause 38. Check unobstructed flow through cooling liquid supply line. When ordering spare parts, always please quote the item Cause 39. Fit a new bush or a spacer sleeve in the cooling numbers, and designations of the items concerned, and the housing. -
Page 29: Check List
15. Check List 15.4 Initial Operation with Hot Fluid When the nominal temperature of the fluid pumped has been 15.1 Pre-requisites for Initial Commissioning attained, adjust the flow rate of the cooling liquid supply. This should be done by throttling the individual valves in the internal Check direction of rotation of driver with pump disconnected. -
Page 30: Sectional Drawings And List Of Components
Sectional Drawings and List of Components 903.1 920.4 350 920.2 400.3 731.2 901.2 902.1 400.3 52-1 903.2 920.3 902.2 903.4 720.3 903.2 412.3 451 412.3 400.4 461.1 461.1 400.4 550 524.2 171.2 171.1 500.4 524.1 Basic construction WK 40 to 125 905 525.2 412.2 400.2... - Page 31 Construction with constant level oiler Constant level oiler Grease-lubricated Construction with bearing and bearing housing seal (viewed from X) construcion housing seal 422.2 500.2 932 731.2 500.1 422.1 WK 150 bearing construction Hot water stuffing box 350 322 360 7A/7E 903.12 361 543 920.4 321 525.4 350 400.3 4003...
-
Page 32: Balancing Liquid Piping
Balancing Liquid Piping Pipe line size Valve Size Size of Safety Valve Field of Application 16 x 1.5 DN15 Balancing liquid piping is a must for WL pumps. However 20 x 2 DN20 DN20 x 32 for WK/WKS pumps balancing liquid piping is required 25 x 2 DN25 whenever the discharge pressure exceeds 20 bar for sizes... - Page 33 Feed water tank Globe valve Check valve Fig. C Pressure Gauge Z = End of KSB Supply Safety valve Illustrations iii) Whenever the balancing liquid line is fed back to feed water tank, and if more than one pumps are Balancing liquid fed back to suction casing.
- Page 34 NOTES...
- Page 35 NOTES...
- Page 36 NOTES...
-
Page 38: Operating Instructions
Operating Instructions Manufactured in technical collaboration with KSB Aktiengesellschaft., Germany by : PUMPS LIMITED Works : Telephone No. Telefax Pimpri Irrigation and Process Division, (020) 772008, 770990 (020) 776120 Mumbai-Pune Road, Pune - 411 018 Chinchwad Power Projects Division, D-II Block, MIDC, Pune - 411 019... - Page 39 Operating Instructions 0011.81 / 00 - 18 G3 High Pressure Centrifugal Pumps Works Order No. : ________________________________________________ Pump Type & Size : ________________________________________________ These operating instructions contain fundamental information and precautionary notes. Please read the manual thoroughly prior to installation of unit, electrical connection and commissioning.
Need help?
Do you have a question about the WK Series and is the answer not in the manual?
Questions and answers
For WKS 40/ 13DSB, if suction pr is 1.8 kg/cm2 (g) and disch pr is 25 kg/cm2 (g) what shall be the balancing line pressure given that all clearances are maintained as new as per manual
For the KSB WK Series WKS 40/13DSB pump with a suction pressure of 1.8 kg/cm² (g) and a discharge pressure of 25 kg/cm² (g), when all clearances are maintained as new, the balancing line pressure will be approximately equal to the pressure in the balancing chamber.
According to the context, the balancing liquid flows from the discharge side through holes in each impeller stage to the balancing chamber to equalize axial thrust. Since the discharge pressure is 25 kg/cm² (g), and the balancing system is designed to equalize pressure on either side of the impellers, the balancing chamber pressure (and thus the balancing line pressure) is typically slightly lower than the discharge pressure due to pressure drop across internal passages.
Therefore, the balancing line pressure will be slightly less than 25 kg/cm² (g), typically around 23–24 kg/cm² (g), depending on internal flow resistance, assuming all clearances are as new.
This answer is automatically generated
Bearing number
The bearing numbers for the KSB WK Series are:
- Non-drive end (Angular contact ball bearing, X arrangement):
- 7305 BG, 7306 BG, 7307 BG, 7309 BG, 7310 BG
- Matched pair: 7305 B. UA, 7306 B. UA, 7307 B. UA, 7309 B. UA, 7310 B. UA
- Suction side (Cylindrical roller bearing):
- NU 206 K, NU 207 K, NU 208 K, NU 210 K, NU 410
These bearings conform to DIN 5412 and DIN 628 standards.
This answer is automatically generated
Uk125/003nor,s.no. 9973255173/100/02 bearing use