Page 1
Digital Shower head systems Installation guide Shower head systems installation instructions Page 1...
Page 2
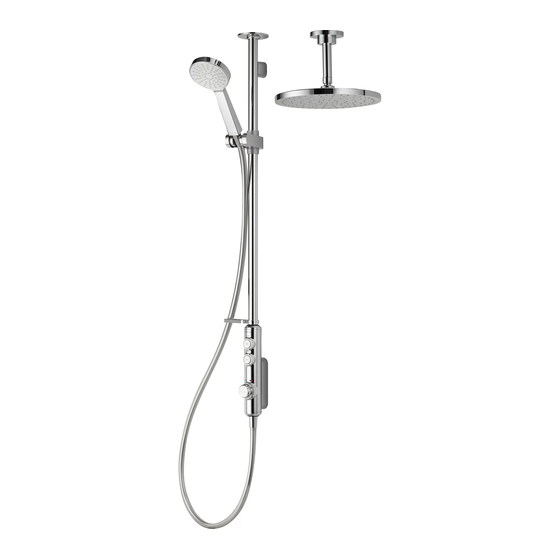
Shower head systems Quartz and iSys Digital Drencher heads Quartz Digital rail system iSys Digital rail system Shower head systems installation instructions Page 2...
Installation instructions This product must be installed by a competent person in accordance with the relevant Water Supply Regulations. In addition to the guide below, it is essential that the written instructions in the main product installation instructions are read and understood, and that you have all the necessary components (shown in the main product installation guide) before commencing installation.
Page 4
Clean and lubricate the pipe using a suitable (silicone based) lubricant. Remove the locking screw, rotate the chrome outlet assembly and remove the outlet from the wall mounting plate. Ensuring the locking screw hole is positioned at the bottom, place the wall outlet mounting plate onto the pipe assembly and mark and prepare the fixing points, using the fixings provided, if suitable.
Page 5
Prepare two fixing points between 520mm (minimum) and 830mm (maximum) apart using the fixings provided, if suitable. The top rail end bracket can be adjusted to suit existing screw holes in the finished wall by sliding the bracket up or down the rail to suit the required position. Pass the rail through the handset holder while keeping the slider levers depressed.
Page 6
Slide the rail assembly up through the top rail end body. Align the small hole in the rail with the bottom rail end fixing point. Secure the rail assembly to the wall, using the fixings provided, if suitable, taking care to not over tighten. Place the rail end caps into the rail ends and push firmly into position.
Page 7
Ensuring the hose washer is in the correct position; attach the hose to the wall outlet. This product must be installed by a competent person in accordance with the relevant Water Supply Regulations. In addition to the guide below, it is essential that the written instructions in the main product installation instructions are read and understood, and that you have all the necessary components (shown in the main product installation guide) before commencing installation.
Page 8
Slide the 15mm gripper ring down the projecting pipe flush with the wall spacer fitting. Ensure the pipe is clean and free of dust and slide the fixing bush onto the pipe flush with the finished wall surface. Slide the fixed head arm over the fixing bush flush with the wall surface and mark the four fixing points.
Page 9
Refit the shower arm and secure it to the wall using the screws provided. Run the shower for a few seconds to clear any debris that may be present. Slide the cover plate into position flush with the finished wall surface. Ensuring the rubber washer is in the correct position, attach the shower head to the fixed arm and carefully secure using a suitable spanner, or a tool with smooth jaws, sufficiently to lock the head into position.
Page 10
This product must be installed by a competent person in accordance with the relevant Water Supply Regulations. In addition to the guide below, it is essential that the written instructions in the main product installation instructions are read and understood, and that you have all the necessary components (shown in the main product installation guide) before commencing installation.
Page 11
Drill a hole (minimum ø28mm, maximum ø40mm) through the ceiling and the noggin. Remove the fixing bracket carefully from the fixed head arm. Set the fixing bracket into position and mark the fixing points. Remove the bracket and drill and prepare suitable fixings. Refit the fixing bracket and secure it through the ceiling and into the noggin using the screws provided if suitable.
Page 12
Lubricate the ‘O’ ring if necessary and carefully slide the cover plate back over the fixed head arm and into position against the ceiling. Secure the cover plate to the arm using the grub screw and 2.5mm hexagonal key provided. Ensuring the rubber washer is in the correct position, attach the shower head to the fixed arm and carefully secure using a suitable spanner, or a tool with smooth...
Page 13
Part No:700997 Issue 01 Jan 14 Please note that calls may be recorded for training and quality purposes The company reserves the right to alter, change or modify the product specifications without prior warning ® Registered Trademark Aqualisa Products Limited...
Page 14
Digital Showers Mixer Showers Power Showers Smart Showers Shower Towers From Top Shower Brands Mira Showers Aqualisa Showers Triton Showers Gainsborough Showers Shower Pumps can upgrade your showering experience even more Stuart Turner Shower Pumps Salamander Shower Pumps Grundfos Shower Pumps...
Need help?
Do you have a question about the Digital Quartz and is the answer not in the manual?
Questions and answers