Table of Contents
Advertisement
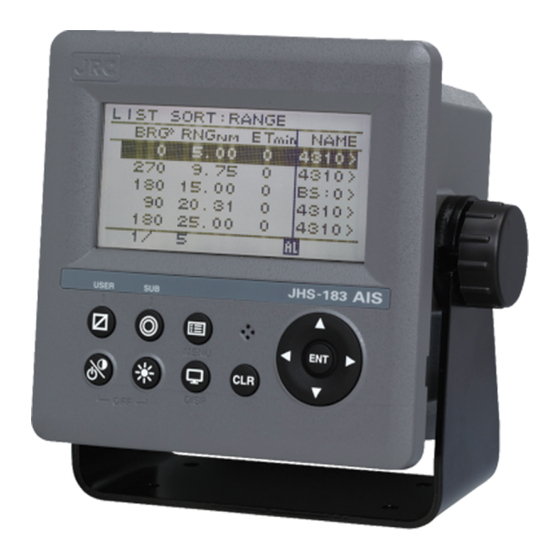
Sjekk av SW versjon:
MAIN MENU->3.Maintance->6.Software version,
trykk CLR just once eller meny
merk 6.Software version,
trykk og hold SUB pluss trykk ENT key
så kommer maintance nummer frem
versjon per 14.11.2017 er:
Controller Main V39,
Controller Lan V28
and Transponder V75 ;
Technote om SW versjon står i JD-1360-16
Strømtrekk i ant kabel ca 0,4A spenning 24V
Strømtrekk i antennekabel 0,4A
Automatic Identification System
Automatic Identification System
JHS-183
JHS-183
INSTALLATION
INSTALLATION
MANUAL
MANUAL
Advertisement
Table of Contents

Subscribe to Our Youtube Channel
Related Manuals for JRC JHS-183


Summary of Contents for JRC JHS-183
- Page 1 JHS-183 JHS-183 Automatic Identification System Automatic Identification System INSTALLATION INSTALLATION MANUAL MANUAL Sjekk av SW versjon: MAIN MENU->3.Maintance->6.Software version, trykk CLR just once eller meny merk 6.Software version, trykk og hold SUB pluss trykk ENT key så kommer maintance nummer frem versjon per 14.11.2017 er:...
- Page 3 About Safety CAUTIONS AGAINST HIGH VOLTAGE Radio and radar devices are operated by high voltages of anywhere from a few hundred volts up to many hundreds of thousands of volts. Although there is no danger with normal use, it is very dangerous if contact is made with the internal parts of these devices.
- Page 4 First aid ☆Note points for first aid Unless there is impending danger leave the victim where he or she is, then begin artificial respiration. Once you begin artificial respiration, you must continue without losing rhythm. (1) Make contact with the victim cautiously, there is a risk that you may get electrocuted. (2) Switch off the machinery and then move the victim away slowly if you must.
- Page 5 ☆If the victim has a pulse but is not breathing (“Mouth to mouth” resuscitation) Figure 1 (1) Place the victim’s head facing backward (place something under the neck like a pillow). (2) Point the chin upward to widen the trachea. (3) Pinch the victim’s nose, take a deep breath, then put your mouth over the victim’s mouth and exhale completely, making sure that your mouth completely covers the victim’s mouth.
- Page 6 ☆If the victim has no pulse and is not breathing (Heart massage in combination with artificial respiration.) Figure 2 If the victim has no pulse, his or her pupils are dilated, and if you cannot detect a heartbeat, the heart may have stopped, beginning artificial respiration is critical. (1) Put both hands on the diaphragm, with hands on top of each other keeping both arms straight (If your elbows are bent, you cannot push with as much power).
-
Page 7: Before Operation
Before Operation Concerning the symbols This manual uses the following symbols to explain correct operation and to prevent injury or damage to property. The symbols and descriptions are as follows. Understand them before proceeding with this manual. WARNING Indicates a warning that, if ignored, may result in serious injury or even death. -
Page 8: Handling Precaution
Handling precaution CAUTION Do not distribute this INSTALLATION MANUAL to ordinary users, because it has been created and published only for use by our service engineers. Do not use this equipment for anything other than specified. Doing so may cause failure or malfunction. Do not turn the trimmer resistors or the trimmer capacitors on the PCB unit, except when and if they need to be adjusted. -
Page 9: Items To Be Explained To The Captain
ITEMS TO BE EXPLAINED TO THE CAPTAIN • Ensure power is energized to the AIS equipment and it is in operation. • The captain can turn off the AIS equipment only if operation of the AIS becomes a threat to the safety of the ship in pirate-infested waters. -
Page 10: Cautions In Working At A High Place
Cautions in Working at a High Place When mounting the transponder, follow the cautions described below because fall from a high place leads to serious injury or fatal accidents in most cases. Do not engage personnel who are in bad shape due to sickness or fatigue and who seem to be inappropriate for other reasons in working in a high place. -
Page 11: Table Of Contents
System configuration ................... Block diagram ....................1.2.1 General configuration .................. 1.2.2 Overall configuration ................... Specifications ..................... 1.3.1 JHS-183 Automatic Identification System ........... 1.3.2 Options ......................1-19 Interconnection diagram ..................1-20 1.4.1 General configuration .................. 1-20 1.4.2 Overall configuration ................... 1-21 2. - Page 12 3.1.2 NCM-983 AIS Controller ................3-12 3.1.2.1 External dimensions and installation space ............3-12 3.1.2.2 Back side of the controller and connectors ............3-15 3.1.2.3 Control cable for AIS Controller ................3-18 3.1.2.4 Data cable for AIS Controller ................3-18 3.1.2.5 Pilot plug cable ....................
-
Page 13: Configuration And Specifications
CONFIGURATION AND SPECIFICATIONS 1. Configuration and Specifications 1.1 Basic configuration 1.1.1 Basic configuration of the equipment Description Model Notes With 1 whip antenna, 2 fitting bands, 1 N-P-10U, and AIS Transponder NTE-183 2 Rubbers 10 x 10 x 10 AIS Controller NCM-983 With 4 tapping screws Spare parts... -
Page 14: Spare Parts
CONFIGURATION AND SPECIFICATIONS 1.1.3 Spare parts SETS PER SHIP NO. SPARE PARTS LIST FOR VESSEL Automatic Identification System MODEL JHS-183 船舶自動識別装置 QUANTITY REMARKS ITEM NAME OF OUTLINE WORKING DESCRIPTION PART (DIMENSION IN M/M) SPARE MARK OF JRC CODE NO. BOX NO. -
Page 15: System Configuration
CONFIGURATION AND SPECIFICATIONS 1.1.4 System configuration NCM-983 NTE-183 AIS controller AIS Transponder External sensor unit (GPS, Speed Log ...) NQE-5183 Connection box Radar or ECDIS The AIS can also be used when connected to remote maintenance system equipment. NBD-577C Power supply unit... -
Page 16: Block Diagram
CONFIGURATION AND SPECIFICATIONS 1.2 Block diagram 1.2.1 General configuration antenna VHF ANT N-P-10U N-P-10U NCM-983 NTE-183 RG-10/UY Trans- AIS Controller AIS Transponder ponder CFQ-9183A Terminal Block DPYC-2.5 DC +24V TTYCS- 1 GYRO COMPASS TTYCS- 1 TTYCS- 4 RADAR TTYCS- 4... -
Page 17: Overall Configuration
CONFIGURATION AND SPECIFICATIONS 1.2.2 Overall configuration antenna VHF ANT N-P-10U N-P-10U NCM-983 NTE-183 RG-10/UY Trans- AIS Controller AIS Transponder ponder Cat-5 LAN Cable Pilot PC CFQ-9193A CFQ-9183A NQE-5183 Connection Box 100V/220V AC NBD-577C 50/60Hz 1φ Power DPYC-2.5 Supply 24V DC TTYCS- 1 GYRO COMPASS... -
Page 18: Specifications
CONFIGURATION AND SPECIFICATIONS 1.3 Specifications 1.3.1 JHS-183 Automatic Identification System General Specification Frequency range 156.025MHz to 162.025MHz Default channel AIS1: 161.975MHz, AIS2: 162.025MHz Channel spacing 25kHz Within ±3×10 Frequency accuracy Type of emission G1D (F1D), G2B (F2B) Type of modulation... - Page 19 CONFIGURATION AND SPECIFICATIONS (2.2) Supported interface sentences Supported Sentence Indication Format Input data sentences Positioning system: Longitude/Latitude GNS, GLL,GGA,RMC Position Accuracy Datum Reference SENSOR1 ※) IEC61162-1/2 Speed Over Ground (SOG) VBW,VTG,RMC SENSOR2 ※) (NMEA1.5-2.3) Course Over Ground (COG) RMC,VTG SENSOR3 Heading HDT,THS RAIM indicator...
- Page 20 CONFIGURATION AND SPECIFICATIONS (2.5) List of sentences and associated data fields (2.5.1) ABK – Addressed and binary broadcast acknowledgement $--ABK,xxxxxxxxx,a,x.x,x,x*hh<CR><LF> Type of acknowledgement Message Sequence Number ITU-R M.1371 message ID AIS channel of reception MMSI of the addressed destination AIS unit (2.5.2) ABM –...
- Page 21 CONFIGURATION AND SPECIFICATIONS (2.5.5) ACS – Channel management information Source $--ACS,x,xxxxxxxxx,hhmmss.ss,xx,xx,xxxx*hh<CR><LF> UTC year UTC month, 01 to 12 UTC day, 01 to 31 UTC at receipt of regional operating settings MMSI of originator Sequence number 1, 0 to 9 (2.5.6) ALR –...
- Page 22 CONFIGURATION AND SPECIFICATIONS (2.5.9) DSC – Digital selective calling information $ --DSC,xx,xxxxxxxxxx,xx,xx,xx,x.x,x.x,xxxxxxxxxx,xx,a,a*hh<CR><LF> Expansion indicator Acknowledgement Nature of distress MMSI of ship in distress Time or Tel. No. Position or Channel/frequency Type of communication or second telecommand Nature of distress or first telecommand Category Address Format specifier...
- Page 23 CONFIGURATION AND SPECIFICATIONS (2.5.13) EPV – Command or report equipment property value $--EPV,a,c--c,c--c,x.x,c--c,*hh<CR><LF> Value of property to be set Property identifier for the property to be set Unique identifier Destination equipment type Sentence status flag (2.5.14) GBS – GNSS satellite fault detection GNSS System ID GNSS Signal ID $--GBS, hhmmss.ss, x.x, x.x, x.x, xx, x.x, x.x, x.x, h, h *hh <CR><LF>...
- Page 24 CONFIGURATION AND SPECIFICATIONS (2.5.17) GNS – GNSS fix data Navigational status indicator Differential reference station ID Age of differential data Geoidal separation, m Antenna altitude, m, re:mean-sea-level (geoid) $--GNS, hhmmss.ss, llll.ll, a, yyyyy.yy, a, c---c, xx, x.x, x.x, x.x, x.x, x.x, a*hh<CR><LF> HDOP Total number of satellites in use, 00-99 Mode indicator: N = No fix, A = Autonomous, D = Differential,...
- Page 25 CONFIGURATION AND SPECIFICATIONS (2.5.22) LRF – Long Range Function $--LRF,x,xxxxxxxxx,c--c,c--c,c--c*hh<CR><LF> Function reply status Function request, 1 to 26 characters Name of requestor, 1 to 20 character string MMSI of requestor Sequence number, 0 to 9 (2.5.23) LR1 – Long-range Reply with destination for function request "A" $--LR1,x,xxxxxxxxx,xxxxxxxxx,c--c,c--c,xxxxxxxxx*hh<CR><LF>...
- Page 26 CONFIGURATION AND SPECIFICATIONS (2.5.26) NAK – Negative acknowledgement $--NAK,cc,ccc,c--c,x.x,c--c*hh<CR><LF> Negative acknowledgement’s descriptive text Reason code for negative acknowledgement Unique identifier Affected sentence formatter Talker identifier (2.5.27) OSD – Own ship data $--OSD, x.x,A,x.x, a,x.x,a,x.x,x.x,a*hh<CR><LF> Speed units, K = km/h; N = knots; S = statute miles/h Vessel drift (speed) Manually Vessel set, degrees true entered...
- Page 27 CONFIGURATION AND SPECIFICATIONS (2.5.30) RMC – Recommended minimum specific GNSS data Navigational status $--RMC, hhmmss.ss, A, llll.ll,a, yyyyy.yy, a, x.x, x.x, xxxxxx, x.x,a, a, a*hh<CR><LF> Mode indicator Magnetic variation, degrees, E/W Date: dd/mm/yy Course over ground, degrees true Speed over ground, knots Longitude, E/W Latitude, N/S Status A = data valid V = navigation receiver warning...
- Page 28 CONFIGURATION AND SPECIFICATIONS (2.5.35) TXT – Text transmission $--TXT,xx,xx,xx,c--c*hh<CR><LF> Text message Text identifier Sentence number, 01 to 99 Total number of sentences, 01 to 99 (2.5.36) TRL – AIS transmitter non functioning log $--TRL,x.x,x.x,x,xxxxxxxx,xxxxxxxx,hhmmss.ss,xxxxxxxx,hhmmss.ss,x,*hh<CR><LF> Reason code Switch on UTC time Switch on date Switch off UTC time Switch off date...
- Page 29 CONFIGURATION AND SPECIFICATIONS (2.5.39) VDO – VHF Data-link Own-vessel message !--VDO,x,x,x,a,s--s,x*hh<CR><LF> Number of fill-bits, 0 to 5 Encapsulated ITU-R M.1371 radio message AIS Channel, "A" or "B" Sequential message identifier, 0 to 9 Sentence number, 1 to 9 Total number of sentences needed to transfer the message, 1 to 9 (2.5.40) VER –...
- Page 30 CONFIGURATION AND SPECIFICATIONS (2.5.44) WPL – Waypoint location $--WPL, llll.ll, a, yyyyy.yy, a, c--c*hh<CR><LF> Waypoint identifier Waypoint longitude, E/W Waypoint latitude, N/S 1-18...
-
Page 31: Options
CONFIGURATION AND SPECIFICATIONS 1.3.2 Options AC/DC Power supply unit (NBD-577C) Source voltage 100/110/120/200/220/240VAC (typical) 90 - 121 / 180 - 242VAC (100V/220V manual switching) 50/60Hz (typical), 47.5 to 64Hz, Single phase and 24VDC (21.6 - 31.2VDC) Output voltage AC operation: Typ. 24VDC, 19 - 35VDC DC operation: DC input is relayed directly. -
Page 32: Interconnection Diagram
GREEN SENSOR2_RX-A BLUE SENSOR2_RX-B PURPLE SENSOR2_GND_ISO GRAY AUX1_TX-A WHITE AUX1_TX-B PINK AUX1_RX-A LIGHT BLUE AUX1_RX-B LIGHT GREEN AUX1_GND-ISO BROWN Shield(GND) BRAID Note: * marked cables are supplied by dockyard **speed log for speed over ground JHS-183 AIS Interconnection Diagram 1-20... -
Page 33: Overall Configuration
CONFIGURATION AND SPECIFICATIONS 1.4.2 Overall configuration 1-21... - Page 34 CONFIGURATION AND SPECIFICATIONS Supplement for interconnection diagram Supplement 1. ALR_OUT and ACK_IN connection The ALR_OUT port is made up of relay contact. If the system detects an error, The ALR_OUT relay works. The relay holds the operational state until the CLR key of the AIS controller is pressed, a response command is received from AUX1 to AUX3 serial interfaces or the active low signal is inputted from ACK_IN.
-
Page 35: Preparation For Installation
2. Preparation for installation The purpose of this document is to provide the shipboard installation plans and procedures for the AIS (JHS-183). It emphasizes the ships that have already been commissioned because these ships require a higher degree of careful planning. - Page 36 PREPARATION FOR INSTALLATION • Power Supply unit (optional) • GPS buffer (optional) (2) Wiring The following cables are connected to the AIS controller. Determine cable type and length. • AIS controller - Power supply unit (typical 2m, Maximum 20m) • AIS controller - AIS Transponder (Maximum 50m) •...
-
Page 37: Installation Location Of Ais Transponder And Controller
PREPARATION FOR INSTALLATION Installation Location of AIS Transponder and Controller Give consideration of electromagnetic wave interference with other equipment when installing the AIS transponder. When deciding installation location for the controller, factors such as checking indications and ease of operation should be taken into consideration. This section describes how to install the AIS transponder and controller. - Page 38 PREPARATION FOR INSTALLATION Figure 2 Safety distance for radio interference between AIS/GPS antenna and others. Inmarsat Inm-B が 煙 突 の 横 Radar Inmarsat 付 近 に あ る 場 合 、 レ ダ ス ト か ら MF/HF Ant Magnet Compass 4m 以...
- Page 39 PREPARATION FOR INSTALLATION (2) AIS transponder installation Installation of the AIS transponder requires welding. In case of new shipbuilding, the installation can be performed under its construction. (Refer to PAGE 3-1 in order to install). On existing ships, the AIS transponder should be installed during periodical inspection because of welding.
- Page 40 PREPARATION FOR INSTALLATION Installation of cable through the hull: In cases where the cable passes through the wall or deck, install the through hull fitting at a suitable point and weld as appropriate. (Standard AIS installation condition.) The installation of a pole that can not be weld is a temporally, therefore when the weld can be carried out, weld the handrail and the deck by a ship owner or a dockyard and then complete the installation.
- Page 41 PREPARATION FOR INSTALLATION Example of a mast without much space Example of a mast with much space (3) Cabling from AIS Transponder Run the cable from AIS Transponder as following Figure. MF/HF Antenna MF/HF Ant AIS TRANSPONDER AIS Transponder Antenna Tuner Antenna Tuner Do not run with high frequency and high Do not draw with high frequency...
-
Page 42: Ais Controller
PREPARATION FOR INSTALLATION 2.2.2 AIS Controller In general, the AIS controller is installed on the chart table or at the Coning position that is center of the front of the bridge. In case of coning position, provide a rack under the face wall of the bridge (order from shipyard) or make a suitable hole in the wall (executed by shipyard) to set the AIS controller. -
Page 43: Installation Planning
PREPARATION FOR INSTALLATION 2.3 Installation planning In order to make the installation plan, confirm the composition of AIS system including external equipments that is mentioned previously. Refer to the connection confirmation list and check the external connections. On existing ships, there may be no serial data signals from the gyrocompass or no reserved signal, therefore confirm the signal output from the gyrocompass and plan to connect to the AIS by using a signal converter if necessary. -
Page 44: Incidental Work
PREPARATION FOR INSTALLATION 2.4 Incidental work Incidental work during equipment installation cannot be avoided. Wall removal, welding, cabling etc should be taken into account. Employ professional carpenters and welders where necessary. Equipments in the bridge and wiring (figure-1) AIS transponder Wire through wire Compass deck... -
Page 45: Work Flow For Ais Installations For Ships In Commission
PREPARATION FOR INSTALLATION Work Flow for AIS Installations for Ships in Commission Responsible Work Item Note Section Acceptance of Order Marine Sales Department/Agent Schedule confirmation Marine Sales Department / TMS Confirmation of work time Department Confirmation of ship inspection Preparation of documents requested by a ship owner and confirmation of submission time Ship inspection (confirmation using a checklist) TMS Department /... -
Page 46: Installation Survey Report
PREPARATION FOR INSTALLATION 2.7 Installation survey report YYYY/MM/DD DATE: _____ / __ / __ Japan Radio Co., Ltd. Approved Checked In charge A I S INSTALLATION SURVEY REPORT Ship owner Ship name 2012/4/20_3rd Edition 2-12... - Page 47 PREPARATION FOR INSTALLATION Ship’s information Ship’s name Survey Date Flag Survey Place Presented by Ship Type Written by Company Name Class IMO No. Sea Area ]A1, [ ]A2, [ ]A3, [ MMSI Call Sign 2. Present Installation Power supply Type Fitting Capacity Main...
- Page 48 PREPARATION FOR INSTALLATION Equipment Model / Maker No.1 Radar (Option) Type: Maker: No.2 Radar (Option) Type: Maker: ECDIS (Option) Type: Maker: VHF (Option) Type: Maker: RMS (Option) Type: Maker: Other comment Component List of Equipment Type Location Basic equipment ]Bridge Controller NCM-983 ]Chart Table...
- Page 49 PREPARATION FOR INSTALLATION 4. AIS Connection diagram NTE-183 W2 ( )m (50m max.) NQE-5183 NBD-577C (Option) (Option) NCM-983 CABLE LIST CABLE TYPE CABLE TYPE CABLE TYPE RG-10UY DPYC(S)-2.5 DPYC(S)-2.5 DPYC(S)-2.5 DPYC(S)-2.5 CFQ-9183A CFQ-9183A TTYCS-1 TTYCS-1 TTYCS-4 TTYCS-4 TTYCS-1 2-15...
- Page 50 PREPARATION FOR INSTALLATION 5. Location Photos (where units are to be mounted) 1) Close-up view of area for AIS Transponder to be mounted (NTE-183) 2) Close-up view of penetrating cable way 3) Close-up view of area for AIS Controller to be mounted (NCM-983) 4) Close-up view of area for Connection Box to be mounted (NQE-5183) 5) Close-up view of Power distribution Panel.
-
Page 51: Installations
INSTALLATIONS 3. Installations 3.1 External dimensions and equipment overview 3.1.1 NTE-183 AIS Transponder 3.1.1.1 External dimensions and installation space Unit: Weight: Approx. 2.6kg Color:... -
Page 52: Installation Of Ais Transponder
INSTALLATIONS 3.1.1.2 Installation of AIS Transponder (1) Installation drawing1 Take care during installation that the ground bolt does not come into contact with the radome, otherwise the radome may be broken. NTE-183 AIS Transponder Rubbers (Attachment) Ground bolt Cautions (Dock supply) *1: Seal this section with self-bonding tape and then wrap with vinyl tape. - Page 53 INSTALLATIONS (2) Installation Pole1 AIS Transponder φ60.5 (50A) φ101.6 (90A) Hex head bolt for grounding (M8 x 20SUS) Steel board (JIS G 3141) (Don't paint.) Pole or Mast (JIS G 3141) Steel pipe Dia.60.5 – Dia.101.6 (50A – 90A) φ60.5 (50A) φ101.6 (90A)
- Page 54 INSTALLATIONS (3) Installation Pole2 Hex head bolt M8 x 20SUS Note Materials Pipe: JIS standard 60.5mm dia. (t4.2), 101.6mm dia. (t4.2), or equivalent Other plates: SPHC t5 or equivalent Screw: M8 x 20 SUS hexagon head screw Coating: Fine particle coating P-N9 Coating range: Whole...
- Page 55 INSTALLATIONS (4) Installation support (Zinc Galvanizing) Separate it from the transponder by 45 mm 50 x 6FB Ground bolt Handrail Handrail (25A SGP) Ground sheet Detail of section C M8 x 20L Ground bolt PL Dia.55 x t 6 19 x 4FB 50 x 12FB Pole or Mast Detail of section B...
- Page 56 INSTALLATIONS (5) Installation procedure Fix the ground sheet by the following parts: 1 washer W8 1 spring washer SW8 Ground sheet 1 hexagon nut N8 Rubbers 10 x 10 x 10 AIS Transponder Fixing procedure (1) Stick Rubbers on the AIS transponder. The rubbers should not touch the pole directly.
-
Page 57: Connection Procedure Of N Type Coaxial Connector
INSTALLATIONS 3.1.1.3 Connection procedure of N type coaxial connector 1. Parts (N-P-10U) 2. Tools... - Page 58 INSTALLATIONS 3. Procedure...
- Page 59 INSTALLATIONS...
- Page 60 INSTALLATIONS 3-10...
- Page 61 INSTALLATIONS 3-11...
-
Page 62: Ncm-983 Ais Controller
INSTALLATIONS 3.1.2 NCM-983 AIS Controller 3.1.2.1 External dimensions and installation space (1) External dimensions and installation space Unit: mm Weight: Approx. 1.6kg Approx. 2.1kg 質量: (with Mounting bracket) Color: N4 [Installation] 3-12... - Page 63 INSTALLATIONS (2) Wall mounting dimensions of a hole in the wall φ4.5 x 4 Unit:mm Console mounting ① Rear case ② Front panel ③ Self-tap-screws 4pcs (Dockyard supply) 3-13...
- Page 64 INSTALLATIONS (3) L-type adapter When using the L-type adapter, depth shrink about 20mm from the wall. (e.g. installed at front wall or it is a narrow space from the back.) However it is impossible to turn the adapter to inside because there are connection cables to AIS transponder.
-
Page 65: Back Side Of The Controller And Connectors
INSTALLATIONS 3.1.2.2 Back side of the controller and connectors Connectors for option cable (1) GND Connect the terminal to the Ship ground. (2) TRANSPONDER N-type connector which is connected to the AIS transponder (3) 24VDC/DATA1 Connect the control cable (CFQ-9183A/D/F) for DC power source input and communication with external units Name Name... - Page 66 INSTALLATIONS (A) DATA2 Connector which is connected to the NQE-5183 connection box Connect the data cable (CFQ-9193A/D/F). Name Name Name AUX4; TX-A AUX2; TX-A AUX3; GND-ISO AUX4; TX-B AUX2; TX-B ALR_OUT_NC SENSOR3; RX-A AUX2; RX-A ALR_OUT_COM SENSOR3; RX-B AUX2; RX-B ALR_OUT_NO SENSOR3;...
- Page 67 INSTALLATIONS Caution of SENSOR (38.4kbps) connection (Setting for terminator) The location of the terminator is described on the previous page. DIP Switch 100Ω GND-ISO NCM-983 AIS Controller When the line is terminated with 100-ohm resistor by other system, set the DIP Switch to the off position.
-
Page 68: Control Cable For Ais Controller
INSTALLATIONS 3.1.2.3 Control cable for AIS Controller These control cables are connected with 24VDC/DATA1 connector. CFQ-9183A (2m) is the standard cable, CFQ-9183D (10m) and CFQ-9183F (20m) are optional cables. CFQ-9183F; 19800 CFQ-9183D; 9800 CFQ-9183A; 1800 3-14 Unit: mm Name Color Name Color 24V+... -
Page 69: Pilot Plug Cable
INSTALLATIONS 3.1.2.5 Pilot plug cable This cable is used to extend the pilot plug, located on the rear side of the AIS controller, to the front side. 330±10 35±1 CFQ-9137A Pilot PC Side AIS Controller Side Receptacle Plug Type: 206486 -1 (Square Flanged) Mfr.: AMP Name TX-A... -
Page 70: Nqe-5183 Connection Box
INSTALLATIONS 3.1.3 NQE-5183 Connection box 3.1.3.1 External dimensions and installation space (1) External dimensions 4-R3 Unit: mm Weight: Approx.2.5kg Color: N7 3-20... - Page 71 INSTALLATIONS (2) Installation space MIN.100 MIN.100 MIN.500 CABLE LEAD-IN HOLE 3-21...
-
Page 72: Connection Diagram
INSTALLATIONS 3.1.3.2 Connection diagram (1) Cable connection Tie-wraps Comb-like plate GYRO No.1 Terminals for Power source and Shield (GND) Controller Compass RADER Conductor size; 4.0mm Other terminals Power Conductor size; 2.5mm Supply Receiver (2) Chassis ground of the connection box The connection box (NQE-5183) does not have a terminal for the ship's ground. - Page 73 INSTALLATIONS (3) Terminal number and name Name 24VDC+ 24VDC- SENSOR1_RX-A SENSOR1_RX-B SENSOR1_GND-ISO SENSOR2_RX-A SENSOR2_RX-B SENSOR2_GND-ISO AUX1_TX-A AUX1_TX-B AUX1_RX-A AUX1_RX-B AUX1_GND_ISO Shield(GND) AUX4_TX-A AUX4_TX-B SENSOR3_RX-A SENSOR3_RX-B SENSOR3_GND-ISO NSK_24V SENSOR4_RX-A SENSOR4_RX-B AUX2_TX-A AUX2_TX-B AUX2_RX-A AUX2_RX-B AUX2_GND_ISO AUX3_TX-A AUX3_TX-B AUX3_RX-A AUX3_RX-B AUX3_GND-ISO ALR_OUT_NC ALR_OUT_COM ALR_OUT_NO ACK_IN+...
- Page 74 INSTALLATIONS (4) Cable connection for each terminals SENSOR (4800bps) connection Connection of shielding braided wires is unnecessary Sensor Sensor TTYCS-1 Connect Shield braided wires to the ground SENSOR (38.4kbps) connection DIP Switch; Terminator for Sensor1-3 TTYCS-1T Connection of shielding braided wires is unnecessary 3-24...
- Page 75 INSTALLATIONS AUX connection Connect Shield braided wires to the ground TTYCS-4 RADAR Parallel connection of the AUX output port AUX 1 to 4 are equipped with an additional pair of terminals to allow two devices to be connected in parallel. Therefore, each AUX output can be connected with two devices.
-
Page 76: Sub Controller Connection Method
INSTALLATIONS 3.1.3.3 Sub controller connection method JHS-183 can connect to another AIS controller as the monitor controller. The SUB controller (normal operation) is possible to operate normally except self diagnosis of the transponder. At maintenance mode, some items are restricted. -
Page 77: Nbd-577C Ac/Dc Power Supply Unit
INSTALLATIONS 3.1.4 NBD-577C AC/DC Power supply unit 3.1.4.1 External dimensions 4-mounting holes Unit: mm Weight: Approx. 5.2kg Color: N7 3-27... -
Page 78: Connection Method For Power Supply Unit
INSTALLATIONS 3.1.4.2 Connection method for power supply unit 1. Remove the screw and open the cover. 2. When using input voltage is 100VAC - 120VAC, connect the plug P1 to 100VAC - 120VAC connector. 200VAC - 240VAC (Initial setting) 100VAC - 120VAC 3. -
Page 79: Nqe-3150 Pilot Plug Box
INSTALLATIONS 3.1.5 NQE-3150 Pilot plug box 3.1.5.1 External dimensions TTYCS-4 Connect shielding braided wires to the terminal. Unit: mm Mass: approx. 0.36kg Color: 7.5BG7/2 3-29... -
Page 80: Mpbx40498/45388 Console Mounting Kit For Nqe-3150 Pilot Plug Box
INSTALLATIONS 3.1.5.2 MPBX40498/45388 Console mounting Kit for NQE-3150 pilot plug box The dimension of a hole in the wall 80.4 Console Mounting KIT Bracket 1 pc Frame 1 pc Screw (CNK4X8Bs) 4 pcs Unit: mm Color: 7.5BG7/2 (MPBX40498A) N4 (MPBX45388) 3-30... -
Page 81: Nbg-380 Power Supply Unit For Pilot Pc
INSTALLATIONS 3.1.6 NBG-380 Power supply unit for Pilot PC 2-6x10 Unit: mm Weight: Approx. 6.5kg Color: 7.5BG7/2 3-31... -
Page 82: Nqe-422A Junction Box
INSTALLATIONS 3.1.7 NQE-422A Junction box Unit: mm Weight: Approx. 0.4kg Color: 7.5BG 7/2 3-32... -
Page 83: Cfq-6961 Pilot Plug Cable
INSTALLATIONS 3.1.8 CFQ-6961 Pilot plug cable NB CFQ-9173A 30 cm kabel med plugg of flens for tilkoblin bak på betjening Connect shielding braided wires to GND-ISO. AMP 206486-2 AIS PILOT PLUG CFQ - 6961 1:BLU:TXA, 4:ORG:TXB, 5:GRN:RXA, 6:BRN:RXB, 9:SHIELD:SG 20.0±1.0m PilotP view- Cable color ver2 ver3 CFQ-9173A... - Page 84 INSTALLATIONS 3-34...
-
Page 85: Appendix
APPENDIX 4. Appendix 4.1 Block diagram 4.1.1 NTE-183 AIS TRANSPONDER 4.1.1.1 CHASSIS... -
Page 86: Block Diagram
APPENDIX 4.1.1.2 BLOCK DIAGRAM... -
Page 87: Ncm-983 Ais Controller
APPENDIX 4.1.2 NCM-983 AIS CONTROLLER 4.1.2.1 CHASSIS... -
Page 88: Block Diagram
APPENDIX 4.1.2.2 BLOCK DIAGRAM... -
Page 89: Replacement Procedure
APPENDIX 4.2 Replacement procedure 4.2.1 AIS Transponder 4.2.1.1 VHF antenna (CAV-2180) Name Code Q’ty Antenna H-7ABJD0002D O-ring BRPK05252 Wrench BRTC05113 H-7ABJD0002D Instruction MTZ303008 Attached O-ring Attached Wrench BRTC05113... -
Page 90: Ais Controller
APPENDIX 4.2.2 AIS Controller 4.2.2.1 Replacement procedure for the CCN-423 LCD 工具を用意します; プラスドライバ (3mm), マイナスドライバ(4.5mm)または六角レンチ (3mm) Prepare the tools; Phillips screwdriver (3 mm), Slotted screwdriver (4.5mm) or Hex wrench (3mm) フロントパネルの外し方(図 1) Removing the Front Panel [Fig.1] フロントパネル下面の穴(2 箇所)に、マイナスドライバ、または六角レンチを差し込みます。 Insert a slotted screwdriver or a hex wrench in a hole on the underside of the front panel (2 places). 図のように、マイナスドライバ、または六角レンチを前に倒してフロントパネルを外します。... - Page 91 APPENDIX サブパネルの外し方 (図 2) Removing the Sub Panel [Fig.2] サブパネルを固定している 8 本のビスを緩めます。 Loosen the screws (eight places) fixing the sub panel, and remove the sub panel from the rear case. サブパネルのコネクタからケーブルを外します。 Remove the cable from the connector of the sub panel (DPU). 注意:サブパネルを外す際、パッキンが外れることがあります。...
-
Page 92: Replacement Procedure For The Cdj-2983 Dpu
APPENDIX 4.2.2.2 Replacement procedure for the CDJ-2983 DPU 工具を用意します;プラスドライバ (3mm), マイナスドライバ(4.5mm)または六角レンチ (3mm) Prepare the tools; Phillips screwdriver (3 mm), Slotted screwdriver (4.5mm) or Hex wrench (3mm) フロントパネルの外し方(図 1) Removing the Front Panel [Fig.1] フロントパネル下面の穴(2 箇所)に、マイナスドライバ、または六角レンチを差し込みます。 Insert a slotted screwdriver or a hex wrench in a hole on the underside of the front panel (2 places). 図のように、マイナスドライバ、または六角レンチを前に倒してフロントパネルを外します。... - Page 93 APPENDIX サブパネルの外し方 (図 2) Removing the Sub Panel [Fig.2] サブパネルを固定している 8 本のビスを緩めます。 Loosen the screws (eight places) fixing the sub panel, and remove the sub panel from the rear case. サブパネルのコネクタからケーブルを外します。 Remove the cable from the connector of the sub panel (DPU). 注意:サブパネルを外す際、パッキンが外れることがあります。...
- Page 94 Setup and Examination サービスマニュアルを参照し、次の項目を設定して下さい。 • 静的情報 • センサ設定 • RMS設定 According to the JHS-183 service manual, set the following items; • Static data settings, • Sensor settings, • RMS settings セットアップ完了後、AISコントローラが正常に動作することを確認して下さい。 After the AIS controller setup is completed, examine that it normally operates.
-
Page 95: Replacement Procedure For The Cbd-2983 Psu
APPENDIX 4.2.2.3 Replacement procedure for the CBD-2983 PSU 工具を用意します; プラスドライバ (3mm), マイナスドライバ(4.5mm)または六角レンチ (3mm) Prepare the tools; Phillips screwdriver (3 mm), Slotted screwdriver (4.5mm) or Hex wrench (3mm) フロントパネルの外し方(図 1) Removing the Front Panel [Fig.1] フロントパネル下面の穴(2 箇所)に、マイナスドライバ、または六角レンチを差し込みます。 Insert a slotted screwdriver or a hex wrench in a hole on the underside of the front panel (2 places). 図のように、マイナスドライバ、または六角レンチを前に倒してフロントパネルを外します。... - Page 96 APPENDIX サブパネルの外し方 (図 2) Removing the Sub Panel [Fig.2] サブパネルを固定している 8 本のビスを緩めます。 Loosen the screws (eight places) fixing the sub panel, and remove the sub panel from the rear case. サブパネルのコネクタからケーブルを外します。 Remove the cable from the connector of the sub panel (DPU). 注意:サブパネルを外す際、パッキンが外れることがあります。...
-
Page 97: Replacement Procedure For The Cqd-2983 Ifu
APPENDIX 4.2.2.4 Replacement procedure for the CQD-2983 IFU 工具を用意します; プラスドライバ (3mm),レンチ (ナット寸法:25.4mm), マイナスドライバ (4.5mm),または六角レンチ (3mm) Prepare the tools; Phillips screwdriver (3 mm), Adjustable wrench (Nut flat size: 25.4mm), Slotted screwdriver (4.5mm) or Hex wrench (3mm) フロントパネルの外し方(図 1) Removing the Front Panel [Fig.1] フロントパネル下面の穴(2 箇所)に、マイナスドライバ、または六角レンチを差し込みます。... - Page 98 APPENDIX サブパネルの外し方 (図 2) Removing the Sub Panel [Fig.2] サブパネルを固定している 8 本のビスを緩めます。 Loosen the screws (eight places) fixing the sub panel, and remove the sub panel from the rear case. サブパネルのコネクタからケーブルを外します。 Remove the cable from the connector of the sub panel (DPU). 注意:サブパネルを外す際、パッキンが外れることがあります。...
- Page 99 APPENDIX CQD-2983 IFU の外し方 (図 4) Removing the CQD-2983 IFU [Fig.4] レンチを使用して、リアコネクタを固定しているナットを外します。 Using a wrench, loosen the nuts fixing the rear connector. IFU を固定している 8 本のビスを緩め、IFU をリアケースから外します。 Loosen the screws (eight places) fixing the IFU, and remove the IFU from the rear case. コネクタからトランスポンダ用ケーブル(W103)と...
-
Page 100: List Of The Gps Receiver To Ais
APPENDIX 4.3 List of the GPS receiver to AIS Connector Equipment Type NMEA Ver. Signal Name Hardware Note Indication JLR-4110 JLR-4110MK2 JLR-4200 JLR-6000 JLR-6000MK2 JLR-6800 JLR-7700 1.5/2.1 DATA OUT DATA1 OUT TTL + DATA1 COM TTL GND DATA2 OUT+ RS-422 TX+ DATA2 OUT- RS-422 TX- JLR-7700MK2... - Page 102 For further information,contact: Not use the asbestos http://www.jrc.co.jp Marine Service Department Telephone : +81-3-3492-1305 Facsimile : +81-3-3779-1420 e-mail : tmsc@jrc.co.jp AMSTERDAM Branch Telephone : +31-20-658-0750 Facsimile : +31-20-658-0755 e-mail : service@jrceurope.com SEATTLE Branch Telephone : +1-206-654-5644 Facsimile : +1-206-654-7030 e-mail : marineservice@jrcamerica.com...
Need help?
Do you have a question about the JHS-183 and is the answer not in the manual?
Questions and answers