Table of Contents
Advertisement
Advertisement
Table of Contents

Related Manuals for Ricoh ARDF DF3090


Summary of Contents for Ricoh ARDF DF3090
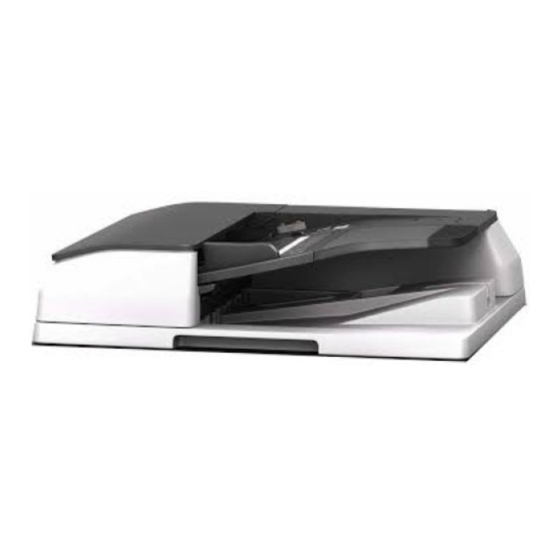
- Page 1 ARDF DF3090 Machine Code: D779 Field Service Manual July, 2014 Subject to change...
-
Page 3: Revision Lists
Revision Lists Version Section Details 1.00 Initial release of this document 1.10 All sections Changed some parts name. Read This First > Safety and Symbols Changed some icons. Replacement and Adjustment > Covers and Original Tray Modified the procedure. > Feed Clutch >... - Page 4 Version Section Details • Modified Step 3. Replacement and Adjustment > Original Length Sensors and Original Sensor • Modified Step 4 and its picture. • Deleted some unnecessary steps. • Modified items need to be removed Replacement and Adjustment > Original in Step 5, and Step 6.
-
Page 5: Safety And Symbols
Safety and Symbols This manual uses several symbols and abbreviations. The meaning of those symbols and abbreviations are as follows: Clip ring Screw Connector Clamp Short Edge Feed Long Edge Feed [A] Short Edge Feed (SEF) [B] Long Edge Feed (LEF) Trademarks ®... -
Page 6: Table Of Contents
TABLE OF CONTENTS Revision Lists................................1 Safety and Symbols............................3 Trademarks..............................3 1. Replacement and Adjustment Covers and Original Tray..........................5 DF Replacement..............................5 Rear Cover..............................6 Front Cover and Original Tray........................7 Original Feed Unit..............................9 Pick-Up Roller..............................10 Feed Belt................................11 Separation Roller.............................13 ARDF Drive Board and DF Position Sensor....................14 Original Length Sensors and Original Sensor....................16 Original Set Sensor............................17 Original Size Sensors and Skew Correction Sensor..................20... -
Page 7: Replacement And Adjustment
1. Replacement and Adjustment Covers and Original Tray DF Replacement Scanner rear cover [A] ( ×3). The screw on harness securing bracket, and then the connector and screw on the earth plate ( ×2, ×1). -
Page 8: Rear Cover
1. Replacement and Adjustment Open the DF and remove the screws ( ×2). Detach the DF while holding the both ends. • Since DF is heavy, be very careful when you detach it. Rear Cover Open the left cover [A]. Open the original tray [B]. -
Page 9: Front Cover And Original Tray
Covers and Original Tray Rear cover [C] ( ×1, hook ×5). Front Cover and Original Tray Open the left cover. Rear cover (page Front cover [A] ( ×1). • Keep the original tray open when you remove the front cover. - Page 10 1. Replacement and Adjustment Original tray [A] ( ×1, ×1, ×1).
-
Page 11: Original Feed Unit
Original Feed Unit Original Feed Unit Open the left cover. Original feed unit [A]. • Pull the original feed unit forward to release the back side of the shaft. -
Page 12: Pick-Up Roller
1. Replacement and Adjustment Pick-Up Roller Original feed unit (page Pick-up roller [A] ( ×1) -
Page 13: Feed Belt
Feed Belt Feed Belt Original feed unit (page Feed belt cover [A] (spring×1). • When reassembling the feed belt cover, make sure that the projection [B] of the feed belt cover is on the guide plate rear [C]. Belt tension unit [D]... - Page 14 1. Replacement and Adjustment Feed belt [E].
-
Page 15: Separation Roller
Separation Roller Separation Roller Original Feed Unit (page Separation roller cover [A]. Separation roller [A] ( ×1) -
Page 16: Ardf Drive Board And Df Position Sensor
1. Replacement and Adjustment ARDF Drive Board and DF Position Sensor Rear cover (page ARDF drive board [A] ( ×2, ×7). DF position sensor with bracket [A] ( ×1). - Page 17 ARDF Drive Board and DF Position Sensor DF position sensor [A] ( ×1).
-
Page 18: Original Length Sensors And Original Sensor
1. Replacement and Adjustment Original Length Sensors and Original Sensor Original Tray (page Tray cover [A] ( ×3). Original sensor [A] ( ×1). Original length sensors [B] ( ×1 each). -
Page 19: Original Set Sensor
Original Set Sensor Original Set Sensor Original feed unit (page Original tray (page Original feed-in guide plate [A] ( ×3). Feed guide [A]. - Page 20 1. Replacement and Adjustment Original turn guide plate [A] (hook ×2).
- Page 21 Original Set Sensor Original set sensor bracket [A] (hook ×2). Original set sensor [A] ( ×1).
-
Page 22: Original Size Sensors And Skew Correction Sensor
1. Replacement and Adjustment Original Size Sensors and Skew Correction Sensor Original turn guide plate (page 17). Original width sensors [A] ( ×1 each) and skew correction sensor [B] with bracket ( ×1, ×1). -
Page 23: Stamp Solenoid
Stamp Solenoid Stamp Solenoid Rear cover (page Stamp solenoid harness [A] ( ×1, ×1). Open the DF. Remove the platen sheet [A]. Stamp solenoid cover [A] ( ×1). - Page 24 1. Replacement and Adjustment Stamp solenoid [A] ( ×1). Pull out the harness [A].
-
Page 25: Original Exit Sensor
Original Exit Sensor Original Exit Sensor Original feed-in guide plate (page 17). The Original Exit Sensor [A] is located in the ARDF mainframe. Original exit sensor bracket [A] ( ×1). Original exit sensor [A] ( ×1). -
Page 26: Registration Sensor
1. Replacement and Adjustment Registration Sensor Original feed-in guide plate (page 17). Registration sensor [A] ( ×1). -
Page 27: Left Cover Switch
Left Cover Switch Left Cover Switch Rear cover (page Left cover switch [A] ( ×2, ×2). -
Page 28: Feed Motor
1. Replacement and Adjustment Feed Motor Rear cover (page Feed motor harness [A] ( ×1). Harness guide [A] ( ×5). - Page 29 Feed Motor Feed motor with bracket [A] ( ×2, spring [B]×1, Timing belt ×1). Feed motor [A] ( ×2).
-
Page 30: Pick-Up Solenoid
1. Replacement and Adjustment Pick-up Solenoid Rear cover (page Harness guide (page 26). Pick-up solenoid [B] ( ×2, ×1). -
Page 31: Inverter Solenoid
Inverter Solenoid Inverter Solenoid Rear cover (page Harness guide (page 26). Inverter solenoid [A] ( ×2, ×1, ×1, gear ×1, gear cover ×1, Timing belt ×1). -
Page 32: Feed Clutch
1. Replacement and Adjustment Feed Clutch Rear cover (page Original feed unit (page Feed clutch [A] ( ×2, bushing ×1, shaft ×1, ×1, ×1). -
Page 33: Transport Motor
Transport Motor Transport Motor Rear cover (page Transport motor bracket [A] (spring ×1, ×2, ×1). Transport motor [A] ( ×2). - Page 34 MEMO...
Need help?
Do you have a question about the ARDF DF3090 and is the answer not in the manual?
Questions and answers