Table of Contents
Advertisement
Quick Links
Advertisement
Table of Contents

Related Manuals for Arkray Gluocard Shine Express


Summary of Contents for Arkray Gluocard Shine Express
- Page 1 User Manual For single user / home use only...
- Page 2 DISTRIBUTED BY: Technical Customer Service: ARKRAY USA 800.566.8558 5182 West 76th Street 24 hours a day, 7 days a week. Minneapolis, MN 55439 U.S.A. In case of emergency, please 800.566.8558 contact your healthcare www.arkrayusa.com professional or emergency medical response. P/N 5531-00 ©...
- Page 3 Welcome to the GLUCOCARD® Shine Express Blood Glucose Monitoring System Thank you for choosing the GLUCOCARD Shine Express Blood Glucose Monitoring System. The system provides you with rapid and convenient blood glucose in vitro (i.e., outside the body) diagnostic monitoring. You can obtain accurate results in just 5 seconds with a small (0.5 µL) blood sample.
-
Page 5: Table Of Contents
Table of Contents Information Important Information: Read This First _ _ _ _ _ _ _ _ _ _ _ _ _ _ _ _ _ _ _ _ _ _ _ _ _ _ _ _ _ _ _ _ _ _ _ _ _ _ _ _ _ _ _ _ _ _ _ _ _ _ _ _ _ _ _ _ _ _ _ _ _ _ _ _ _ Important Safety Information _ _ _ _ _ _ _ _ _ _ _ _ _ _ _ _ _ _ _ _ _ _ _ _ _ _ _ _ _ _ _ _ _ _ _ _ _ _ _ _ _ _ _ _ _ _ _ _ _ _ _ _ _ _ _ _ _ _ _ _ _ _ _ _ _ _ _ _ _ _ _ _ _ _ _ _ _ _ _ _ _ _ _ _ _ _ _ _ _ Limitations of GLUCOCARD®... -
Page 6: Important Information: Read This First
Important Information: Read This First Intended Use • The GLUCOCARD Shine Express Glucose Monitoring System is intended for the quantitative measurement of glucose in fresh capillary whole blood samples drawn from the fingertips. • The GLUCOCARD Shine Express Blood Glucose Monitoring System is intended for self-testing outside the body (in vitro) by people with diabetes at home as an aid to monitor the effectiveness of diabetes control. -
Page 7: Important Safety Information
Important Safety Information • Please use this device only for the intended use described in this user manual. • Please follow the suggested cleaning and disinfection procedures described in this user manual. • GLUCOCARD Shine Blood Glucose Test Strips are intended for single use only. -
Page 8: Limitations Of Glucocard Shine Express Blood Glucose Monitoring System
Limitations of GLUCOCARD Shine Express Blood Glucose Monitoring System • An abnormally high or low red blood cell count (hematocrit level over 65% or below 15%) may produce inaccurate results. • Inaccurate results may occur in severely hypotensive individuals or patients in shock. •... - Page 9 Important Information • Glucose in blood samples react with the chemical in the test strip to produce a small electrical current. The GLUCOCARD Shine Express Meter detects this electrical current and measures the amount of glucose in the blood sample. •...
-
Page 10: Specifications
Specifications Product specifications Measurement range 20–600 mg/dL Sample size Minimum 0.5 μL Test time 5 seconds Sample type Fresh capillary whole blood Calibration Plasma-equivalent Assay method Electrochemical Battery life 3,000 tests Power Two 1.5 V AAA alkaline batteries Memory 1,000 test results Size 4.06 x 2.23 x 0.67 inches (103 x 54 x 17 mm) -
Page 11: Glucocard Shine Express Blood Glucose Monitoring System
GLUCOCARD Shine Express Blood Glucose Monitoring System The GLUCOCARD Shine Express Blood Glucose Monitoring System includes the following items: GLUCOCARD Shine Express Blood Glucose Meter User Manual Quick Reference Guide Batteries (2) Lancing Device Lancets (10) ... -
Page 12: Inserting Or Replacing The Batteries
Inserting or Replacing the Batteries • The GLUCOCARD Shine Express Meter uses two AAA alkaline batteries. • Before using the meter, check the battery compartment and insert batteries if empty. • When the symbol appears on the display while the meter is in use, the batteries should be replaced as soon as possible. -
Page 13: Glucocard® Shine Blood Glucose Test Strip
GLUCOCARD Shine Blood Glucose Test Strips The GLUCOCARD Shine Express Blood Glucose Monitoring System measures blood glucose quickly and accurately. It automatically absorbs the small blood sample applied to the narrow edge of the test strip. Contact bars Gently push the test strip, with its contact bars facing up, into the test strip port of meter. - Page 14 Warning • GLUCOCARD Shine Blood Glucose Test Strips should only be used with fresh capillary whole blood samples. • Do not reuse test strips. • Do not use test strips past the expiration date. • Test strips in new, unopened vials and test strips in vials that have been opened can be used until the expiration date printed on the test strip box and vial label if the test strips are used and stored according to its storage and...
-
Page 15: Glucocard Shine Express Blood Glucose Meter
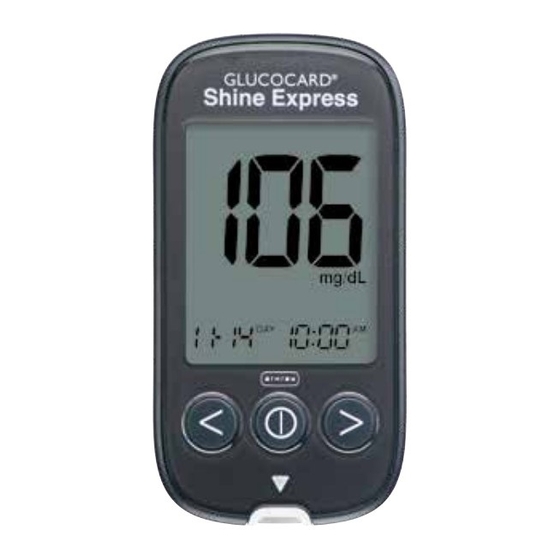
GLUCOCARD Shine Express Blood Glucose Meter Data Port Display Used to transfer data Shows results from the meter to a and messages computer with a cable <, > Button Button Turns the meter Turns the meter on, selects on/off, confirms or changes menu selections, information... -
Page 16: Glucocard Shine Express Blood Glucose Meter Display
GLUCOCARD Shine Express Blood Glucose Meter Display Memory recall mode: appears when test results stored in the memory are displayed PP2 Alarm: appears when the post- meal alarm has been set Mute symbol: appears only when the sound is set to OFF Control Solution flag: appears when the control solution test results are 10 11 12... -
Page 17: Setting Up The Glucocard Shine Express System
Setting Up the GLUCOCARD Shine Express System Meter settings, such as time and date, should be checked and updated before using the meter or after changing the meter batteries. Press and hold the button for three (3) seconds to enter ‘SET’... -
Page 18: Adjusting The Date And Time
Step 2 Selecting a Language The meter has a bilingual, talking function that can be used as a verbal aid for using the meter and hearing test results. When entering the language selection Voice prompt: Voice prompt: mode for the first time, ‘L1’ will be “English”... - Page 19 Step 4 Setting the Month Voice prompt: A number indicating the month will blink on “September” the screen. Press the < or > button until the correct month appears. Press the button to confirm your selection and go to the next step. You will hear a voice prompt say “Set date”.
- Page 20 Step 7 Setting the Hour Voice prompt: A number indicating the hour will blink on “Twelve PM” the screen. Press the < or > button until the correct hour appears. Press the button to confirm the hour and go to the next step. You will hear a voice prompt say “Set minute”.
-
Page 21: Setting The Sound On/Off
Setting the Sound On/OFF Step 9 A number showing the sound volume will blink on the screen. Press the < or > button to adjust the volume from 1 (lowest) to 5 (highest), or to turn the beep sound ‘OFF’ or ‘On’. Voice prompt: “... -
Page 22: Turning On The Test Strip Expiration Date Indicator
Turning on the Test Strip Expiration Date Indicator This setting allows you to turn the test strip expiration date indicator ‘On’ or ‘OFF’. This setting turns the function ‘On’ or ‘OFF’ only. See page 24 to set the test strip expiration date. Step 10 When ‘EP’... -
Page 23: Turning On The Hypoglycemia (Hypo) Indicator
Turning on the Hypoglycemia (HYPo) Indicator This setting allows you to turn the hypoglycemia indicator (possible low blood sugar) ‘On’ or ‘OFF’ and to select the desired level for the indicator. You will be alerted any time your test result is lower than the selected level. Step 11 On pressing the <... -
Page 24: Setting The Test Strip Expiration Date Indicator
Setting the Test Strip Expiration Date Indicator Step 1 Entering the Expiration Date Setting Press and hold the < and > buttons at the same time for three (3) seconds to enter the expiration date settings. After all segments flash across the screen, ‘EP’ will show up, and you will hear a voice prompt say ”Set expiration date of the test strip“. -
Page 25: Checking The System
Checking the System You may check your meter and test strips using the GLUCOCARD Shine Control Solution (Level 1 and/or 2). GLUCOCARD Shine Control Solutions contain known amounts of glucose, and is used to check that the meter and test strips are working properly. The test strip vials have GLUCOCARD Shine Control Solution ranges printed on their labels. -
Page 26: Control Solution Testing
You may do a control solution test: • When you want to practice the test procedure using the control solution instead of blood. • When using the meter for the first time. • Whenever you open a new vial of test strips. •... - Page 27 Step 3 Shake the GLUCOCARD Shine Control Solution bottle before each test. Remove the cap and squeeze the bottle to discard the first drop. Wipe the tip with a clean tissue or cloth. Dispense a drop of control solution onto a clean non-absorbent surface. It helps to squeeze a drop onto the top of the cap as shown.
- Page 28 Step 4 The display segments will rotate clockwise and a test result will appear after the meter counts down from 5 to 1. When flagged, the test result is stored in the meter‘s memory but it is not included in the averages. Voice prompt: “Your control solution test result is one hundred three...
-
Page 29: Comparing The Control Solution Test Results
Comparing the Control Solution Test Results The test result of each control solution should be within the range printed on the label of the test strip vial. Repeat the control solution test if the test result falls outside of the range. Out of range test results may occur in following situations: Situations Do This... -
Page 30: Using The Lancing Device
Using the Lancing Device You will need a lancing device in order to collect a blood sample. You may use the lancing device that is included in the GLUCOCARD Shine Express Blood Glucose Monitoring System or any other medically approved lancing device. Adjustable Tip Ejection System Lancet Holder... -
Page 31: Preparing The Lancing Device
Preparing the Lancing Device Step 1 Wash hands and sample site with soap and warm water. Rinse and dry thoroughly. Step 2 Unscrew and remove the lancing device tip. Step 3 Firmly insert a new disposable lancet into the lancet holder. Hold the lancet firmly. Gently twist to pull off protective disk. - Page 32 Step 4 The lancing device has five puncture depth settings, numbered 1 through 5. The smaller numbers are for a shallower puncture and the larger numbers are for a deeper puncture. Choose a depth of penetration by rotating the top portion of the adjustable tip until the setting number matches the arrow.
-
Page 33: Preparing The Meter And Test Strip
Preparing the Meter and Test Strip Step 6 Insert a test strip with the contact bars facing up into the meter’s test strip port. Push the test strip in gently until the meter beeps. Be careful not to bend the test strip. The symbol will appear on the screen and you will hear a voice prompt say “Blood glucose test. - Page 34 Step 8 After the symbol appears on the screen, apply the blood sample to the narrow end of the test strip until the meter beeps. If the confirmation window is not filled in time because of abnormal viscosity (thickness and stickiness) or insufficient volume, the Er4 message may appear.
- Page 35 Step 9 At this time, the display segments will rotate clockwise while the blood sample is going into the test strip. The test result will appear after the meter counts down from 5 to 1. The test result will be automatically stored in the meter’s memory. If the test strip is removed after the test result is displayed, the meter will automatically switch off after three (3) seconds.
- Page 36 Step 10 You can attach a flag to a test result to indicate particular situations while the test strip is still in the meter. When the result is displayed right after a test, press the < or > button to select a Pre-meal flag ( ), a Post-meal flag ( ), a Fasting flag (...
-
Page 37: Discarding Used Lancets
Discarding Used Lancets Step 1 Unscrew the adjustable cap from the lancing device. Step 2 Stick the lancet into the saved protective disk. Remove lancet and dispose of the used lancet in a proper biohazard container. CAUTION • The lancet is for single use only. •... -
Page 38: Hi' And 'Lo' Messages
‘HI’ and ‘Lo’ Messages ‘HI’ Message Voice prompt: The meter displays test results between “Your blood glucose 20–600 mg/dL. ‘HI’ appears when the blood result is above six glucose level is greater than 600 mg/dL and hundred milligrams per deciliter” indicates severe hyperglycemia (much higher than normal glucose levels). -
Page 39: Target Blood Glucose Ranges
Target Blood Glucose Ranges Reminders Your target ranges from your healthcare professional Time of day Before breakfast Before lunch or dinner 1 hour after meals 2 hours after meals Between 2 a.m. and 4 a.m. Expected Values: Normal blood glucose levels for an adult without diabetes are below 100 mg/dL before meals and fasting* and are less than 140 mg/dL two hours after meals. -
Page 40: Transferring Test Results
Transferring Test Results Test results stored in GLUCOCARD Shine Express Blood Glucose Meter can be transferred from the meter to the desktop version of ARK Care Advance Diabetes Management System via a data cable. The meter screen displays ‘Pc’ and you will hear a voice prompt say “Communication cable is connected”... -
Page 41: Meter Memory
Meter Memory The GLUCOCARD Shine Express Blood Glucose Meter can save up to 1,000 glucose test results with time and date. If the memory is full, the oldest test result will be deleted and the latest test result will be stored. The meter calculates and displays the averages of Total test results, Pre-meal ( ) test results, Post-meal test (... - Page 42 Step 2 Viewing Averages Press the < button to view 1-, 7-, 14-, 30- and 90-day average values, and the number of tests performed for the last test period. Voice prompt: Voice prompt: “The average for seven “The average for ninety days days of total measurements of total measurements is one is one hundred eighteen...
- Page 43 Step 4 Viewing Post-meal Averages Press the < button to view 1-, 7-, 14-, 30- and 90-day average values, and the number of tests performed post-meals with the symbol for the last test period. Voice prompt: Voice prompt: “The average for one day of “The average for ninety days post-meal is one hundred of post-meal is one hundred...
-
Page 44: Viewing Test Results
Step 6 Use the > button to scroll back through averages seen previously. Press the button to turn off the meter. NOTE • The control solution test results saved with the symbol are not included in the averages. Viewing Test Results Step 1 Press any button to turn the meter on. -
Page 45: Setting The Alarm Function
Setting the Alarm Function Four types of alarms can be set in the GLUCOCARD Shine Express Meter: one (1) post-meal alarm (PP2 Alarm) and three (3) time set alarms (alarm 1–3). • The PP2 Alarm goes off 2 hours after setting the alarm. •... -
Page 46: Setting The Time Alarms (Alarm 1-3)
Step 2 Turning the PP2 Alarm OFF To turn off the PP2 Alarm, press and hold the < button for three (3) seconds. Voice prompt: disappears “Post-meal alarm ‘PP2’, the symbol, and is off.” ‘OFF’ will appear on the screen. Then the screen will change automatically to the memory recall mode without the... - Page 47 Step 2 On pressing the > button, ‘alarm1’ is set and Voice prompt: “On” ‘On’ is displayed on the screen. Press the > button again to cancel ‘alarm1’. ‘OFF’ will blink on the screen, and you will hear a voice prompt say “Off”. Step 3 Voice prompt: Press the <...
- Page 48 Step 5 Press the button to finish and to go to ‘alarm2’ setting, and you will hear a voice prompt say “Set alarm two”. Repeat steps 2 to 4 to set the remaining time alarms (alarm 2–3). Step 6 Press the button for three (3) seconds to finish and turn the meter off.
-
Page 49: Caring For The Glucocard Shine Express System
Caring for the GLUCOCARD Shine Express System • To minimize the risk of transmission of bloodborne pathogens, the pre-cleaning and disinfection procedure should be performed as recommended in the instructions below. • Wash your hands thoroughly with soap and water after handling the meter, lancing device or test strips. - Page 50 • We have validated Clorox® Germicidal Wipes with 0.55% sodium hypochlorite as the active ingredient for disinfecting the GLUCOCARD Shine Express Meter and lancing device. It has been shown to be safe for use with the meter and lancing device. •...
- Page 51 Pre-cleaning and Disinfection Procedures 1 Open the cap of the Clorox® Germicidal Wipes container and pull out one (1) towelette and close the cap. 2 Wipe the entire surface of the meter three (3) times horizontally and three (3) times vertically using one towelette to pre-clean blood and Both...
- Page 52 7 Repeat the same procedure for the lancing device (step 1 to step 6 ). NOTE • After the pre-cleaning and disinfection procedure, the control solution should be tested to confirm that the meter works properly before using the meter. •...
- Page 53 CAUTION • Do not use other cleaners or disinfectants because other chemicals have not been validated and may damage the meter. • Do not get fluids inside the meter through the test strip port, data transmission port or battery compartment. •...
-
Page 54: Understanding Error Messages
Understanding Error Messages Message What it means What to do A used test strip was inserted. Repeat the test with a new test strip. Voice prompt: “Used test strip. Please repeat the test with a new test strip.” The blood or control solution Repeat the test with sample was applied before the a new test strip and... - Page 55 Message What it means What to do This error message may Repeat the test with a appear when the wrong GLUCOCARD Shine Blood blood glucose test Glucose Test Strip. strip is used instead of GLUCOCARD Shine Blood Glucose Test Strip. Voice prompt: “Error 5.
-
Page 56: General Troubleshooting
General Troubleshooting Problem Troubleshooting The display is blank even • Check whether the test strip is inserted after inserting a test strip. with the contact bars facing up. Check if the test strip has been inserted completely into the test strip port. •... -
Page 57: Performance Characteristics
Performance Characteristics The performance of GLUCOCARD Shine Express Blood Glucose Monitoring System has been evaluated in laboratory and in clinical tests. Accuracy The accuracy of the GLUCOCARD Shine Express Blood Glucose Monitoring System was assessed by comparing blood glucose results obtained by patients with those obtained using a YSI Model 2300 Glucose Analyzer, a laboratory instrument. - Page 58 User performance results for glucose concentrations between 48 mg/dL and 553 mg/dL. Within ± 15 mg/dL and Within ± 20% 371/371 (100%) Precision Precision studies were performed in a laboratory using the GLUCOCARD Shine Express Blood Glucose Monitoring System. Within Run Precision Blood avg.
-
Page 59: Warranty Information
Warranty Information Manufacturer's Warranty The manufacturer warrants that the GLUCOCARD Shine Express Meter shall be free of defects in material and workmanship in normal use for a period of five (5) years. The meter must have been subjected to normal use. The warranty does not cover improper handling, tampering, use or service of the meter.
Need help?
Do you have a question about the Gluocard Shine Express and is the answer not in the manual?
Questions and answers