Table of Contents
Advertisement
Quick Links
Advertisement
Table of Contents

Related Manuals for Arkray GLUCOCARD Shine XL


Summary of Contents for Arkray GLUCOCARD Shine XL
- Page 1 User Manual For single user / home use only...
- Page 2 (i.e., outside the body) diagnostic monitoring. You can obtain accurate results in just five seconds with a small (0.5 µL) blood sample. DISTRIBUTED BY: ARKRAY USA 5182 West 76th Street Minneapolis, MN 55439 U.S.A. 800.566.8558 www.arkrayusa.com...
-
Page 3: Table Of Contents
GLUCOCARD Shine Blood Glucose Test Strips _______________________ Important Safety Instructions ______________________________________ 12 GLUCOCARD Shine XL Blood Glucose Meter __________________________ 14 GLUCOCARD Shine XL Blood Glucose Meter Display __________________ 15 Preparation Setting Up the GLUCOCARD Shine XL System ________________________ 16 Adjusting the Date and Time _______________________________________ 16 Setting the Sound ‘On’/‘OFF’... -
Page 4: Important Information: Read This First
Important Information: Read This First To receive safe and optimum system benefits, please read the entire contents of this manual before using the system. Please note the following instructions: • Do not use the system for diagnosis or screening of diabetes •... -
Page 5: Important Health-Related Information
• The GLUCOCARD Shine XL Blood Glucose Monitoring System is intended for self-testing in vitro (outside the body) diagnostic use. • The GLUCOCARD Shine XL Blood Glucose Meter is designed to minimize code related errors in monitoring by using the no-coding function. - Page 6 Important Health-related Information This device is not intended for use in healthcare or assisted- use settings such as hospitals, physician offices or long-term care facilities because it has not been cleared by the FDA for use in these settings, including for routine assisted testing or as part of glycemic control procedures.
-
Page 7: Specifications
Specifications Product Specifications Measurement range 20–600 mg/dL Sample size Minimum 0.5 μL Test time Five seconds Sample type Fresh capillary whole blood Calibration Plasma-equivalent Assay method Electrochemical Battery life 5,000 tests Power Two 3.0 V lithium batteries (disposable, type CR2032) Memory 250 test results Size... - Page 8 Specifications Storage/Transport Conditions Temperature Glucose Meter 32–122 ºF (0–50 ºC) (with batteries) Test strip 34–86 ºF (1–30 ºC) Control solution 46–86 ºF (8–30 ºC) Relative humidity 20–80 % Test strip 8 www.arkrayusa.com...
-
Page 9: Glucocard Shine Xl Blood Glucose Monitoring System
GLUCOCARD Shine XL Blood Glucose Monitoring System GLUCOCARD Shine XL Blood Glucose Monitoring System includes the following items: GLUCOCARD Shine XL Blood Glucose Meter User Manual Quick Reference Guide Batteries (2) Lancing Device Lancets (10) ... -
Page 10: Inserting Or Replacing The Batteries
Inserting or Replacing the Batteries • The GLUOCARD Shine XL Meter comes with two 3.0 V lithium batteries. • Before using the meter, check the battery compartment and insert batteries if empty. • When the symbol appears on the display while the meter is in use, the batteries should be replaced as soon as possible. -
Page 11: Glucocard Shine Blood Glucose Test Strips
GLUCOCARD Shine Blood Glucose Test Strips The GLUCOCARD Shine XL Blood Glucose Monitoring System measures blood glucose quickly and accurately. It automatically absorbs the small blood sample applied to the narrow edge of the test strip. Contact bars Gently push the test strip, with its... -
Page 12: Important Safety Instructions
Important Safety Instructions • GLUCOCARD Shine Test Strips should be used only with fresh capillary whole blood samples. • Do not reuse test strips. • Do not use GLUCOCARD Shine Test Strips beyond the expiration date. This may cause inaccurate results. •... - Page 13 • Do not store your meter in unsanitary or contaminated sites. • Make sure to follow the procedures found in the Caring for the GLUCOCARD Shine XL System section of this user manual. NOTE • You can get more safety information at FDA Public Health Notification (http://wayback.archive-it.org/7993/20170111013014/...
-
Page 14: Glucocard Shine Xl Blood Glucose Meter
GLUCOCARD Shine XL Blood Glucose Meter Data Port Used to transfer data from the meter to a computer with a cable Display Shows results < and messages Button Turns the meter on and selects or changes information > Button Selects or... -
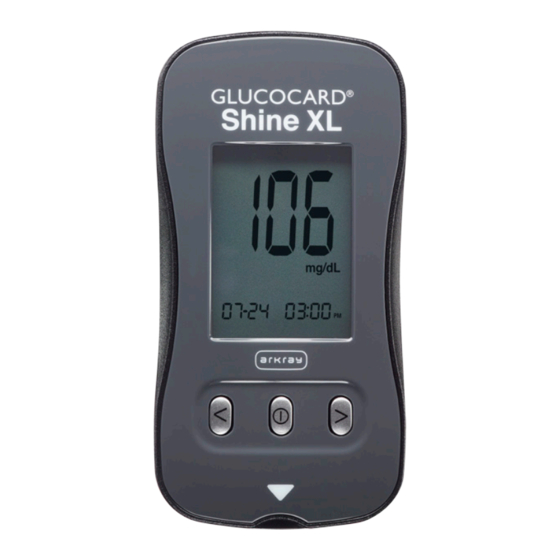
Page 15: Glucocard Shine Xl Blood Glucose Meter Display
Alarm symbol application of a appears when the drop of blood or post-meal alarm control solution has been set NOTE • The unit of measurement for your GLUCOCARD Shine XL Meter is preset and fixed in mg/dL. www.arkrayusa.com 15... -
Page 16: Setting Up The Glucocard Shine Xl System
Setting Up the GLUCOCARD Shine XL System The meter settings, such as time and date, should be checked and updated before using the meter, or after changing the meter batteries. Press and hold the button for three seconds to enter the ‘SET’... - Page 17 Step 3 Setting the Month A number indicating the month will blink on the bottom left corner of the screen. Press the < > button until the correct month appears. Press the button to confirm the selection and progress to the next step. Step 4 Setting the Date <...
- Page 18 Step 6 Setting the Hour < > Press the button until the correct hour appears. Press the button to confirm the hour and progress to the next step. Step 7 Setting the Minute < > Press the button until the correct minute appears.
-
Page 19: Setting The Sound 'On'/'Off
Setting the Sound ‘On’/‘OFF’ Step 8 < > On pressing the button, the screen will display ‘On’ or ‘OFF’. Press the button to confirm the selection. The meter will beep in the following instances if set to ‘On’. < • When the button is pushed to turn on the meter •... -
Page 20: Checking The System
Checking the System The GLUCOCARD Shine XL Meter and GLUCOCARD Shine Test Strips should be checked using GLUCOCARD Shine Control Solution, available in two levels (Level 1 and 2). The GLUCOCARD Shine Control Solutions contain known amounts of glucose and are used to check that the meter and test strips are working properly. -
Page 21: Control Solution Testing
Use GLUCOCARD Shine Control Solution when: • You want to practice the test procedure, instead of using blood • You use the meter for the first time • You begin using a new vial of test strips • You suspect the meter or test strips are not working properly •... - Page 22 NOTE • The meter will switch off if the control solution sample is not applied within two minutes of the symbol appearing on the screen. < • If the meter turns off, press the button and start from step two. Step 3 A test result will appear after the meter counts down from '5' to '1'.
-
Page 23: Comparing The Control Solution Test Results
If results continue to fall outside the range printed on the test strip vial, the GLUCOCARD Shine XL Meter and GLUCOCARD Shine Test Strips may not be working properly. Do NOT use your system and contact Customer Service: 800.566.8558, 24 hours a day, 7 days a week. -
Page 24: Using The Lancing Device
Using the Lancing Device A lancing device is needed in order to collect a blood sample. You may use the lancing device contained in the GLUCOCARD Shine XL Blood Glucose Monitoring System or any other medically approved lancing device. Adjustable Cap Ejection System Lancet Holder Charger... -
Page 25: Preparing The Lancing Device
Preparing the Lancing Device Step 1 Wash hands and the sample site with soap and warm water. Rinse and dry thoroughly. Step 2 Unscrew and remove the adjustable cap. Step 3 Insert a new disposable lancet firmly into the lancet holder. Twist off the protective cover of the lancet and set it aside, then replace the adjustable cap. -
Page 26: Preparing The Meter And Test Strip
Step 5 Cock the lancing device by holding the body in one hand and pulling on the charger. A click may be heard. NOTE • The skin depth to retrieve samples will vary for various people at different sample sites. •... -
Page 27: Flagging Post-Meal Test Results
Flagging Post-meal Test Results • GLUCOCARD Shine XL Meter allows post-meal test to be flagged with the symbol. • The post-meal flag ( ) can be attached and deleted just before applying the blood sample. • Once the test result is saved with the post-meal flag ( ), it cannot be deleted. -
Page 28: Applying The Blood Sample
Applying the Blood Sample Step 8 Obtain a blood sample using the lancing device. Place the device against the pad of the finger. The best puncture sites are on the middle or ring fingers. Press the release button. Remove the lancing device from the finger. - Page 29 NOTE • The meter will switch off if the blood sample is not applied within two minutes of the symbol appearing on the screen. < • If the meter turns off, press the button and apply the blood sample after the symbol appears on the screen.
-
Page 30: Discarding Used Lancets
Discarding Used Lancets Step 1 Unscrew the lancing device‘s adjustable cap. Step 2 Place the protective cover on the lancet. Remove lancet and dispose of the used lancet in a proper biohazard container. CAUTION • Check for damage before using the lancet. If it has been damaged, please discard it and use another lancet. -
Page 31: Alternate Site Testing
Alternate Site Testing What is AST (Alternate Site Testing)? When someone tests their glucose, they usually take the blood sample from the tip of the finger. However, since there are many nerve endings in the fingertip, it can be painful. When doing a glucose test, using different parts of the body, such as the forearms, palms, thighs and calves, can reduce pain during testing. - Page 32 CAUTION • AST results should never be used to calibrate Continuous Glucose Monitoring Systems nor entered into an insulin dosing calculator or pump for dosing recommendations. Things to Know When Using AST Please read the following before testing at alternate sites (forearms, palms, thighs and calves).
- Page 33 AST Precautions • Do not ignore the symptoms of hyperglycemia or hypoglycemia. • When the results of the test do not reflect the way you feel, retest using the fingertip. If the fingertip result still does not reflect the way you feel on retesting, please consult your healthcare professional.
-
Page 34: Hi' And 'Lo' Messages
‘HI’ and ‘Lo’ Messages ‘HI’ Message The meter displays results between 20–600 mg/dL. ‘HI’ appears when the blood glucose level is greater than 600 mg/dL and indicates severe hyperglycemia (much higher than normal glucose levels). If ‘HI’ is displayed again upon retesting, please contact your healthcare professional immediately. -
Page 35: Target Blood Glucose Ranges
1. American Diabetes Association (Standards of Medical Care in Diabetes - 2018. Diabetes Care, January 2018, vol. 41, Supplement 1, S13-S27) Transferring Test Results Test results stored in GLUCOCARD Shine XL Meter can be transferred from the meter to the ARK Care® Advance Real-Time Diabetes Management System via a data cable when the data cable connects the meter with a computer. -
Page 36: Meter Memory
Meter Memory The GLUCOCARD Shine XL Meter can save up to 250 glucose test results with time and date. If the memory is full, the oldest test result will be deleted and the latest test result will be stored. The GLUCOCARD Shine XL Meter calculates and displays the averages of total test results, pre-meal test results and post-meal test ( ) results from the last 14 days. - Page 37 Step 3 Use the > button to scroll through the test results, starting from the most recent and ending with the oldest. Press the < button to return to the previous result. After checking the stored test result, press the button to turn off the meter.
-
Page 38: Setting The Alarm Function
Setting the Alarm Function Four types of alarms can be set in the GLUCOCARD Shine XL Meter. One post-meal alarm (PP2 alarm) and three time set alarms (alarm 1–3). • The ‘PP2’ alarm goes off two hours after setting the alarm. -
Page 39: Setting The Time Alarms (Alarm 1-3)
Setting the Time Alarms (Alarm 1–3) Step 1 < Without inserting a test strip, press the buttons simultaneously for three seconds to enter the time alarm mode. While ‘OFF’ blinks on the screen, alarm 1 will be displayed. Step 2 >... - Page 40 Step 4 < Press the button to adjust the minute of alarm 1. A number indicating the minute will blink on the screen. > Press the button to set the minute. Step 5 Press the button to finish and enter alarm 2 mode.
-
Page 41: Caring For The Glucocard Shine Xl System
Caring for the GLUCOCARD Shine XL System Use a soft cloth or tissue to wipe the meter exterior. If necessary, dip the soft cloth or tissue in a small amount of alcohol. Do not use organic solvents such as benzene, acetone, or any household and industrial cleaners that may cause irreparable damage to the meter. -
Page 42: Understanding Errors And Other Messages
Understanding Error and Other Messages Message What it means What to do A used test strip Remove the test strip was inserted. and insert a new test strip. The blood or control Repeat the test with a new test strip and solution sample wait until the was applied before... - Page 43 Message What it means What to do Repeat the test with This error message may appear when a GLUCOCARD Shine the wrong blood Test Strip. Insert the glucose test strip is test strip with the used instead of the contact bars facing up, GLUCOCARD Shine and push in gently until Test Strip.
-
Page 44: General Troubleshooting
General Troubleshooting Problem Troubleshooting • Check whether the test strip is inserted with the contact bars facing up. • Check if the test strip has been inserted completely into the test The display is blank strip port. even after inserting •... -
Page 45: Performance Characteristics
Performance Characteristics The performance of GLUCOCARD Shine XL Blood Glucose Monitoring System has been evaluated in laboratory and clinical tests. Accuracy: The GLUCOCARD Shine XL Blood Glucose Monitoring System is calibrated to yield results equivalent to plasma glucose concentrations. The accuracy of the... - Page 46 Precision: Precision studies were performed in a laboratory using the GLUCOCARD Shine XL Blood Glucose Monitoring System Within Run Precision Blood avg. 38 mg/dL SD = 1.9 mg/dL Blood avg. 86 mg/dL SD = 3.2 mg/dL Blood avg. 125 mg/dL CV = 4.1 %...
- Page 47 • Alternate site test results for glucose concentration ≥ 75 mg/dL Test site Within ± 5 % Within ± 10 % Within ± 15 % Within ± 20 % Fingertip 27/48 (56.3 %) 46/48 (95.8 %) 48/48 (100 %) 48/48 (100 %) Forearm 19/48 (39.6 %) 42/48 (87.5 %)
-
Page 48: Warranty Information
Warranty Information Warranty The manufacturer warrants that the GLUCOCARD Shine XL Meter shall be free of defects in material and workmanship in normal use for a period of five years. The meter must have been subjected to normal use. The warranty does not cover improper handling, tampering, use or service of the meter. - Page 49 MEMO www.arkrayusa.com 49...
- Page 50 MEMO 50 www.arkrayusa.com...
Need help?
Do you have a question about the GLUCOCARD Shine XL and is the answer not in the manual?
Questions and answers