Arkray Glucocard Expression User Instruction Manual
Audio-hearing blood glucose monitoring system
Hide thumbs
Also See for Glucocard Expression:
- User instruction manual (68 pages) ,
- Quick reference manual (1 page)

Related Manuals for Arkray Glucocard Expression


Summary of Contents for Arkray Glucocard Expression
- Page 1 Read this User Instruction Manual carefully User Instruction Manual before you start testing.
-
Page 2: Table Of Contents
Meter Display Screen ........11 The GLUCOCARD Expression Test Strip ......13 GLUCOCARD Expression Control Solution (required). - Page 3 Changing the Battery ........62 Cleaning and disinfection procedures for GLUCOCARD Expression meter and Lancing Device .
-
Page 4: Introduction
INTrOdUCTION Thank you for choosing the GLUCOCARD Expression Blood Glucose Monitoring System to help you monitor your diabetes. We designed the GLUCOCARD Expression Blood Glucose Monitoring System to be accurate and easy to use. The added convenience of the bilingual voice feature can be used as a verbal aid for using the meter and hearing test results by visually impaired users. -
Page 5: Intended Use
Intended Use The GLUCOCARD Expression Blood Glucose Monitoring System is intended for the quantitative measurement of glucose in fresh capillary whole blood samples drawn from the fingertips, forearm, or palm. Testing is done outside the body (In Vitro diagnostic use). The meter includes voice functionality to assist visually impaired users. - Page 6 IMPOrTANT: • Dehydration – Severe dehydration may lead to inaccurate blood glucose test result. If you suspect you are severely dehydrated, contact your healthcare professional immediately. • Hematocrit range – A hematocrit range that is higher than 55% or lower than 30% can cause inaccurate blood glucose test results.
-
Page 7: In Vitro Diagnostic Use
IN vITrO dIAgNOSTIC USE Important Safety Instructions • The meter and lancing device are for single patient use. Do not share them with anyone including other family members! Do not use on multiple patients! • All parts of the kit are considered biohazardous and can potentially transmit infectious diseases, even after you have performed cleaning and disinfection. -
Page 8: The Glucocard Expression System Includes
THE gLUCOCArd EXPrESSION SYSTEM INCLUdES: • GLUCOCARD Expression Meter • User Instruction Manual • Carrying Case • Self-testing Log Book • May include Test Strips, Control Solution, and Lancing Device and/or Lancets... -
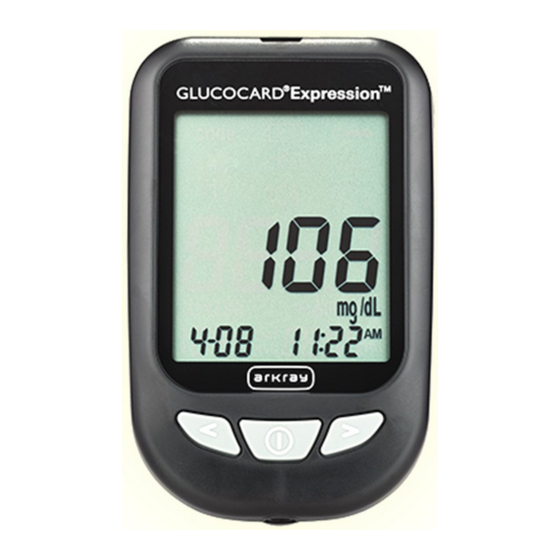
Page 9: Getting To Know The Glucocard Expression Blood Glucose Meter
TO KNOW THE gLUCOCArd EXPrESSION BLOOd gLUCOSE METEr Test Strip Port Insert test strip (see page 48) to turn on the meter. Meter display Shows your blood glucose test results, memory values, averages, and other messages. Enter ( ) and... - Page 10 Battery Compartment Holds two AAA batteries data Port Connect an ARKRAY data cable* here to send data to a PC. *Purchased separately...
-
Page 11: Meter Display Screen
METEr dISPLAY SCrEEN BATTErY Appears when batteries need to be changed (see page 62). CABLE Indicates the meter is in data transfer mode to PC. Indicates the number in the meter display is a stored test value (see page 56). ALArM Indicates alarm has been set (see page 22). - Page 12 BEEPEr Set sound volume (see page 24). TEMPErATUrE Appears when meter is outside of temperature range (50˚F~104˚F). CLOCK Indicates the meter is ready to set up time and date (see page 18). vOICE mg /dL Indicates the voice feature is turned on (see page 24).
-
Page 13: The Glucocard Expression Test Strip
Insert this end to the test solution here. strip port on the meter. The GLUCOCARD Expression Test Strips require a small blood sample to quickly test glucose in fresh capillary whole blood. The test results are plasma-calibrated for easy comparison to lab results, however results may be 10% to 15% higher than results obtained from whole- blood referenced blood glucose assays. - Page 14 IMPOrTANT: • Immediately close the test strip bottle cap tightly after each use. Keep the unused test strips in the original bottle. DO NOT store any test strips outside the bottle while not in use. • DO NOT reuse test strips. Test strips are for single use only. •...
-
Page 15: Glucocard Expression Control Solution (Required)
Run a control test to make sure the Test Strips and Meter are working together properly, to practice testing procedure, and after opening a new bottle of GLUCOCARD Expression Test Strips. Call your local supplier or pharmacy to order control solution. -
Page 16: Setting Up Your Glucocard Expression System
SETTINg UP YOUr gLUCOCArd EXPrESSION SYSTEM The Setup Screen The Setup Screen of the GLUCOCARD Expression meter lets you take advantage of the GLUCOCARD functions of this meter. To access the Setup Screen: Step 1: Press and hold Enter ( ) to turn on meter. - Page 17 Press Enter ( ) to enter Memory Recall to retrieve stored results. Your meter stores up to 300 test results with date and time (see page 54). Press Enter ( ) to enter PC Link Mode for data transfer onto a PC. Press Enter ( ) to enter Time and Date Setup (see page 18).
-
Page 18: Setting The Clock
Setting the Clock You will need: • Your GLUCOCARD Expression Meter. NOTE If date and time on the GLUCOCARD Expression Meter has not been set, test or control result will not be stored in memory. Step 1: Press and hold Enter ( ) to turn on the meter. - Page 19 Step 3: Set the Year. The current year will flash. If the voice function is on, the meter will say, “Set Year.” Press < or > to select the correct year. Press Enter ( ) to confirm your choice. The screen advances to set the month. Step 4: Set the Month.
- Page 20 Step 6: Set the Time Format to 12-hour or 24-hour: The current time format will flash. Press < or > to select either 12-hour format or 24-hour format. Press Enter ( to confirm your choice. The screen advances to the hour setting.
- Page 21 NOTE: • Anytime during set up, inserting a GLUCOCARD Expression Test Strip will begin testing. Any changes made so far will be stored. • You may need to reset time after changing batteries. After date and time has been set, the meter will announce the date and time if the voice feature is on.
-
Page 22: Setting The Alarms
Setting the Alarms You can set up to three alarms on the GLUCOCARD Expression meter. You must set the clock before the alarms can be set. When an alarm sounds, the meter turns on, and a melody sounds for 30 seconds. - Page 23 Step 4: The display screen will indicate alarm 1 status (the default is OFF). You can turn alarm on or off by pressing < or >. Step 5: ) and the hour will flash. Press < or > Press Enter ( to select the hour.
-
Page 24: Voice And Beeper Function
• Alarm settings will not be erased when changing batteries. Begin testing by inserting a GLUCOCARD Expression Test Strip (see page 40, Testing Your Blood Glucose), or press and hold Enter ( ) to turn off the meter, or see the next section on how to set up the voice feature on your meter. - Page 25 Setting volume Step 1: Press and hold Enter ( ) to turn on the meter. Step 2: Press Enter ( ) to go into setup screen. Press < or > until starts to flash. Press Enter ( ) to enter volume setting. Step 3: The screen displays the current sound volume (default is 2).
- Page 26 Language Selection Step 1: Press and hold Enter ( ) to turn on the meter. Step 2: Press Enter ( ) to enter setup screen. Step 3: Press < or > until starts to flash. If the voice function is on, the meter will announce “Language Selection.”...
-
Page 27: Voice Function Table
NOTE: • Any time during set up you can insert a GLUCOCARD Expression Test Strip and begin testing. Any changes made so far are stored. • Your choice of language and volume settings will not be erased when changing batteries. - Page 28 WHEN the meter will speak... WHAT the meter will say... Turned on Melody Prompt user to insert test strip “Please insert test strip” Test strip is inserted and the meter is ready “ Blood glucose test. Please to test (with flashing arrow and blood drop) apply blood onto the test strip”...
- Page 29 voice Function: Control Solution and Blood Glucose Testing (See page 33 - Control Solution Testing and page 40—Testing Your Blood Glucose) Insert the test strip and press < or > (ctl appears next to the test strip icon) “L1 control solution test. Please apply control solution onto the test strip.”...
- Page 30 Function: The Setup Screen (See page 16—Setting Up Your Glucocard Expression System) Pressing Enter ( ) to enter setup screen (after the meter has been turned on) “Memory “End Function “Language Recall” Mode” Selection” “PC Link” “Set Date and “Set Testing...
- Page 31 voice Function: Setting the Clock WHEN the meter will speak... WHAT the meter will say... During date and time setup, “Set Year” setting up the year During date and time setup, “Set Month” setting up the month During date and time setup, “Set Day”...
- Page 32 voice Function: Setting the Alarms WHEN the meter will speak... WHAT the meter will say... Setting alarm 1, 2, or 3 “Set Alarm (number)” When sending data to PC “Sending data to PC” Finish sending data to PC “Data transmission complete” voice Function: Other warning messages (See page 74 - Solving Problems) Meter date and time has not been set “Please set date and time”...
-
Page 33: Control Solution Testing
• The blood glucose test results do not reflect how you feel. • You want to practice the testing procedure. Call your local supplier or pharmacy to order control solution. If they do not stock it, call ARKRAY Order Services at 800.818.8877 (USA and Canada only). -
Page 34: Performing A Control Solution Test
Performing a Control Solution Test IMPOrTANT: • Use only the GLUCOCARD Expression Control Solution with the GLUCOCARD Expression Test Strips. Other brands of control solution will produce inaccurate results. • Always check the expiration date. DO NOT use control solution if it is expired. - Page 35 IMPOrTANT: • Check the expiration date printed on the test strip bottle and its package. Do not use expired test strips. • Use test strip immediately after removing from the bottle. • Do not use wet or damaged test strips. •...
- Page 36 Step 2: Wait until the flashing blood drop and arrow icons appear on the meter display screen. The meter will also announce, “Please apply blood onto the test strip” if you have the voice feature turned on. Press > to enter L1 control mo /dL solution testing.
- Page 37 Step 5: Gently touch the drop of the control solution to the tip of the test strip. The meter will beep indicating it has received the control solution. Step 6: The screen will start to count down. After 6 seconds, the control test result will appear on the meter display screen.
- Page 38 NOTE: • Control solution test results will be stored into the meter memory and indicated by icon. • Control solution test results will not be used for calculating averages. Step 8: Remove the used test strip. The meter will automatically turn off. Discard the used test strip into a proper waste container.
-
Page 39: Control Solution Trouble Shooting
Control Solution Trouble Shooting If your control solution test is out of range (too high or too low), it may be caused by the following: Possible Causes WHAT you can do… Wrong brand of Control Make sure you are using GLUCOCARD Solution used Expression Control Solution. -
Page 40: Testing Your Blood Glucose
Before you begin, make sure: • The meter has been set up properly and you’ve completed a control test. See Setting Up Your GLUCOCARD Expression System on page 16, and Control Solution Testing on page 33 for details. • Wash your hands and the testing site thoroughly with soap and warm water, dry well. - Page 41 • If the meter is being operated by a second person who is providing testing assistance to the user, the meter and lancing device should be cleaned and disinfected appropriately when testing is conducted by the second person. IMPOrTANT: • Check the expiration date printed on the test strip bottle. DO NOT use expired Test Strips.
-
Page 42: Preparing Your Lancing Device
Preparing Your Lancing device Step 1 Remove the adjustable cap by twisting the cap off the lancing device and insert the lancet by pushing down firmly until lancet is fully seated. Step 2 Twist the protective cover off the lancet. Attach the adjustable cap by twisting clockwise onto the lancing device. - Page 43 Step 3 Adjust the puncture setting on the adjustable cap for the puncture depth level (1 is the lightest and 5 is the deepest). Step 4 With one hand holding the adjustable cap, pull back the lancing device with your other hand until you hear a click. The lancing device is now ready for blood sampling.
-
Page 44: Obtaining A Blood Sample
Obtaining a Blood Sample CAUTION: • The lancets are for single use only. Always use a new sterile lancet each time you perform the test. • DO NOT share your device or lancets with other people. Sharing or reusing lancets can lead to disease transmission. • Dispose of properly in biohazard waste. • When performing a blood glucose test, use a new sterile lancet every time. If alcohol wipes are used to cleanse the fingers, make sure the area is dry before the blood sample is obtained. Step 1: Wash hands with soap and warm water and dry thoroughly. Warm water stimulates blood flow to the fingers making it easier to obtain a sample. Step 2: Hang the arm down at the side for 10 to 15 seconds;... -
Page 45: Important Information On Alternate Site Testing (Ast)
Tip: To avoid soreness, select a site on the side of your fingertips. To avoid calluses, choose a different site each time for obtaining the blood sample. Important Information on Alternate Site Testing (AST) The GLUCOCARD Expression Blood Glucose Monitoring System can test blood glucose from areas other than your fingertip such as palm and forearm (alternate site testing, or AST). Alternate site testing can be less painful than fingertip testing, because of the physiological differences between your fingertip, palm and forearm;... - Page 46 dO AST ONLY in the following intervals: • In a pre-meal or fasting state (more than 2 hours since the last meal). • 2 hours or more after taking insulin. • 2 hours or more after exercise. Alternate site measurements should never be used to calibrate continuous glucose monitors (CGMs) Alternate site measurements should never be used for insulin dosing calculations.
- Page 47 • Your AST results do not match the way you feel. • You are testing for hyperglycemia. • Your routine glucose results are often fluctuating. NOTE: • Rubbing forearm until warm before lancing will help minimize the difference between fingertip and AST test results. The palm (at the base of the thumb) does not require rubbing before testing.
-
Page 48: Performing A Blood Glucose Test
Performing a Blood glucose Test Step 1: Remove a GLUCOCARD Expression test strip from the test strip bottle. Close the bottle cap immediately. Insert the test strip to turn on the meter. IMPOrTANT: • Check the expiration date printed on the test strip bottle and its package. - Page 49 Step 2: A flashing blood drop and arrow icon appears on the meter display screen. The meter will announce, “Please apply blood onto the test strip” if you have the voice feature turned on. mo /dL Step 3: Obtain blood sample. For Fingertip Testing: Hold the lancing device (use the narrow tip adjustable cap) against the side of your fingertip and press the release button.
- Page 50 TIP: • Gently massage your hand and finger toward the puncture site to form a drop of blood (approximate size ). Do not “milk,” or squeeze around the puncture site. • Lance the side of your fingertip to avoid soreness. To avoid calluses, choose a different lancing site each time.
- Page 51 For forearm test sites, apply and release pressure (“pump”) for a few seconds while keeping the lancing device in constant contact with the skin. Palm testing (at the base of the thumb) does not require pumping. When the blood drop is large enough (approximate size ), lift the lancing device straight up without smearing the blood drop.
- Page 52 Step 4: Gently bring the test strip to the drop of blood at a slight angle. The test strip acts like a straw to pull the blood in. Keep the test strip in the blood drop until the meter beeps to indicate the test strip has enough blood.
- Page 53 CAUTION cont: • Wash your hands thoroughly with soap and water after handling the meter, lancing device or test strips. • Clean and disinfect the meter and lancing device after the test (see cleaning and disinfection). Step 6: Remove the used test strip into proper waste container. The meter will automatically shut off.
-
Page 54: Understanding Your Blood Glucose Test Results
Understanding Your Blood glucose Test results Blood glucose values vary depending on food intake, medication, health, stress, and exercise. The ideal range for adults without diabetes: • less than 100 mg/dL before meals. • less than 140 mg/dL after meals. It is important to consult with your physician or healthcare professional to determine an appropriate target range for you. - Page 55 If the meter displays results that are “HI” or “LO,” or you get a result that is more than 250 mg/dL or below 50 mg/dL AND you DO NOT feel ill: • Test your meter with a control solution, refer to page 33, Control Solution Testing.
-
Page 56: Viewing The Meter Memory
Meter Memory Your GLUCOCARD Expression meter automatically stores up to 300 test and control results with date and time. The meter also provides 7, 14, and 30 day averaging to help track your blood glucose trends. You must set... - Page 57 Step 1: Press and hold Enter ( ) to turn on the meter. Step 2: Press Enter ( ) to enter setup screen. Step 3: Press < or > until starts to flash. If the voice function is turned on, the meter will say “memory recall.”...
- Page 58 nil will appear on the display screen after the last recorded test result if less then 300 readings are stored. You can press > to go back viewing from the oldest to the most recent readings. mg /dL mg /dL Step 4: When you reach the most recent test result, continue to press >...
- Page 59 The number of results included in the average is shown right next to icon. Control solution results are not included in the day average calculations. mg/dL mg/dL mg /dL...
- Page 60 NOTE: • Control testing results are flagged by on the bottom left corner of the display screen in addition to • When the meter memory is blank, the display screen will show nil. • When there is no day average data available, the display screen will show 4 dashes.
-
Page 61: Caring For The Meter
NOTE: • Do not get water inside the GLUCOCARD Expression Meter. Never immerse the meter or hold it under running water. • Do not use glass or household cleaners on the meter. -
Page 62: Changing The Battery
Batteries need to be changed when the icon appears on the meter display. Materials you will need: • Two Alkaline AAA Batteries • Your GLUCOCARD Expression Meter Step 1: Press firmly on the battery cover and slide in the direction of the arrow. -
Page 63: Cleaning And Disinfection Procedures For Glucocard Expression Meter And Lancing Device
Given the right conditions some germs can live on surfaces for hours and even for days. The proper disinfection of GLUCOCARD Expression blood glucose monitoring equipment is using DISPATCH® Hospital Cleaner Disinfectant Towels with Bleach. These are pre-moistened disposable towels for use... - Page 64 A cleaning step must be performed before each disinfection step. Cleaning and disinfection frequency: The GLUCOCARD Expression meter and Lancing Device should be cleaned when it appears dirty or contaminated with blood. It should be disinfected every day according to the validated cycle of 1825 times.
- Page 65 2. Inspect for blood, debris, dust, or lint anywhere on the meter. 3. Clean or disinfect meter. 4. To clean the GLUCOCARD Expression meter, blood/body fluids must be thoroughly cleaned from surface and objects before disinfecting. Dispense the towel (DISPATCH) from its package. Wipe surface with towel (DISPATCH) until completely wet.
- Page 66 5. To disinfect the GLUCOCARD Expression meter, dispense a second towel (DISPATCH) from its package. Wipe surface with towel (DISPATCH) until completely wet. You must wipe all external areas of the meter including both front and back surfaces and allow 1 minute contact at room temperature.
- Page 67 NOTE: • If the meter is being operated by a second person who is providing testing assistance to the user, the meter should be decontaminated prior to use by the second person. • Avoid alcohol and ammonia. Even though these two ingredients are excellent disinfectants they are not safe for your meter or lancet device.
- Page 68 Cleaning and disinfecting Lancing device Clean and disinfect Lancing Device after every use with DISPATCH® hospital cleaner disinfectant towels with bleach, with EPA registration number 56392- 8. Other wipes with EPA Reg. No. 56392-8 may also be used. 1. Inspect for blood, debris, dust, or lint anywhere on the lancing device. 2.
- Page 69 4. To disinfect the lancing device, dispense a second towel (DISPATCH) from its package. Wipe surface with towel (DISPATCH) until completely wet. You must wipe surface with towel (DISPATCH) until completely wet and allow 1 minute contact at room temperature. Wipe dry or allow to air dry.
- Page 70 NOTE: • If the meter is being operated by a second person who is providing testing assistance to the user, the lancing device should be decontaminated prior to use by the second person. • The lancing device is for patient self-monitoring by a single person only. It must not be used to collect blood from more than one person as this poses an infection risk.
- Page 71 The list of things you should look for as signs of deterioration after disinfection: • Control solution out of range • Clouding for LCD display • Corroding for plastic housing • Corroding for buttons • Malfunction of any meter buttons If these signs of deterioration are noted, you should stop using the device and call customer service at 1-800-566-8558 (USA and Canada only).
-
Page 72: Purchase Information For Dispatch Hosptal Cleaner Disinfectant
Purchase Information for dispatch Hospital Cleaner disinfectant Towels with Bleach Dispatch is the product of Clorox, the catalog number is CLH69150. Below is the list of national distributors and its phone number. • Medline ................800.633.5463 • DNR Supplies ..............763.420.7825 To find a local distributor in your area, call Customer Service at 800.234.7700, M-F, 8:30–5:00 pm EST. -
Page 73: Storage And Precautions
STOrAgE ANd PrECAUTIONS Storage and Precautions • The meter and test strips are designed to be used within the temperature range 50˚F to 104˚F. Do not leave in hot car. • Avoid leaving the meter in extremely hot or cold places, such as near a heat source or in an extremely hot or cold car. -
Page 74: Downloading Test Results To A Computer
TEST rESULTS TO A COMPUTEr We offer a diabetes management software system to help you download your test results to a computer. For more information on ARKRAY diabetes data management software, call ARKRAY Customer Service at 800.566.8558 (24 hours a day, 7 days a week, USA and Canada only). - Page 75 What you see What meter says What it means What you should do • Remove the battery and turn on the meter. • Remove the test strip The meter and insert a new test “ Error 1 Meter electronics strip. Failure”...
- Page 76 What you see What meter says What it means What you should do Change the battery Low battery Batteries are low (see page 62, Changing the Battery). Move the meter into an area that is between “ Temperature is Temperature is 50º...
- Page 77 What you see What meter says What it means What you should do Wash and dry your hands and repeat the test on your fingertip “ Your blood Test result is with a new test strip. glucose reading lower than 20 If the result is still is below 20 mg/ mg/dL...
-
Page 78: Warranty
Warranty You are a valued customer of ARKRAY. It is important to us that you are completely satisfied with your GLUCOCARD Expression blood glucose meter. ARKRAY warrants your GLUCOCARD Expression blood glucose meter will be free from defects in materials and workmanship for a period of five years from the date of the original purchase. -
Page 79: Specifications
1000 tests of continuous use or 1 year Automatic Power-off: After 2 minutes of non-use Operating Temperature: 50˚F to 104˚F. Relative Humidity: 20–85% Storage Condition: Meter at 39˚F ~ 122˚F Test Strips at 41˚F ~ 86˚F For additional information, refer to the gLUCOCArd Expression Test Strip insert. - Page 80 TEL 800.566.8558 FAX 952.646.3110 www.arkrayusa.com P/N 7888-03 Rev 2/14 ©2012 ARKRAY, Inc. 65070000093...
Need help?
Do you have a question about the Glucocard Expression and is the answer not in the manual?
Questions and answers
I have no manual
The manual for the ARKRAY GLUCOCARD Expression blood glucose meter is available as a User Instruction Manual. You should check ARKRAY's official resources or customer support for a copy.
This answer is automatically generated
I can see how to turn it on and off but what about other functions?
The Arkray Glucocard Expression is a talking blood glucose monitor with the following functions:
- Audible Test Results: Bilingual voice feature (English and Spanish) for hearing test results.
- Large Display & Icons: Oversized picture icons and a large LCD screen for easy readability.
- Fast Testing: Provides results in 6 seconds.
- Small Sample Size: Requires only 0.8 µL of blood for testing.
- Alternate Site Testing: Allows testing from the palm and forearm.
- Memory Storage: Stores up to 300 test results with date and time.
- Result Averaging: Calculates 7, 14, and 30-day averages.
- Auto Coding: No manual coding required.
- Battery Powered: Uses two AAA batteries, lasting up to 1,000 tests.
- Automatic Power-Off: Turns off after 2 minutes of inactivity.
- Reliable & Accurate: Uses a glucose oxidase system with plasma-referenced results.
These functions make the device easy to use, especially for visually impaired users.
This answer is automatically generated
how to delete old readings
This does not satisfy my needs. Don't know where this system came from. I have hearing difficulties and having voice on this is beyond me.
I have no manual. How do I get that? Must I print manual from web? Need an actual manual so don't you supply manual?>
There was no manual sent. Said I had to download? I need manual.