Table of Contents
Advertisement
Advertisement
Table of Contents

Related Manuals for ESD CAN-CBM-DP


Summary of Contents for ESD CAN-CBM-DP
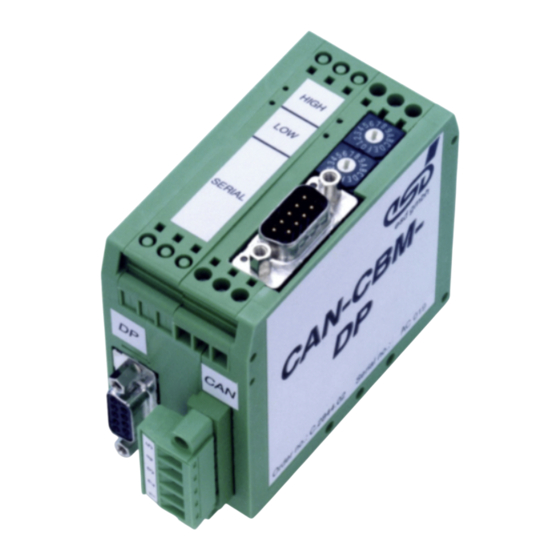
- Page 1 CAN-CBM-DP PROFIBUS-DP / CAN-Gateway Software Manual to Product: C.2844.xx CAN-CBM-DP Software Manual Rev. 2.0 esd electronic system design gmbh Vahrenwalder Str. 207 • 30165 Hannover • Germany www.esd-electronics.com • Fax: 0511/37 29 8-68 Phone: 0511/37 29 80 • International: +49-5 11-37 29 80...
- Page 2 gmbh.
- Page 3 Manual Rev. Chapter Changes versus previous version Chapter restructured, notes inserted Complete chapter restructured Chapter: “Editing the GSD-File with a Text Editor” inserted Technical details are subject to change without notice. CAN-CBM-DP Software Manual Rev. 2.0...
- Page 4 This page is intentionally left blank. CAN-CBM-DP Software Manual Rev. 2.0...
-
Page 5: Table Of Contents
Module-ID: ..........25 CAN-CBM-DP Software Manual Rev. 2.0... - Page 6 7.2.3 Online / Offline Configuration ........69 7.2.4 Configuration of the CAN-CBM-DP Module ..... . 70 7.2.4.1 Properties in the Data Mapping Dialog Box .
- Page 7 9. Important CANopen Messages ..........101 CAN-CBM-DP Software Manual Rev. 2.0...
- Page 8 This page is intentionally left blank. CAN-CBM-DP Software Manual Rev. 2.0...
-
Page 9: Overview
Tx-identifier. Rx-identifiers are assigned to the input bytes on CAN side. Received CAN data is treated as input data by the PROFIBUS. The PROFIBUS station address is set directly at the CAN-CBM-DP module by means of coding switches. -
Page 10: The Diagnose And Configuration Tool Cict
1.4 The Diagnose and Configuration Tool CICT The tool CICT offers an operating surface designed for the CAN-CBM-DP for the display of parameters and configuration of the module. Since the module is mainly to be configured via the PROFIBUS, the tool is mainly used for the display of transmitted parameters. -
Page 11: Functionality Of The Local Firmware
Fig. 2.1.1: Overview of functions of the CAN-CBM-DP module 2.1 PROFIBUS-Slave Address The CAN-CBM-DP module simulates a slave module on the PROFIBUS side. The slave address is set by means of coding switches at the module. When switching on the module the hexadecimal PROFIBUS address set is requested. -
Page 12: User Data
Functionality of the local Firmware 2.2 User Data The CAN-CBM-DP-module simulates a total of up to 300 bytes for the input direction and the output direction in the current software implementation. From these 300 bytes a maximum of 244 bytes can be selected for one data direction, otherwise the division into input bytes and output bytes is entirely up to the user. -
Page 13: More Addressable Can Identifiers In Page Mode
PROFIBUS telegram (that means more than 48). Because of the additional protocol expenditure the handling of the Page Mode is slightly more complicated than the standard operation of the gateway. The data exchange between PROFIBUS and CAN requires two cycles instead of one PLC cycle. CAN-CBM-DP Software Manual Rev. 2.0... -
Page 14: Implementing And Diagnose
Set the PROFIBUS address of the module by means of the coding switch. Connect the PROFIBUS connector to the PROFIBUS interface of the CAN-CBM-DP module. Configure the settings of the CAN-CBM-DP module in the PLC via the SIMATIC manager Switch on the power supply for the CAN-CBM-DP. -
Page 15: Start-Up
CAN-CBM-DP module to the CAN bus. When the CAN-CBM-DP module receives data, it provides these to the PLC master. The configuration is described in chapter 5 ‘Configuration via the SIMATIC-Manager’ from page 21. -
Page 16: Diagnose Via Led Display
Diagnose 4x short flashes configuration via SIMATIC-Manager or system function telegram SFC13 (DPNRM_DG) (see chap. 3.4) PROFIBUS OK no data exchange PROFIBUS- LED 3 data data exchange via (red) exchange PROFIBUS Table 3.3.1: LED status CAN-CBM-DP Software Manual Rev. 2.0... -
Page 17: Slave Diagnose
3.4.1 Diagnose Bytes 0...5 The assignment of these diagnose bytes has been predefined in norm DIN EN 19425, part 3. Below, the status messages will be described in consideration of the CAN-CBM-DP module. The following designations will be used for this:... -
Page 18: Station Status 1
Wrong setting. - evaluate diagnose bytes 9 and 10 - this bit is always ‘1’, if you, e.g., just access the CAN-CBM-DP by means of a PG or another DP slave has already been set by DP master. another master. -
Page 19: Station Status 2
A diagnose message applies. The DP slave cannot operate until the error has been removed (static diagnose message). This bit is always ‘1’. The response monitoring for the CAN-CBM-DP is activated. DP slave has received freeze command. DP slave has received SYNC command. -
Page 20: Station Status 3
DP slave is stored in this byte. 3.4.1.5 Diagnose Bytes 4 and 5: Manufacturer Identification The manufacturer identification has been coded into two bytes. For the CAN-CBM-DP module the designation 04A4 hex is returned. CAN-CBM-DP Software Manual Rev. 2.0... -
Page 21: External (Module-Specific) Diagnose Bytes
= "byte" 3 wrong length correct: length = 1-8 or 16 4 only one byte has been specified for identifier 5 format specification is missing 6 wrong identifier Table 3.4.5: Module-specific status messages CAN-CBM-DP Software Manual Rev. 2.0... -
Page 22: Gsd File
GSD File 4. GSD File Below, the GSD file (Device Master Data) of the CAN-CBM-DP module has been printed. The specification printed here are for orientation. Decisive is the data contained in the GSD file CDPS04A4.GSD, included in the product package. - Page 23 ExtUserPrmData=3 "RTR-Frames" Bit(4) 0 0-1 Prm_Text_Ref=3 EndExtUserPrmData ExtUserPrmData=4 "CANopen-Slave" Bit(3) 0 0-1 Prm_Text_Ref=2 EndExtUserPrmData ExtUserPrmData=5 "CANopen-Master" Bit(2) 0 0-1 Prm_Text_Ref=2 EndExtUserPrmData ExtUserPrmData=6 "Start-Frame" Bit(1) 0 0-1 Prm_Text_Ref=2 EndExtUserPrmData ExtUserPrmData=7 "Page-Mode" Bit(0) 0 0-1 Prm_Text_Ref=2 EndExtUserPrmData CAN-CBM-DP Software Manual Rev. 2.0...
- Page 24 ExtUserPrmData=9 "WakeUp Time (0=Off, 255=Default)" Unsigned8 255 0-255 EndExtUserPrmData ExtUserPrmData=10 "Sync Time (0=Off, 65535=Default)" Unsigned16 65535 0-65535 EndExtUserPrmData Ext_User_Prm_Data_Const(0)=0x00,0x06,0x00,0x00,0x00,0x00,0xff,0xff,0xff Ext_User_Prm_Data_Ref(1)=1 Ext_User_Prm_Data_Ref(2)=2 Ext_User_Prm_Data_Ref(2)=3 Ext_User_Prm_Data_Ref(2)=4 Ext_User_Prm_Data_Ref(2)=5 Ext_User_Prm_Data_Ref(2)=6 Ext_User_Prm_Data_Ref(2)=7 Ext_User_Prm_Data_Ref(3)=8 Ext_User_Prm_Data_Ref(6)=9 Ext_User_Prm_Data_Ref(7)=10 Slave_Family = 9@CAN@V01 Periphery = "ET 200" OrderNumber = "C.2844.03" CAN-CBM-DP Software Manual Rev. 2.0...
-
Page 25: Configuration Via Simatic Manager
5. Configuration via SIMATIC Manager 5.1 Course of Configuration The CAN-CBM-DP module is configured via the PROFIBUS or the serial interface by means of tool CICT (limited configuration). The configuration via the PROFIBUS is of higher priority, i.e. the PROFIBUS configuration overwrites the configuration made via the serial interface. It is not possible to change parameters which have been set via the PROFIBUS by means of the serial interface. -
Page 26: Set Profibus Address
A window opens in which you have to specify the PROFIBUS station address. Attention!! The hexadecimal address set at the coding switches has to be converted into a decimal value and entered here! Fig. 5.1.1: Setting the PROFIBUS address of the CAN-CBM-DP CAN-CBM-DP Software Manual Rev. 2.0... -
Page 27: Parameter Telegram
More comfortable, however, is of course the specification in the format shown above. Here, the parameters can be configured ‘directly’. Therefore, in the following descriptions the configuration by means of hexadecimal values will not be considered. CAN-CBM-DP Software Manual Rev. 2.0... -
Page 28: Can-Bitrate
Configure gateway as CANopen slave. (CS) CANopen-Master: Configure gateway as CANopen master. (CM) Start-Frame: After wake-up time has expired, a start frame is transmitted, if the (AS) gateway is a master (autostart). Page-Mode: Activate Page-Mode. (PM) CAN-CBM-DP Software Manual Rev. 2.0... -
Page 29: Module-Id
CAN. The Wakeup Time specified here, overwrites the value of Wakeup Time stored previously in the CAN-CBM-DP gateway, if another value than ‘255’ was specified. If ‘255’ is specified, the value stored in the gateway will be used. -
Page 30: Sync Time
‘0’, and the Wakeup-Time function would be deactivated, therefore. SYNC Time: The CAN-CBM-DP module can cyclically transmit the commands SYNC and START for simple CANopen applications. The SYNC Time for the transmission can be specified in the properties window as described above, via the Communication Window or via the tool CICT. -
Page 31: Assigning The Slots Of The Dp Slave
DP slave for data exchange is set by double clicking the device ‘Universal Module’ for each byte with activated DP-slave window. In the DP-slave window the assigned slots are represented by a ‘0’. Fig. 5.1.3: Setting the parameters CAN-CBM-DP Software Manual Rev. 2.0... -
Page 32: Configuration Of Slots
5.1.5 Save Settings to Hard Disk Now you have to save the settings via menu points Station/Save to hard disk. Afterwards the settings are transmitted to the PLC by means of menu points Target System/Load in Unit. CAN-CBM-DP Software Manual Rev. 2.0... -
Page 33: Description Of Input Window 'Properties - Dp Slave
The data format for all properties is hexadecimal (!). Note: The CAN-CBM-DP-module with the order no. C.2844.05 can handle 29-Bit-CAN-identifiers. A 29-bit identifier requires four bytes and bit 29 must be set to ‘1’ (counted 0...31 bits), in order to enable the module to distinguish between 11-bit and 29-bit identifiers. - Page 34 If form and the CAN Identifier are not set, these parameters can be changed via tool CICT. A Can identifier which has not been set is indicated by the entry EEEE hex. CAN-CBM-DP Software Manual Rev. 2.0...
-
Page 35: The Communication Window
The Communication Window will be described in detail on the following pages. Note: The CAN-CBM-DP-module with the order no. C.2844.05 can handle 29-Bit-CAN-identifiers. A 29- bit identifier requires four bytes and bit 29 must be set to ‘1’ (counted 0...31 bits), in order to enable the module to distinguish between 11-bit and 29-bit identifiers. -
Page 36: Configuring The Communication Window
Identifier: FFEF hexadecimal Identifier: FFEF hexadecimal Form byte: 00 hexadecimal Form byte: 00 hexadecimal Fig. 5.3.1: Configuring the input path of the Fig. 5.3.2: Configuring the output path of the Communication Window Communication Window CAN-CBM-DP Software Manual Rev. 2.0... -
Page 37: Format Of Communication Window
PLC loop counter (has to be incremented in pulse with OB1 in order to tell the gateway the OB1 cycle) sub command (always set to ‘0’) command (description refer page ?) Table 5.3.1: Write bytes of the Communication Window CAN-CBM-DP Software Manual Rev. 2.0... -
Page 38: Read Bytes Of The Communication Window
PLC loop counter which has been transmitted to the gateway via the last PROFIBUS telegram return of the sub command error code of the read function (not supported at the moment) Table 5.3.2: Read bytes of the Communication Window CAN-CBM-DP Software Manual Rev. 2.0... - Page 39 PLC-loop counter has to be specified. The loop counter has to be realised by the user. It is required to provide the CAN-CBM-gateway with the OB1- cycle of the PLC. CAN-CBM-DP Software Manual Rev. 2.0...
- Page 40 By means of this command a remote-request frame is transmitted. Prior to the transmission the reception on the Rx-identifier has to be enabled by command 4. Command 7: Executes command 4 and command 6 See there. CAN-CBM-DP Software Manual Rev. 2.0...
- Page 41 Configuration via SIMATIC Manager Command 20, 21: Cyclical transmission of the CANopen commands SYNC or START The CAN-CBM-DP module can cyclically transmit the commands SYNC and START for simple CANopen applications. The commands are transmitted as shown in the table above. The cycle is specified e.g in the properties window in bytes 4 and 5 when the Communication Window is configured (refer to page 31).
-
Page 42: Examples On The Communication Window
CAN frame (depending on the application). Send new ‘Read Bytes of Communication-Window’ (refer to page 33) with increased loop-counter value of 3. and if necessary new application data. Continue PLC programm (new request at the next programm cycle) CAN-CBM-DP Software Manual Rev. 2.0... - Page 43 In order to acknowledge the execution of the command a read access to byte 13 of the Communication Window should follow. It has to have the same value of the PLC-loop counter as when the command was called. CAN-CBM-DP Software Manual Rev. 2.0...
-
Page 44: Receiving Data
In order to acknowledge the execution of the command a read access of byte 13 of the Communication Window should be made with every command call. It has to have the same value of the PLC-loop counter as it had when the command was called. CAN-CBM-DP Software Manual Rev. 2.0... - Page 45 4 received data byte 5 received data byte 6 received data byte 7 data length PLC-loop counter 8-bit counter + n returned sub-command (without significance) error code of the read function (without significance) CAN-CBM-DP Software Manual Rev. 2.0...
- Page 46 3 data byte 4 data byte 5 data byte 6 data byte 7 data length for transmission commands (Tx) PLC-loop counter 8-bit counter + m sub-command (always set to ‘0’) command ‘Disable Rx-Identifier’ CAN-CBM-DP Software Manual Rev. 2.0...
-
Page 47: Page Mode
CAN-devices. If the connected CAN-devices have been configured, the normal page mode (PM) is to be preferred Note: The CAN-CBM-DP-module with the order no. C.2844.05 can handle 29-Bit-CAN- identifiers. A 29-bit identifier requires four bytes and bit 29 must be set to ‘1’ (counted 0...31 bits), in order to enable the module to distinguish between 11-bit and 29-bit identifiers. -
Page 48: Mode Of Operation
PLC cycles are required, therefore, to transmit all data. In order to keep the number of PLC cycles low, input and output page should be selected as large as possible. CAN-CBM-DP Software Manual Rev. 2.0... -
Page 49: Definition Of Plc-Addresses
PLC. The inputs need at least a page size of 32 bytes so that the setup can be made via page 0 and page 1. Fig. 6.4.2: Example 1: Configuring the PLC-addresses in Page Mode CAN-CBM-DP Software Manual Rev. 2.0... - Page 50 65 66 67 68 69 70 71 72 73 74 75 76 77 78 79 Slot 2 Example: Page 51 Parameter of Tx-Id 10 Parameter of Tx-Id 11 endconfig Page no. (Tx-Configuration) Fig. 6.4.4: Example 2: Output page with a length of 82 bytes CAN-CBM-DP Software Manual Rev. 2.0...
- Page 51 Consistency over the entire length ! Sequential addressing of segments of inputs and outputs ! Communication Window into the last two segments (if desired) ! Table 6.4.1: Rules for the assignment of addresses in Page Mode CAN-CBM-DP Software Manual Rev. 2.0...
-
Page 52: Page Structure
The contents of bytes 3 to 7, the ‘protocol data’ will not be referred to. Please use the function block (FB2) contained in the product package to control the transmission of pages. It contains the commands required for the protocol control. The following chapters will describe the page types. CAN-CBM-DP Software Manual Rev. 2.0... -
Page 53: Setup Via Page 0 And 1
The setup requires some time. Therefore it is recommendable to delay the transmission of the next page for about 5 sec. It is, for example, possible to program a PLC timer which considers the delay. CAN-CBM-DP Software Manual Rev. 2.0... -
Page 54: Tx-Configuration Via Pages 51...150
The CAN-CBM-DP module with the order-no. C.2844.03 supports 11-bit-identifier: 0 ... 2047 (decimal). The CAN-CBM-DP module with the order-no. C.2844.05 supports 29-bit-identifier, too. form Via this byte you can choose whether the output data is to be converted from Motorola data format of the PLC into Intel data format of the CAN network or not. -
Page 55: Rx-Configuration Via Pages 151...250
The CAN-CBM-DP module with the order-no. C.2844.03 supports 11-bit-identifier: 0 ... 2047 (decimal). The CAN-CBM-DP module with the order-no. C.2844.05 supports 29-bit-identifier, too. form Via this byte you can choose whether the output data is to be converted from Motorola data format of the PLC into Intel data format of the CAN network or not. -
Page 56: Data Exchange Via Pages 251...N
CAN frame once *) *) Change between 3 and 4 causes a direct output of data Table 6.4.7: Specifying the cause for transmitting Tx-data Tx_user_data Here the user data of this Tx-identifier to be transmitted are specified. CAN-CBM-DP Software Manual Rev. 2.0... - Page 57 In this byte the gateway specifies an input counter. The input counter is incremented with each Rx-frame received. It can be used by the user, for example, to program a guarding protocol. Rx_user_data Here the received user data of this Rx-identifier are entered. CAN-CBM-DP Software Manual Rev. 2.0...
-
Page 58: Using The Page Mode With Fbs And Dbs
Start address of the first input segment. READ_CONFIG_DB Data block to define the Rx-identifiers. READ_DB Data block to read the input data. RET_VALUE Message about the handling of the present page. Table 6.5.1: Function of data blocks used by FB2 CAN-CBM-DP Software Manual Rev. 2.0... -
Page 59: Freigabe
Table 6.5.2: Structure of the WRITE-CONFIG-DB Here the value of the Tx-identifier has to be specified. Tx-Identifier x CAN-CBM-DP order-no. C.2844.03: 0 ... 2047 CAN-CBM-DP order-no. C.2844.05: 0 ... 536870911 In parameter form you choose whether the output data is to... -
Page 60: Read_Address
In FB2 the bit FREIGABE has to be set = 1! READ_ADDRESS Start address of the first input segment. Via this parameter the PLC-start address of the first segment of the input page is transferred to the PLC. CAN-CBM-DP Software Manual Rev. 2.0... -
Page 61: Read_Config_Db
Table 6.5.3: Structure of the READ-CONFIG-DB Here the value of the Rx-identifier has to be specified. Rx-Identifier x CAN-CBM-DP order-no. C.2844.03: 0 ... 2047 CAN-CBM-DP order-no. C.2844.05: 0 ... 536870911 In parameter form you choose, whether the input data is to... - Page 62 Rx-Ids 11 ... 19, therefore requires a length of (9 6 + 4) = 58 bytes End flag = EEEEEEEE hex Note: In FB2 the bit FREIGABE has to be set = 1! CAN-CBM-DP Software Manual Rev. 2.0...
-
Page 63: Write_Db
Table 6.5.4: Structure of WRITE_DB This byte specifies the number of data bytes which are to length x be transmitted on the Tx-identifier defined here (+1 for the force-byte): lenght = (number of data bytes) + 1 CAN-CBM-DP Software Manual Rev. 2.0... - Page 64 ‘EE’ in cell length. FB2 will then continue to transmit the user data of the first WRITE_DB. Note: Bit FREIGABE has to be set = 1 in FB2, if the output data is to be written! CAN-CBM-DP Software Manual Rev. 2.0...
-
Page 65: Read_Db
The input counter is incremented with every Rx-frame received. It can, for example, be used to program a guarding protocol. The user data between 1 to 8 bytes is specified after userdata x parameter count-in. CAN-CBM-DP Software Manual Rev. 2.0... - Page 66 RET_VALUE Page type currently being transmitted (at FREIGABE = 1) no page transmission reserved Tx-configuration via pages 51...150 Rx-configuration via pages 151...250 data pages 251...n Table 6.5.7: Return parameter RET_VALUE CAN-CBM-DP Software Manual Rev. 2.0...
-
Page 67: Methodology
3. Include More FBs 3.1 FB4: data exchange via Communication Window 3.2 FB1: initializing CANopen modules by means of a list (INIT_LIST_DB, INIT_DB) 3.3 FB3: controlling 127 uniform CANopen devices This page is intentionally left blank. CAN-CBM-DP Software Manual Rev. 2.0... -
Page 68: Configuration Via Tools Of Other Manufacturers
Configuration with the SIMATIC Manager”). If the “Universalmodule” is not supported, the GSD-file has to be adapted via a text editor or the CAN-CBM-DP module can be configurated via the tool CICT, whereas editing the GSD-file with a text editor is recommended. - Page 69 1 1 1 1 1 1 63 bytes, resp. 63 words Example Module 1: Bit-No.: Content: = 0x05 6 byte data Octet 3, 4, 5: Manufacturer-specific_configuration_byte Octet 3 and Octet 4 = CAN-identifier example: Identifier 0x0203 Octet 5 = Form byte CAN-CBM-DP Software Manual Rev. 2.0...
- Page 70 Attention!: Please note, that the GSD-file has to be renamed. The file name may be maximum 8 characters long. Some configuration-software for the PROFIBUS Master does not operate with longer file names. CAN-CBM-DP Software Manual Rev. 2.0...
-
Page 71: Parameter Display And Configuration With The Tool Cict
CICT is a menu-controlled program for PC. It is used to display parameters and configure (limited) the CAN-CBM-DP module. It can be operated under Windows 3.11, Windows NT 4.x and Windows 95. At the moment CICT only supports 11-bit CAN identifiers. -
Page 72: Hardware Selection
2. Now the dialog box represented in the following figure appears (example CAN-CBM-DP). IN order to configure the CAN-CBM-DP module it has to be set as shown. The selection of the Serial Port depends on the interface available at your PC. If a mouse is already connected to interface COM1, please select COM2 for the module. -
Page 73: Online / Offline Configuration
Fig. 7.2.3: Select menu point Connect If a connection to the CAN-CBM-DP has been established, the message ‘ONLINE’ appears in the status line on the right below, and the CAN-CBM-DP module can be configured as described in the following chapter. -
Page 74: Configuration Of The Can-Cbm-Dp Module
Parameter Display and Configuration via CICT 7.2.4 Configuration of the CAN-CBM-DP Module In order to configure the CAN-CBM-DP module you have to select menu point Data Mapping from menu File or click the Data Mapping button in the tool bar. -
Page 75: Properties In The Data Mapping Dialog Box
In the status line of the Data Mapping dialog box the following properties are displayed: Fig. 7.2.6: Meaning of specifications in the status line PROFIBUS-DP Address The PROFIBUS-DP Address can only be read. The value read corresponds to the value set via the coding switches. Value range: 3...124 decimal CAN-CBM-DP Software Manual Rev. 2.0... - Page 76 Wakeup Time can be set in two different ways: 1. As described above. 2. Via the parameter telegram in the DP properties windows (refer to page 23) Both entries are equal. That means that the last specification is valid! CAN-CBM-DP Software Manual Rev. 2.0...
- Page 77 Parameter Display and Configuration via CICT SYNC Time: The CAN-CBM-DP module can cyclically transmit the commands SYNC and START for simple CANopen applications. The SYNC Time for the transmission can be specified in the properties window, via the Communication Window or via the tool CICT as described above.
-
Page 78: Display And Edit User Parameter Properties
Parameter Display and Configuration via CICT 7.2.4.2 Display and Edit User Parameter Properties In order to display parameter properties they have to be loaded from the CAN-CBM-DP module into the PC by means of the interface. In order to load the configuration currently stored in the CAN-CBM-DP module you have to select menu point Load from... - Page 79 This parameter shows whether the module has last been configured via the PROFIBUS. Only if an N for NO is displayed, it is possible to change parameters CAN Id and Format via the configuration program CICT. Otherwise (i.e. Y for YES) the configuration can only be changed via the PROFIBUS. CAN-CBM-DP Software Manual Rev. 2.0...
- Page 80 The bit should always be set to 0. If parameter Format has not been set, the default setting will be used. In default setting all bits are set to ‘0’, i.e. no data is being converted. CAN-CBM-DP Software Manual Rev. 2.0...
-
Page 81: Editing User Parameter Properties
Pictogram Meaning DP byte is assigned with entry unknown CAN identifier (CAN-ID = EEEE hex) communication window (CAN-ID = FFEF hex) Table 7.2.4: Pictograms in Edit Parameter window CAN-CBM-DP Software Manual Rev. 2.0... -
Page 82: Deleting All User Parameter Properties
Deleting all User Parameter Properties Select menu point Clear in menu CAN-CBM-DP. You are requested to save your changes in a file. All user parameter properties are deleted. -
Page 83: Data-Mapping Dialog Box In Page Mode
Most of the parameters have already been described above. Only the differing parameters are to explained shortly, here: Page Shows the number of the assigned page. Start, End Here, the first and last entry of a page are represented by a ‘1’. CAN-CBM-DP Software Manual Rev. 2.0... -
Page 84: Configuration Example
0309 FFEF 00 TX N communication window end mark These parameters are changable, if ConfigByDP = N. Table 7.2.12: Explanation of some parameters by means of an example configuration CAN-CBM-DP Software Manual Rev. 2.0... -
Page 85: Managing The Configuration Files
7.2.6 Managing the Configuration Files Loading the Configuration from the CAN-CBM-DP Module In order to load the configuration currently stored in the CAN-CBM-DP module, you have select menu point Load from... from menu CBM-DP. All data stored in the CAN-CBM-DP-module are read and displayed in the configuration window. - Page 86 Select CFG file (possibly change path). Click OK button or press >Enter< key. The Windows standard window for setting the printer options appears. Click OK button or press >Enter< key. The printout will be generated. CAN-CBM-DP Software Manual Rev. 2.0...
-
Page 87: Diagnose
Parameter Display and Configuration via CICT 7.2.7 Diagnose The functionality described here is valid for various esd-CAN modules. Therefore, the descriptions have been kept general. If limitations regarding the modules apply, this will be mentioned at the according place. The functionality described in this chapter is not being supported by CAN-Interface modules which use the standard esd-CAN protocol, but only by CAN-Interface modules with CANopen Protocol, apart from the CAN-CSC595/1. -
Page 88: Look Canopen Modules
CANOPEN standard objects: Device Type Manufacturer Device Name Manufacturer Hardware Version Manufacturer Software Version being displayed as shown in the figure on the right. Fig. 7.2.15: Menu Look CANopen Modules CAN-CBM-DP Software Manual Rev. 2.0... -
Page 89: Config Modules
No. specified under Module No.. Index Indicates the index of the SDO. Sub Index Indicates the sub index of the SDO. Data Here the data is entered which is to be written, or the received data is displayed. CAN-CBM-DP Software Manual Rev. 2.0... - Page 90 SDO_WRONG_SUBIND wrong subindex 0x06090030 SDO_VALUE_EXCEED specified value exceeds permissible thresholds 0x06090031 SDO_VALUE_2_HIGH value range too high 0x06090032 SDO_VALUE_2_LOW value range too low 0x08000000 SDO_OTHER_ERROR undefined error Table 7.2.7: Error codes of the SDO domain transfer CAN-CBM-DP Software Manual Rev. 2.0...
-
Page 91: Maintenance
Therefore, please execute these functions (reading and writing of memory cells) only after you have specifically talked about it with esd! By means of the Memory dialog data can be read or written in memory and controller of the interface module. - Page 92 :=#READ_ADDRESS_CW init_db :=#INIT_DB offset :=#INIT_OFFSET ret_value :=#t016 #BIT15 #BIT14 W#16#0 // means: configuration in FB1 is off #t016 // status of setup M034 #FREIGABE M014 #INIT_LIST_DB #t008 DB [#t008] // open DB with init-list #MOTOR CAN-CBM-DP Software Manual Rev. 2.0...
-
Page 93: Examples
Network 5: ----------- 95.0 M401 // CAN-ID = 0 // subcommand // command = 0: M499 M401: U 95.1 // start-frame ready ? M402 // CAN-ID = 0 (for start-frame) W#16#100 // CAN-data = 0x01,0x00 (start-frame) CAN-CBM-DP Software Manual Rev. 2.0... - Page 94 // command = 4: activate reception M499 M407: U 95.7 M408 W#16#187 // 1.PDO of motor 7 // subcommand // command = 4: activate reception M499 M408: U 96.0 M499 W#16#188 // 1.PDO of motor 8 CAN-CBM-DP Software Manual Rev. 2.0...
- Page 95 :=MB5 READ_DATA2 :=MB6 READ_DATA3 :=MB7 READ_DATA4 :=MB8 READ_DATA5 :=MB9 READ_DATA6 :=MB10 READ_DATA7 :=MB11 READ_LEN :=MB12 READ_FIFO_COUNT :=MB14 READ_COMMAND :=MB15 READ_RET_VAL :=MW14 WRITE_RET_VAL :=MW16 W#16#181 >I M601 W#16#1FF <I M601 W#16#181 // CAN-ID DBW [MD L#16 CAN-CBM-DP Software Manual Rev. 2.0...
- Page 96 ( in FB 3 FB 1 (motor set-up) and FB 2 (data exchange) are called ) CALL 3 , DB103 FREIGABE :=E125.7 KONFIG_DB:=W#16#5D // DB93: initialize motors 1,3,4,7,8 ; 1,4,8 DATEN_DB :=W#16#64 RET_VALUE:=MW16 >=I 99.7 // motors initiliazed => Communication Window can be used CAN-CBM-DP Software Manual Rev. 2.0...
- Page 97 BYTE B#16#0 B#16#6 length 30.0 CAN_ID6 DWORD DW#16#0 DW#16#EEEEEEEE CAN-identifier FORMAT6 BYTE B#16#0 B#16#0 format-byte LENGTH6 BYTE B#16#0 B#16#0 length CAN_ID7 DWORD DW#16#0 DW#16#0 CAN-identifier FORMAT7 BYTE B#16#0 B#16#0 format-byte LENGTH7 BYTE B#16#0 B#16#0 length CAN-CBM-DP Software Manual Rev. 2.0...
- Page 98 Data byte 1 data23 BYTE B#16#0 B#16#0 Data byte 2 data33 BYTE B#16#0 B#16#0 Data byte 3 data43 BYTE B#16#0 B#16#0 Data byte 4 data53 BYTE B#16#0 B#16#0 Data byte 5 laenge4 BYTE B#16#0 B#16#7 Length CAN-CBM-DP Software Manual Rev. 2.0...
- Page 99 = 2 => read (domain upload) v014 BYTE B#16#0 B#16#0 length v015 BYTE B#16#0 B#16#0 data 0 v016 BYTE B#16#0 B#16#0 data 1 v017 BYTE B#16#0 B#16#0 data 2 v018 BYTE B#16#0 B#16#0 data 3 CAN-CBM-DP Software Manual Rev. 2.0...
- Page 100 BYTE B#16#0 B#16#0 data 3 v0197 BYTE B#16#0 B#16#0 reserve v0108 WORD W#16#6040 W#16#6040 index v0128 BYTE B#16#0 B#16#0 subindex v0138 BYTE B#16#1 B#16#1 v0148 BYTE B#16#2 B#16#2 length v0158 BYTE B#16#0 B#16#0 data 0 CAN-CBM-DP Software Manual Rev. 2.0...
- Page 101 W#16#0 istposition3 DWORD DW#16#0 DW#16#0 force4 BYTE B#16#0 B#16#0 Motor 4 res4 BYTE B#16#0 B#16#0 steuerwort4 WORD W#16#0 W#16#0 sollposition4 DWORD DW#16#0 DW#16#0 empfangszaehler4 BYTE B#16#0 B#16#0 reserve4 BYTE B#16#0 B#16#0 statuswort4 WORD W#16#0 W#16#0 CAN-CBM-DP Software Manual Rev. 2.0...
- Page 102 128.0 force9 BYTE B#16#0 B#16#0 Motor 9 res9 BYTE B#16#0 B#16#0 steuerwort9 WORD W#16#0 W#16#0 sollposition9 DWORD DW#16#0 DW#16#0 empfangszaehler9 BYTE B#16#0 B#16#0 reserve9 BYTE B#16#0 B#16#0 statuswort9 WORD W#16#0 W#16#0 istposition9 DWORD DW#16#0 DW#16#0 CAN-CBM-DP Software Manual Rev. 2.0...
- Page 103 Examples This page is intentionally left blank. CAN-CBM-DP Software Manual Rev. 2.0...
- Page 104 80 xx Operational -> preoperational 81 xx Reset (e.g. CAN-I/O-module) 82 xx Reset communication Sync all Emergency message (e.g. by 80h + Node-ID 0...8 bytes error code CANopen-I/O-module) Node-ID..Node-ID of the accessed CANopen module CAN-CBM-DP Software Manual Rev. 2.0...
Need help?
Do you have a question about the CAN-CBM-DP and is the answer not in the manual?
Questions and answers