Advertisement
Quick Links
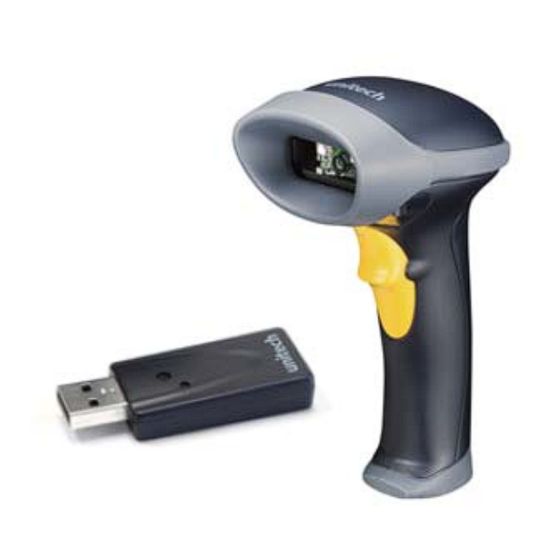
STEP3:Scan Dongle
Scan the barcode on the USB Dongle.
Settings and Configuration
The following section covers the most common
configuration settings for your MS842RP scanner.
For additional configuration options please visit
unitech scanners.com/MS842RP and select the
"Download" tab. You will find the user's manual
and a variety of other resources.
Trigger Mode
Manual Trigger- Normal *
Presentation Mode
Power Saving
(For HID Only)
Enabled
* :Default Option
For more detailed scanner setting, please go to www.ute.com to download the user manual and the
scanner configuration manager utility.
Setup and Installation
The following steps will walk you through
the installation process.
STEP1:Power On
Switch the power button to the on position.
STEP4:Connect Dongle To Host
Plug the USB Dongle to a free USB port of a host
computer. The MS842RP is now ready to use.
Dongle Mode
SPP
Mobile Phone Read Mode
Hand Held Scanning -
Mobile Phone
Presentation Scanning -
Mobile Phone
Disabled
MS842RP
STEP2:Charge
Connect the power supply cable to
the bottom of the MS842RP and to
an electrical outlet. Charge for at
least 5 hours.
Test and Finish
Open a word processing program such
as Microsoft Word or Notepad on your
host. Now scan the following barcode:
If the word "Unitech" appears on the
screen you have succesfully installed
your scanner.
HID*
Beep
Beep on Good Read
(Toggle)
Wireless 2D Imager Scanner
Quick Start Guide
System setting
Factory Default
Display F/W
Beep on Connection Change
(Toggle)
Version 1.0
401239G
Advertisement

Related Manuals for Unitech MS842RP


Summary of Contents for Unitech MS842RP
-
Page 1: Quick Start Guide
Plug the USB Dongle to a free USB port of a host as Microsoft Word or Notepad on your computer. The MS842RP is now ready to use. host. Now scan the following barcode: If the word “Unitech” appears on the screen you have succesfully installed your scanner. - Page 2 MS842RP Wireless 2D Imager Scanner Quick Start Guide Operation Mode wedge Batch Auto* Output data Transmit + Buffer Erase Batch Mode: Erase Erase Previous Entry Enter Batch Buffer Erase Batch Send Auto Mode: Erase Erase Previous Entry Enter Auto Buffer Erase...
Need help?
Do you have a question about the MS842RP and is the answer not in the manual?
Questions and answers