Table of Contents
Advertisement
Quick Links
Compact-Module CKR
Anleitung
Compact Modules CKR
Instructions
Modules Compacts CKR
Instructions
Linearmoduli Compact CKR
Istruzioni
The Drive & Control Company
The Drive & Control Company
R320103679 (2009.09)
DE+EN+FR+IT
Montage
Inbetriebnahme
Mounting
Start-up
Montage
Mise en service
Montaggio
Messa in funzione
Wartung
Maintenance
Entretien
Manutenzione
Advertisement
Table of Contents

Related Manuals for REXROTH CKR 9-70


Summary of Contents for REXROTH CKR 9-70
- Page 1 Compact-Module CKR R320103679 (2009.09) Anleitung DE+EN+FR+IT Compact Modules CKR Instructions Modules Compacts CKR Instructions Linearmoduli Compact CKR Istruzioni The Drive & Control Company The Drive & Control Company Montage Inbetriebnahme Wartung Mounting Start-up Maintenance Montage Mise en service Entretien Montaggio Messa in funzione Manutenzione...
-
Page 2: Table Of Contents
Bosch Rexroth AG Anleitung CKR R320103679 (2009.09) Sicherheit, Verweise, Symbole, Wartung Anziehdrehmomente Schmiernippel im Tischteil Sicherheitshinweise Schmieranschlüsse für Tischteilaufbauten 30 Kennzeichnung von Verweisen Schmiernippel in Verbindungsplatten Symbole Schmierstoff Anziehdrehmomente Schmierstoffmengen Übersicht Schmierintervalle Typenübersicht 10. Austausch Baugruppen Typenschild, Bestellung von 10.1 Übersicht Verschleißteilen... - Page 3 R320103679 (2009.09) Instructions CKR Bosch Rexroth AG Safety, Cross-References and Symbols, Maintenance Tightening torques Lube nipple in the carriage Safety notes and their symbols Lube ports for carriage attachments Cross-referencing symbols Lube nipple in connecting plates Symbols Lubricant Tightening torques...
- Page 4 3. Fixation 10.2.1 Echange de la tête d’extrémité Fixation des modules compacts par côté tendeur (CKR 9-70) pièces de bridage 10.2.2 Echange de la tête d’extrémité côté Fixation du module compact CKR 25-200 tendeur (CKR 12-90, 15-110, 20-145, par réglettes pour rainures ou lardons...
- Page 5 R320103679 (2009.09) Instructions CKR Bosch Rexroth AG Sicurezza, rimandi, simboli, coppie di Manutenzione serraggio Nippli ingrassatori nella tavola Avvertenze per la sicurezza Connettori per la lubrificazione Segni grafici di rimando e avvertenze di accessori delle tavole Simboli Nippli ingrassatori nelle piastre Coppie di serraggio d’accoppiamento...
-
Page 6: Anziehdrehmomente
Bosch Rexroth AG Anleitung CKR R320103679 (2009.09) Sicherheit, Verweise, Symbole, Anzieh- Safety, Cross-References and Symbols, drehmomente Tightening torques 1.1 Sicherheitshinweise 1.1 Safety notes and their symbols Als Sicherheitshinweise werden folgende Piktogramme The following symbols are used to identify safety notes:... - Page 7 R320103679 (2009.09) Instructions CKR Bosch Rexroth AG Sécurité, références croisées, Sicurezza, rimandi, simboli, coppie di symboles, couples de serrage serraggio 1.1 Prescriptions de sécurité 1.1 Avvertenze per la sicurezza Les pictogrammes suivants sont utilisés en tant que Vengono utilizzati i seguenti simboli grafici quali avvertenze per prescriptions de sécurité...
-
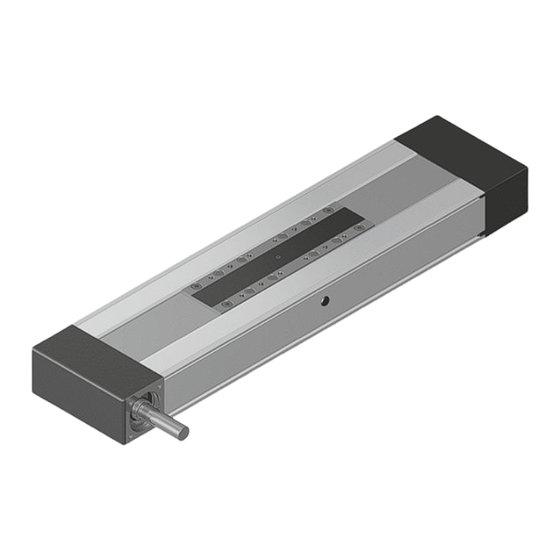
Page 8: Übersicht
Bosch Rexroth AG Anleitung CKR R320103679 (2009.09) Übersicht 2.1 Typenübersicht Rexroth Compact-Module CKR sind in fünf Baugrößen erhältlich. Sie werden auf Wunsch einbaufertig vormontiert geliefert. Rexroth Compact-Module CKR können mit Hilfe dieser Anleitung von (mm) (mm) einschlägig ausgebildeten Fachleuten 9-70... - Page 9 Le presenti istruzioni di mon- appropriately trained specialists to permettent le montage, la mise en taggio sono d’aiuto a personale mount, start up and maintain Rexroth service et l’entretien des modules specializzato per quanto riguarda Compact Modules CKR. compacts CKR Rexroth par un l’assemblaggio, la messa in funzione...
-
Page 10: Befestigung
Bosch Rexroth AG Anleitung CKR R320103679 (2009.09) Befestigung 3.1 Compact-Module mit Spannstücken befestigen Compact-Module nicht an den Endköpfen unterstützen (1)! Tragendes Teil ist der Hauptkörper. Diesen mög- lichst auf der ganzen Länge unterstüt- zen (2). Gleichmäßige Verteilung der (mm) (mm) Spannstücke auf der gesamten Länge... - Page 11 R320103679 (2009.09) Instructions CKR Bosch Rexroth AG Securing Fixation Fissaggio 3.1 Securing Compact Modules 3.1 Fixation des modules com- 3.1 Fissare i Linearmoduli using clamping fixtures pacts par pièces de bridage Compact con staffe Do not position any supports Ne pas supporter les modules...
-
Page 12: Anbauteile
Bosch Rexroth AG Anleitung CKR R320103679 (2009.09) Anbauteile F Auf Wunsch können folgende Komponenten bei der Bosch Rexroth AG einsatzfertig montiert werden. Nachträg- liches einbauen ist jederzeit möglich. 4.1 Schaltsystem mit Magnet- feldsensoren (alle Größen) 1 Dose mit Stecker 2 Magnetfeldsensor... - Page 13 Bosch vants peuvent être montés en usine chez presso la Bosch Rexroth AG i seguenti Rexroth AG, ready for use by the cus- Bosch Rexroth AG. Un rééquipement est componenti pronti per l’uso. È altrettanto tomer.
-
Page 14: Verbindungsplatte
Bosch Rexroth AG Anleitung CKR R320103679 (2009.09) 4.4 Verbindungsplatte 4.4.1 Verbindungsplatten montieren Verbindungsplatten können jederzeit nachgerüstet werden. • Wenn über diese Verbindungsplatten nachgeschmiert werden soll: Verbindungsplatten vor der Montage vollständig mit Fett füllen.! 9.3 + 9.4 • Gewindestift aus Tischteil entfer- nen und O-Ring in die Senkung der Verbindungsplatte legen. - Page 15 R320103679 (2009.09) Instructions CKR Bosch Rexroth AG 4.4 Connecting plates 4.4 Plaques de liaison 4.4 Piastre di accoppiamento 4.4.1 Mounting the connecting 4.4.1 Montage des plaques de 4.4.1 Montare le piastre di accop- plates liaison piamento Connecting plates can be retrofitted at Le rééquipement des plaques de liaison...
-
Page 16: Montage Schaltsystem
Bosch Rexroth AG Anleitung CKR R320103679 (2009.09) Montage Schaltsystem mit Magnetfeldsensoren F Schalter und Dose können jeder- zeit nachgerüstet und der Schaltpunkt verschoben werden. Der Schalteranbau ist nur auf einer Seite des Compact- Moduls zulässig und erfolgt erst nach Befestigung des Compact-Moduls am Unterbau. - Page 17 R320103679 (2009.09) Instructions CKR Bosch Rexroth AG Installing the Switching Montage du système Montaggio sistema System with magnetic de commutation avec interruttori con sensore field sensor capteur de champ magnetici magnétique F Switches and sockets can be F L’interrupteur et la prise peuvent...
-
Page 18: Dose Montieren
5.3 Dose montieren F Mehrere Montagevarianten für Dose und Stecker sind möglich. 5.3.1 • CKR 9-70, CKR 12-90, CKR 15-110 und CKR 20-145: Dose in die obere Nut am Hauptkörper einhängen (1). • CKR 25-200: Dose in die mittlere Nut am Hauptkörper einhängen (2). - Page 19 • CKR 9-70, CKR 12-90, CKR 15-110 • CKR 9-70, CKR 12-90, CKR 15-110 • CKR 9-70, CKR 12-90, CKR 15-110...
-
Page 20: Deckel Montieren
CKR 12-90, 15-110, 20-145, 25-200: punkt einstellen. Chemin de câbles / Canalina di fissaggio R0396 620 18 • Schalter mit Gewindestift fixieren. CKR 9-70: R0396 620 26 • Deckel wieder einschnappen. Dose / Socket / Prise / Presa R0375 400 00 Zur Funktionskontrolle Kapitel „Inbetriebnahme“... - Page 21 R320103679 (2009.09) Instructions CKR Bosch Rexroth AG 5.4 Mounting the cover 5.4 Montage du couvercle 5.4 Montare il coperchio • Measure out the required length of • Mesurer la protection du chemin de • Misurare, tagliare a misura, sbavare cover for the duct, cut the cover to câbles, la couper à...
-
Page 22: Montage Schaltsystem Mit Mechanischen Oder Induktiven Schaltern
Bosch Rexroth AG Anleitung CKR R320103679 (2009.09) Montage Schaltsystem mit mechanischen oder induktiven Schaltern (nur am CKR 25-200 unter Verwendung der Ver- bindungsplatte) F Das gesamte Schaltsystem muss auf einer Seite des Compact-Moduls montiert werden! Compact-Modul zuerst befestigen! ! 3. - Page 23 R320103679 (2009.09) Instructions CKR Bosch Rexroth AG Mounting the Switching Montage de système Montare il sistema System with mechanical de commutation avec interruttori con interrut- or proximity switches interrupteurs mécani- tori meccanici ovvero ques ou inductifs induttivi (only for CKR 25-200 when...
-
Page 24: Kabelkanal Montieren /Demontieren
Bosch Rexroth AG Anleitung CKR R320103679 (2009.09) 6.6 Kabelkanal montieren / demontieren Kabelkanal montieren • Länge des Kabelkanals messen. • Kabelkanal absägen und entgraten. • Löcher für Kabelausgänge ausmes- sen, körnen und bohren. • Wenn die vorhandenen Befesti- gungsbohrungen nicht ausreichen, zusätzliche Befestigungslöcher in... - Page 25 R320103679 (2009.09) Instructions CKR Bosch Rexroth AG 6.6 Mounting / removing 6.6 Montage / démontage 6.6 Montare / smontare la the cable duct du chemin de câbles canalina per cavi Mounting the cable duct Montage du chemin de câbles Montare la canalina per cavi •...
-
Page 26: Montage Antrieb
Bosch Rexroth AG Anleitung CKR R320103679 (2009.09) Montage Antrieb Motor mit Vorsatzgetriebe montieren Maximales Drehmoment und ma- ximale Drehzahl des Motors dürfen die Grenzwerte des Compact-Moduls bzw. des Vorsatzgetriebes nicht überschrei- ten! Siehe Katalog „Compact-Module“. F Das Getriebe ist für den Motoran- bau vormontiert. - Page 27 R320103679 (2009.09) Instructions CKR Bosch Rexroth AG Installing the Drive Montage de Montaggio l’entraînement dell’azionamento Mounting the motor with Montage du moteur avec Montare il motore con gear unit réducteur riduttore The maximum torque and maxi- Le couple maximal et la vitesse...
-
Page 28: Inbetriebnahme
Bosch Rexroth AG Anleitung CKR R320103679 (2009.09) Inbetriebnahme Normale Betriebsbedingungen / Normal operating conditions 8.1 Betriebsbedingungen Conditions de service normales / Condizioni di funzionamento normali Normale Betriebsbedingungen siehe Tabelle. Umgebungstemperatur / Ambient 10 °C ... 40 °C temperature / Température ambiante / •... - Page 29 R320103679 (2009.09) Instructions CKR Bosch Rexroth AG Start-up Mise en sevice Messa in funzione 8.1 Operating conditions 8.1 Conditions de service 8.1 Condizioni di funzionamento The normal operating conditions are Conditions de service normales, voir le Per condizioni di funzionamento normali given in table.
-
Page 30: Wartung
Bosch Rexroth AG Anleitung CKR R320103679 (2009.09) Wartung Anschlussmaße des Tischteils / Connection dimensions for carriage Dimensions de raccordement du plateau / Dimensioni d‘attacco della tavola F Durch die werkseitige Grundschmie- rung beschränkt sich die Wartung des CKR Ø Y auf das Schmieren der Kugelschienenfüh-... - Page 31 R320103679 (2009.09) Instructions CKR Bosch Rexroth AG Maintenance Entretien Manutenzione F Since basic lubrication is done F Du fait de la lubrification avant F Grazie alla lubrificazione di base ef- in-factory before shipment, all that is re- service en usine, l’entretien du module...
-
Page 32: Schmiernippel In Verbindungsplatten
Fett / Grease / Materialnummern / Part numbers • Lithiumseifenfett verwenden: Graisse / Grasso Références / Numeri di ordina- – für CKR 9-70/CKR 12-90: KP00K, zione Konsistenzklasse NLGI 00 9-70 – für andere CKR: KP2K, Dynalub 520 R3416 043 00 12-90 Konsistenzklasse NLGI 2. - Page 33 KP00K, consistency class • Utiliser graisse au savon de lithium : KP00K, classe di consistenza NLGI 00 – pour CKR 9-70/CKR 12-90 : NLGI 00 – For other CKR modules: KP2K, KP00K, classe de consistance – per altri CKR: KP2K, consistency class NLGI 2.
-
Page 34: Austausch Baugruppen
Bosch Rexroth AG Anleitung CKR R320103679 (2009.09) 10. Austausch Baugruppen 10. Sostituzione gruppi di componenti 10.1 Übersicht 10.1 Rappresentazione esplosa 10. Replacement of Assemblies 10.1 Overview 10. Echange des ensembles 10.1 Aperçu CKR 9-70 F Schematische Darstellung F Schematic representation F Représentation schématique... - Page 35 R320103679 (2009.09) Instructions CKR Bosch Rexroth AG Position BG = Baugruppe Bauteil Anzahl siehe Abschnitt Item AS = Assembly Component Units see section Position E = Ensemble Composant Nombre voir section Posizione GC = Gruppo di Componente Quantità vedere capitoli...
-
Page 36: Endkopf Spannseite Austauschen
Bosch Rexroth AG Anleitung CKR R320103679 (2009.09) 10.2. Endkopf Spannseite austauschen 10.2.1 Endkopf Spannseite austauschen (CKR 9-70) F Endköpfe werden als komplette Baugruppen geliefert. Stromversorgung unterbrechen! F Bevor der Zahnriemen entspannt wird, das Kapitel „Zahnriemen spannen“ 10.2.1. beachten ! 11. - Page 37 10.2.1 Replacing the idler end 10.2.1 Echange de la tête d’extrémité enclosure (CKR 9-70) côté tendeur (CKR 9-70) 10.2.1 Sostituire la testata tendi- cinghia (CKR 9-70) F End enclosures are supplied as F Les têtes d’extrémité sont livrées complete assembly kits.
- Page 38 Bosch Rexroth AG Anleitung CKR R320103679 (2009.09) 10.2.2 Endkopf Spannseite austauschen (CKR 12-90, 15-110, 20-145, 25-200) F Endköpfe werden als komplette Baugruppen geliefert. Stromversorgung unterbrechen! F Bevor der Zahnriemen entspannt wird, das Kapitel „Zahnriemen spannen“ beachten ! 11. • Die Achse mit Riemenrad (7) in die beiden Spannaufnahmen (1) stecken.
- Page 39 R320103679 (2009.09) Instructions CKR Bosch Rexroth AG 10.2.2 Replacing the idler end 10.2.2 Echange de la tête 10.2.2 Sostituire la testata enclosure (CKR 12-90, d’extrémité côté tendeur d’estremità, lato di 15-110, 20-145, 25-200) (CKR 12-90, 15-110, tensionamento 20-145, 25-200) (CKR 12-90, 15-110,...
-
Page 40: Zahnriemen Austauschen
Länge des Hauptkörpers / Length of the frame / Beispiel: Longueur du corps principal / Lunghezza del profilato di base CKR 9-70, Tischteil kurz, L= 500 mm, X Teilung des Zahnriemens / Toothed belt pitch / Pas de la courroie crantée / Passo della cinghia dentata = (2 ·... - Page 41 Example: Exemple: Esempio: CKR 9-70, short carriage, L= 500 mm, X CKR 9-70, plateau court, L= 500 mm, X CKR 9-70, tavola corta, L= 500 mm, X = (2·L+88) mm. = (2·L+88) mm. = (2·L+88) mm.
-
Page 42: Endkopf Antriebsseite Austauschen
Bosch Rexroth AG Anleitung CKR R320103679 (2009.09) 10.5 Endkopf Antriebsseite aus- tauschen F Endköpfe werden als komplette Baugruppen geliefert. Stromversorgung unterbrechen! F Bevor der Zahnriemen entspannt wird, das Kapitel „Zahnriemen spannen“ beachten ! 11. F Vor der Demontage des Endkopfes den Zahnriemen entspannen ! 10.4. - Page 43 R320103679 (2009.09) Instructions CKR Bosch Rexroth AG 10.5 Replacing the drive end block 10.5 Echange de la tête d’extré- 10.5 Sostituire la testata d’estre- mité côté entraînement mità, lato di azionamento F End blocks are supplied as F Les têtes d’extrémité sont livrées F Le testate d’estremità...
-
Page 44: Zahnriemen Spannen
Tensioning force of the axis / wiederholen. Force de précharge de l’axe / • Mit den seitlichen Gewindestiften (2) Forza di precarico dell’asse die Spanngewindestifte wieder fixieren (nicht bei CKR 9-70). 9-70 F Nicht mit Drehmoment anziehen. 12-90 1120 15-110 1410 •... - Page 45 Linearmoduli Compact dopo la loro that you return the complete Compact après l’échange d’éléments, de nous sostituzione, raccomandiamo in questi Module to Bosch Rexroth AG. renvoyer le module compact complet. casi di inviare il Linearmodulo completo.
- Page 46 Bosch Rexroth AG Anleitung CKR R320103679 (2009.09)
- Page 47 R320103679 (2009.09) Instructions CKR Bosch Rexroth AG...
- Page 48 97424 Schweinfurt, Germany Tel. +49 9721 937-0 Fax +49 9721 937-275 www.boschrexroth.com/dcl Technische Änderungen vorbehalten Subject to technical modifications Sous réserve de modifications techniques Soggetto a modifiche tecniche © Bosch Rexroth AG 2009 Printed in Germany R320103679 (2009.09) DE+EN+FR+IT • DCL/MKT2...
Need help?
Do you have a question about the CKR 9-70 and is the answer not in the manual?
Questions and answers