Advertisement
Quick Links
Advertisement

Related Manuals for Easypix DVC529


Summary of Contents for Easypix DVC529
- Page 1 USER MANUAL...
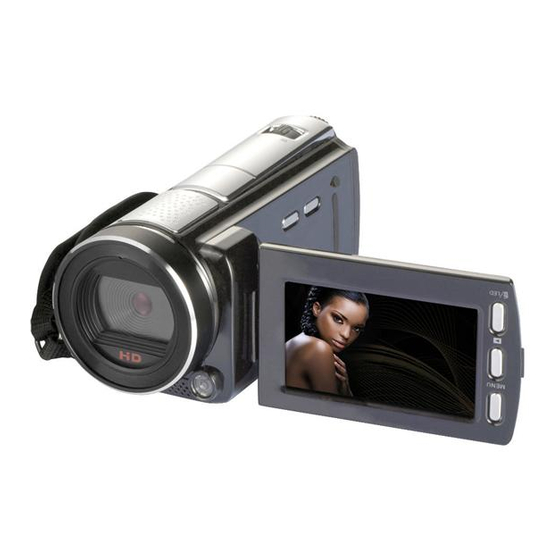
- Page 2 Parts of the camcorder 1: Preview button 2: Menu button 3: LCD screen 4: HDMI jack 5: Mode dial 6: Power LED 7: Shutter button 8: Charging LED 9: Up/Exposure button 10: Right button 11: OK button 12: Down/Self-timer button 13: Left button 14: USB jack 15: AV out jack...
- Page 3 19: Display button 20: Power button 21: Lens cover 22: Compensating LED 23: Microphone 24: Battery cover/SD card slot 2. Preparing for using Installing the Battery Push the locker of Battery cover (1) upward to open the battery cover. Place the lithium-ion battery or four AAA size batteries into the compartment.
- Page 4 Inserting the Memory Card This camcorder does not has an internal memory, If you want record you have to use a SD or MMC card. Turn off the camcorder before inserting or removing the memory card. Be sure to orient the card correctly when inserting it. Never try to force the memory card into the slot when you feel resistance.
- Page 5 Turn off the camcorder. Push the locker of Battery cover upward to open the battery cover. Insert the memory card as illustrated. Monitor screen display Capture mode [ 1. Camera Mode x1.5 2.Face Detect 3.Number of pictures remaining on SD Card 4.
- Page 6 Video record mode [ 1. Video recording icon 2. Recording time available 3. Video size 4. SD Card inserted 5. Battery power level 6. Date display 7. Zoom value level 8. Time display 9. Anti-shake 10. White Balance 11. Exposure Audio record mode [ 1.
- Page 7 Playback mode [ 1. Playback mode icon 2. Current file#/Total files on SD Card 3. Image size 4. Video size 5. Video recording time 6. Auido recording time 7. SD Card inserted 8. Battery power level 9. Date stamp 10. Press the shutter button to play or stop Video file, press the OK button to pause playing.
- Page 8 Recording a video clip 1: Turn on the camcorder and set the camcorder to video record mode( 2: Press the SHUTTER button to start recording. 3: Press the SHUTTER button again to end the recording. If the memory is full the camcorder will stop recording automatically. Taking still images 1: Set the camcorder to capture mode, the icon appears on the LCD...
- Page 9 2: Press the LEFT or RIGHT buttons to select the movie clips you want to playback. 3: Press the SHUTTER button to start playing. Press OK button to pause and press it again to continue. Press the SHUTTER button to stop playing.
- Page 10 LCD screen turns black, Connect the camcorder to a TV and the TV screen now performs as the camcorder LCD screen. Connect the camcorder to a TV via the TV-out cable (supplied) 。 Turn on the TV and the camcorder, and then set the TV to “AV” mode. When the camcorder is set to record mode, you can preview the subjects you want to record on the TV screen.
- Page 11 computer’s hard disk. Connecting the Camcorder to a PC with the USB Cable 1: Connect the supplied USB cable to the computer's USB port and turn on the camcorder. A string character “Mass Storage” appears on the screen when Connection to the computer has been successfully completed. 2: Open [My Computer] or [Windows Explorer].
- Page 12 [5M]: 2592x1944;[3M]: 2048x1536 ; [2M]:1600x1200;[VGA]:640x480. Video: 1080P:1920x1080; 720P:1280x720; VGA: 640x480; QVGA: 320x240. Sensitivity ISO100/200/400/ Auto White balance Auto/Daylight/Cloudy/Fluorescent/Incandescent Storage SD (up to 32G), MMC, Support SDHC Digital zoom Power Supply Li-Ion Battery/ALKALINE-battery Ambient Operating: 0° C to 40° C temperature Storage: -20 to 60°...
- Page 13 DECLARATION OF CONFORMITY Easypix herebly declares that the product DVC529 Full HD Focus is in conformity to all the essential requirements of Directive 1999/5/EC. The declaration of conformity can be downloaded here: http://www.easypix.info/download/pdf/doc_dvc529.pdf For technical help please visit our support area on www.easypix.eu.
Need help?
Do you have a question about the DVC529 and is the answer not in the manual?
Questions and answers