Table of Contents
Advertisement
Available languages
Available languages
Quick Links
Advertisement
Chapters
Table of Contents

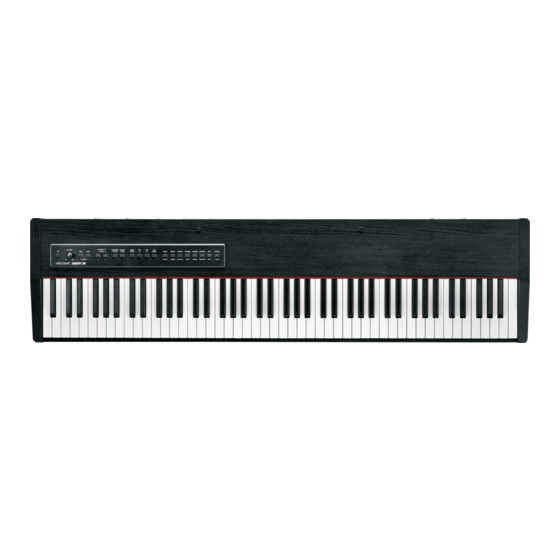
Related Manuals for Viscount Smart 30


Summary of Contents for Viscount Smart 30
- Page 1 SMART 30 DIGITAL PIANO Manuale Utente - IT User Manual - EN Ver. 1.0...
-
Page 3: Table Of Contents
SMART 30 Manuale Utente INDICE 1. Note importanti ..............................2 1.1 Cura del prodotto ..............................2 1.2 Note riguardanti il manuale ..........................2 2. Comandi e connessioni ..........................3 2.1 Pannello frontale ..............................3 2.2 Pannello posteriore............................... 4 3. Selezione ed utilizzo dei suoni ........................6 3.1 Selezione di un singolo suono .......................... -
Page 4: Note Importanti
SMART 30 Manuale Utente 1. NOTE IMPORTANTI 1.1 CURA DEL PRODOTTO Non applicate eccessiva forza alle strutture ed ai comandi dello strumento (manopole, pulsanti, tastiera ecc…). Non collocare, quando possibile, lo strumento in prossimità di unità che producano forti interferenze come apparecchi radio –... -
Page 5: Comandi E Connessioni
SMART 30 Manuale Utente 2. COMANDI E CONNESSIONI 2.1 PANNELLO FRONTALE 1. Pulsante [ ]: pulsante per la messa in Stand-by (modalità di basso consumo) e riaccensione dello strumento. Quando lo strumento è in Stand-by il led di questo pulsante è rosso. Premendo il pulsante il led diventa blu e lo strumento viene acceso, durante questa fase vengono accesi in sequenza i led dei pulsanti dei suoni (vedi punto 9). -
Page 6: Pannello Posteriore
SMART 30 Manuale Utente 2.2 PANNELLO POSTERIORE 1. Connettore [USB TO HOST]: presa USB di trasmissione e ricezione di dati MIDI con un computer per l’utilizzo di applicazioni per la registrazione e riproduzione di sequenze MIDI. 2. Connettore [PEDAL UNIT]: collegare qui il cavo proveniente dal gruppo a 3 pedali opzionale. - Page 7 è seguita da numeri e lettere). NOTE Viscount International S.p.A. non è responsabile per la perdita, l'intercettazione o l'abuso dei dati inviati o ricevuti tramite Bluetooth. Verificate sempre di condividere e ricevere dati da dispositivi affidabili e adeguatamente protetti.
-
Page 8: Selezione Ed Utilizzo Dei Suoni
3.1 SELEZIONE DI UN SINGOLO SUONO Tramite i pulsanti descritti nel punto 9 del par. 2.1 è possibile selezionare i suoni di cui dispone il pianoforte SMART 30. Quando è selezionato un singolo suono, lo strumento è in modalità Single . -
Page 9: Sovrapposizione Di Due Suoni (Modalità Dual)
SMART 30 Manuale Utente 3.2 SOVRAPPOSIZIONE DI DUE SUONI (modalità DUAL) E’ possibile suonare due suoni contemporaneamente su tutta l’estensione della tastiera. Questa modalità viene denominata Dual . Sound 1 Sound 2 Per attivare questa modalità premere il pulsante di uno dei due suoni (anche due o più... -
Page 10: Suonare In Due (Modalità Twin Piano)
SMART 30 Manuale Utente Per modificare i suoni delle parti destra o sinistra, tenere premuto rispettivamente [R] o [L] e premere il pulsante del suono desiderato. Come per le altre modalità, anche in Split è possibile selezionare e regolare il riverbero, così come impostare la trasposizione per ottave, diversificabile per il Sound1 ed il Sound2 . -
Page 11: Bilanciamento Dei Volumi Di Due Suoni
SMART 30 Manuale Utente impostare la trasposizione per ottave, diversificabile per il Sound1 ed il Sound2 . E’ inoltre possibile regolare il bilanciamento del volume dei due suoni. La regolazione di questi parametri è descritta nei prossimi paragrafi. CAMBIARE I SUONI NELLE DUE SEZIONI DI TASTIERA Premendo un singolo pulsante dei suoni, su entrambe le sezioni viene assegnato lo stesso suono. -
Page 12: Trasposizione Per Semitoni Della Tastiera
SMART 30 Manuale Utente B7: cattedrale. C8: effetto disattivato. REGOLAZIONE DELLA PROFONDITA’ DEL RIVERBERO pred. Per regolare la profondità (Depth) dell’effetto, da un valore minimo di 0 a un valore massimo di 12, tenendo premuto [METRONOME/STYLE] premere: F7: per diminuirla. -
Page 13: Regolazione Della Risonanza Delle Corde
SMART 30 Manuale Utente 3.10 REGOLAZIONE DELLA RISONANZA DELLE CORDE Nei pianoforti acustici, quando il pedale Sustain è premuto tutti gli smorzatori sono sollevati, pertanto tutte le corde del pianoforte sono libere di rispondere all'energia emessa da quelle delle note suonate, con il risultato che esse stesse iniziano a vibrare leggermente in ragione di un fenomeno fisico conosciuto come ‘‘risonanza... -
Page 14: Suonare Con L'accompagnamento
4.1 SELEZIONE ED ESECUZIONE DI UNO STILE Il pianoforte SMART 30 dispone di una vasta gamma di stili con i quali è possibile essere accompagnati da altri strumenti o solo da un pianoforte. Ciò risulta particolarmente utile per completare le proprie esecuzioni o per l’apprendimento. -
Page 15: Regolazione Del Volume
SMART 30 Manuale Utente viene suonato un accordo, il led si accende a luce fissa e lo stile selezionato inizia ad accompagnare l’esecuzione del musicista. Ripremere [PIANIST STYLE] per arrestare l’accompagnamento. Volume Stili/Metronomo 4.2 REGOLAZIONE DEL VOLUME Per modificare il volume degli stili, prima che ne venga avviato uno oppure durante l’esecuzione, tenendo premuto il pulsante [METRONOME/STYLE]... -
Page 16: Funzionamento Del Basso Negli Style
SMART 30 Manuale Utente Full Keyboard Chord OFF: gli accordi vengono riconosciuti nella parte sinistra della tastiera, a partire dal primo La (A0), fino al punto di Split (vedi par. 3.3). Il riconoscimento degli accordi avviene anche con una sola nota premuta. -
Page 17: Utilizzo Del Metronomo
SMART 30 Manuale Utente 5. UTILIZZO DEL METRONOMO Il metronomo è un utile strumento per esercitarsi seguendo un preciso tempo. Il metronomo di cui dispone lo strumento è regolabile nel tempo metronomico, nella divisione musicale e nel volume. Per accendere il metronomo premere il pulsante [METRONOME/STYLE]. Il led rosso indica il battere, il led blu il levare. -
Page 18: Ascolto Dei Brani Di Pianoforte
SMART 30 Manuale Utente 6.2 ASCOLTO DEI BRANI DI PIANOFORTE Per ascoltare i brani di pianoforte tenendo premuto il pulsante [PLAY] premere uno dei tasti da E2 a B5. Selezione brani di pianoforte Per scopi di apprendimento è possibile escludere le note suonate con la mano destra o la mano sinistra di questi brani, così... -
Page 19: Registrazione Ed Ascolto Delle Proprie Esecuzioni
SMART 30 Manuale Utente 7. REGISTRAZIONE ED ASCOLTO DELLE PROPRIE ESECUZIONI Lo strumento dispone di un sistema di registrazione e di riproduzione delle proprie esecuzioni musicali. Il sistema di registrazione acquisisce i seguenti dati: suono o suoni selezionati note... -
Page 20: Riproduzione
SMART 30 Manuale Utente 7.2 RIPRODUZIONE Selezione locazioni di memoria Per riprodurre l’ultima esecuzione registrata, premere [PLAY], il cui led si accende a luce fissa. Per riprodurre un’esecuzione salvata in una delle 8 locazioni di memoria, tenendo premuto [PLAY] premere uno degli 8 tasti da E1 a B1. -
Page 21: Disattivare Gli Altoparlanti Interni
SMART 30 Manuale Utente 8.4 DISATTIVARE GLI ALTOPARLANTI INTERNI (Altop. ON) Se necessario è possibile disabilitare l’amplificazione interna per fare in modo che il suono non venga emesso dagli altoparlanti ma sia presente solo in cuffia e nell’uscita di linea [OUTPUT]. -
Page 22: Guida Ai Problemi Piu' Comuni
Si sta utilizzando un sistema operativo diverso da iOS. NOTA Qualora questa guida non sia sufficiente a risolvere il problema che si sta verificando contattare il servizio di assistenza tecnica all’indirizzo email service@viscount.it segnalando il tipo di problema. IT - 20... -
Page 23: Guida Rapida
SMART 30 Manuale Utente 10. GUIDA RAPIDA Tenendo premuto il pulsante [PLAY] Tenendo premuto il pulsante [METRONOME/STYLE] IT - 21... - Page 24 SMART 30 Manuale Utente Tenendo premuti i pulsanti [PLAY] e [METRONOME/STYLE] IT - 22...
-
Page 25: Midi
SMART 30 Manuale Utente 11. MIDI LISTA PROGRAM CHANGE Bank Select MSB Program Change Trasmesso Ricevuto (CC 0) Piano 1 Piano 1 Piano 2 Piano 2 Piano 3 Piano 3 Harpsi Harpsi E.Piano 1 E.Piano 1 E.Piano 2 E.Piano 2 ----------- E.Piano 3... - Page 26 MIDI IMPLEMENTATION CHART Viscount Smart 30 Version: 1.0 Digital Piano Date: 11/10/2016 FUNCTION… TRANSMITTED RECEIVED REMARKS BASIC Default 1- 2 1÷16 CHANNEL Changed ******** ******** MODE Default Mode 3 Mode 3 ******** ******** Messages Altered ******** ******** NOTE 1÷127 1÷127...
- Page 27 Smaltimento dei rifiuti elettrici ed elettronici (applicabile nell’Unione Europea e negli altri paesi europei con servizio di raccolta differenziata) Ai sensi dell’art. 13 del Decreto legislativo 25 luglio 2005, n. 151 “Attuazione delle Direttive 2002/95/CE, 2002/96/CE e 2003/108/CE” II simbolo presente sul prodotto o sulla sua confezione indica che il prodotto non verrà trattato come rifiuto domestico.
- Page 29 SMART 30 User Manual TABLE OF CONTENTS 1. Important notes .............................2 1.1 Looking after the product ............................. 2 1.2 Notes about the manual ............................2 2. Controls and connections ..........................3 2.1 Front panel ................................3 2.2 Rear panel ................................4 3.
-
Page 30: Important Notes
SMART 30 User Manual 1. IMPORTANT NOTES 1.1 LOOKING AFTER THE PRODUCT Do not apply excessive force to the organ’s structures or the controls (knobs, buttons, keyboard etc.). When possible, do not place the instrument close to units which generate strong interference, such as radios, TVs, computer videos, etc. -
Page 31: Controls And Connections
SMART 30 User Manual 2. CONTROLS AND CONNECTIONS 2.1 FRONT PANEL 1. [ ] button: Standby (energy saving mode) and Switch on button. When the instrument enters stand-by mode, the light turns red. Pressing the button the instrument is switched on and the light turns blue; the sound button lights (see point 9) are turned on in sequence. -
Page 32: Rear Panel
SMART 30 User Manual 2.2 REAR PANEL 1. [USB TO HOST] connector: USB connector for the transmission and reception of MIDI data to and from a computer, running applications for the recording and playback of MIDI sequences. 2. [PEDAL UNIT] connector: connect here the cable from the optional 3-pedals unit. - Page 33 Bluetooth HX- device (the name of the device is followed by numbers and letters). NOTES Viscount International S.p.A. is not responsible for the loss, interception, or misuse of data sent or received via Bluetooth. ...
-
Page 34: Selecting And Using Sounds
3.1 SELECTING A SINGLE SOUND Using the buttons described in section 9 of the par. 2.1 you can select the available sounds of the SMART 30 piano. When a single sound is selected, the instrument is in Single mode. As you can see, around each button are printed the names of two different sounds, one above and one below the button itself. -
Page 35: Layering Two Sounds (Dual Mode)
SMART 30 User Manual 3.2 LAYERING TWO SOUNDS (DUAL mode) It is possible to play two sounds simultaneously across the entire range of the keyboard. This mode is called Dual. Sound 1 Sound 2 To activate this mode, press the button of one of the two sounds... -
Page 36: Playing In Two (Twin Piano Mode)
SMART 30 User Manual press the desired sound. As with the other modes, also in Split you can select and adjust the reverb, as well as set the transposition by octaves, separately for Sound1 and Sound2. It is also possible to adjust the volume balance of the two sounds . -
Page 37: Volume Balance Of Two Sounds
SMART 30 User Manual CHANGING THE SOUNDS OF THE TWO KEYBOARD SECTIONS By pressing a single sound button, both sections are assigned the same sound. To select the sound of the left section, hold down the [L] button, then press the sound button you wish to use. -
Page 38: Keyboard Transposition By Semitones
SMART 30 User Manual NOTES In Dual and Split mode, depth adjustment only affects Sound1. Reverb type is the same for all the sounds, reverb depth can be set sound by sound. 3.8 KEYBOARD TRANSPOSITION BY SEMITONES... -
Page 39: Setting The Touch Sensitivity
SMART 30 User Manual 3.11 SETTING THE TOUCH SENSITIVITY The instrument has four levels of sensitivity to pressure, that is, how Touch Sens. the instrument responds to the strength applied to the keyboard. To select the level of touch sensitivity, press and hold the [PLAY]... -
Page 40: Playing With Accompaniment
4.1 SELECTING AND PLAYING A STYLE The piano SMART 30 features a wide range of styles with which you can be accompanied by other instruments or only by a piano. This is especially useful to enrich your performances or for learning. The instrument is able to recognize the harmony of a piece, thus the accompaniment plays perfectly in tune with what the musician is playing. -
Page 41: Adjusting The Volume
SMART 30 User Manual Styles/Metronome Volume 4.2 ADJUSTING THE VOLUME To change the volume of the styles, press and hold the [METRONOME/ STYLE] button, and simultaneously use the keys from A0 (minimum volume) to F#1 (maximum volume). This can be done either before starting a style, or while it is playing. -
Page 42: The Bass In Styles
SMART 30 User Manual Full Keyboard Chord OFF, chords are recognized only on the left side of the keyboard, from the first A (A0), to the split point (see par. 3.3). Even a single key is recognized as a chord. -
Page 43: Using The Metronome
SMART 30 User Manual 5. USING THE METRONOME The metronome is a useful tool to practice a precise tempo. It has different settings that can be adjusted: tempo, time signature and volume. To activate the metronome, press the [METRONOME/STYLE] button. The red light indicates the beat, the blue light indicates the upbeat. -
Page 44: Playing Piano Songs
SMART 30 User Manual 6.2 PLAYING PIANO SONGS To listen to the piano songs press and hold [PLAY] button, then press one of the buttons from E2 to B5. Piano Songs Selection For learning purposes, in these songs the notes played with the right hand or the left hand can be excluded, so that you can play the missing part on the keyboard. -
Page 45: Recording And Playback
SMART 30 User Manual 7. RECORDING AND PLAYBACK The instrument is equipped with a tool to record and replay your performances. The following data can be recorded the following data: selected sound(s) notes pedals style balance between two sounds... -
Page 46: Additional Functions
SMART 30 User Manual 8. ADDITIONAL FUNCTIONS 8.1 ENERGY SAVING MODE Auto Power Off To avoid unnecessary use of electric energy, the instrument switches off automatically after 30 minutes of inactivity (of keyboard, panel, pedals and lack of received MIDI data). However it is possible to disable this function. -
Page 47: Saved Parameters
SMART 30 User Manual 8.5 SAVED PARAMETERS When the instrument is switched off (also in Stand-By) not all settings are saved. These settings will be lost and then reset to their default values the next time the instrument is switched on. The following settings are saved:... -
Page 48: Troubleshooting
You are not using an iOS operating system. NOTE Should the tips contained in this guide be insufficient to solve your problem, please get in touch with our technical assistence by writing an email to service@viscount.it , describing your current problem. EN - 20... -
Page 49: Quick Guide
SMART 30 User Manual 10. QUICK GUIDE While holding down the [PLAY] button While holding down the [METRONOME/STYLE] button EN - 21... - Page 50 SMART 30 User Manual While holding down the [PLAY] and [METRONOME/STYLE] buttons EN - 22...
-
Page 51: Midi
SMART 30 User Manual 11. MIDI PROGRAM CHANGE LIST Bank Select MSB Program Change Transmitted Received (CC 0) Piano 1 Piano 1 Piano 2 Piano 2 Piano 3 Piano 3 Harpsi Harpsi E.Piano 1 E.Piano 1 E.Piano 2 E.Piano 2 ----------- E.Piano 3... - Page 52 MIDI IMPLEMENTATION CHART Viscount Smart 30 Version: 1.0 Digital Piano Date: 11/10/2016 FUNCTION… TRANSMITTED RECEIVED REMARKS BASIC Default 1- 2 1÷16 CHANNEL Changed ******** ******** MODE Default Mode 3 Mode 3 ******** ******** Messages Altered ******** ******** NOTE 1÷127 1÷127...
- Page 53 Disposal of old Electrical & Electronic Equipment (Applìcable throughout the European Union and other European countries with separate collection programs) Dir. 2002/95/CE, 2002/96/CE e 2003/108/CE This syrnbol, found on your product or on its packaging, indicates that this product should not be treated as household waste when you wish to dispose of it.
- Page 54 Viscount International S.p.A. Via Borgo, 68 / 70 – 47836 Mondaino (RN), ITALY Tel: +39-0541-981700 Fax: +39-0541-981052 Website: www.viscountinstruments.com...
Need help?
Do you have a question about the Smart 30 and is the answer not in the manual?
Questions and answers