Table of Contents
Advertisement
Available languages
Available languages
Quick Links
Advertisement
Chapters
Table of Contents

Related Manuals for Viscount Concerto III


Summary of Contents for Viscount Concerto III
- Page 1 Concerto III Manuale Operativo Operating Manual Ver. EU - 1.1...
-
Page 3: Table Of Contents
Viscount Concerto III - Manuale Operativo INDICE 1. Note importanti ........................... 3 1.1 Cura del prodotto ........................3 1.2 Note riguardanti i floppy disk....................3 1.3 Note riguardanti il manuale ....................4 2. Comandi e connessioni ....................... 5 2.1 I pannelli laterali ........................5 2.2 Il pannello centrale ......................... - Page 4 Viscount Concerto III - Manuale Operativo 8. Registrare e riprodurre esecuzioni musicali ................44 8.1 Registrare un esecuzione musicale ..................44 8.2 Riprodurre un esecuzione musicale ..................47 8.3 Attivare e impostare il metronomo ..................48 8.4 Impostare la divisione musicale ................... 49 8.5 Quantizzazione degli eventi MIDI nelle basi registrate ............
-
Page 5: Note Importanti
Viscount Concerto III - Manuale Operativo 1. NOTE IMPORTANTI 1.1 CURA DEL PRODOTTO • Non applicate eccessiva forza alle strutture ed ai comandi (manopole, registri, pulsanti,) dell’organo. • Non collocare, quando possibile, lo strumento in prossimità di unità che producano forti interferenze come apparecchi radio –... -
Page 6: Note Riguardanti Il Manuale
Viscount Concerto III - Manuale Operativo 1.3 NOTE RIGUARDANTI IL MANUALE • Conservate con cura questo manuale. • Il presente manuale costituisce parte integrante dello strumento. Le descrizioni e le illustrazioni contenute nella presente pubblicazione si intendono non impegnative. • Ferme restando le caratteristiche essenziali dello strumento, il costruttore si riserva il diritto di apportare eventuali modifiche di parti, dettagli ed accessori che riterrà... -
Page 7: Comandi E Connessioni
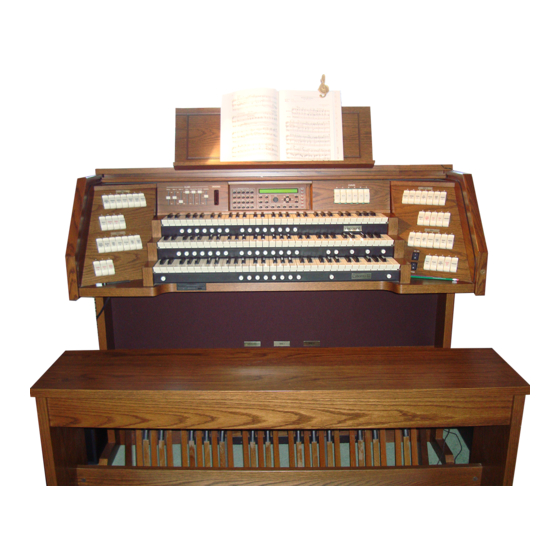
Viscount Concerto III - Manuale Operativo 2. COMANDI E CONNESSIONI 2.1 I PANNELLI LATERALI 1. Registri [MAN. II]: tramite questi registri potrete comporre la sonorità desiderata per il secondo manuale. 2. Registri [PEDAL]: in questa sezione sono raccolti i registri della pedaliera. -
Page 8: Il Pannello Centrale
Viscount Concerto III - Manuale Operativo 2.2 IL PANNELLO CENTRALE Versione con voci Orchestra Versione senza voci Orchestra 7. Slider [VOLUMES]: tramite questi controlli potrete regolare i volumi di tutte le sezioni dell’organo e più precisamente: o [PEDAL]: volume della pedaliera. - Page 9 9. Pulsanti [ORCHESTRA SECTION] (solo versione con voci Orchestra): in questa sezione sono raccolte le voci Orchestra dell’organo. Una delle caratteristiche principali del Concerto III è data proprio dalla presenza di queste voci tramite le quali suonare tutti gli strumenti previsti dallo standard General MIDI ed arricchire le sonorità...
-
Page 10: I Comandi Sui Divisori Dei Manuali
Orchestra) di tutti i manuali e della pedaliera. 16. Memorie dedicate: le memorie del Concerto III includono anche sei memorie dedicate della pedaliera (16a), del Man.III (16b), del Man.II (16c) e del Man.I (16d). Nelle memorie dedicate è... - Page 11 Viscount Concerto III - Manuale Operativo MEMORY BANK). Questo parametro risulta di fondamentale importanza in caso di utilizzo dello strumento da parte di più organisti, ognuno dei quali potrà effettuare le proprie memorizzazioni all’interno di un banco di memoria. Per il salvataggio delle memorie fate riferimento al punto 17.
-
Page 12: I Comandi Sulla Pedaliera
Viscount Concerto III - Manuale Operativo 2.4 I COMANDI SULLA PEDALIERA 26. Pistoni delle unioni: questi pistoni replicano le funzioni dei registri [COUPLERS] presenti sul pannello centrale. Per la descrizione dettagliata di ogni singola unione consultare il punto 14 del par. 2.2. -
Page 13: Le Connessioni Poste Sotto I Manuali
35. Prese [MIDI]: prese pentapolari DIN tramite le quali collegare strumenti dotati di interfaccia MIDI. Tramite la presa [IN] potrete ricevere i messaggi MIDI generati da sorgenti MIDI esterne, la presa [OUT] trasmette i messaggi MIDI generati dal Concerto III, la presa [THRU] trasmette gli stessi dati MIDI ricevuti dalla presa [IN]. -
Page 14: Le Connessioni Poste Sul Pannello Posteriore
Orchestra, mentre nelle [OUT 1] e [OUT 2] saranno presenti le voci liturgiche in base alle impostazioni della funzione AMPLIFICATION SYSTEM. Nella versione del Concerto III senza voci Orchestra, le uscite ad esse dedicate non sono presenti, per cui si avrà: o [OUT 1 (GENERAL)]: collegando questi Jack, in queste uscite saranno presenti le voci di tutto l’organo. - Page 15 Viscount Concerto III - Manuale Operativo ESEMPI DI UTILIZZO DELLE USCITE [MAIN OUTPUTS] - Collegamento di tutte le uscite [MAIN OUTPUTS] - Collegamento delle uscite [OUT 1] e [OUT 2] - Collegamento della sola uscita [OUT 1]...
-
Page 16: L'unità Centrale Di Controllo
[SET-UP]: regolazione dell’equalizzatore, del Tremolo e del Riverbero (cap. 7). 3. Sequencer: in questa sezione sono raccolti i pulsanti per la gestione del sequencer multitraccia di cui è dotato il Concerto III (cap. 8). o [RECORD]: pulsante per avviare una sessione di registrazione (par. 8.1). - Page 17 Viscount Concerto III - Manuale Operativo 4. Pulsanti per la gestione delle funzioni a display: tramite questi pulsanti è possibile muovere il cursore, impostare i valori, selezionare le videate e confermare o meno eventuali richieste da parte del sistema. o [VALUE]: encoder rotativo per la regolazione dei parametri.
- Page 18 Questo temperamento riveste un’importanza particolare, in quanto usato normalmente in Europa nei secoli XVI e XVII, fino ai primi del ‘700. Ecco quindi i sei temperamenti di cui dispone il Concerto III, primo fra tutti il “mesotonico” o MEANTONE.
-
Page 19: Funzioni Per La Gestione Delle Voci Dell'organo
Viscount Concerto III - Manuale Operativo 4. FUNZIONI PER LA GESTIONE DELLE VOCI DELL’ORGANO Importante innovazione dell’organo Concerto III è data dal fatto di poter caricare voci liturgiche in sostituzione di quelle inizialmente inserite dai nostri studi, semplicemente richiamando una funzione e display ed utilizzando gli appositi floppy disk. - Page 20 Viscount Concerto III - Manuale Operativo La funzione in oggetto prevede due diverse modalità di caricamento, per cui è possibile installare: tutte le voci di un manuale o della pedaliera. la singola voce. CARICAMENTO DI TUTTE LE VOCI DI UN MANUALE O DELLA PEDALIERA...
- Page 21 Viscount Concerto III - Manuale Operativo A procedura ultimata il display visualizzerà: indicando ora di verificare le etichette posizionate sui registri in base alle nuove voci caricate. Premere [EXIT/NO] ed eseguire la funzione LABEL CHECK descritta al par. 4.4. CARICAMENTO DELLA SINGOLA VOCE Per procedere con il caricamento di una voce, selezionare dal menu VOICES, la funzione LOAD VOICE FROM DISK.
- Page 22 Viscount Concerto III - Manuale Operativo INFORMAZIONI SUI FILE DELLE VOCI Il Concerto III è in grado di caricare nuovi voci nella propria memoria interna tramite cinque tipi di file: 1) .GRP: indica quali file .KEY, .PED o .DET delle voci debbano essere letti.
-
Page 23: Ordinamento Delle Voci
LABEL CHECK. 4.3 REGOLAZIONE DEI VOLUMI DELLE VOCI Ulteriore personalizzazione del Concerto III può essere apportata tramite la regolazione dei volumi di ogni singola voce in un range da –12 dB a +6 dB. Per richiamare la funzione in oggetto selezio- nare la voce VOICES VOLUME e premere [ENTER/YES], il display visualizzerà:... -
Page 24: Verifica Delle Etichette Dei Registri
Viscount Concerto III - Manuale Operativo Posizionare il cursore sulla voce desiderata e utilizzare l’encoder per modificare il valore (espresso in dB). La modifica sarà udibile in tempo reale al fine di agevolare l’utente nella regolazione desiderata. Utilizzare i pulsanti [CURSOR (PG) DOWN] e [CURSOR (PG) UP] per visualizzare le restanti voci. -
Page 25: Messaggi Di Errore - Menu Voices
Viscount Concerto III - Manuale Operativo SOSTITUZIONE DELLE ETICHETTE Come abbiamo visto, dopo aver caricato un set di voci può essere necessario sostituire le etichette dei registri, in quanto la maggior parte delle voci saranno cambiate e non ci sarà più la corrispondenza tra nome del registro e voce caricata in memoria. - Page 26 Viscount Concerto III - Manuale Operativo Nel floppy disk non è presente il file .DAT, visualizzato sul display, necessario per il caricamento della voce. FILE.KEY NOT FOUND Nel floppy disk non è presente il file .KEY, visualizzato sul display, necessario per il caricamento della voce.
-
Page 27: Funzioni Riguardanti I Floppy Disk
Viscount Concerto III - Manuale Operativo 5. FUNZIONI RIGUARDANTI I FLOPPY DISK Per accedere alle funzioni di gestione dei floppy disk e dei file in essi memorizzati, premere il pulsante [DISK] dopo aver inserito un floppy nel drive. Il sistema, dapprima, procederà con la lettura del disco, visualizzando: quindi: Come è... -
Page 28: Visualizzare Il Contenuto Dei Floppy
Viscount Concerto III - Manuale Operativo NOTE IMPORTANTI Il menu DISK è richiamabile solo in caso di floppy disk inserito nel drive. Richiamando il menu DISK con inserito un floppy non formattato, il sistema avvierà automaticamente la funzione di formattazione descritta nel par. 5.3. - Page 29 Viscount Concerto III - Manuale Operativo inserire ora il floppy per procedere con la scrittura dei dati. Trattandosi di copia fisica, non sarà possibile copiare un intero floppy in un unico passaggio, pertanto il sistema chiederà di estrarre il disco di destinazione: e di reinserire quello sorgente.
-
Page 30: Formattazione Dei Floppy Disk
Viscount Concerto III - Manuale Operativo 5.3 FORMATTAZIONE DEI FLOPPY DISK Qualora vengano utilizzati floppy disk non formattati, prima di essere utilizzati con il Concerto III ® è necessario eseguire una formattazione. Il sistema formatta i dischi in formato MS-DOS , permet- tendo quindi di utilizzare questi floppy anche con Personal Computer e/o Sequencer. -
Page 31: Salvataggio Su Disco Delle Memorie E Impostazioni Dell'organo
Viscount Concerto III - Manuale Operativo o FREE SPACE: indica la quantità di spazio libero presente nel disco. o FILE ON DISK: riporta il numero di file attualmente memorizzati nel floppy disk. Premere il pulsante [EXIT/NO] per tornare a visualizzare il menu DISK. -
Page 32: Caricare Le Memorie E/O Le Impostazioni Dell'organo Salvate Su Disco
Viscount Concerto III - Manuale Operativo Qualora, prima della videata precedentemente riportata, apparisse il messaggio: ciò sta ad indicare che è già presente nel floppy disk un file con il nome precedentemente composto. Premere [ENTER/YES] per sovrascrivere il file originale o [EXIT/NO] per annullare il salvatag- gio. -
Page 33: Copia Di Singoli File
Viscount Concerto III - Manuale Operativo 5.7 COPIA DI SINGOLI FILE Qualora si desideri copiare uno o più file da un floppy disk in un altro, è necessario richiamare la funzione FILE COPY. A tal fine selezionare il campo COPY presente nella riga inferiore del menu DISK e premere [ENTER/YES]. - Page 34 Viscount Concerto III - Manuale Operativo Dopo aver avviato la copia il display visualizzerà: Terminata la lettura del primo file, verrà chiesto di estrarre il disco sorgente: e di inserire quello di destinazione (ovvero quello in cui si desidera copiare i file).
-
Page 35: Rinomina Dei File
Viscount Concerto III - Manuale Operativo 5.8 RINOMINA DEI FILE La funzione FILE RENAME permette di rinominare i file memorizzati nei floppy. Per richiamare la funzione in oggetto selezionare il campo REN e premere [ENTER/YES], il display visualizzerà il contenuto del floppy disk: tramite i pulsanti [CURSOR], ora, selezionare il file che si desidera rinominare e premere [ENTER]. -
Page 36: Cancellazione Dei File
Viscount Concerto III - Manuale Operativo 5.9 CANCELLAZIONE DEI FILE Per cancellare eventuali file memorizzati nei floppy disk è necessario richiamare la funzione FILE DELETE: selezionare pertanto la voce DEL nel menu DISK e premere [ENTER/YES]. Tramite queste voci a display è possibile cancellare: o DIRECTORY: uno dei file presenti nel disco. -
Page 37: Informazioni Relative I File
Viscount Concerto III - Manuale Operativo Premere ora [ENTER/YES] per completare l’operazione o [EXIT/NO] per annullare il tutto. Durante la cancellazione verrà visualizzata la videata: la quale informa circa il file che si stà cancellando. 5.10 INFORMAZIONI RELATIVE I FILE Volendo ottenere informazioni, come la dimensione ed il tipo, sui file presenti nei floppy disk, è... -
Page 38: Messaggi Di Errore - Menu Disk
Viscount Concerto III - Manuale Operativo 5.11 MESSAGGI DI ERRORE – MENU DISK DISK NOT IN DRIVE E’ stato richiamato il menu DISK senza floppy inserito nel drive. NO FILES Non è presente nessun file nel floppy disk per completare l’operazione in corso. -
Page 39: Funzioni Midi E Di Utilità
Tentare di correggere gli errori eseguendo una formattazione. 6. FUNZIONI MIDI E DI UTILITA’ Il Concerto III dispone di un set di funzioni tramite le quali personalizzare, in base alle proprie esigenze, l’interfaccia MIDI dell’organo. Oltre a ciò, in questa sezione sono raccolte classiche impostazioni dell’organo liturgico, quali il Piston Combine ed il Keyboard Inversion e altre funzioni tramite le quali configurare i canali audio di uscita e la dinamica delle note per ogni manuale. -
Page 40: Regolazione Del Contrasto Del Display
6.1 REGOLAZIONE DEL CONTRASTO DEL DISPLAY Il display di cui è dotato il Concerto III permette di regolarne il contrasto così da ottenere sempre la massima visibilità in relazione all’angolo assunto dall’organista. La regolazione può essere eseguita direttamente dal menu MIDI&UTILITY posizionando il cursore sul campo LCD CONTRAST e impostandone il valore tramite l’encoder. - Page 41 Viscount Concerto III - Manuale Operativo Premere [EXIT/NO] per tornare al menu MIDI&UTILITY o [CURSOR (PG) DOWN] per visualizzare la videata riguardante l’impostazione dei canali MIDI: La riga superiore della videata raccoglie i parametri per regolare i canali MIDI di trasmissione per ogni sezione.
-
Page 42: Configurazione Dei Manuali
Viscount Concerto III - Manuale Operativo Nella riga inferiore del display sono presenti i campi di impostazione, definiti da due lettere. Per cui si avrà: N/N: entrambi i filtri disattivati Y/N: filtro attivo solo sui messaggi ricevuti N/Y: filtro attivo solo sui messaggi trasmessi Y/Y: filtro attivo sia sui messaggi ricevuti, sia su quelli trasmessi. - Page 43 Viscount Concerto III - Manuale Operativo ESEMPIO DI UNA CONFIGURAZIONE DI AMPLIFICATION SYSTEM Così sarebbero suddivisi i canali audio con l’impostazione presente nella videata sopra riportata. Premendo di nuovo [CURSOR (PG) DOWN] verrà visualizzata la videata: tramite questa funzione è possibile regolare, per ogni sezione dell’organo, la dinamica con cui suonare le voci Orchestra (nella versione dell’organo con voci Orchestra) e da trasmettere via...
-
Page 44: Impostazioni Generali Dell'organo
Viscount Concerto III - Manuale Operativo 7. IMPOSTAZIONI GENERALI DELL’ORGANO Premendo il pulsante [SET-UP] nel pannello centrale è possibile accedere alle impostazioni generali dell’organo, quali la regolazione dei Tremoli, del riverbero e dell’equalizzatore. La videta visualizzata è la seguente: la quale contiene i seguenti campi di selezione: o TREMULANT: regolazione dei Tremoli per ogni manuale. -
Page 45: Selezione Del Tipo Di Riverbero
Viscount Concerto III - Manuale Operativo 7.2 SELEZIONE DEL TIPO DI RIVERBERO Il Concerto III prevede la possibilità di selezionare otto tipi di riverberi, adattando così al meglio il suono generato dall’organo con l’ambiente in cui si stà suonando. Come descritto nel cap. 2, tramite lo slider [REVERB] presente sul pannello centrale è possibile regolare il livello del riverbero. -
Page 46: Registrare E Riprodurre Esecuzioni Musicali
Viscount Concerto III - Manuale Operativo 8. REGISTRARE E RIPRODURRE ESECUZIONI MUSICALI Il Concerto III è dotato di un sequencer multitraccia tramite il quale registrare, memorizzare su floppy e rieseguire esecuzioni musicali. Oltre a ciò il sistema permette la registrazione di sequenze MIDI in multisessione (ovvero in diversi step), la quantizzazione degli eventi MIDI e tre funzioni di editing tramite le quali modificare le vostre registrazioni. - Page 47 Viscount Concerto III - Manuale Operativo o RECORD: visualizza il nome della sequenza MIDI attualmente in fase di registrazione. In caso di prima registrazione comparirà sempre il nome “NEWSONG”, mentre eseguendo una registrazione in multisessione viene visualizzato il nome corrente della base.
- Page 48 Viscount Concerto III - Manuale Operativo Le tracce di cui è composta la sequenza MIDI verranno indicate dalla sigla PLY. Sarà ora possibile selezionare una delle seguenti modalità: REC (Record): la traccia viene nuovamente registrata, sovrascrivendo tutti gli eventi originali.
-
Page 49: Riprodurre Un Esecuzione Musicale
Viscount Concerto III - Manuale Operativo Per arrestare la registrazione premere di nuovo [START-STOP], il display visualizzerà la videata di salvataggio della sequenza appena registrata tramite la quale comporre il nome della base. Anche in questo caso utilizzare i pulsanti [CURSOR] per muovere il cursore e l’encoder per selezionare i caratteri. -
Page 50: Attivare E Impostare Il Metronomo
Viscount Concerto III - Manuale Operativo Come descritto nel paragrafo precedente, le tracce contenute nella song verranno indicate dalla sigla PLY. Per ogni traccia sono presenti le seguenti modalità di esecuzione (selezionabili posizionando il cursore sulla traccia desiderata e ruotando l’encoder): PLY (Play): la traccia viene suonata dall’organo e vengono trasmessi i dati alla porta [MIDI... -
Page 51: Impostare La Divisione Musicale
MIDI tra le varie tracce. Caratteristica molto utile della quantizzazione di cui dispone il sequencer del Concerto III è data dal fatto che è possibile impostare sia la divisione musicale nella quale, all’interno di una misura, verranno posizionate le note, sia un determinato intervallo di misura, senza così... - Page 52 Viscount Concerto III - Manuale Operativo in cui sono presenti i seguenti parametri di programmazione: o QUANTIZE: imposta la divisione musicale più vicina nella quale verranno posizionate tutte le note presenti in una determinata misura. o FROM M: imposta il numero di misura iniziale dal quale iniziare a quantizzare gli eventi MIDI.
-
Page 53: Funzioni Di Modifica Delle Sequenze Midi
Viscount Concerto III - Manuale Operativo 8.6 FUNZIONI DI MODIFICA DELLE SEQUENZE MIDI Come descritto nelle note introduttive di questo paragrafo, il sequencer del Concerto III prevede la possibilità di modificare i parametri principali di una base registrata tramite tre funzioni di Edit: TRANSPOSE: trasposizione per semitoni della base. - Page 54 Viscount Concerto III - Manuale Operativo dopodichè chiederà di comporre il nome della nuova base: Utilizzare i pulsanti [CURSOR] per muovere il cursore e l’encoder per selezionare i caratteri desiderati. Premere di nuovo [ENTER/YES] per procedere con il salvataggio finale della song, durante il quale il display visualizzerà:...
- Page 55 Viscount Concerto III - Manuale Operativo Tramite questa videata è possibile inserire il nome della song modificata. Utilizzare i pulsanti [CURSOR] per muovere il cursore e l’encoder per selezionare la lettera desiderata. Premere quindi [ENTER/YES] per salvare definitivamente la nuova song.
-
Page 56: Messaggi Di Errore - Sezione Sequencer
Viscount Concerto III - Manuale Operativo NOTE IMPORTANTI RIGUARDO LE FUNZIONI EDIT Onde evitare di perdere la sincronizzazione tra le varie tracce, è possibile eseguire una cancellazione Erase solo di tutta la song. In questo caso infatti il campo Track rimarrà... - Page 57 Viscount Concerto III - Manuale Operativo NO FILES E’ stato richiamato il sequencer in modalità Play senza nessun file .MID presente nel floppy disk. DISK IS WRITE PROTECTED Si è tentato di salvare una song in un floppy disk protetto in scrittura. Rimuovere la protezione e rieseguire la procedura.
-
Page 58: Il Telecomando
Impostare una voce in Local Off significa fare in modo che questa non suoni tramite la generazione interna del Concerto III ma che ne venga trasmesso, alla sua attivazione, il relativo messaggio MIDI (Sistema Esclusivo) così da poter essere accesa e suonata su uno strumento collegato. -
Page 59: Appendice
11. APPENDICE 11.1 AGGIORNAMENTO DEI SISTEMI OPERATIVI Il Concerto III offre la possibilità di aggiornare i propri sistemi operativi qualora venissero appor- tate modifiche software allo strumento. Per procedere con l’installazione è sufficiente accendere l’organo con inserito nel disk drive il floppy contenente il/i file di aggiornamento rilasciati dalla Viscount. - Page 60 Viscount Concerto III - Manuale Operativo e la relativa verifica: A procedura ultimata verrà visualizzata la videata: AGGIORNAMENTO DEL SOFTWARE “SOUND DRIVER” Accendere l’organo tenendo premuti i pulsanti [CURSOR (PG) LEFT] e [CURSOR (PG) RIGHT] e con il floppy disk contenente il file di aggiornamento della sezione “Sound Driver” inserito nel drive.
-
Page 61: Factory Settings
Viscount Concerto III - Manuale Operativo UNABLE TO UPDATE SOUND DRIVER Il sistema non è in grado di installare l’aggiornamento della sezione Sound Driver. Contattare il più vicino centro di assistenza comunicando il codice di errore (Error Code) visualizzato a display. - Page 62 INFORMAZIONI FCC NOTA: Questo strumento è stato provato e garantito in conformità con le specifiche tecni- che stabilite per dispositivi digitali della Classe B, secondo le norme FCC parte 15. Queste norme servono per garantire una misura di protezione contro interferenze con altri dispositivi elettronici nell’ambiente residenziale.
- Page 65 Viscount Concerto III - Operating Manual CONTENTS 1. Important notes ......................... 65 1.1 Looking after the product ..................... 65 1.2 Notes on floppy disks ......................65 1.3 Notes about the manual ......................66 2. Controls and connections ......................67 2.1 The side panels........................67 2.2 The central panel ........................
- Page 66 Viscount Concerto III - Operating Manual 8. Recording and playing back musical performances ............106 8.1 Recording a performance....................106 8.2 Playing back a performance ....................109 8.3 Switching on and setting the metronome ................110 8.4 Setting the time signature ....................111 8.5 Quantizing the MIDI events in the songs recorded............
-
Page 67: Important Notes
Viscount Concerto III - Operating Manual 1. IMPORTANT NOTES 1.1 LOOKING AFTER THE PRODUCT • Do not apply excessive force to the organ’s structures or the controls (knobs, stops, push-buttons, etc.). • When possible, do not place the instrument close to units which generate strong interference, such as radios, TVs, computer videos, etc. -
Page 68: Notes About The Manual
Viscount Concerto III - Operating Manual 1.3 NOTES ABOUT THE MANUAL • Take good care of this manual. • This manual constitutes an integral part of the instrument. The descriptions and illustrations in this publication are not binding. • While the instrument’s essential characteristics remain the same, the manufacturer reserves the... -
Page 69: Controls And Connections
Viscount Concerto III - Operating Manual 2. CONTROLS AND CONNECTIONS 2.1 THE SIDE PANELS 1. [MAN. II] stops: these stops allow you to set the voice of your choice for the second manual. 2. [PEDAL] stops: this section contains the pedal board stops. -
Page 70: The Central Panel
Viscount Concerto III - Operating Manual 2.2 THE CENTRAL PANEL Version with Orchestra voices Version without Orchestra voices 7. [VOLUMES] slider: these sliders allow you to adjust the volumes of all the organ’s sections, as follows: o [PEDAL]: pedal board volume. - Page 71 9. [ORCHESTRA SECTION] buttons (version with Orchestra voices only): this section contains the organ’s Orchestra voices. One of the key features of the Concerto III is the provision of these voices, allowing you to play all the instruments covered by the General MIDI standard, enhancing your organ’s voice range.
-
Page 72: The Manuals Splitter Controls
Orchestra voices) of all the manuals and the pedal board. 16. Dedicated memories: the Concerto III also has six memories dedicated to the pedal board (16a), to Man.III (16b), to Man.II (16c) and to Man.I (16d). In the dedicated memories you can only save the setup of the stops, the couplers and the Orchestra voices (in the version of the organ with Orchestra voices) of the section associated to the memory selected. - Page 73 Viscount Concerto III - Operating Manual instrument is used by more than one organist, since each of them will be able to save his or her own settings inside a memory bank. For the memory saving procedure, see point 17.
-
Page 74: Pedal Board Controls
29. [MAN. III] pedal: you can use this pedal to control the volume of the third manual. 30. [MIDI SUSTAIN] piston: Sustain piston for the Orchestra voices. It also transmits Control Change ”CC64” on Midi Out (in the Concerto III without Orchestra section transmits only the Control Change “CC64”). -
Page 75: The Conncections Underneath The Manuals
35. [MIDI] connectors: five-pin DIN connectors for connection of instruments with MIDI interface. The [IN] connector allows receipt of MIDI messages generated by remote MIDI sources, the [OUT] connector transmits the MIDI messages generated by the Concerto III, and the [THRU] connector transmits exactly the data received at the [IN] connector. -
Page 76: The Connections On The Rear Panel
Orchestra voices, while the [OUT 1] and [OUT 2] will carry the church organ voices on the basis of the AMPLIFICATION SYSTEM function. In the Concerto III version without Orchestra voices, the outputs dedicated to these voices are absent, so the setup will be: o [OUT 1 (GENERAL)]: if these jacks are connected, these outputs will carry the voices of the entire organ. - Page 77 Viscount Concerto III - Operating Manual EXAMPLES OF USE OF THE [MAIN OUTPUTS] OUTPUTS - Connection of all the [MAIN OUTPUTS] outputs - Connection of outputs [OUT 1] and [OUT 2] - Connection of output [OUT 1] only...
-
Page 78: Central Control Unit
Viscount Concerto III - Operating Manual 3. CENTRAL CONTROL UNIT The central unit which controls all the Concerto III’s internal functions is located above the third manual, behind the retracting panel. 1. Display: display of 40 characters on two lines for display of all the video pages relating to the organ’s functions. - Page 79 Viscount Concerto III - Operating Manual 4. Display function control buttons: these buttons allow you to move the cursor, set values, select video pages and confirm or reject prompts from the system. o [VALUE]: rotary encoder for setting parameters. o [CURSOR (PG) UP]: button for moving the cursor (indicated by the flashing field) up or for selecting the previous video page.
- Page 80 Centuries, until the beginning of the 18 . Here are the six temperaments offered by the Concerto III, first of all the MEANTONE. MEANTONE 8 pure major thirds: E flat – G / B flat – D / F – A / C – E / G – B / D – F # / A – C# / E – G.
-
Page 81: Functions For Controlling The Organ's Voices
4. FUNCTIONS FOR CONTROLLING THE ORGAN’S VOICES One major innovation of the Concerto III organ is that it allows the user to load church organ voices to replace those initially loaded by our workshops by just recalling a display function and using the relevant floppy disks. - Page 82 Viscount Concerto III - Operating Manual This function contains two different loading systems, it is therefore possibile to install: all the voices of a manual or the pedal board. an individual voice. LOADING OF VOICES OF A COMPLETE MANUAL OR OF THE COMPLETE...
- Page 83 Viscount Concerto III - Operating Manual Once the procedure is complete, the display will show: instructing you to check the labels on the stops against the new voices loaded. Press [EXIT/NO] and perform the LABEL CHECK function described in point 4.4.
- Page 84 Viscount Concerto III - Operating Manual INFORMATION ABOUT VOICE FILES The Concerto III is capable of loading new voices in its own internal memory by means of five types of file: 1) .GRP: indicates which voice .KEY, .PED or .det files are to be read. This type of...
-
Page 85: Voice Sort
LABEL CHECK function. 4.3 REGULATING THE VOICE VOLUMES You can further customise your Concerto III’s sound setup by regulating the volumes of each individual voice in a range from -12 dB to +6 dB. To recall this function, select the VOICES VOLUME option and press the [ENTER/YES] button;... -
Page 86: Checking The Stop Labels
Viscount Concerto III - Operating Manual Locate the cursor on the voice of choice and use the encoder to modify the value (expressed in dB). The modification will be audible in real time, making it easier for the user to obtain the setting required. -
Page 87: Error Messages - Voices Menu
Viscount Concerto III - Operating Manual CHANGING LABELS As we have seen, once you have loaded a set of voices it may be necessary to change the labels of the stops, since most of the voices will have changed and the name of the stop will no longer correspond to the voice loaded in the memory. - Page 88 Viscount Concerto III - Operating Manual The floppy disk does not contain file .DAT, shown in the display and necessary for the voice load. FILE.KEY NOT FOUND The floppy disk does not contain file .KEY, shown in the display and necessary for the voice load.
-
Page 89: Floppy Disk Functions
Viscount Concerto III - Operating Manual 5. FLOPPY DISK FUNCTIONS To access the functions for management of the floppy disks and the files saved on them, press the [DISK] button after inserting a floppy disk in the drive. The system will proceed to read the disk... -
Page 90: Displaying The Contents Of Floppy Disks
Viscount Concerto III - Operating Manual IMPORTANT NOTES The DISK menu can only be recalled with a floppy disk inserted in the drive. If the DISK menu is recalled with an unformatted floppy disk inserted, the system will automatically start the formatting function described in point 5.3. - Page 91 Viscount Concerto III - Operating Manual now insert the floppy disk to proceed with writing of the data. Since a physical copy is made, it will not be possible to copy a whole floppy disk in a single pass, so the system will prompt you to extract the destination disk: and to re-insert the source disk.
-
Page 92: Formatting Floppy Disks
If unformatted floppy disks are used, they must be formatted before they can be used with the ® Concerto III. The system formats the disks in MS-DOS format, so that they can also be used with personal computers and/or sequencers. -
Page 93: Saving The Organ's Memories And Settings On Disk
Viscount Concerto III - Operating Manual o FREE SPACE: indicates the amount of empty space on the disk. o FILE ON DISK: states the number of files currently stored on the floppy disk. Press the [EXIT/NO] button to return to display of the DISK menu. -
Page 94: Loading The Organ's Memories And Settings Saved On Disk
Viscount Concerto III - Operating Manual If the following message should appear before the video page shown above: the system is warning you that the floppy disk already contains a file with the name (and, of course, the extension) you have just typed. Press [ENTER/YES] to overwrite the original file or [EXIT/ NO] to abort the saving operation. -
Page 95: Copying Individual Files
Viscount Concerto III - Operating Manual 5.7 COPYING INDIVIDUAL FILES If you wish to copy one or more files from one floppy disk to another, recall the FILE COPY function. This is done by selecting the COPY field on the bottom line of the DISK menu and pressing [ENTER/YES]. - Page 96 Viscount Concerto III - Operating Manual After the copying procedure is started, the display will show: When reading of the first file is complete, you will be prompted to extract the source disk: and insert the destination disk (i.e. the disk onto which you wish to copy the files).
-
Page 97: Renaming Files
Viscount Concerto III - Operating Manual 5.8 RENAMING FILES The FILE RENAME function allows you to rename the files saved on the floppy disks. To recall this function, select the REN option and press the [ENTER/YES] button; the display will show the contents of the floppy disk: now use the [CURSOR] buttons to select the file you wish to rename and press [ENTER/YES]. -
Page 98: Deleting Files
Viscount Concerto III - Operating Manual 5.9 DELETING FILES To delete any files saved on the floppy disks, recall the FILE DELETE function: to do this, select the DEL option and press [ENTER/YES]. These display options allow you to delete: o DIRECTORY: one of the files on the disk. -
Page 99: File Information
Viscount Concerto III - Operating Manual Now press [ENTER/YES] to complete the operation [EXIT/NO] to abort the entire function. During deletion, the following video page will be displayed: which informs you about the file being deleted. 5.10 FILE INFORMATION If you require information, such as size and type, about the files on the floppy disks, recall the FILE INFO function in the DISK menu. -
Page 100: Error Messages - Disk Menu
Viscount Concerto III - Operating Manual 5.11 ERROR MESSAGES - DISK MENU DISK NOT IN DRIVE The DISK menu has been recalled with no floppy disk inserted in the drive. NO FILES There is no file on the floppy disk for completion of the current operation. -
Page 101: Midi And Utility Functions
Try formatting the disk to correct the errors. 6. MIDI AND UTILITY FUNCTIONS The Concerto III features a set of functions allowing the user to customise the organ’s MIDI interface to his or her own requirements. This section also contains the classical church organ settings, including Piston Combine and Keyboard Inversion, and additional functions used to set up the audio output channels and the note dynamics for each manual. -
Page 102: Regulating The Display Contrast
Viscount Concerto III - Operating Manual 6.1 REGULATING THE DISPLAY CONTRAST The Concerto III’s display has a contrast adjustment function allowing the maximum visibility to be obtained for the organist’s performing angle. The setting can be made directly from the MIDI&UTILITY menu by locating the cursor on the LCD CONTRAST field and setting the value using the encoder. - Page 103 Viscount Concerto III - Operating Manual The top line of the video page contains the parameters for regulating each section’s MIDI transmission channels. The bottom line consists of the four sections for setting the MIDI reception channels. Use the encoder to make the settings.
-
Page 104: Manual Setup
Viscount Concerto III - Operating Manual 6.4 MANUAL SETUP Selecting the KEYBOARD SETTINGS option in the MIDI&UTILITY menu gives access to all the settings relating to the manuals, including the reversal of manuals I and II, regulation of the audio output channels and the note dynamic settings. - Page 105 Viscount Concerto III - Operating Manual Pressing [CURSOR (PG) DOWN] again displays the following video page: this function allows the dynamic to be used for playing the Orchestra voices (in the version with Orchestra voices) and to be transmitted by MIDI to be set for each section of the organ.
-
Page 106: Organ General Settings
Viscount Concerto III - Operating Manual 7. ORGAN GENERAL SETTINGS Pressing the [SET-UP] button on the central panel gives access to the organ’s general settings, such as setting of the Tremulants, reverb and equalizer. The video page displayed is as follows: containing the following selection fields: o TREMULANT: setting of the Tremulants for each manual. -
Page 107: Setting The Type Of Reverb
7.2 SELECTING THE TYPE OF REVERB The Concerto III provides a choice of eight types of reverb, allowing perfect adaptation of the organ’s sound to the room in which it is being played. As described in chap. 2, the [REVERB] slider on the central panel allows the level of the reverb to be adjusted. -
Page 108: Recording And Playing Back Musical Performances
8. RECORDING AND PLAYING BACK MUSICAL PERFORMANCES The Concerto III has a multitrack sequencer allowing the user to record, save on floppy disk and play back musical performances. Besides this, the system allows MIDI sequences to be recorded in multidubbing mode (i.e. in different steps) and the quantizing of MIDI events, and offers three editing functions for modifying your recordings. - Page 109 - IN: the events present on the [MIDI IN] port are recorded. Select this mode if you wish to record music performed on an instrument connected to the Concerto III. - - - -: the selected track is deactivated. The events performed on the relative section are not recorded.
- Page 110 Viscount Concerto III - Operating Manual The tracks in the MIDI sequence are identified by the PLY code. There is now a choice of the following modes: REC (Record): the track is recorded and re-writes all the original events OVD (Overdub): the new events recorded are added to those already in the track.
-
Page 111: Playing Back A Performance
Viscount Concerto III - Operating Manual To stop the recording, press [START-STOP] again; the display will show the video page for saving the sequence just recorded, in which the name of the song can be entered. With the usual procedure, use the [CURSOR] buttons to move the cursor and the encoder to select the characters. -
Page 112: Switching On And Setting The Metronome
Play mode. 8.3 SWITCHING ON AND SETTING THE METRONOME The Concerto III’s sequencer has its own metronome, which can be heard through the instrument’s internal speakers. To switch on the metronome, simply press the [METRONOME] button in the group of sequencer buttons. -
Page 113: Setting The Time Signature
MIDI events on the various tracks. One very useful feature of the quantizing function provided on the Concerto III’s sequencer is that the user can set both the value of the beat within in the bar on which the notes will be positioned and a given number of bars, so that it is not necessary to quantize the entire MIDI sequence. - Page 114 Viscount Concerto III - Operating Manual containing the following programming parameters: o QUANTIZE: sets the value of the nearest beat on which all the notes in a given bar will be placed. o FROM M: sets the number of the initial bar (measure) from which the quantizing of the MIDI events will start.
-
Page 115: Midi Sequences Modification Functions
Viscount Concerto III - Operating Manual 8.6 MIDI SEQUENCE MODIFICATION FUNCTIONS As described in the introductory notes to this section, the Concerto III’s sequencer allows you to modify the main parameters of a recorded song using three Edit functions: TRANSPOSE: transposes the song by semitones. - Page 116 Viscount Concerto III - Operating Manual after which it will ask you to enter the name of the new song: Use the [CURSOR] buttons to move the cursor and the encoder to select the characters required. Press [ENTER/YES] again to go ahead with the final saving of the song, during which the display...
- Page 117 Viscount Concerto III - Operating Manual This video page allows you to enter the name of the modified song. To do this, use the [CURSOR] buttons to move the cursor and the encoder to select the letter you require. Then press [ENTER/YES] to save the new song definitively.
-
Page 118: Error Messages - Sequencer Section
Viscount Concerto III - Operating Manual IMPORTANT NOTES ABOUT THE EDIT FUNCTIONS To avoid loss of synchronisation between the various tracks, an Erase cancellation can only be carried out on the entire song. In this case, the Track field will be fixed at the ALL value and it will not be possible to select individual tracks. - Page 119 Viscount Concerto III - Operating Manual NO FILES The Sequencer has been recalled in Play mode with no .mid files on the floppy disk. DISK IS WRITE PROTECTED You have attempted to save a song on a write-protected floppy disk. Remove the protection and repeat the procedure.
-
Page 120: The Remote Control
30° (vertical or horizontal) to the organ’s panel. 10. VOICE LOCAL OFF Setting a voice in Local Off mode means that it will not be played by the Concerto III’s internal sound generation system, but when it is activated the relative MIDI (System Exclusive) message will be transmitted, so that it can be turned on and played on a connected instrument. -
Page 121: Appendix
11. APPENDIX 11.1 UPDATING OF THE OPERATING SYSTEMS The Viscount Concerto III has the possibility of updating its operating systems in case of software changes to the instrument. For the updating you simply have to switch the organ and to insert the floppy disk containing the updating released by Viscount. - Page 122 Viscount Concerto III - Operating Manual and with the concerned check: When the procedure is completed, the display will show: UPDATING OF THE SOFTWARE “SOUND DRIVER” Switch the organ on keeping pressed the buttons [CURSOR (PG) LEFT] and [CURSOR (PG) RIGHT] with the floppy disk containing the updating files in the disk drive.
-
Page 123: Factory Settings
Viscount Concerto III - Operating Manual UNABLE TO UPDATE SOUND DRIVER The system is unable to install the updating of the Sound Driver section. Contact your nearest service center with the information of the Error Code shown on the display. - Page 125 MIDI IMPLEMENTATION CHART Viscount Concerto III Version: 1.5 Classic Organ Date: 21/07/03 FUNCTION ... TRANSMITTED RECOGNIZED REMARKS BASIC Default 1 – 16 1 – 16 CHANNEL Changed 1 – 16 1 – 16 MODE Default Mode 3 Mode 3 Messages...
- Page 127 NOTE: This equipment has been tested and found to comply with the limits for a Class B digital Device, persuant to Part 15 if the FCC Rules. These limits are designed to provide reasonable protection against harmful interference in a residential installation. This equipment generates, uses and can radiate radio frequency energy and, if not installed and used in accordance with the instruction, may cause harmful interference to radio comunications.
- Page 128 Viscount International S.p.A. Via Borgo n.° 68/70 – 47836 Mondaino (RN), ITALY From Italy: TEL: 0541-981700 FAX: 0541-981052 From all other countries: TEL: +39-0541-981700 FAX: +39-0541-981052 E-MAIL: organs@viscount.it WEB: http://www.viscount-organs.com http://www.viscount.it...
Need help?
Do you have a question about the Concerto III and is the answer not in the manual?
Questions and answers