Table of Contents
Advertisement
Advertisement
Table of Contents

Related Manuals for ZKTeco Atlas x60 Series


Summary of Contents for ZKTeco Atlas x60 Series
- Page 1 Installation Guide Atlas x60 Series Access Control Panels...
-
Page 2: What's In The Box
RLED BEEP BEEP COMM2 HOLD HOLD SHIELD SHIELD WLAN +12V +12V DOOR RETURN RETURN GLED GLED RLED RLED BEEP BEEP HOLD HOLD SHIELD SHIELD 4 Screws & Anchors 1 Screwdriver 4 Diodes Atlas x60 Series Access Control Panels Installation Guide... -
Page 3: Table Of Contents
Connect the Controller to the Network ....Complete the Configuration ........Add a User and Test Access ........... Add Secondary Controllers ........... Mobile App ................... Special Considerations for Complex Networks ..Where to Go Next ..............Atlas x60 Series Access Control Panels Installation Guide... -
Page 4: Optional Accessories
Optional Accessories Wiegand Card Reader Prox Card Exit Button Door Sensor SLK20R Enrollment reader CR10E Card Enrollment Reader FR1500A FP & Prox Reader Atlas x60 Metal Cabinet Atlas x60 Series Access Control Panels Installation Guide... -
Page 5: Safety Precautions
Do not use the device for any purpose other than those specified. Remove dust or dirt regularly. While cleaning, wipe dust off with a smooth cloth or towel instead of water. Contact your supplier in case of any problem! Atlas x60 Series Access Control Panels Installation Guide... -
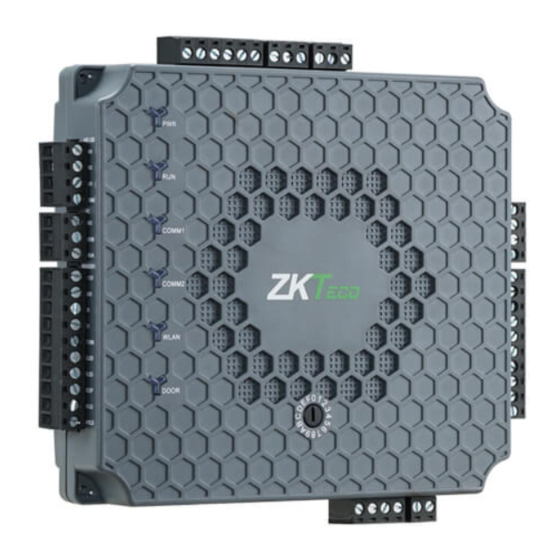
Page 6: Product Pin Diagram
Press reset button for about 2-5 seconds, zk firmware will check if there is a USB disk which stores an upgrade package inserted into controller, if yes, then controller will do firmware upgrade automatically. Press reset button for about 5-10 seconds, zk firmware will temporarily set IP to default 169.254.202.242. Atlas x60 Series Access Control Panels Installation Guide... -
Page 7: Led Indicators
Flashing (DOOR) Green LED indicates RLED SHIELD RETURN a door opening signal (a door is opened). BEEP GLED DOOR HOLD RLED RETURN SHIELD BEEP GLED HOLD Figure 8 RLED SHIELD Atlas x60 Series Access Control Panels Installation Guide BEEP HOLD... -
Page 8: Product Dimension
BEEP BEEP BEEP BEEP HOLD HOLD HOLD HOLD SHIELD SHIELD SHIELD SHIELD 6.3in (160mm) 7.75in (197mm) 7.75in (197mm) Figure 9 Atlas x60 Metal Cabinet 11in (280mm) 15in (380mm) 3.15in (80mm) Figure 10 Atlas x60 Series Access Control Panels Installation Guide... -
Page 9: Installation Of Panel & Cabinet
State Indicators Mounting Holes Figure 12 We recommend drilling the mounting plate screws into solid wood (i.e. stud/beam). If a stud/beam cannot be found, then use the supplied drywall plastic mollies (anchors). Atlas x60 Series Access Control Panels Installation Guide... -
Page 10: Wiring Legend
SHIELD SHIELD The auxiliary input may be connected to infrared motion sensors, fire alarms, or smoke detectors. The auxiliary output may be connected to alarms, cameras or door bells, etc. Figure 13 Atlas x60 Series Access Control Panels Installation Guide... -
Page 11: Power Wiring Diagram
RLED BEEP BEEP COMM2 RLED HOLD HOLD SHIELD SHIELD +12V WLAN +12V BEEP DOOR RETURN RETURN GLED GLED RLED RLED BEEP BEEP HOLD HOLD HOLD SHIELD SHIELD SHIELD 12V DC Figure 14 Atlas x60 Series Access Control Panels Installation Guide... -
Page 12: Wiegand Connection
Wiegand Connection DC+(6-14V) Wiegand D0 Wiegand D1 Green LED Beeper Wiegand Card Reader COMM 485A 485B AUX1 AUX2 BREAK AC FAIL BAT FAIL +12V Figure 15 Atlas x60 Series Access Control Panels Installation Guide... -
Page 13: Osdp Connection
OSDP Connection NOTE: OSDP and ZKTeco RS485 (FR1500A readers) cannot both be connected to one control panel. OSDP Reader D0 D1 +12V +12V 485B 485A +12V +12V COMM1 RETURN RETURN GLED GLED 485B RLED RLED BEEP BEEP COMM2 HOLD HOLD... -
Page 14: Fr1500A Connection
RLED RLED +12V BEEP BEEP HOLD HOLD SHIELD SHIELD COMM1 RETURN GLED RLED BEEP COMM2 HOLD 12V DC 12V DC SHIELD WLAN +12V FR1500A FR1500A FR1500A FR1500A Figure DOOR RETURN Atlas x60 Series Access Control Panels Installation Guide GLED RLED... -
Page 15: Dip Switch Setting For Fr1500A Device Id
RS485 address 1 is for IN reader, 200 meters or 600 ft , the number 6 RS485 address 2 is for OUT reader) switch should be ON as below Distance: More than 200 meters Atlas x60 Series Access Control Panels Installation Guide... -
Page 16: Rex Connections
COMM1 RETURN RETURN GLED GLED RLED RLED BEEP BEEP COMM2 HOLD HOLD SHIELD SHIELD WLAN +12V +12V DOOR RETURN RETURN GLED GLED RLED RLED BEEP BEEP HOLD HOLD SHIELD SHIELD Figure 19 Atlas x60 Series Access Control Panels Installation Guide... -
Page 17: Lock Connection
HOLD HOLD SHIELD SHIELD +12V WLAN +12V DOOR RETURN RETURN GLED GLED RLED RLED BEEP BEEP HOLD HOLD SHIELD SHIELD ETHERNET ETHERNET Door Contact Sensor Sensor 12V DC FR107 Diode Figure 20 Atlas x60 Series Access Control Panels Installation Guide... -
Page 18: Aux. I/O Connection
+12V DOOR RETURN RETURN GLED GLED RLED RLED BEEP BEEP HOLD HOLD SHIELD SHIELD ETHERNET FIRE ALARM 12V DC 12V DC Figure 21 AUX. Output Connection ETHERNET ALARM 12V DC Figure 22 Atlas x60 Series Access Control Panels Installation Guide... -
Page 19: Ethernet Connection
As the Atlas-460 supports auto MDI/MDIX, it is not necessary to use a crossover type cable. COMM ETHERNET 485A 485B AUX1 AUX2 BREAK AC FAIL BAT FAIL +12V SLK20R Enrollment reader Figure 24 Atlas x60 Series Access Control Panels Installation Guide... -
Page 20: Typical Installation
Installation Diagram Ethernet Communication wire 220/110 V Input Atlas x60 Access Control Bundle CEILING Sensor Electric Lock OUTDOOR INDOOR Exit Button Reader for "In" Door Reader for "Out" Door Figure 25 Atlas x60 Series Access Control Panels Installation Guide... -
Page 21: Troubleshooting
2 Years from original purchase date, replacement/repair of hardware under ZK standard warranty requires an evaluation of the failed system by a ZK Technical Support specialist, and the issuance of a Technical Support RMA number. Atlas x60 Series Access Control Panels Installation Guide... -
Page 22: Reader 485 Setting Table
Reader 485 Setting Table Switch Setting Address No. Atlas x60 Series Access Control Panels Installation Guide... - Page 23 Switch Setting Address No. Atlas x60 Series Access Control Panels Installation Guide...
-
Page 24: Electrical Specifications
The input ports are pulled Pull- up resistance (Ω) 4.7k up with 4.7k resistors WIEGAND INPUT Voltage (V) 10.8 13.5 Current (mA) ZK ELECTRIC LOCK Voltage (V) DC 10.8 13.2 Current (mA) Atlas x60 Series Access Control Panels Installation Guide... - Page 25 14in. X 2.5in. X 12in. 380mm(L) X 80mm(W) X 280mm(H) Atlas-160: 6.3in. X 4.17in. (160mm X 140mm) Dimensions (Board Only) Atlas-260/460: 7.75in. X 6.73in. (197mm X 171mm) 32 bit 1.2GHz 256MB Flash Certified Atlas x60 Series Access Control Panels Installation Guide...
- Page 26 Connect the Controller to the Network ............. Complete the Configuration ................Add a User and Test Access ................. Add Secondary Controllers .................. Mobile App ........................Special Considerations for Complex Networks ........Where to Go Next ....................... Atlas x60 Series Access Control Panels Installation Guide...
-
Page 27: Introduction
Web Management Application. The exact text of the warning, and the way to resolve it, varies among browser applications. You can prevent this warning by installing a signed HTTPS certificate when directed, below. Atlas x60 Series Access Control Panels Installation Guide... -
Page 28: Understanding The Atlas Series Network
For more complex networks, be sure to review the “Special Considerations” discussed at the end of this document before proceeding. Atlas x60 Series Access Control Panels Installation Guide... -
Page 29: Initial Controller Setup
Log in using the default administrator account: • User name: admin • Password: admin You will be directed to the Setup Wizard, where you will enter information re- quired for the controller to operate. Atlas x60 Series Access Control Panels Installation Guide... - Page 30 Choose whether this controller will be a “Primary” or a “Secondary”. Make sure you understand the Atlas Series network, discussed above. The first controller installed should be a primary, and all others should be secondaries. Atlas x60 Series Access Control Panels Installation Guide...
- Page 31 This determines what your controller will be used for: controlling door entry, perhaps door exit, or as special purpose readers. Note: Secondary controllers are configured when they are connected to the system. Atlas x60 Series Access Control Panels Installation Guide...
- Page 32 + Card Enrollment Point - The second reader will be used to easily enter card numbers when adding users. Page 5: Time Zone (primaries only) Atlas x60 Series Access Control Panels Installation Guide...
- Page 33 Note: Secondary controllers get their time and time zone from the primary con- troller. Page 6: Password (primaries only) Enter a strong password for the primary administrator account. The user name for this account is “admin” and cannot be changed. Atlas x60 Series Access Control Panels Installation Guide...
- Page 34 To assign a static IP address, choose “Manually” and enter the IP address and con- figuration specified by the network administrator. “Using DHCP” is probably the right choice for secondary controllers, unless you have a complicated network discussed below under “Special Considerations for Complex Networks. ” Atlas x60 Series Access Control Panels Installation Guide...
-
Page 35: Connect The Controller To The Network
Otherwise, disconnect the controller and complete the physical installation. Con- nect it to the local area network via ethernet. Atlas x60 Series Access Control Panels Installation Guide... -
Page 36: Complete The Configuration
Registration is required if you ever need to reset your system password, and op- tionally allows ZKTeco to contact you about software updates and other informa- tion. Follow these steps to register for the first time or to update your registration information. - Page 37 “Menu About” and clicking button.) Register Find and open the registration confirmation file you saved. You should see a “Registration successful” message window. Atlas x60 Series Access Control Panels Installation Guide...
- Page 38 “Remove Secondary, Muster, or Card Enrollment Point” • Change the default connection type for readers (Wiegand, OSDP, or ZKTeco RS-485). These settings are on the sub-controller, and are detailed in the topic, “Hardware Properties”. The defaults vary by model and are listed in the topic, “Models and Configurations”.
- Page 39 Install a Fingerprint Enrollment Reader (optional) If you are using biometric readers, a ZKTeco USB fingerprint enrollment reader must be installed at any computer where fingerprints will be enrolled. Plug the device into any USB port.
-
Page 40: Add A User And Test Access
(To test biometrics) Scroll down to “Number of Enrolled Fingerprints, ” click “Enroll Fingerprints, ” and follow the on-screen instructions. You must have installed a USB fingerprint enrollment reader during “Com- plete the Configuration. ” Atlas x60 Series Access Control Panels Installation Guide... - Page 41 Save The card, PIN, and fingerprint you entered should now work to grant access at the specified doors, assuming you chose a compatible “Default Mode” during “Configure Doors. ” Atlas x60 Series Access Control Panels Installation Guide...
- Page 42 Card numbers can be more easily entered by using enrollment points. See the online help topic, “Features and Tasks: Card Enrollment Points. ” The number of digits for PINs can be changed in “Admin System Settings. ” Atlas x60 Series Access Control Panels Installation Guide...
-
Page 43: Add Secondary Controllers
Enter a “Name, ” and select “Custom Door Names” so you can name the doors. c. Leave all other settings as they are. These are the settings that were discovered. d. Click on the menu bar. Save Atlas x60 Series Access Control Panels Installation Guide... -
Page 44: Mobile App
Mobile App ZKTeco provides its “Atlas” mobile app in Apple’s “App Store” and in “Google Play. ” You must authorize each mobile device before it can access your system. In the Web Management Application: Go to “Admin Authorized Mobile Devices. ”... - Page 45 You can then email the image to the mobile device user. On the mobile device: Install and run the “Atlas” mobile app. Press Scan QR Code Atlas x60 Series Access Control Panels Installation Guide...
- Page 46 The photo viewfinder will appear. Point the square scanning box at any copy of the authorization QR code. A picture will be taken automatically when a QR code is within the box, showing the message, “Authorization code suc- cessfully located. ” Atlas x60 Series Access Control Panels Installation Guide...
- Page 47 Each authorization code can authorize only one mobile device. You may delete and add authorizations as needed to support several devices. The number of devices you can authorize is limited by your license. Atlas x60 Series Access Control Panels Installation Guide...
-
Page 48: Special Considerations For Complex Networks
“Help” from the menu in the upper right corner. The help’s “Introduction” page will guide you to more information on operating the application, changing the configuration of controllers and doors, setting up door access, using emergency features, and more. Atlas x60 Series Access Control Panels Installation Guide... - Page 49 www.zkteco.eu...
Need help?
Do you have a question about the Atlas x60 Series and is the answer not in the manual?
Questions and answers
how do you reset password
@ledon password reset on a atlas 460 bundle