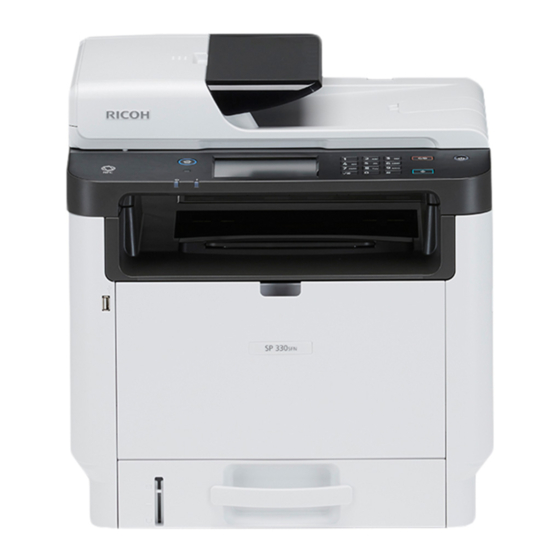
Ricoh SP 330SN Manual
Hide thumbs
Also See for SP 330SN:
- User manual (492 pages) ,
- Service manual (333 pages) ,
- Field service manual (278 pages)
Advertisement
Table of Contents
- 1 Setup Guide
- 2 Setting up the Machine
- 3 Installing the Software
- 4 Check How the Computer Is Connected
- 5 Use the Machine from a Smart Device
- 6 Connecting the Machine Via Wireless (Wi-Fi)
- 7 Connecting the Machine (Usb/Network)
- 8 Setting the Date and Time
- 9 Selecting the Telephone Line Type and Telephone Network Connection Type
- 10 Setting the Outside Line Access Number
- 11 Basic Operation for Sending a Fax
- 12 Scan Settings
- Download this manual
Advertisement
Table of Contents

Related Manuals for Ricoh SP 330SN


Summary of Contents for Ricoh SP 330SN
-
Page 1: Setup Guide
Setup Guide Setting Up the Machine Installing the Software FAX settings Scan settings Control Panel Sheet... -
Page 3: Setting Up The Machine
1. Setting Up the Machine 32 cm (12.6 inches) 20 cm 89.6 (7.9 inches) 10 cm (4.0 inches) Power Source 120 - 127 V, 60 Hz, 7.7 A 220 - 240 V, 50/60 Hz, 4.3 A 10 cm (4.0 inches) 70 cm DYG212 (27.6 inches) - Page 4 DYG137 DYG138 DYG139 DYG140 DYG141 DYG142 DYG143 DYG144 DYG145 DYG146 DYG147 DYG148 DYG149...
- Page 5 When using a wireless (Wi-Fi) connection, connect the wireless LAN option and proceed to Step 26 ( for SP 330SFN/3710SF) or Step 55 ( for SP 330SN). DYG339 When using a wired (Ethernet) connection, connect the Ethernet cable and proceed to Step 67 ( for SP 330SFN/3710SF) or Step 91 ( for SP 330SN).
- Page 6 ™ SP 330 SFN/3710SF (Wi-Fi) DYG150...
- Page 7 SSID :XXXXXXXXXXXXX Encryption key :XXXXXXXXXXXXX DYG085 SSID :XXXXXXXXXXXXX Encryption key :XXXXXXXXXXXXX DYG086...
- Page 8 ™ SP 330 SN (Wi-Fi) Language 1 22 English German French DYG182 DYG150 Set Date Set Date Month/Day/Year Day/Month/Year Day/Month/Year / 2017 Year/Month/Day DSG330 DYG183 Set Time Set Time 12-hour Format Hour: Min 24-hour Format DSG332 DSG333 Network Wizard Wired (Ethernet) Wireless (Wi-Fi) DYG071 Wi-Fi Setup Wizard...
- Page 9 Network Wizard Network Wizard Do not auto display IPv4 Configuration Menu from the next time IPv6 Configuration Quit Setup DYG076 DYG077 ™ SP 330 SFN/3710SF (Ethernet/USB) DYG150...
- Page 11 ™ SP 330SN(Ethernet/USB) Language 1 22 English German French DYG182 DYG150 Set Date Set Date Month/Day/Year Day/Month/Year Day/Month/Year / 2017 Year/Month/Day DSG330 DYG183 Set Time Set Time 12-hour Format Hour: Min 24-hour Format DSG332 DSG333 Network Wizard Network Wizard Wired (Ethernet)
-
Page 12: Installing The Software
2. Installing the Software Check how the computer is connected Specify how to connect to your computer according to the communication environment of your system. The wireless LAN (Wi-Fi) connection is available when you attach a wireless LAN option to the USB port on the back of the machine. If you have already set up a Wi-Fi connection during the initial setup of the machine and want to install the printer driver, see page 17 "Easy Setup Using the CD-ROM". -
Page 13: Use The Machine From A Smart Device
Use the machine from a smart device Android ■ How to use the machine from a ■ How to use the NFC (Android smart device smart devices only) From smart device applications, you can use the Configure the network connection of following functions of the machine: the machine. -
Page 14: Connecting The Machine Via Wireless (Wi-Fi)
CD-ROM" and select "The machine's IP address has been already configured." on step 6. ™ SP 330SN Configuring Settings Using the Control Panel Check that the router (access point) is working correctly. Make sure the wireless LAN option is attached to the ●... - Page 15 Enter the encryption key using the number keys, and then Easy Setup Using the WPS Button press the [OK] key. Password ™ SP 330SFN/3710SF Key : (8-63 chars/64 hex) WPA2-PSK ● Make sure the Ethernet cable is not connected to the DSG353 machine.
- Page 16 6. 10. Press the WPS button on the router (access point) within two minutes. ™ SP 330SN ● Make sure the Ethernet cable is not connected to the machine. ● In Steps 9 to 11, configure each setting within two minutes.
- Page 17 CD-ROM" and select "The machine's IP address has been already configured." on step 6. ™ SP 330SN ● Make sure the Ethernet cable is not connected to the machine. ● In Steps 12 to 14, configure each setting within two minutes.
- Page 18 Open the PIN code configuration window (web page) for the 11. Enter the machine’s PIN code (8 digits) on the router router (access point) on your computer. (access point)’s web page.(The web page accessed in Step Make sure the wireless LAN option is attached to the machine and the wireless (Wi-Fi) connection is enabled.
- Page 19 Select [The machine's IP address is not configured or you Easy Setup Using the CD-ROM want to change it.] when installing this machine. Using the CD-ROM supplied with this machine, you can install Connect your computer and this machine by using the USB the driver from your computer and configure the Wireless (Wi-Fi) cable.
-
Page 20: Connecting The Machine (Usb/Network)
Connecting the Machine (USB/Network) Windows DYG153 DYG154 Click [Finish] in the [Setup Complete] dialog box. If the installer prompt you to restart Windows, reboot your ● The following items are necessary to set up a wired computer. connection. ● USB interface cable or Ethernet interface cable ●... -
Page 21: Setting The Date And Time
3. FAX settings (SP 330SFN/3710SF only) Connection Connect a telephone line cord to LINE. If using an external telephone, connect the telephone to TEL. ● Connect the public switched telephone network (PSTN) to Line. Connecting lines other than PSTN to this machine may cause it to malfunction. -
Page 22: Selecting The Telephone Line Type And Telephone Network Connection Type
Selecting the Telephone Line Type and Telephone Network Connection Type Press [Setting]. Press [Dial/Push Phone]. Press [Administrator Tools]. Press the telephone line type appropriate for your telephone service. Press [PSTN / PBX]. If you are requested to enter a password, enter the password using the number keys, and then press [OK]. -
Page 23: Scan Settings
3 Display panel 8 Fax indicator 4 Number keys 9 Alert indicator 5 [Clear/Stop] key 10 [Start] key ™ Panel sheet for SP 330SN 10 11 12 13 1415 DYG159 1 [Image Quality] key 11 [Duplex] key 2 [Shortcut to Func.] key... - Page 24 Trademark Android is a trademark of Google Inc. IOS is a trademark or registered trademark of Cisco in the U.S. and other countries and is used under license. Wi-Fi, Wi-Fi Direct, Wi-Fi Protected Setup, WPA, Wi-Fi Protected Access, WPA2, and Wi-Fi Protected Access 2 are registered trademarks of Wi-Fi Alliance.
- Page 25 M0C4-8503...
Need help?
Do you have a question about the SP 330SN and is the answer not in the manual?
Questions and answers