Advertisement
Quick Links
Advertisement

Related Manuals for OZtrail DTC-BU6-B


Summary of Contents for OZtrail DTC-BU6-B
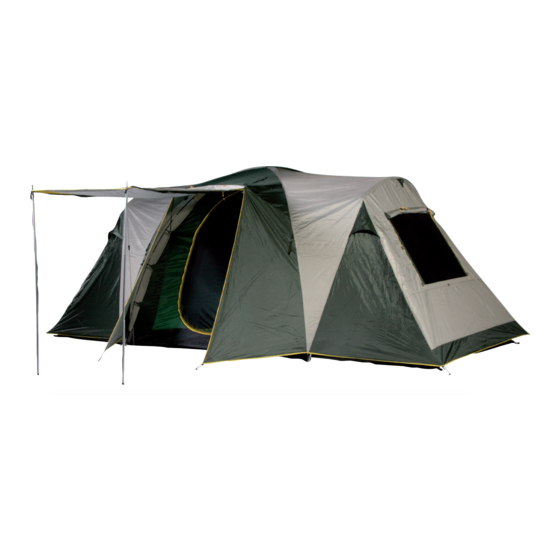
- Page 1 Owners Manual Classic Bungalow 6 Dome www.oztrail.com.au DTC-BU6-B...
-
Page 2: Important Safety And Care Information
IMPORTANT SAFETY AND CARE INFORMATION PLEASE READ BEFORE SETTING UP YOUR TENT/SHELTER At the time of purchase we guarantee that this product is supplied without fault in construction, materials or function. We recommend that you assemble it as a trial before going away. - Page 3 To prevent injury caused by fire - • Do not pitch the tent/shelter near a camp fire or any other flame source • Do not use candles, matches or any other flame source in or near the tent (this includes stoves, cooking equipment, lighting and heating appliances) •...
- Page 4 Check that all parts are present and that you familiarise yourself with the assembly and disassembly of the product. If you have any problems, your OZtrail dealer will be able to sort it out for you. You should have the following parts: -...
- Page 5 PRODUCT AND PARTS PRODUCT AND PARTS Part Description Cont. 1 x Gear Loft 1 x Cup Holder 2 x Awning Poles...
- Page 6 ASSEMBLY INSTRUCTIONS Step 1 Select a sheltered camp site protected from the wind that will not allow water to pond under the tent floor. Clear a level area of all stones, twigs, etc. Step 2 Lay out the tent inner and position it so the doors face the desired direction. There are 8 peg down points. Start with the front 4 first, peg them down through the Ring of the Ring &...
- Page 7 ASSEMBLY INSTRUCTIONS b) The End Rooms Fitting the portico poles – Select the Green tip fibreglass roof pole and slide through the sleeve running over the end room, and then slot each end of the pole into the plastic elbow located at the end of each pole sleeve.
- Page 8 FIGURES AND ILLUSTRATIONS Peg Points Figure 1 Eyelets for Halo Portico Elbow Pole Tie Point Figure 2 J Hook Ring & Pin...
- Page 9 FIGURES AND ILLUSTRATIONS Halo Sleeve Inside Figure 3...
- Page 10 DISASSEMBLY INSTRUCTIONS Step Release guy ropes. Release velcro that attaches the fly to the poles. Remove roof vent pole. Remove fly from tent. Lay fly flat on ground and fold the fly in half, third or quarters. (folding depends on the length of the pole carry bag.) Step Unzip doors and windows, collapse the tent by removing and disassembling the poles.
-
Page 11: Folding Instructions
FOLDING INSTRUCTIONS Figure 4 Fold tent into a The width of Rectangular shape the tent should not exceed the length of the pole bag Front of tent R OLL (door unzipped) -
Page 12: Prolonging The Life Of Your Tent/Shelter
PROLONGING THE LIFE OF YOUR TENT/SHELTER •Intermittent use only. Although our polyester fabrics are treated for extra UV resistance, continuous exposure to sun light will break the fabric down. Fading of colour is an early warning sign. These tents/shelters are not designed as permanent dwellings or structures. -
Page 13: Understanding Waterproofness
UNDERSTANDING WATERPROOFNESS What is not covered by warranty! OZtrail tents use waterproof and water repellent fabrics. However, with the addition of seams, zips and other desirable features a recreational tent will not be as waterproof as a car, house or other solid structures. The following are common examples of how water can enter a tent: - Condensation - When warm moist air meets cooler air, condensation occurs. - Page 14 Replacing shock-cord in tent poles Use this procedure to replace broken or untied Shock-Cord:- 1. Start by cutting the Shock-Cord to 2/3’s the length of the Tent Pole 2. Feed the cord through the first pole section and tie a double knot. The knot will catch on the end of the fibreglass pole inside the ferrule.
- Page 15 ZIPS Reducing the risk of jamming fabric in the zip ~ • When using the zip, hold the pull-tab between your thumb and forefinger with your thumb facing you. •As you are closing the zip clear the way in front and under the zip slider using the back of your hand, and cup the zip slider underneath with your remaining 3 fingers.
- Page 16 In addition, defects resulting from intentional damage, negligence or unreasonable use will void the warranty. This warranty does not cover incidental expenses including property damage. Imported by: OZtrail Leisure Products PO Box 1, Sumner Park QLD 4074 www.oztrail.com.au Made in China...
Need help?
Do you have a question about the DTC-BU6-B and is the answer not in the manual?
Questions and answers