
Related Manuals for Belling Mini Richmond BMR60DOIND


Summary of Contents for Belling Mini Richmond BMR60DOIND
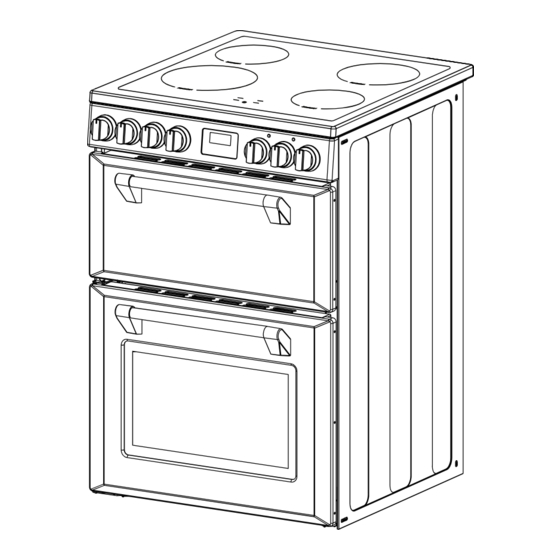
- Page 1 BMR60DOIND Freestanding Double Oven with Induction Cooktop I N S T R U CT IO N M AN UA L belling.com.au | belling.co.nz PLEASE READ THE INSTRUCTION MANUAL CAREFULLY BEFORE USING THE UNIT...
-
Page 2: Customer Care
CONGRATULATIONS Dear Customer, Congratulations on the purchase of your new product from Belling. We recommend you please take some time to read the instruction manual thoroughly to familiarise yourself with the functionality and operations to ensure optimum performance of your new appliance. - Page 3 CONTENTS 9 - 23 PRODUCT / INSTALLER DETAILS OPERATION (CONT.) Timer WARNINGS & PRECAUTIONS 5 - 8 Cooking Guide - Oven Safety precautions Cooking Tips - Hob Other Important Safety Information Heat Settings Warning for Use of Grill, Using the Hotplates of your Cooker Oven &...
- Page 4 PRODUCT / INSTALLER DETAILS For future reference we suggest that you staple a copy of your purchase receipt here and complete the below so the information is always at hand. PRODUCT DETAILS Model number: Serial number: (Located on the product rating label) Description: PURCHASE DETAILS Date of purchase:...
-
Page 5: Safety Instructions Warning
Icon Type Meaning WARNING: Type Meaning 1. SAFETY INSTRUCTIONS WARNING Serious injury or death risk WARNING Serious injury or death risk WARNINGS & PRECAUTIONS WARNING: RISK OF ELECTRIC SHOCK Dangerous voltage risk 1. SAFETY INSTRUCTIONS 1.4 During Cleaning and Maintenance 1. -
Page 6: Other Important Safety Information
1.1 General Safety Warnings 1. SAFETY INSTRUCTIONS 1. SAFETY INSTRUCTIONS WARNINGS & PRECAUTIONS 1.1 General Safety Warnings 1. SAFETY INSTRUCTIONS 1.1 General Safety Warnings 1. SAFETY INSTRUCTIONS OTHER IMPORTANT Hotplate warnings WARNING: SAFETY INFORMATION WARNING: DO NOT allow pots to boil dry, 1.1 General Safety Warnings as damage to hotplate may result. -
Page 7: During Cleaning And Maintenance
1. SAFETY INSTRUCTIONS WARNING: WARNINGS & PRECAUTIONS 1.1 General Safety Warnings 1. SAFETY INSTRUCTIONS 1. SAFETY INSTRUCTIONS After use, always turn off the cooking zones The cooker MUST NOT be and the cooktop as described in this manual placed on a base or a plinth. (i.e. - Page 8 1.1 General Safety Warnings 1. SAFETY INSTRUCTIONS 1.1 General Safety Warnings 1.1 General Safety Warnings 1.1 General Safety Warnings 1. SAFETY INSTRUCTIONS Icon Type Meaning Icon Type RISK OF EL WARNING: WARNING: WARNING: Icon Type Meaning Icon Type Meaning WARNING Serious injury or death risk WARNING Serious in...
-
Page 9: Operation
OPERATION Product Overview 1. Induction Hob Oven Element ( Hidden under floor) 2. Element 10. Oven Element (Hidden under floor) (conventional models only) 3. Control Panel 11. Oven Element (fan forced models only) 4. Side Racks 12. Fan & Element Cover (fan forced models only) 5. -
Page 10: Induction Cooktop
OPERATION Control Panel 1. Induction control knobs 2. Oven temperature control knob 4. 3 button programmable timer 3. Oven function control knobs 1. Induction control knobs: operates 3. Oven function control knobs: and adjusts power level for each zone sets the desired oven function 2. -
Page 11: Safety Instructions
OPERATION 1. SAFETY INSTRUCTIONS PREPARING YOUR PRODUCT Preparing your appliance for the first time FOR THE FIRST TIME Please wipe out the oven interior prior to operation 1.1 General Safety Warnings 1. SAFETY INSTRUCTIONS with warm soapy water and polish dry with a soft Oven shelf positions clean cloth. - Page 12 OPERATION USING THE OVEN OF YOUR ELECTRIC COOKER Control Knob 1 & 2: Oven Function Control Knob 3: Temperature Control Knob Icons (printed around the knobs) Cooking Mode Selection Knob Cooking Temperature Selection Knob Induction Power Level Selection Knob...
-
Page 13: Conventional Oven
OPERATION Oven Light Turns on only the oven light, the light remains on for all other functions. Defrost The fan starts operating. To use this function, take your frozen food and place it in the oven on a shelf on the third slot from the bottom. It is recommended that you place an oven tray under the defrosting food to catch the melting ice. - Page 14 OPERATION OVEN TEMPERATURE (THERMOSTAT) KNOB Selection of cooking temperature is carried out by turning the knob anti-clockwise to the required temperature, between 60ºC to MAX. If the appliance is electric the “oven indicator lamp” will come on when the oven is heating up. 1.
-
Page 15: Adjusting The Time
OPERATION Using the Programmable Clock This model has a digital display, 24hr clock (3 Button Digital Clock) with 3 control buttons. When the power is connected, the screen displays ‘12:00’ and the bar above the ‘ ’ symbol flashes. Setting the time when power is first connected To set the correct time, press the ‘... -
Page 16: Automatic Setting
OPERATION START COOKING NOW FOR EXAMPLE: if cooking time takes 45 minutes and you want it to finish at 14:00 AND SET COOKING TIME 1. Press the function button repeatedly This semi-automatic setting of the oven until the bar above ‘ ’... - Page 17 1.1 General Safety Warnings 1. SAFETY INSTRUCTIONS OPERATION 1.1 General Safety Warnings 1. SAFETY INSTRUCTIONS START COOKING NOW TIMER AND SET THE FINISH TIME WARNING: The digital countdown timer can be set up to 23 hours and 59 minutes maximum. 1.
- Page 18 OPERATION COOKING GUIDE - OVEN Fan-forced Conventional Dishes Thermostat Shelf Cook time Thermostat Shelf Cook time position (min) position (min) Layered pastry 170 - 190 1, 2 or 3 35 - 45 170 - 190 1 or 2 35 - 45 Cake 150 - 170 1, 2 or 3...
-
Page 19: Simmering, Cooking Rice
OPERATION Simmering, cooking rice 3. Preheat the pan briefly and add two tablespoons of oil. Simmering occurs below boiling point, at around 4. Cook any meat first, and then 85°C, when bubbles are just rising occasionally put it aside and keep warm. to the surface of the water or sauce. - Page 20 • OPERATION • OPERATION • iron pot USING THE HOTPLATES OF YOUR COOKER Using the hotplates of your cooker OPERATION magnetic circuit OPERATION OPERATION A Word On Induction Cooking OPERATION ceramic glass plate • Induction cooking is a safe, advanced, efficient, and economical cooking technology. induction coil iron pot It works by electromagnetic vibrations generating heat directly in the pan, rather than indirectly through...
- Page 21 OPERATION OPERATION OPERATION OPERATION • • • 1.1 General Safety Warnings • OPERATION OPERATION OPERATION • • OPERATION OPERATION OPERATION • • Using the hotplates of your cooker Using the hotplates of your cooker OPERATION OPERATION • Icon Type Meaning •...
- Page 22 OPERATION (L1 & L2) and Boost (P) settings. • OPERATION • OPERATION OPERATION • -clockwise. • • 1 - 9 as well as extra low (L1 & L2) and Boost (P) settings. • OPERATION • OPERATION -clock USING YOUR HOB When You Have Finished Cooking •...
-
Page 23: Keep Warm Function
OPERATION OPERATION • -clockwise. • 1 - 9 as well as extra low • (L1 & L2) and Boost (P) settings. • OPERATION • OPERATION KEEP WARM FUNCTION RESIDUAL HEAT WARNING OPERATION OPERATION • -clockwise back to the off ( •... - Page 24 1. SAFETY INSTRUCTIONS 1. SAFETY INSTRUCTIONS 1.1 General Safety Warnings 1.1 General Safety Warnings 1. SAFETY INSTRUCTIONS 1. SAFETY INSTRUCTIONS WARNING: FITTING ACCESSORIES & CLEANING 1.1 General Safety Warnings 1.1 General Safety Warnings 1. SAFETY INSTRUCTIONS 1.1 General Safety Warnings 1.
- Page 25 FITTING ACCESSORIES & CLEANING 5. Withdraw the hinge hooks from their location following arrow C. 4. Gently close the door until left and right hinge levers A are hooked to part B of the door. 6. Rest the door on a soft surface; 7.
- Page 26 1.1 General Safety Warnings 1. SAFETY INSTRUCTIONS FITTING ACCESSORIES & CLEANING 1.1 General Safety Warnings 1. SAFETY INSTRUCTIONS 1.1 General Safety Warnings . SAFETY INSTRUCTIONS Cleaning the door glass Clean the glass door using non-abrasive products or sponges and dry it with a soft cloth. 1.1 General Safety Warnings 1.
-
Page 27: Cleaning The Hob
FITTING ACCESSORIES & CLEANING CLEANING THE HOB What? How? Important! 1. Switch the power Everyday soiling When the power to the cooktop on glass (fingerprints, to the cooktop off. is switched off, there will be no marks, stains left by ‘hot surface’... -
Page 28: General Safety Warnings
WARNING: HINT & TIPS .1 General Safety Warnings Icon Type Meaning WARNING: Type Meaning WARNING Serious injury or death risk SOLVING PROBLEMS WARNING Serious injury or death risk WARNING: RISK OF ELECTRIC SHOCK Dangerous voltage risk 1.4 During Cleaning and Maintenance If you have a problem with your appliance, check the table below before calling service. - Page 29 HINT & TIPS Problem Possible causes What to do Condensation forming Induction cooking does not directly Use rangehoods with larger filter on rangehood or heat the air around the vessel which areas. Check rangehood installation surrounding surfaces can cause condensation to form height.
- Page 30 HINT & TIPS RATION OPERATION Problem Possible causes What to do • Fan noise coming from A cooling fan built into your induction This is normal and needs no action the induction hob hob has come on to prevent the •...
-
Page 31: Installation
1. SAFETY INSTRUCTIONS 1.1 General Safety Warnings 1. SAFETY INSTRUCTIONS 1. SAFETY INSTRUCTIONS 1.1 General Safety Warnings INSTALLATION WARNING: 1. SAFETY INSTRUCTIONS 1.1 General Safety Warnings 1. SAFETY INSTRUCTIONS 1. SAFETY INSTRUCTIONS 1.1 General Safety Warnings 1.1 General Safety Warnings WARNING: Icon Type... - Page 32 INSTALLATION Overheat clearances The distance between the highest part of the hob of the cooking appliance should be higher than 600mm for a range hood and higher than 750mm for an overhead exhaust fan.
-
Page 33: Installation Sequence
1.1 General Safety Warnings 1. SAFETY INSTRUCTIONS INSTALLATION WARNING: 1.1 General Safety Warnings Installation Sequence Warning for installer Icon Type Meanin The safety chains on the rear of Only a qualified person in compliance with the WARNING: Icon Type Meaning WARNING Serious injury or the cooker must be installed. - Page 34 1. SAFETY INSTRUCTIONS WARNING: INSTALLATION 1.1 General Safety Warnings 1.1 General Safety Warnings . SAFETY INSTRUCTIONS Icon Type Meaning WARNING: Icon Type Meaning WARNING Serious injury or death risk WARNING Serious injury or death risk WARNING: WARNING: RISK OF ELECTRIC SHOCK Dangerous voltage risk FITTING A POWER SUPPLY CABLE RISK OF ELECTRIC SHOCK...
-
Page 35: Technical Specs
Icon Type Meaning WARNING: Type Meaning WARNING Serious injury or death risk WARNING Serious injury or death risk TECHNICAL SPECS WARNING: RISK OF ELECTRIC SHOCK Dangerous voltage risk 1.4 During Cleaning and Maintenance RISK OF ELECTRIC SHOCK Dangerous voltage risk SYMBOL ISO 7010 W021 WARNING: SYMBOL ISO 7010 W021... - Page 36 TECHNICAL SPECS Bottom Grill Bottom Grill Circulation fan...
-
Page 37: Manufacturer Guarantee
Australia / New Zealand. b) In the case of Belling products used for purposes other than personal, domestic or household purposes (including business or commercial use), a period of 90 days from the date the product is purchased as a brand-new product from a retailer located in Australia / New Zealand. - Page 38 MANUFACTURER GUARANTEE 2. Warranty exclusions This express warranty does not apply where: a) The product has been installed, used or operated otherwise than in accordance with the product manual or other similar documentation provided to you with the product; b) The product requires repairs due to damage resulting from accident, misuse, incorrect installation, insect or vermin infestation, improper liquid spillage, cleaning or maintenance, unauthorised modification, use on an incorrect voltage, power surges and dips, voltage supply problems, tampering or unauthorised repairs by any persons, use of defective or incompatible...
- Page 39 MANUFACTURER GUARANTEE 4. How to make a claim You may make a claim under this warranty through our website, contacting our customer care line or via email. Contact details for Glen Dimplex Australia and New Zealand can be found at the end of this document. To make a valid claim under this warranty, you must: a) Lodge the claim with us as soon as possible and no later than 14 days after you first become aware of the breakdown;...
- Page 40 NOTES...
- Page 41 NOTES...
- Page 42 NOTES...
- Page 43 READ THE INSTRUCTION BOOKLET BEFORE INSTALLING AND USING THE APPLIANCE. The manufacturer will not be responsible for any damage to property or to persons caused by incorrect installation or improper use of the appliance. The manufacturer is not responsible for any inaccuracies, due to printing or transcription errors, contained in this manual. In addition, the appearance of the figures reported is also purely indicative.
- Page 44 | belling.co.nz...
Need help?
Do you have a question about the Mini Richmond BMR60DOIND and is the answer not in the manual?
Questions and answers