Mitsubishi Electric City Multi PKFY Series Technical & Service Manual
Hide thumbs
Also See for City Multi PKFY Series:
- Technical & service manual (50 pages) ,
- Technical & service manual (50 pages) ,
- Technical & service manual (34 pages)
Advertisement
SPLIT-TYPE, HEAT PUMP AIR CONDITIONERS
TECHNICAL & SERVICE MANUAL
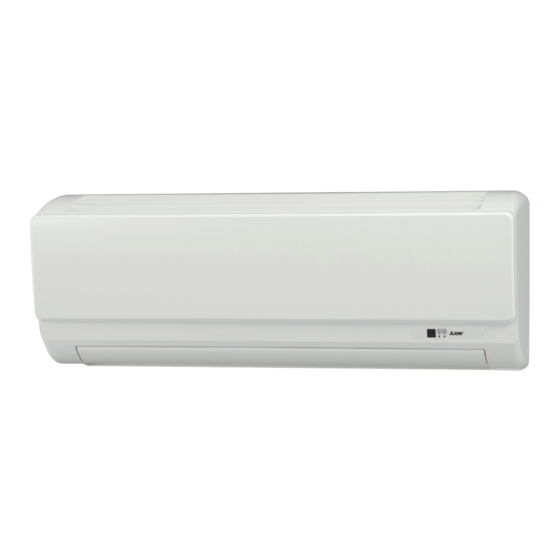
Indoor unit
[Model names]
PKFY-P06NBMU-E
PKFY-P08NBMU-E
INDOOR UNIT
[Service Ref.]
PKFY-P06NBMU-E
PKFY-P06NBMU-ER1
PKFY-P08NBMU-E
PKFY-P08NBMU-ER1
Model name
indication
R410A
R22
CONTENTS
1. TECHNICAL CHANGES ......................... 2
2. PART NAMES AND FUNCTIONS .......... 2
3. SPECIFICATION ..................................... 5
4. OUTLINES AND DIMENSIONS .............. 7
5. WIRING DIAGRAM ................................. 8
6. REFRIGERANT SYSTEM DIAGRAM .......... 9
7. MICROPROCESSOR CONTROL ......... 10
8. TROUBLESHOOTING .......................... 15
9. DISASSEMBLY PROCEDURE ............. 23
PARTS CATALOG (OCB461)
September 2012
No. OCH461
REVISED EDITION-B
Revision:
• "8-2. Function of Dip
switch" has been modified.
• Some descriptions have
been modified.
• Please void OCH461
REVISED EDITION-A.
Note:
• This manual describes only
service data of the indoor
units.
• RoHS compliant products
have <G> mark on the
spec name plate.
Advertisement
Table of Contents

Related Manuals for Mitsubishi Electric City Multi PKFY Series


Summary of Contents for Mitsubishi Electric City Multi PKFY Series
-
Page 1: Table Of Contents
SPLIT-TYPE, HEAT PUMP AIR CONDITIONERS September 2012 No. OCH461 REVISED EDITION-B TECHNICAL & SERVICE MANUAL R410A Indoor unit [Model names] [Service Ref.] Revision: • "8-2. Function of Dip PKFY-P06NBMU-E PKFY-P06NBMU-E switch" has been modified. • Some descriptions have PKFY-P06NBMU-ER1 been modified. •... -
Page 2: Technical Changes
Use the specifi ed refrigerant only Never use any refrigerant other than that specifi ed. Doing so may cause a burst, an explosion, or fi re when the unit is being used, serviced, or disposed of. Correct refrigerant is specifi ed in the manuals and on the spec labels provided with our products. We will not be held responsible for mechanical failure, system malfunction, unit breakdown or accidents caused by failure to follow the instructions. - Page 3 Wireless remote controller display CHECK TEST RUN display Lights up while the signal is transmitted to CHECK and TEST RUN display indicate that the indoor unit when the button is pressed. the unit is being checked or test-run. display MODEL SELECT display SET TEMP.
- Page 4 Wired remote controller Display Section “Sensor” indication Day-of-Week Shows the current day of the week. Displays when the remote controller sensor is used. For purposes of this explanation, Time/Timer Display all parts of the display are shown. Shows the current time, unless the simple or Auto Off During actual operation, only “Locked”...
-
Page 5: Specification
SPECIFICATION 3-1. Specifi cations PKFY-P08NBMU-E PKFY-P06NBMU-E Service Ref. PKFY-P08NBMU-ER1 PKFY-P06NBMU-ER1 Power source 1-phase 208/230V 60Hz Cooling capacity (Nominal) Btu/h 6,000 8,000 0.03 0.03 Power input 0.15 0.15 Current input Heating capacity (Nominal ) Btu/h 6,700 9,000 0.03 0.03 Power input 0.15 0.15 Current input... - Page 6 3-2. Electrical parts specifi cations Service Ref. PKFY-P06NBMU-E PKFY-P08NBMU-E Symbol PKFY-P06NBMU-ER1 PKFY-P08NBMU-ER1 Parts name Room temperature Resistance 30°F/15.8k , 50°F/9.6k , 70°F/6.0k , 80°F/4.8k , 90°F/3.9k , 100°F/3.2k TH21 thermistor Liquid pipe thermistor Resistance 30°F/15.8k , 50°F/9.6k , 70°F/6.0k , 80°F/4.8k , 90°F/3.9k , 100°F/3.2k TH22 TH23 Resistance 30°F/15.8k , 50°F/9.6k , 70°F/6.0k , 80°F/4.8k , 90°F/3.9k , 100°F/3.2k...
-
Page 7: Outlines And Dimensions
OUTLINES AND DIMENSIONS PKFY-P06NBMU-E Unit : inch (mm) 30-13/16(783) PKFY-P08NBMU-E PKFY-P06NBMU-ER1 PKFY-P08NBMU-ER1 32-1/8(815) 8-7/8(225) 3/16(5) 25-3/16(640) 4-1/2(115) Air intake Air intake 4-3/16(106.7) (Direction) 1/8(3) installaion plate Power supply Terminal block Transmission Address board Air intake (Direction) 2-7/8 25-3/16(640) Air intake (74.6) Address board 27-3/8(695) -
Page 8: Wiring Diagram
WIRING DIAGRAM PKFY-P06NBMU-E PKFY-P08NBMU-E PKFY-P06NBMU-ER1 PKFY-P08NBMU-ER1 Legend Symbol Symbol Symbol Name Name Name Fan motor Address board Indoor controller board Vane motor Switch Mode selection CN32 Connector Remote switch Centrally control Linear expansion valve CN51 Voltage selection Power supply Remote indication, SW11 Address setting 1s digit CN52... -
Page 9: Refrigerant System Diagram
REFRIGERANT SYSTEM DIAGRAM PKFY-P06NBMU-E PKFY-P08NBMU-E PKFY-P06NBMU-ER1 PKFY-P08NBMU-ER1 Gas pipe temperature thermistor TH23 Gas pipe Flare Strainer (#100mesh) Liquid pipe temperature thermistor TH22 Liquid pipe Strainer Heat exchanger (#100mesh) Linear expansion valve Room temperature thermistor Strainer TH21 (#100mesh) Unit: mm(inch) Service ref. PKFY-P06/08NBMU-E PKFY-P06/08NBMU-ER1 Item... -
Page 10: Microprocessor Control
MICROPROCESSOR CONTROL INDOOR UNIT CONTROL 7-1. COOL OPERATION <How to operate> Press POWER ON/OFF button. TIME SUN MON TUE WED THU FRI SAT TIMER AFTER AFTER Press the operation MODE button to display COOL. ERROR CODE FUNCTION û Fû C FILTER û... - Page 11 7-2. DRY OPERATION <How to operate> Press POWER ON/OFF button. TIME SUN MON TUE WED THU FRI SAT TIMER AFTER AFTER Press the operation MODE button to display DRY. ERROR CODE FUNCTION û Fû C FILTER û Fû C Press the TEMP. button to set the desired temperature. WEEKLY SIMPLE ONLY1Hr.
- Page 12 7-3. FAN OPERATION <How to operate> Press POWER ON/OFF button. TIME SUN MON TUE WED THU FRI SAT Press the operation MODE button to display FAN. TIMER AFTER AFTER ERROR CODE FUNCTION û Fû C FILTER û Fû C WEEKLY SIMPLE ONLY1Hr.
- Page 13 7-4. HEAT OPERATION <How to operate> Press POWER ON/OFF button. Press the operation MODE button to display HEAT. TIME SUN MON TUE WED THU FRI SAT Press the TEMP. button to set the desired temperature. TIMER AFTER AFTER ERROR CODE FUNCTION NOTE: The set temperature changes 2°F when the button is...
- Page 14 From the preceding page Control modes Control details Remarks 2-3. Thermo OFF mode 2. Fan When the thermo stat function changes to OFF, the indoor fan operates in [Extra low]. 2-4. Heat defrosting mode The indoor fan stops. (1) Initial setting: OFF → HEAT···[last setting] 3.
-
Page 15: Troubleshooting
TROUBLESHOOTING 8-1. HOW TO CHECK THE PARTS PKFY-P06NBMU-E PKFY-P08NBMU-E PKFY-P06NBMU-ER1 PKFY-P08NBMU-ER1 Parts name Check points Room temperature Disconnect the connector then measure the resistance with a tester. thermistor (TH21) (At the ambient temperature 50°F~86°F) Liquid pipe temperature Normal Abnormal thermistor (TH22) Refer to the next page for the details. - Page 16 8-1-1. Thermistor < Thermistor for lower temperature > <Thermistor characteristic graph> Room temperature thermistor (TH21) Thermistor for Liquid pipe temperature thermistor (TH22) lower temperature Gas pipe temperature thermistor (TH23) Thermistor R =15kΩ ± 3% Fixed number of B=3480 ± 2% Rt=15exp { 3480( 273+(t-32)/1.8 30°F...
- Page 17 <Output pulse signal and the valve operation> Closing a valve : 1 → 2 → 3 → 4 → 1 Output Output Opening a valve : 4 → 3 → 2 → 1 → 4 (Phase) The output pulse shifts in above order. Note: •...
- Page 18 8-2. Function of Dip switch PKFY-P06NBMU-E PKFY-P08NBMU-E PKFY-P06NBMU-ER1 PKFY-P08NBMU-ER1 Operation by switch Effective Switch Pole Function Remarks timing Thermistor<Room temperature> Indoor unit Built-in remote controller Address board position Filter clogging detection Provide Not provide <Initial setting> Filter cleaning sign 2,500 hr 100 hr 1 2 3 4 5 6 7 8 9 10 Fresh air intake...
- Page 19 Effective Operation by switch Remarks Switch timing SW11 SW12 SW11 Address board 1s digit How to set addresses address Example : If address is "3", remain SW12 <Initial setting> setting (for over 10) at "0", and match SW11 (for 1 to 9) SW12 SW11 SW12...
- Page 20 8-3. TEST POINT DIAGRAM 8-3-1. Indoor controller board PKFY-P06NBMU-E PKFY-P08NBMU-E PKFY-P06NBMU-ER1 PKFY-P08NBMU-ER1 CN5V CN60 Vane motor output Linear expansion CN81 CN90 CN29 (MV) valve output (LEV) Connected to the Connected to the wireless Pipe temperature 12VDC pulse output 12VDC pulse output address board (CN82) remote controller board (W.B) thermistor/Gas (TH23)
- Page 21 8-3-2. Indoor power board PKFY-P06NBMU-E PKFY-P08NBMU-E PKFY-P06NBMU-ER1 PKFY-P08NBMU-ER1 Power supply for indoor controller board Fan motor output (MF) Between 1 to 3 208/230V AC CN2M FUSE Connected to the terminal block (TB5) 6A 250V (M-NET transmission connecting wire) 24-30V DC (non-polar) CN35P Connected to the indoor controller board (CN35M)
- Page 22 8-3-2. Indoor power board PKFY-P06NBMU-E PKFY-P08NBMU-E Power supply for indoor controller board PKFY-P06NBMU-ER1 PKFY-P08NBMU-ER1 Fan motor output (MF) Between 1 to 3 208/230V AC CN2M Connected to the terminal block (TB5) FUSE (M-NET transmission connecting wire) 6A 250V 24-30V DC (non-polar) CN35P Connected to the indoor controller board (CN35M)
-
Page 23: Disassembly Procedure
DISASSEMBLY PROCEDURE PKFY-P06NBMU-E PKFY-P08NBMU-E Be careful when removing heavy parts. OPERATION PROCEDURE PHOTOS & ILLUSTRATIONS 1. REMOVING THE LOWER SIDE OF THE INDOOR UNIT Figure 1 Figure 2 FROM THE INSTALLATION PLATE When there is removing plate (1) Remove the corner box at right lower side of the indoor unit and remove the removing plate from the corner box. - Page 24 OPERATION PROCEDURE PHOTOS 3. REMOVING THE INDOOR CONTROLLER BOARD AND Electrical box cover Photo 2 INDOOR POWER BOARD (1) Remove the front panel. (Refer to 2) (2) Remove the electrical box cover (screw 4 × 10). (Refer to the Photo 2) INDOOR CONTROLLER BOARD (1) Disconnect the following connectors on the indoor controller board.
- Page 25 OPERATION PROCEDURE PHOTOS 5. REMOVING THE NOZZLE ASSEMBLY AND DRAIN HOSE Photo 5 (1) Remove the front panel (Refer to 2). Heat exchanger Electrical box (2) Remove the electrical box cover. (3) Disconnect the connector (CN5V) on the indoor controller Drain hose board.
- Page 26 PKFY-P06NBMU-ER1 PKFY-P08NBMU-ER1 Be careful when removing heavy parts. OPERATION PROCEDURE PHOTOS & ILLUSTRATIONS 1. REMOVING THE LOWER SIDE OF THE INDOOR UNIT Figure 1 Figure 2 FROM THE INSTALLATION PLATE When there is removing plate (1) Remove the corner box at right lower side of the indoor unit and remove the removing plate from the corner box.
- Page 27 OPERATION PROCEDURE PHOTOS & ILLUSTRATIONS 3. REMOVING THE INDOOR CONTROLLER BOARD AND Photo 2 INDOOR POWER BOARD Electrical box (1) Remove the front panel. (Refer to procedure 2) cover (2) Remove the electrical box cover (screw 4 × 10). (See the Photo 2) Screw for INDOOR CONTROLLER BOARD electrical box...
- Page 28 OPERATION PROCEDURE PHOTOS & ILLUSTRATIONS 6. REMOVING THE ELECTRICAL BOX Photo 6 (1) Remove the front panel. (Refer to procedure 2) (2) Remove the electrical box cover. (See the Photo 2) Indoor controller board (3) Remove the water cut. (See the Photo 3) Screw for Fixture for Linear...
- Page 29 OPERATION PROCEDURE PHOTOS & ILLUSTRATIONS 8. REMOVING THE VANE MOTOR Photo 10 (1) Remove the front panel. (Refer to procedure 2) (2) Remove the screw of the electrical parts box cover, and remove the cover. Heat exchanger (3) Remove the 2 screws of the vane motor. Disconnect the relay connector and remove the motor Vane motor fixing from the shaft.
- Page 30 HEAD OFFICE : TOKYO BLDG., 2-7-3, MARUNOUCHI, CHIYODA-KU TOKYO 100-8310, JAPAN Copyright 2009 MITSUBISHI ELECTRIC CORPORATION Distributed in Sep. 2012 No. OCH461 REVISED EDITION-B Distributed in Nov. 2011 No. OCH461 REVISED EDITION-A Distributed in Apr. 2009 No. OCH461 PDF 7 New publication, effective Sep.
- Page 31 HEAD OFFICE : TOKYO BLDG., 2-7-3, MARUNOUCHI, CHIYODA-KU TOKYO 100-8310, JAPAN Copyright 2009 MITSUBISHI ELECTRIC CORPORATION Distributed in Nov. 2011 No. OCH461 REVISED EDITION-A Distributed in Apr. 2009 No. OCH461 PDF 7 New publication, effective Nov. 2011 Made in Japan...
- Page 32 SPLIT-TYPE, HEAT PUMP AIR CONDITIONERS November 2011 No. OCB461 REVISED EDITION-A PARTS CATALOG R410A Indoor unit Revision: [Model names] [Service Ref.] • PKFY-P06/08NBMU-ER1 PKFY-P06NBMU-E PKFY-P06NBMU-E have been added in REVISED EDITION-A. • Some descriptions have PKFY-P06NBMU-ER1 been modified. PKFY-P08NBMU-E PKFY-P08NBMU-E •...
- Page 33 RoHS PARTS LIST PANEL AND HEAT EXCHANGER PARTS PKFY-P06NBMU-E PKFY-P08NBMU-E PKFY-P06NBMU-ER1 PKFY-P08NBMU-ER1 For PKFY-P・NBMU-E For PKFY-P・NBMU-ER1 Q'ty/set Wiring Recom- Remarks PKFY-P06NBMU Part No. Part Name Specifi cation Diagram mended PKFY-P08NBMU (Drawing No.) Symbol Q'ty -ER1 R01 E01 635 T7W E11 651 FRONT PANEL R01 E14 054 HOLDER...
- Page 34 ELECTRICAL PARTS PKFY-P06NBMU-E PKFY-P08NBMU-E PKFY-P06NBMU-ER1 PKFY-P08NBMU-ER1 12 13 Q'ty/set Wiring Recom- Remarks PKFY-P06NBMU Part No. Part Name Specifi cation Diagram mended PKFY-P08NBMU (Drawing No.) Symbol Q'ty -ER1 R01 23A 530 NOZZLE R01 E23 223 VANE MOTOR R01 E26 002 AUTO VANE R01 23A 527 DRAIN HOSE R01 23A 126 MOTOR BAND SET(LEFT,RIGHT)
- Page 35 2-4. EXTERNAL HEATER ADAPTER Part No. PAC-SA88HA-E HEAD OFFICE : TOKYO BLDG., 2-7-3, MARUNOUCHI, CHIYODA-KU, TOKYO 100-8310, JAPAN CCopyright 2009 MITSUBISHI ELECTRIC CORPORATION New publication, effective Nov. 2011 Distributed in Nov. 2011 No. OCB461 REVISED EDITION-A Specifications arer subject to change without notice.
Need help?
Do you have a question about the City Multi PKFY Series and is the answer not in the manual?
Questions and answers
we have city multi unit PMFY-PO8NBMU-E
@B B PATEL
The Mitsubishi Electric City Multi PKFY-P08NBMU-E unit may not be heating the room due to several possible reasons:
1. Power Issues – Ensure the unit is receiving the correct power supply (1-phase 208/230V, 60Hz). If power input is disrupted, the unit will not function properly.
2. Thermistor Disconnection – If the room temperature thermistor (TH21) is removed or improperly connected, the unit may not detect temperature changes correctly, affecting heating performance.
3. Airflow Setting – If SW1-7 and SW1-8 are not set correctly, airflow may be restricted, impacting heating efficiency.
4. Error Signal Input – If an error signal has been input to the unit, it might be in an error state, preventing operation.
5. Heat Exchanger Issues – The aluminum fin and copper tube heat exchanger might be obstructed or malfunctioning, reducing heat transfer efficiency.
6. Fan Operation – If the line flow fan is not operating properly due to motor failure (0.008 kW motor output), airflow may be insufficient to heat the room.
Checking these factors can help diagnose why the unit is not heating the room.
This answer is automatically generated
unit does not cool
The Mitsubishi Electric City Multi PKFY Series unit may not be cooling due to several possible reasons:
1. Incorrect Refrigerant – Using a refrigerant other than the specified one can lead to system malfunction or failure.
2. Mechanical Failure – Issues with components like the heat exchanger or other internal parts could prevent cooling.
3. Electrical Problems – Faulty wiring, incorrect voltage, or electrical component failure may affect the unit’s operation.
4. Blocked Airflow – A clogged air filter, obstructed intake, or outlet can reduce cooling efficiency.
5. Incorrect Settings – The remote controller settings may be incorrect, such as being set to heating mode instead of cooling.
6. System Malfunction – If the unit is experiencing an internal malfunction, it may require servicing or troubleshooting.
To resolve the issue, check the refrigerant type, clean or replace filters, inspect electrical connections, and verify the unit’s settings. If problems persist, professional servicing may be required.
This answer is automatically generated