Velux Integra KLI 310 Directions For Use Manual
Hide thumbs
Also See for Integra KLI 310:
- Instructions manual (55 pages) ,
- Instructions manual (15 pages) ,
- Quick start manual (9 pages)
Advertisement
Table of Contents
- 1 Table of Contents
- 2 Wall Switch Types
- 3 Wall Switch Functionality
-
4
Rain Sensor
- 4.1 Setup of Wall Switch KLI 311 to Operate VELUX INTEGRA ® Flat Roof Window CVP
- 4.2 Setup of Wall Switch KLI 312 to Operate VELUX INTEGRA ® Solar Blinds DSL/RSL/FSL/FSC
- 4.3 Setup of Wall Switch KLI 313 to Operate VELUX INTEGRA ® Solar Awning Blind MSL
- 4.4 Setup of Wall Switch KLI 313 to Operate VELUX INTEGRA ® Solar Roller Shutter SSL or SST
- 4.5 Setup of Wall Switch KLI 313 to Operate VELUX INTEGRA ® Solar Awning Blind MSG
- 5 Setup of a New Wall Switch KLI 311/312/313 in Addition to an Existing Wall Switch KLI 311/312/313
- 6 Setup of Wall Switch for Group Control of Products
- Download this manual
See also:
Instruction Manual
VELUX INTEGRA
KLI 310/311/312/313
®
Congratulations on your new VELUX INTEGRA
product!
®
Thank you for buying this VELUX INTEGRA
product.
®
The wall switch has been produced and tested in accordance with the newest
methods and strictest requirements and will help you to get the most out of all your
VELUX INTEGRA
products.
®
DIRECTIONS FOR USE FOR VELUX INTEGRA
KLI 310/311/312/313. ©2018, 2019 VELUX GROUP
®
® VELUX, THE VELUX LOGO, VELUX INTEGRA, io-homecontrol AND THE io-homecontrol LOGO ARE REGISTERED TRADEMARKS USED UNDER LICENCE BY THE VELUX GROUP
VAS 454360-2019-02
ENGLISH
Advertisement
Table of Contents

Related Manuals for Velux Integra KLI 310


Summary of Contents for Velux Integra KLI 310
- Page 1 ® DIRECTIONS FOR USE FOR VELUX INTEGRA KLI 310/311/312/313. ©2018, 2019 VELUX GROUP ® ® VELUX, THE VELUX LOGO, VELUX INTEGRA, io-homecontrol AND THE io-homecontrol LOGO ARE REGISTERED TRADEMARKS USED UNDER LICENCE BY THE VELUX GROUP VAS 454360-2019-02 ENGLISH...
-
Page 2: Table Of Contents
KLI 310/311/312/313 ® Contents Wall switch types Wall switch functionality Rain sensor Setup of wall switch KLI 311 to operate VELUX INTEGRA roof windows GGL/GGU ® or roof windows GGL/GGU with VELUX INTEGRA window operators ® Setup of wall switch KLI 311 to operate VELUX INTEGRA flat roof window CVP ®... -
Page 3: Wall Switch Types
More products of the same type can be operated simultaneously with one KLI 310. To pair the KLI 310, follow the instructions for the product you wish to pair it with. KLI 311 Wall switch KLI 311 is delivered with VELUX INTEGRA roof windows and ® VELUX INTEGRA window operators. -
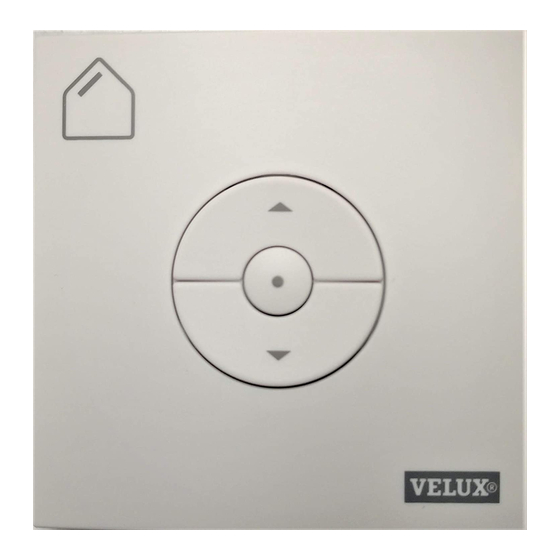
Page 4: Wall Switch Functionality
STOP key Product stops. Wall switch KLI has two buttons used for setup: The GEAR button "Open for registration". The PAIR button "Register". To push the buttons, use a pointed object. ENGLISH VELUX ®... -
Page 5: Rain Sensor
"K" in the size code on the data plate and can only be ® carried out with wall switch KLI 311. Note: Does not apply to VELUX INTEGRA roof windows without a "K" in the size code nor to VELUX INTEGRA flat-roof ® ®... - Page 6 Setup of wall switch KLI 311 to operate VELUX INTEGRA roof windows GGL/GGU or ® roof windows GGL/GGU with VELUX INTEGRA window operators ® If a non-functional wall switch must be replaced or if the wall switch cannot find certain products, the products can be prepared for registration by resetting them manually.
-
Page 7: Setup Of Wall Switch Kli 311 To Operate Velux Integra ® Flat Roof Window Cvp
Setup of wall switch KLI 311 to operate VELUX INTEGRA flat roof window CVP ® If a non-functional wall switch must be replaced or if the wall switch cannot find certain products, the products can be prepared for registration by resetting them manually. -
Page 8: Setup Of Wall Switch Kli 312 To Operate Velux Integra ® Solar Blinds Dsl/Rsl/Fsl/Fsc
Setup of wall switch KLI 312 to operate VELUX INTEGRA solar blinds DSL/RSL/FSL/FSC ® If a non-functional wall switch must be replaced or if the wall switch cannot find certain products, the products can be prepared for registration by resetting them manually. -
Page 9: Setup Of Wall Switch Kli 313 To Operate Velux Integra ® Solar Awning Blind Msl
Setup of wall switch KLI 313 to operate VELUX INTEGRA solar awning blind MSL ® If a non-functional wall switch must be replaced or if the wall switch cannot find certain products, the products can be prepared for registration by resetting them manually. -
Page 10: Setup Of Wall Switch Kli 313 To Operate Velux Integra ® Solar Roller Shutter Ssl Or Sst
Setup of wall switch KLI 313 to operate VELUX INTEGRA solar roller shutter SSL or SST ® If a non-functional wall switch must be replaced or if the wall switch cannot find certain products, the products can be prepared for registration by resetting them manually. -
Page 11: Setup Of Wall Switch Kli 313 To Operate Velux Integra ® Solar Awning Blind Msg
Setup of wall switch KLI 313 to operate VELUX INTEGRA solar awning blind MSG ® If a non-functional wall switch must be replaced or if the wall switch cannot find certain products, the products can be prepared for registration by resetting them manually. - Page 12 Setup of wall switch KLI 311/312/313 to operate electrical products connected to VELUX INTEGRA power supply unit KUX 110 ® If a non-functional wall switch must be replaced or if the wall switch cannot find certain products, the products can be prepared for registration by resetting them manually.
- Page 13 Setup of wall switch KLI 311/312/313 to operate electrical products connected to VELUX INTEGRA control unit KLC 500 ® If a non-functional wall switch must be replaced or if the wall switch cannot find certain products, the products can be prepared for registration by resetting them manually.
- Page 14 Setup of wall switch KLI 311/312/313 to operate electrical products already registered in VELUX INTEGRA control pad KLR 200 ® The instructions below show how to copy the contents of control pad KLR 200 to wall switch KLI 311/312/313. See also the instructions for the control pad.
-
Page 15: Setup Of A New Wall Switch Kli 311/312/313 In Addition To An Existing Wall Switch Kli 311/312/313
1 second. The product will start running briefly back and forth. Press PAIR button on the new wall switch for 1 second. 1 sec 1 sec The product can now be operated with both wall switches. ENGLISH VELUX ®... -
Page 16: Setup Of Wall Switch For Group Control Of Products
Press the GEAR button on wall switch for 1 second. Press the PAIR button on wall switch for 1 second. 1 sec 1 sec Wall switch can now operate both products. Wall switch can still operate its own product. ENGLISH VELUX ®... - Page 17 Manual operation of VELUX INTEGRA roof windows GGL/GGU ® Manual operation of centre-pivot windows You can open and close your centre-pivot window manually. If the window is already open, you must close it fully with the wall switch first. • Open the window by pulling downwards on the control bar of the window.
- Page 18 Closing of VELUX INTEGRA roof windows GGL/GGU ® in the case of power failure or discharged battery Manual closing without using the wall switch In case of power failure or discharged battery, you can close your centre-pivot window manually by disengaging the chain on the ventilation flap of the window.
- Page 19 Closing of VELUX INTEGRA flat roof window CVP ® without using the wall switch Flat roof windows Carefully remove the cover cap on the kerb. Press the test button on the window operator behind the cover cap briefly and refit the cover cap.
Need help?
Do you have a question about the Integra KLI 310 and is the answer not in the manual?
Questions and answers