
Related Manuals for Inalto ICC705TB


Summary of Contents for Inalto ICC705TB
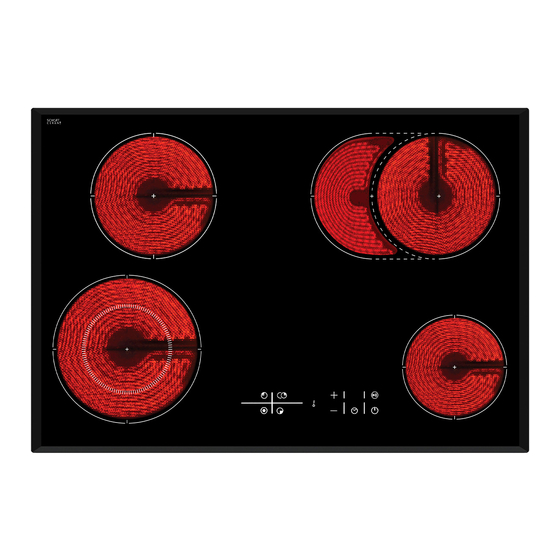
- Page 1 U S E R M A N U A L I N A L T O . C O M . A U 75cm Electric Cooktop — M O D E L C O D E / S I C C 7 0 5 T B A H I G H E R L E V E L O F C O O K I N G...
- Page 2 It is important that you read through the following use and care manual thoroughly to familiarise yourself with the installation and operation requirements of your appliance to ensure optimum performance. Again, thank you for choosing an InAlto appliance and we look forward to being of service to you. Kind Regards, The Residentia Team Postage.
- Page 3 CONTENTS INALTO.COM.AU WELCOME SAFE T Y SPECIFICATIONS INSTRUCTIONS USING YOUR OPERATING CLEANING & COOKTOP YOUR COOKTOP MAINTENANCE INSTALL ATION TROUBLESHOOTING PURCHASE DETAILS WARRANTY INFORMATION...
-
Page 4: Safety Instructions
► Repairs may only be carried out by authorised service agents. ► Your Inalto cooktop is not to be used by children or persons with reduced physical, sensory or mental capabilities, or lack of experience and knowledge, unless they have been given supervision or instruction. - Page 5 PAGE 05 INALTO.COM.AU DECLARATION OF CONFORMITY UNPACKING The manufacturer declares that the cooktop is built using During transportation, protective packaging was used to certified materials and requires the appliance to be installed protect the appliance against any damage. After unpacking, in accordance with the standards currently in force.
-
Page 6: Specifications
USER MANUAL PAGE 06 Specifications Product dimensions: Aperture dimensions: Depth: 520 mm Depth: 490 mm Width: 750 mm Width: Height: Product specifications: o 1 x 1.00 / 2.10 kW double zone (Ø 140/240 mm) o 1 x 1.40 / 2.20 kW oval zone (Ø 170/265 mm) o 1 x 1.80 kW zone (Ø... - Page 7 PAGE 07 INALTO.COM.AU Electrical details Rated Voltage: 220-240V~/380-415V 2N~/380-415V 3N~ 50/60Hz Supply Connection: (double pole switched fused outlet with 3mm contact gap) Max Rated Inputs: 7.3 kW ² (not supplied) Mains Supply Lead: 5 core x 1.5mm Ceramic hob surface layout 1 x 1.80 kW zone (Ø...
-
Page 8: Using The Ceramic Hob
USER MANUAL PAGE 08 Control panel layout Safety lock button Minus button Cooking zone selection buttons Plus button Timer display Timer button Zone timer activated LED Zone temperature display Pause button Power button Using the ceramic hob Before first use IMPORTANT: You should clean the ceramic hob surface. - Page 9 PAGE 09 INALTO.COM.AU Touch controls o All operations are performed by means of the touch controls that can be found on the control panel. o Each touch control has a visual display that corresponds to it. Switching the hob top on and off o Press the power button (11) to switch on the appliance.
- Page 10 USER MANUAL PAGE 10 Switching on a zone and setting a power level o press the "boiler plate" button to start the barbecue function, corresponding to the digital tube scintillation display gear (the default is 5 files), then click "add" and "subtract" button to adjust the gear position.
- Page 11 PAGE 1 1 INALTO.COM.AU Suspension o A. and plate heating furnace in the process, if you want to suspend this furnace operation (heating, timing), can be selected in furnace set, press "pause" button to suspend operation, display "P" suspended after the furnace plate.
- Page 12 USER MANUAL PAGE 12 Residual temperature o A. After the furnace plate is heated, the corresponding digital tube will flash display "H", indicating the high temperature. o B. The display time is as follows: o The burner is open for 3 seconds and "H" is not displayed. o Open the burner for 3-10 seconds, and "H"...
- Page 13 PAGE 13 INALTO.COM.AU o Before use, make sure that the bottoms of the saucepans are clean and dry. o When cold, the bottom of the pans should be slightly concave, as they expand when hot and lie flat on the surface of the hob. This will allow the heat to transfer more easily.
-
Page 14: Cleaning And Maintenance
USER MANUAL PAGE 14 Cleaning and maintenance Cleaning operations must only be carried out when the hob is cool. The appliance should be disconnected from your mains supply before commencing any cleaning process. Cleaning the ceramic hob top Any residues that are left on the hob top surface from cleaning agents will damage it. - Page 15 PAGE 15 INALTO.COM.AU Positioning The adjacent furniture must be able to withstand a minimum temperature rise of 85°C above the ambient temperature of the room it is located in, during periods of use. This appliance is classified as Class 3 and therefore is to be built into a kitchen unit (depending on size) or 600 mm worktop that is at least 30 mm thick.
- Page 16 USER MANUAL PAGE 16 o IMPORTANT: You must observe the ventilation requirements shown in the drawing opposite. o The air intake vent can be at the rear wall or in the base area. There is no need for venting at the front MIN.
- Page 17 PAGE 17 INALTO.COM.AU Inserting and Fixing the Cooktop • Carefully lower the cooktop into the aperture hole that you have cut out. • Using the screws provided, affix the Fig. 4 4 brackets to the underside of the cooktop, as illustrated (Fig. 4).
- Page 18 USER MANUAL PAGE 18 Connecting the mains supply cable o The mains terminal block is located on the underside of the hob and the terminals are accessible by removing the terminal block cover. This is done by depressing the front of the cover and releasing it from the securing clips.
- Page 19 The cable connections must be in accordance with the diagram PAGE 19 INALTO.COM.AU located on the bottom of the hob (see above). The links must also be positioned as indicated. o The cable connections must be in accordance with the diagram o You should use a good quality screwdriver to carefully, fully located on the bottom of the hob (see above).
-
Page 20: Troubleshooting
USER MANUAL PAGE 20 Troubleshooting Please read the issues below carefully and try all relevant steps. If none of this helps, please contact us on 1300 11 4357 for further advice or to schedule a technician to inspect your cooktop. Tips &... - Page 21 PAGE 21 INALTO.COM.AU RECEIPT Purchase Details For future reference, please record the following The rating plate of your hob is located on the underneath information which can be found on the rating plate and the of the appliance. Therefore please fit the duplicate data date of purchase which can be found on your sales invoice.
-
Page 22: Warranty Information
USER MANUAL PAGE 22 Warranty Information WARRANTY TERMS & CONDITIONS IN THIS WARRANTY COOKING APPLIANCES ‘acceptable quality’ as referred to in clause 10 of this (BUILT-IN OVENS, COOKTOPS) warranty has the same meaning referred to in the ACL; ‘ACL’ means Trade Practices Amendment (Australian This document sets out the terms and conditions of the Consumer Law) Act (No.2) 2010;... - Page 23 PAGE 23 INALTO.COM.AU 10. For Appliances and services provided by Residentia You will bear the cost of transportation, travel and delivery of the Appliance to and from Residentia Group in Australia, the Appliances come with a Group or its ASR. If you reside outside of the service...
- Page 24 A H I G H E R L E V E L O F C O O K I N G — W W W . R E S I D E N T I A . G R O U P...
Need help?
Do you have a question about the ICC705TB and is the answer not in the manual?
Questions and answers