Table of Contents
Advertisement
Advertisement
Table of Contents
Troubleshooting

Related Manuals for Janome Sewist 725s


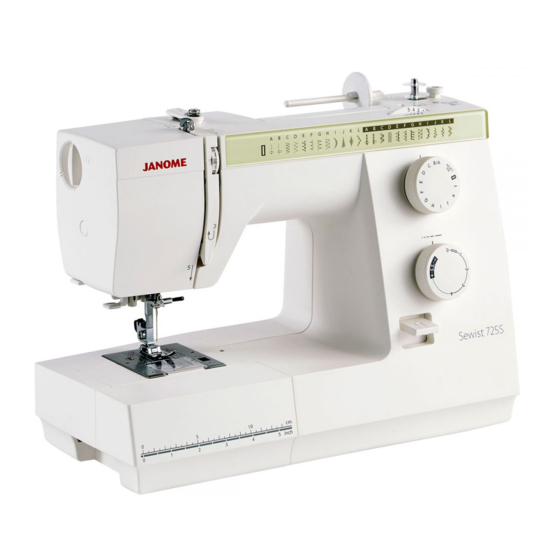
Summary of Contents for Janome Sewist 725s
- Page 1 INSTRUCTION BOOK...
- Page 3 IMPORTANT SAFETY INSTRUCTIONS When using an electrical appliance, basic safety precautions should always be followed, including the following: This sewing machine is designed and manufactured for household use only. Read all instructions before using this sewing machine. DANGER — To reduce the risk of electric shock: 1.
- Page 4 For Europe only: This appliance can be used by children aged from 8 years and above and persons with reduced physical, sensory or mental capabilities or lack of experience and knowledge if they have been given supervision or instruction concerning use of the appliance in a safe way and understand the hazards involved.
-
Page 5: Table Of Contents
TABLE OF CONTENTS ESSENTIAL PARTS UTILITY STITCHES Names of Parts ..........2 Basic Zigzag ...........21 Standard Accessories ........3 Overcasting ............21 Accessory storage ..........3 Knit Stitch ............22 Extension Table ..........4 Tricot Stitch (Multiple Zigzag Stitch) ....22 Free-arm sewing..........4 Straight Stretch Stitch ........23 Zigzag Stretch Stitch ........23 GETTING READY TO SEW Button Sewing ..........24... -
Page 6: Essential Parts Names Of Parts
ESSENTIAL PARTS Names of Parts Bobbin winder stopper Bobbin winder spindle Hole for extra spool pin Spool holder Spool pin Bobbin winding tension disc Thread take-up lever Foot pressure dial Face plate Thread cutter Needle threader Needle plate Extension table (Accessory storage) Hook cover plate Hook cover plate release button Thread tension dial... -
Page 7: Standard Accessories
Standard Accessories Zigzag foot A (set on the machine) Overedge foot C Zipper foot E Blind hemming foot G Buttonhole foot B Automatic buttonhole foot R Needle set Bobbin x4 (1 set on the machine) Screwdriver Lint brush Seam ripper (buttonhole opener) Quilting guide Spool holder (large) (set on the machine) Spool holder (small) -
Page 8: Extension Table
Extension Table To detach: Pull the extension table to the left. To attach: Push the extension table, inserting the tab into the slot until the table snaps into the machine. q Tab w Slot Free-arm sewing Free-arm sewing is used for stitching sleeves, waistbands, pant legs or any other tubular garments. It is also useful for darning socks or mending knees or elbows. -
Page 9: Getting Ready To Sew Connecting The Power Supply
GETTING READY TO SEW Connecting the Power Supply z Turn the power switch off. x Insert the machine plug into the machine socket. c Insert the power supply plug into the wall outlet. v Turn the power switch on. q Power switch w Machine plug e Machine socket r Power supply plug... -
Page 10: Reverse Stitch Lever
Reverse Stitch Lever Push the reverse stitch lever down to sew in reverse. The machine will sew in reverse while the lever is pushed. Foot Pressure Dial Turn the foot pressure dial to adjust the foot pressure. The foot pressure dial should be set at “ ”... -
Page 11: Raising And Lowering The Presser Foot
Raising and Lowering the Presser Foot The presser foot lifter raises and lowers the presser foot. You can raise the foot about 1/4˝ (0.6 cm) higher than the normal up position for easy removal of the presser foot, or to help you place heavy fabric under the foot. q Lowered position w Normal up position e Extra up position Changing the Presser Foot To remove: Raise the needle to its highest position by... -
Page 12: Removing And Attaching The Foot Holder
Removing and Attaching the Foot Holder WARNING: Turn OFF the power switch before detaching or attaching the foot holder. To remove: Remove the setscrew by turning it counterclockwise with a screwdriver and remove the foot holder. To attach: Match the hole in the foot holder with the threaded hole in the presser bar. -
Page 13: Needle And Thread Chart
To check needle straightness, place the flat side of the needle onto something flat (a needle plate, glass etc.) The gap between the needle and the flat surface should be consistent. Never use a blunt needle. r Gap Needle and Thread Chart • For general sewing, use needle size 11/75 or 14/90. • A fine thread and needle should be used for sewing lightweight fabrics, so the fabric will not be marred. • Heavy fabrics require a needle large enough to pierce the fabric without fraying the needle thread. • Always test the needle size on a small scrap of the fabric that will be used for actual sewing. • In general, use the same thread for the needle and bobbin. • When sewing stretch fabrics, very fine fabrics and synthetics, use a blue tip needle. • The blue tip needle effectively prevents skipped stitches. Fabric Thread Needle Lawn Georgette Silk #80-100 #9/65-11/75 Fine Tricot Cotton #80-100 Blue tip needle Organza Synthetic #80-100 Crepe Sheeting Silk #50... -
Page 14: Winding The Bobbin
Winding the Bobbin Setting the spool Place a spool of thread on the spool pin with the thread coming off the spool as illustrated. A: Press the large spool holder firmly against the spool of thread. q Large spool holder B: For a small spool, use the small spool holder. w Small spool holder Extra spool pin The extra spool pin is for bobbin winding without unthreading the machine. -
Page 15: Winding The Bobbin
Winding the bobbin z Draw the thread from the spool. Guide the thread around the bobbin winding tension disc. q Bobbin winding tension disc x Thread through the hole in the bobbin from the inside to the outside. Put the bobbin on the bobbin winder spindle with the free end of the thread coming out at the top. -
Page 16: Inserting The Bobbin
Inserting the bobbin z Place the bobbin in the bobbin holder with the thread running off as illustrated. q Thread x Guide the thread into the front notch on the front side of the bobbin holder. Draw the thread to the left, sliding it between the tension spring blades. w Front notch e Tension spring blade c Continue to draw the thread lightly until the... -
Page 17: Threading The Machine
Threading the Machine Raise the thread take-up lever to the highest position by turning the handwheel toward you. Raise the presser foot. z Draw the thread from the spool and pass it under the upper thread guide. Then draw it down along the right channel. -
Page 18: Needle Threader
Needle threader z Raise the needle to its highest position and lower the presser foot. Push down the needle threader knob as far as it will go. The hook comes out through the needle eye from behind. q Threader knob x Draw the thread from the left around the guide and under the hook. -
Page 19: Drawing Up The Bobbin Thread
Drawing up the Bobbin Thread z Raise the presser foot and hold the needle thread lightly with your left hand. q Needle thread x Turn the handwheel slowly toward you one complete turn. Bring the bobbin thread up by pulling the needle thread as illustrated. q Needle thread w Bobbin thread c Pull 4˝ (10 cm) of both threads back and... -
Page 20: Selecting The Stitch Pattern
Selecting the Stitch Pattern Turn the handwheel to raise the needle at its highest position. Stitch pattern selector dial Turn the stitch pattern selector dial to set the symbol of the desired stitch pattern at the setting mark. q Stitch pattern selector dial w Setting mark CAUTION: Do not turn the stitch pattern selector dial... -
Page 21: Adjusting Stretch Stitch Balance
Adjusting stretch stitch balance If the stretch stitch patterns are uneven when you sew on a particular fabric, correct them by turning the stitch length dial. “–” If the pattern is drawn out, correct them by “+” setting the dial to the “–” side. If the pattern is compressed, correct them by setting the dial to the “+” side. Stitch Width Adjusting Dial Turn the stitch width dial to set the desired stitch width number at the setting mark. -
Page 22: Balancing Needle Thread Tension
Balancing Needle Thread Tension The thread tension should be adjusted depending on the sewing materials, layers of fabric and sewing method. To adjust the thread tension, turn the thread tension dial. q Thread tension dial Balanced tension: The ideal straight stitch has threads locked between two layers of fabric, as illustrated. For an ideal zigzag stitch, the bobbin thread does not show on the right side (top side) of the fabric, and the needle thread shows slightly on the wrong side (bottom side) of the fabric. -
Page 23: Basic Sewing Straight Stitch Sewing
BASIC SEWING Straight Stitch Sewing q Stitch pattern: A / B w Stitch width: 0 or 5 e Stitch length: 1.5 – 4 r Thread tension: 2 – 6 t Presser foot: Zigzag foot A Starting to sew Raise the presser foot and place the fabric under the foot. -
Page 24: Seam Guides On The Needle Plate
Seam guides on the needle plate The seam guides on the needle plate help you to measure seam allowance. The numbers indicate the distance between the center needle position and the seam guide. q Seam guides Number Spacing (cm) Spacing (inch) (5/8) (3/4) Turning a square corner... -
Page 25: Utility Stitches Basic Zigzag
UTILITY STITCHES Basic Zigzag q Stitch pattern: w Stitch width: 1 – 5 e Stitch length: 0.5 – 3 r Thread tension: 2 – 5 t Presser foot: Zigzag foot A Simple zigzag stitching is widely used for overcasting, sewing on buttons etc. Adjust the stitch length to suit your sewing needs. -
Page 26: Knit Stitch
Knit Stitch q Stitch pattern: w Stitch width: e Stitch length: S.S. r Thread tension: 3 – 7 t Presser foot: Overedge foot C This stitch is ideal for finishing edges of stretch fabrics. It seams and finishes the fabric edges simultaneously. Place the edge of the fabric next to the guide of foot and sew while guiding the fabric edge along the guide. -
Page 27: Straight Stretch Stitch
Straight Stretch Stitch q Stitch pattern: A / B w Stitch width: 0 or 5 e Stitch length: S.S. r Thread tension: 2 – 5 t Presser foot: Zigzag foot A The pattern is sewn with two stitches forward and one stitch backward, forming a seam that does not rip easily. -
Page 28: Button Sewing
Button Sewing q Stitch pattern: w Stitch width: Adjust as necessary e Stitch length: r Thread tension: 3 – 7 t Presser foot: Buttonhole foot B y Feed dog: Lowered z Unthread the needle. Adjust the stitch width to match it with the span of the holes in the button. -
Page 29: Automatic Buttonhole
Automatic Buttonhole q Stitch pattern: w Stitch width: 4 – 5 e Stitch length: 0.5 – 1 r Thread tension: 1 – 5 t Presser foot: Automatic buttonhole foot R NOTE: The size of buttonhole is automatically determined by placing the button in the automatic buttonhole foot. - Page 30 c Pull the buttonhole lever down as far as it will r Buttonhole lever v Raise the foot and pass the needle thread through the opening in the foot. Draw both needle and bobbin threads to the left. Insert the fabric under the foot and lower the needle into the fabric at the starting point.
-
Page 31: Adjusting The Buttonhole Stitch Density
To sew another buttonhole, turn the stitch selector to “RESET”, then back to “ ” again, as shown. Now, simply step on the foot control to sew an identical buttonhole. m When buttonhole sewing is finished, push the buttonhole lever up as far as it will go. Adjusting the buttonhole stitch density Turn the stitch length dial within the range of “ ” to adjust the buttonhole stitch density. q Stitch length dial... -
Page 32: Corded Buttonhole
Corded Buttonhole q Stitch pattern: w Stitch width: 4 – 5 e Stitch length: 0.5 – 1 r Thread tension: 1 – 5 t Presser foot: Automatic buttonhole foot R z With the buttonhole foot raised, hook the filler cord on the spur at the back of the foot. Bring the ends toward you under the foot, clearing the front end. -
Page 33: Manual Buttonhole
Manual Buttonhole q Stitch pattern: w Stitch width: 4 – 5 e Stitch length: 0.5 – 1 r Thread tension: 1 – 5 t Presser foot: Buttonhole foot B If the diameter of the button is more than 1˝ (2.5 cm), a buttonhole must be made manually as follows: z Replace the foot with the buttonhole foot B. x Pull the buttonhole lever down as far as it will Draw both needle and bobbin thread to the left. - Page 34 b Restart the machine to sew the back bartack and right row, and then stop the machine at the starting point. n When buttonhole sewing is finished, push the buttonhole lever up as far as it will go.
-
Page 35: Zipper Application
Zipper Application q Stitch pattern: w Stitch width: e Stitch length: 1.5 – 4 r Thread tension: 3 – 6 t Presser foot: Zipper foot E Attaching the zipper foot A: To sew the left side of the zipper, attach zipper foot with the right side pin. B: To sew the right side of zipper, attach the zipper foot with the left side pin. - Page 36 To sew z Attach zipper foot with the right side pin. Fold back the upper layer seam allowance. Fold back the lower layer seam allowance to leave a 1/8˝ (0.4 cm) margin of fabric. q Lower layer w End of the opening e Zipper teeth r 1/8˝ (0.4 cm) margin t Upper layer y Opening size u Folded edge...
- Page 37 b Raise and release the foot, and re-attach it with the left side pin. Starting just below zipper bottom stop, sew across fabric to about 3/8˝ (1 cm) distance from the basting line. Turn fabric 90 degrees and sew a seam the entire length of the zipper tape. Before reaching the slider, stop the machine with needle in fabric and raise the foot. Use seam ripper to open a few inches of basting stitch. !3 Unstitch basting !4 3/8˝ (1 cm) n Unzip a few inches to clear a path for...
-
Page 38: Blind Hemming
Blind Hemming q Stitch pattern: E or F w Stitch width: 2 – 3 e Stitch length: 2 – 3 r Thread tension: 1 – 4 t Presser foot: Blind hemming foot G z On heavy weight fabrics that ravel, the raw edge should be overcast first. Fold the hem under the fabric as illustrated for fine or medium fabrics. -
Page 39: Decorative Stitches Smocking
DECORATIVE STITCHES Smocking q Stitch pattern: w Stitch width: 3 – 5 e Stitch length: S.S. r Thread tension: 1 – 4 t Presser foot: Zigzag foot A z Choose a soft and lightweight fabric such as batiste, gingham or challis. Cut the fabric three times wider than the project width. Increase the stitch length to “4”... -
Page 40: Quilting
Quilting q Stitch pattern: w Stitch width: e Stitch length: 1.5 – 4 r Thread tension: 3 – 6 t Presser foot: Zigzag foot A y Quilting guide The quilting guide will help keep the seam spacing constant. z Insert the quilting guide into the opening and set the quilting guide at the desired seam spacing. -
Page 41: Pin Tucking
Pin Tucking q Stitch pattern: w Stitch width: e Stitch length: 1.5 – 3 r Thread tension: 2 – 6 t Presser foot: Blind hemming foot G Fold a fabric wrong side together. Lower the needle into the fabric 0.1 – 0.2 cm inside the folded edge. -
Page 42: Fagoting
Fagoting q Stitch pattern: w Stitch width: 3 – 5 e Stitch length: 1 – 3 r Thread tension: 1 – 4 t Presser foot: Zigzag foot A Use this stitch to join two pieces of fabric to create an open work appearance, and add design interest. Fold under each fabric edge 1/2˝ (1.3 cm) and press. -
Page 43: Appliqué
Appliqué q Stitch pattern: w Stitch width: 3 – 5 e Stitch length: 0.5 – 1 r Thread tension: 1 – 4 t Presser foot: Buttonhole foot B y Foot pressure: “ ” (2) Baste appliqué pieces on the fabric, or fuse the appliqué pieces with an iron-on fabric joiner. Stitch around the appliqué, making sure the needle at the right swing falls along the outer edge of the appliqué. -
Page 44: Decorative Satin Stitches
Decorative Satin Stitches q Stitch pattern: I – L w Stitch width: 3 – 5 e Stitch length: 0.5 – 1 r Thread tension: 1 – 4 t Presser foot: Buttonhole foot B Determine the appropriate stitch density by test sewing. -
Page 45: Care And Maintenance
CARE AND MAINTENANCE WARNING: Turn the power switch off and unplug the machine before cleaning. NOTE: Do not dismantle the machine in any way other than what is explained in this section. Clean the outside of the machine with a soft cloth and mild soap. -
Page 46: Replacing The Bobbin Holder
Replacing the Bobbin Holder z Insert the bobbin holder into the hook race. x Make sure the knob of the bobbin holder fits next to the stopper on the race. q Knob w Stopper c Replace the bobbin. Attach the needle plate, inserting the two guide pins into the holes in the needle plate. Tighten the screw firmly with the screwdriver. -
Page 47: Troubleshooting
Troubleshooting Condition Cause Reference The needle 1. The needle thread is not threaded properly. Page 13 thread 2. The needle thread tension is too tight. Page 18 breaks. 3. The needle is bent or blunt. Page 9 4. The needle is incorrectly inserted. Page 8 5. -
Page 48: Troubleshooting
Troubleshooting Condition Cause Reference Noisy operation 1. The feed dog is packed with lint. Page 41 2. Lint has collected in the bobbin holder. Page 41 Layer slippage 1. The foot pressure is not adjusted properly. Page 6... - Page 49 This page is left intentionally blank...
- Page 50 This page is left intentionally blank...
- Page 52 507-850-607 (EN)
Need help?
Do you have a question about the Sewist 725s and is the answer not in the manual?
Questions and answers