Advertisement
Quick Links
Patents Pending, Registered Design
Electric Shower
Installation and Instruction Manual
Installer - please read all instructions carefully before installation
and leave this manual with the end user for future reference
Intertek BEAB Control
Intertek EMC Verified
(Europe)
Intertek ETL
(Europe)
Smart App
3yr
Warranty
3yr
Warranty
150kg
Rail Rating
150kg
Rail Rating
C0
Advertisement

Subscribe to Our Youtube Channel
Related Manuals for Akw iSure


Summary of Contents for Akw iSure
- Page 1 Smart App Warranty Warranty Intertek BEAB Control 150kg Rail Rating Patents Pending, Registered Design Intertek EMC Verified (Europe) Electric Shower Installation and Instruction Manual 150kg Rail Rating Intertek ETL Installer - please read all instructions carefully before installation (Europe) and leave this manual with the end user for future reference...
-
Page 2: Product Features
Smart App Product Features Product Features Warranty The iSure Electric Shower has been specifically designed to allow for easy installation. Advanced fitting innovations mean it’s quick and easy to install over most manufacturers’ footprints and extra safe. Flexible Installation 8 Water Inlet Points... -
Page 3: Table Of Contents
These instructions are provided to advise the minimum standards of installation and recommends the best practice for the installation. Due to the very wide variability of possible installation conditions AKW cannot provide all circumstances for the installation. AKW cannot accept any liability in connection with this information or its use. This information is provided on the condition that the person receiving it shall make their own tests to determine the suitability for their particular purpose. - Page 4 © 2015 AKW 14-009-033-07...
-
Page 5: User
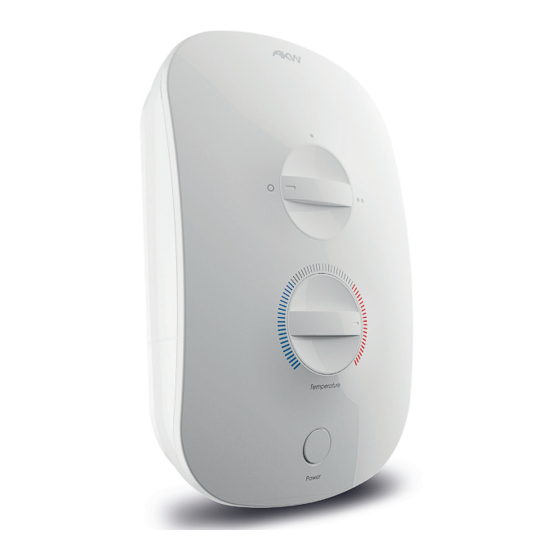
When the power is first turned on, the shower is in standby mode. To switch on, press and release the power button, the Temperature and Power Level will be indicated on the two controls. To switch off, press and release the power button to the stop water flowing. © 2015 AKW 14-009-033-07... - Page 6 © 2015 AKW 14-009-033-07...
- Page 7 Water from Obstruction in hose or handset Call AKW Technical Enquiries pressure relief outlet-PRD activated © 2015 AKW 14-009-033-07...
- Page 8 © 2015 AKW 14-009-033-07...
- Page 9 Live & Neutral Terminal Block Earth Terminal Block Removable Bottom Case Side Pipe & Cable Side Pipe & Cable Cut-out Entry Cut-out Entry Fixing Hole Rear of Front Cover Shower Hose Outlet Bottom Pipe Inlet and Cable Entry Cover © 2015 AKW 14-009-033-07...
- Page 10 Height (H) 380 mm Width (W) 230 mm Depth 85 mm Footprint Height (H2) 345 mm Footprint Width (W2) 210 mm Water Ingress Rating IPX4 Water and Cable Entry Points Top, bottom, side or back. © 2015 AKW 14-009-033-07...
- Page 11 © 2015 AKW 14-009-033-07...
- Page 12 © 2015 AKW 14-009-033-07...
- Page 13 Ensure the shower unit is positioned over a bath, shower tray or wet floor. The showerhead must be directed away from the shower unit, during normal use the showerhead must not spray directly on to the shower unit. © 2015 AKW 14-009-033-07...
- Page 14 Slide out the relevant pipe & entry covers pipe forwards, slide out and remove the bottom cover plate Note the unit can be temporarily hung using the top screws fixings whilst the cable and pipe work entries can be connected. © 2015 AKW 14-009-033-07...
- Page 15 Insert wall plugs and screw the top two and drill the marked fixing points. Before screws to the wall. Note: the bottom screw drilling, ensure there are no cables or water should only be fitted during final installation supplies running within the wall © 2015 AKW 14-009-033-07...
- Page 16 © 2015 AKW 14-009-033-07...
- Page 17 Before re-assembling the front cover, ensure the Attach the front cover to the shower and dials are turned clockwise and hit their end stops ensure all 4 screws are pushed home. as shown in the image above. © 2015 AKW 14-009-033-07...
-
Page 18: Installer
Note: If the stated flow rates are not available, it may not be possible to achieve optimum performance from the unit throughout the year. Note: If the Pressure Relief Device fails, then call the installer in first instance as there may be a dynamic pressure problem. © 2015 AKW 14-009-033-07... - Page 19 © 2015 AKW 14-009-033-07...
- Page 20 © 2015 AKW 14-009-033-07...
-
Page 21: Check List
Place absorbent material around the inlet areas in case of leaks. Check that there are no leaks Turn off the supply, dry off any water in and around the appliance before connecting or reinstating the electricity. © 2015 AKW 14-009-033-07... - Page 22 © 2015 AKW 14-009-033-07...
- Page 23 © 2015 AKW 14-009-033-07...
- Page 24 LEFT RIGHT © 2015 AKW 14-009-033-07...
-
Page 25: Electricals
The current carrying capacity of the cable must be at least that of the shower circuit protection. Trim and replace the pipe and cable entry covers. DO NOT connect any other fittings to this shower. DO NOT use silicone sealant to seal the shower appliance to the wall. © 2015 AKW 14-009-033-07... - Page 26 Cold Water Flushing & Priming Step 1 Step 2 Adjust power setting to: Allow the shower to run until a smooth flow is achieved (approx. 1 minute). Once complete, press the power button to exit cold water flushing mode. © 2015 AKW 14-009-033-07...
-
Page 27: Commissioning
Confirm the operation of the Temperature and Flow increase and decrease knobs Press the Power button to revert to standby mode It is important to complete the installation and record the commissioning tests to provide a performance reference point for future tests. © 2015 AKW 14-009-033-07... -
Page 28: Commissioning
Water supply temperature Mains terminal Voltage Record details of test equipment (brand, model, serial number and calibration information) used to provide the above information, if necessary record on separate paper and attach to this instruction booklet. © 2015 AKW 14-009-033-07... - Page 29 © 2015 AKW 14-009-033-07...
- Page 30 © 2015 AKW 14-009-033-07...
- Page 31 © 2015 AKW 14-009-033-07...
- Page 32 © 2015 AKW 14-009-033-07...
Need help?
Do you have a question about the iSure and is the answer not in the manual?
Questions and answers