
Related Manuals for Sonny's Dual CounterWeight Top Brush


Summary of Contents for Sonny's Dual CounterWeight Top Brush
- Page 1 Top Brush Dual Counterweight (DCW) Owner’s Manual Sonny's Enterprises, Inc. 5605 Hiatus Road Tamarac, Florida 33321 16v1...
-
Page 2: Table Of Contents
Program - Manuals DCW Top Brush *Table of Contents* WARNING *SAFETY REQUIREMENTS* WARNING ............3 *INTRODUCTION* ....................... 5 Product Specifications ....................6 *INSTALLATION* ........................ 8 Utilities Requirements ....................8 Dimensions NEED TO UPDATE ..................9 Equipment Installation ....................12 Installation Tools and Consumables ................ 12 Brush Hub Installation .................... -
Page 3: Warning *Safety Requirements* Warning
Program - Manuals DCW Top Brush WARNING *SAFETY REQUIREMENTS* WARNING 1. All employees must be thoroughly trained in safe operation and standard maintenance practices. All employees must review this entire manual monthly. 2. Do not enter the wash tunnel when the equipment is operating. Death or dismemberment may occur. - Page 4 Program - Manuals DCW Top Brush 13. Store all cleaning and washing solutions and oils in a well-ventilated area. Clean up fluid spills immediately to prevent hazardous safety conditions. Be certain to follow all safety procedures on SDS Sheets for each chemical product used. 14.
-
Page 5: Introduction
Program - Manuals DCW Top Brush *INTRODUCTION* This Owner’s Manual contains information that is vital to the successful installation, operation and maintenance of your SONNY’S vehicle washing equipment. Please read, and understand, the full contents of this manual before installation and operation of the equipment. Keep this booklet in a location where it may be used for ongoing reference. -
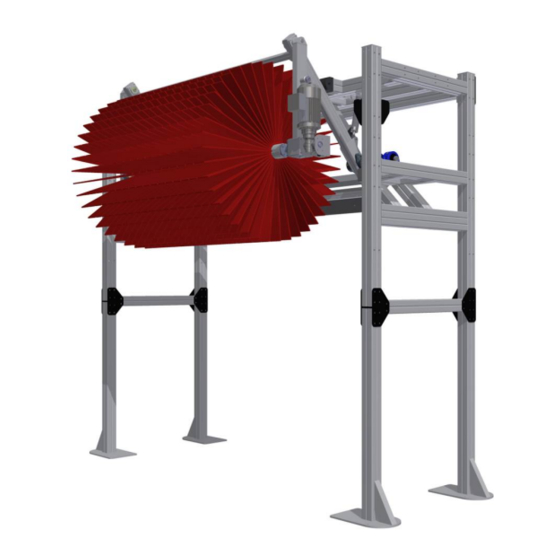
Page 6: Product Specifications
Program - Manuals DCW Top Brush Product Specifications Designed to occupy 108” of tunnel length and 152” width (attachments available and add more length) 4” x 4” Aluminum alloy frame and legs for stability and durability Heavy duty double roller pivot bearings increase durability and smoothness of operation ... - Page 7 Program - Manuals DCW Top Brush For Parts/Accessories Information Please Reference our Catalog or Website. © SONNY’S The CarWash Factory SonnysDirect.com This document is confidential and proprietary to SONNY’S and cannot be used, disclosed or Page 7 of 21 duplicated without prior written consent. Content, prices and availability subject to change without notice. 4.29.2019 OwnersManual_TopBrush_DualCounterweight_16v1.docx...
-
Page 8: Installation
Program - Manuals DCW Top Brush *INSTALLATION* Utilities Requirements UTILITIES INTERCONNECTION AND THE MATERIALS REQUIRED FOR INTERCONNECTION TO SONNY’S EQUIPMENT ARE THE RESPONSIBILITY OF THE CUSTOMER! PERFORM ALL TRADES WORK TO ALL APPLICABLE LOCAL AND NATIONAL CODES! Electrical • The Customer's Electrician is to provide and install single phase power from the (24 or 110 VAC as determined at time of order) from the Customer’s Controller system to the liquid solenoid valve for the brush spray bars and, if required, the motor starter coil for the hydraulic power pack feeding the brush and any pump motor for the chemical... -
Page 9: Dimensions Need To Update
Program - Manuals DCW Top Brush Dimensions Figure #1 © SONNY’S The CarWash Factory SonnysDirect.com This document is confidential and proprietary to SONNY’S and cannot be used, disclosed or Page 9 of 21 duplicated without prior written consent. Content, prices and availability subject to change without notice. 4.29.2019 OwnersManual_TopBrush_DualCounterweight_16v1.docx... - Page 10 Program - Manuals DCW Top Brush NOTE: 28” Brush is the maximum size that can be used. When using a 28” brush it will require retracts to hold the brushes retracted until the Top Brush is on the hood of the vehicle.
- Page 11 Program - Manuals DCW Top Brush Meter-Out Flow Control Valves Figure #3 CAUTION: Do not plumb any air to the back side of the cylinder, air is for retract only. NOTE: Flow control adjustment required upon installation. © SONNY’S The CarWash Factory SonnysDirect.com This document is confidential and proprietary to SONNY’S and cannot be used, disclosed or Page 11 of 21...
-
Page 12: Equipment Installation
Program - Manuals DCW Top Brush Equipment Installation Installation Tools and Consumables Tools Consumables 1. Safety Glasses 1. Anti-Seize Compound 2. ½ " Drive Ratchet Set 2. Marine Grease 3. Standard Combo Wrenches 4. 4’ Level 5. Electric Impact Wrench 6. - Page 13 Program - Manuals DCW Top Brush Installation Steps 1. Determine where the Top Brush is to be installed (see Figures #1 & #2 in the Dimensions Section and the tunnel layout drawings for your location). 2. Sweep any debris from where the Top Brush will stand.
- Page 14 Program - Manuals DCW Top Brush 7. Level and square the frame with the centerline of the equipment (see Figure #1 in the Dimensions Section and the tunnel layout drawings for your location). 8. Place and anchor the unit per the dimensions shown in Figure #1.
-
Page 15: Brush Hub Installation
Program - Manuals DCW Top Brush Brush Hub Installation 1. Remove and discard the retainer plate from one end of top brush assembly. Insert the screws and lock washers to the PS Spindle. Reuse Screws 2. Hold the brush straight, insert the end of the brush to the PS top brush arm spindle and tighten into place with the screws. -
Page 16: Electric "Flender" Motor
Program - Manuals DCW Top Brush 5. Slide the brush hub into the DS spindle and tighten the screws. DS Set Screws 6. Once the top brush assembly is securely tighten to both spindles (DS & PS), go ahead and tighten the PS bearing set screws. -
Page 17: Adjustments And Testing
Program - Manuals DCW Top Brush Adjustments and Testing Adjust the Cleaning Pressure of the Washer Ensure the air solenoid is manually put in the wash position so there is no air pressure applied to the retract cylinder. Using a 3/4” wrench, loosen up the 4 bolts that secure the counterweight assembly until lock washers have released pressure. -
Page 18: General Operation
Program - Manuals DCW Top Brush *GENERAL OPERATION* Top Brush Operation Brush rotation starts and stops with a signal from the Customer supplied Controller system. This Controller Start-Stop signal should also control soap solution delivery to the spray bar on the brush. BE CERTAIN THAT THE BRUSHES ROTATE AGAINST VEHICLE TRAVEL With the brush rotating (against the direction of vehicle travel and at proper RPM) the vehicle’s front hood contacts the brush and brush travels across the vehicle maintaining... -
Page 19: Preventive Maintenance
Program - Manuals DCW Top Brush *PREVENTIVE MAINTENANCE* DAILY 1. Check all lines and fittings for leaks. Repair, or replace, as needed. 2. Check brush for proper operation, listening for any unusual noises from the equipment. 3. Inspect brush cloth for cuts, grease, or oil. Remove and repair, or replace, any cloth panel if any of these conditions are found. -
Page 20: Warranty
Program - Manuals DCW Top Brush *WARRANTY* SONNY’S ENTERPRISES, INC. FACTORY LIMITED LIFETIME WARRANTY Equipment manufactured by SONNY’S ENTERPRISES, INC. is warranted to be free from defect in material and workmanship. Welded metal framework and other non-moving, non-wearable fabricated metal components manufactured by SONNY’S are warranted for the life of the equipment to the original purchaser. -
Page 21: Customer Service
Program - Manuals DCW Top Brush *CUSTOMER SERVICE* Please contact SONNY’S Equipment Department for installation and/or operational questions regarding this piece of equipment. Please refer to the Parts Catalog and contact SONNY’S Customer Service Order Entry Department for any replacement parts for this piece of equipment. You can also visit the web at www.SonnysDirect.com.
Need help?
Do you have a question about the Dual CounterWeight Top Brush and is the answer not in the manual?
Questions and answers