Table of Contents
Advertisement
Quick Links
Advertisement
Table of Contents

Related Manuals for R&S DVMS1


Summary of Contents for R&S DVMS1
- Page 1 ® R&S DVMS1 DTV Monitoring System Getting Started (E=ÚC2) 2113761902...
- Page 2 Trade names are trademarks of the owners. ® 2113.7619.02 | Version 12 | R&S DVMS1 ® ® The following abbreviations are used throughout this manual: R&S DVMS is abbreviated as R&S DVMS, R&S DVMS1 is abbrevi- ated as R&S DVMS1.
- Page 3 Safety Instructions Instrucciones de seguridad Sicherheitshinweise Consignes de sécurité Risk of injury and instrument damage The instrument must be used in an appropriate manner to prevent electric shock, fire, personal injury or instrument damage. ● Do not open the instrument casing. ●...
- Page 4 Gefahr von Verletzungen und Schäden am Gerät Betreiben Sie das Gerät immer ordnungsgemäß, um elektrischen Schlag, Brand, Verletzungen von Personen oder Geräteschäden zu verhindern. ● Öffnen Sie das Gerätegehäuse nicht. ● Lesen und beachten Sie die "Grundlegenden Sicherheitshinweise", die als gedruckte Broschüre dem Gerät beiliegen. ●...
- Page 5 Safety Instructions - Informaciones de seguridad Safety Instructions for Stacking Instruments Danger of injury Instruments may slip if they are stacked on top of each other. Place the instrument on a stable, even surface. Stack the instruments according to their size, with the largest instrument on the bottom. Do not stack more than three in-struments directly on top of each other.
- Page 6 Safety Instructions - Informaciones de seguridad Informaciones de seguridad para el amontonamiento de aparatos Peligro de heridas Los aparatos pueden desplazarse al ser amontonados. Posicionar los aparatos sobre una superficie estable y lisa. Amontonar los aparatos por orden de su tamaño. No amontonar nunca más de tres aparatos uno sobre el otro.
- Page 7 Sicherheitshinweise Sicherheitshinweise für das Stapeln von Geräten Verletzungsgefahr Geräte können beim Aufeinanderstapeln verrutschen. Gerät auf stabile, gerade Unterlage stellen. Die Geräte der Größe nach stapeln. Nicht mehr als drei Geräte direkt übereinander stellen. Geräte dürfen nur gestapelt werden, wenn Gerätefüße und Gehäuseteile waa- gerechtes Stapeln ermöglichen.
- Page 8 Consignes de sécurité Consignes de sécurité pour l’empilage des appareils Risque de blessures Les appareils peuvent se décaler lorsqu’ils sont empilés. Les appareils doivent toujours être placés sur une surface stable et plane et empilés en fonction de leur taille sans jamais dépasser trois appareils.
-
Page 9: Table Of Contents
® Contents R&S DVMS1 Contents 1 Preface....................7 For Your Safety......................7 Information Provided on the R&S Homepage............7 Information Provided on the R&S DVMS..............8 Product Documentation....................8 Conventions Used in the Documentation..............9 2 Setting Up the Instrument..............10 Unpacking the Instrument..................10 2.1.1... - Page 10 ® Contents R&S DVMS1 3.2.12 TS/IP Interface Module (R&S DVMS-B40)..............24 4 Connecting the Instrument..............26 Connecting to the AC Power Supply.................26 Connecting External Devices..................26 5 Switching On or Off the Instrument........... 28 Switching On the Instrument..................28 Switching Off the Instrument..................29 Checking the Provided Software Options..............
- Page 11 ® Contents R&S DVMS1 8.3.1 Prerequisite for Backup and Restore................43 8.3.2 Backup and Restore Application................... 47 9 Maintenance..................51 Cleaning the Instrument..................... 51 Replacing the Fuses....................51 Storing the Instrument....................52 Index......................53 Getting Started 2113.7619.02 ─ 12...
- Page 12 ® Contents R&S DVMS1 Getting Started 2113.7619.02 ─ 12...
-
Page 13: Preface
® Preface R&S DVMS1 Information Provided on the R&S Homepage 1 Preface This chapter provides safety-related information, an overview of the user documenta- tion and the conventions used in the documentation. 1.1 For Your Safety The R&S DVMS is designed for use solely in industrial and laboratory environments. -
Page 14: Information Provided On The R&S Dvms
® Preface R&S DVMS1 Product Documentation ● Applications 1.3 Information Provided on the R&S DVMS The context-sensitive online help provides quick user assistance, see also "Online help" on page 8. The user manual and the open source acknowledgment are stored in PDF format under C:\Program Files\Rohde-Schwarz\DVMS\Host\Help. -
Page 15: Conventions Used In The Documentation
® Preface R&S DVMS1 Conventions Used in the Documentation For detailed information on how to use the help, see the chapter "Operating Concepts". 1.5 Conventions Used in the Documentation The following conventions are used throughout this documentation. Typographical conventions Convention Description "Graphical user interface elements"... -
Page 16: Setting Up The Instrument
® Setting Up the Instrument R&S DVMS1 Unpacking the Instrument 2 Setting Up the Instrument Risk of injuries To avoid injuries to yourself or others, always follow the instructions provided in the fol- lowing chapters. Furthermore, observe the general safety instructions at the beginning of this manual. -
Page 17: Checking The Accessories
® Setting Up the Instrument R&S DVMS1 Putting Up the Instrument 2.1.3 Checking the Accessories The instrument comes with the following accessories: ● Power cable ● Getting started manual 2.1.4 Warranty Conditions For information on warranty conditions for the R&S DVMS, see the terms of the deliv- ery documents. -
Page 18: Mounting The Instrument In A Rack
® Setting Up the Instrument R&S DVMS1 Putting Up the Instrument 2.2.2 Mounting the Instrument in a Rack The R&S DVMS can be installed in a 19" rack mount by using a rack adapter kit (for order no. see data sheet). Follow the installation instructions that are part of the adapter kit. -
Page 19: Interfaces And Connectors
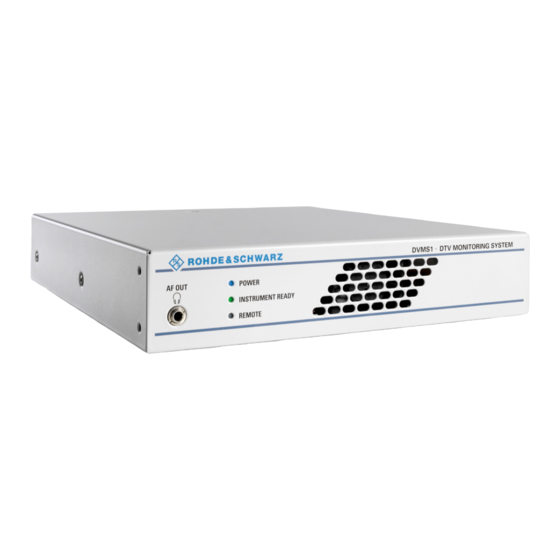
® Interfaces and Connectors R&S DVMS1 Front Panel 3 Interfaces and Connectors This chapter describes the front panel and the rear panel of the instrument, including all status displays and connectors. Some connectors warm up slightly when high voltages are applied. As long as maxi- mum input levels are not exceeded, warm-up does not affect normal operation. -
Page 20: Connectors
® Interfaces and Connectors R&S DVMS1 Rear Panel 3.1.1.2 INSTRUMENT READY Displays the status of the R&S DVMS. ● LED off: R&S DVMS is not ready for operation. For example, after powering up until the startup process is completed; the LED sta- tus display changes thereafter. -
Page 21: Ac Power Supply Connector
® Interfaces and Connectors R&S DVMS1 Rear Panel Figure 3-2: Rear panel view (example) 3.2.1 AC Power Supply Connector The AC power supply connector and the AC power switch are combined. Switch positions: ● [I]: Depending on the setting of the On/Standby function key on the front panel, the instrument is either in standby mode or in operation. -
Page 22: Pps Ref In
® Interfaces and Connectors R&S DVMS1 Rear Panel 3.2.3 1 PPS REF IN This BNC jack is used as input for the 1PPS (1 pulse per second) reference pulse. The 1PPS reference pulse input of the R&S DVMS is used for measuring the network delay in DVB‑T distribution networks. -
Page 23: Lan Interface
® Interfaces and Connectors R&S DVMS1 Rear Panel Signal Signal DDC data Not used Analog vertical sync TMDS clock shield TMDS data 1- TMDS clock+ TMDS data 1+ TMDS Clock- TMDS data 1 shield Not used Not used Not used... -
Page 24: Usb Interfaces
® Interfaces and Connectors R&S DVMS1 Rear Panel 3.2.6 USB Interfaces Two USB 3.0 interfaces of the type A (host USB) are provided (USB = universal serial bus). Use the interfaces to connect external devices like a keyboard, mouse, printer, or memory stick. -
Page 25: Dvb-T/Dvb-T2 Receiver Module (R&S Dvms-B55)
® Interfaces and Connectors R&S DVMS1 Rear Panel ● LED green: Input is used for monitoring. Synchronization state is valid for both RF signal and related transport stream. ● LED yellow: Input is used for monitoring but synchronization cannot be achieved. -
Page 26: Dvb-T2 Receiver Module (R&S Dvms-B54)
® Interfaces and Connectors R&S DVMS1 Rear Panel RF IN This BNC socket (female connector @DVMS) is used to feed in an RF signal conform- ing to the DVB‑T2 (ETSI EN 302 755) standard. An LED indicates the RF IN status: ●... -
Page 27: Single Ts Input Module (R&S Dvms-B11)
® Interfaces and Connectors R&S DVMS1 Rear Panel To select the input, in the toolbar, click "Instrument Configuration" and then select "Sig- nal Interface". See the user manual or help system. To help locating a connector socket, you can let its status LED flash blue ("Instrument Configuration"... -
Page 28: S/S2 Receiver Module (R&S Dvms-B51)
® Interfaces and Connectors R&S DVMS1 Rear Panel Figure 3-6: Single TS input module The status of the connectors is indicated by LEDs. Before showing a new state, each LED holds the current state for at least one second, if the current state is not "off" or "flashing". - Page 29 ® Interfaces and Connectors R&S DVMS1 Rear Panel Figure 3-7: S/S2 receiver module The status of the connectors is indicated by LEDs. Before showing a new state, each LED holds the current state for at least one second, if the current state is not "off" or "flashing".
-
Page 30: Ts/Ip Interface Module (R&S Dvms-B40)
® Interfaces and Connectors R&S DVMS1 Rear Panel An LED indicates the TS OUT status: ● LED off: Output is not used. ● LED blue: Output is used as loop output. 3.2.12 TS/IP Interface Module (R&S DVMS-B40) The TS/IP module (R&S DVMS‑B40) is an option module. - Page 31 ® Interfaces and Connectors R&S DVMS1 Rear Panel To select and configure the IP in flows and IP out flows, in the toolbar, click "Instrument Configuration" and then select "Signal Interface". See the user manual or help system. The assignment of the RJ45 connector supports twisted-pair category 7 STP cables in a star configuration (STP for shielded twisted pair).
-
Page 32: Connecting The Instrument
® Connecting the Instrument R&S DVMS1 Connecting External Devices 4 Connecting the Instrument This chapter describes how to connect the instrument to the power supply and external devices. Preventing electromagnetic interference Use only suitable and double-shielded signal/control cables with at least 80 dB to 1 GHz shielding. - Page 33 ® Connecting the Instrument R&S DVMS1 Connecting External Devices ● Memory stick for easy transfer of data to/from a computer (e.g. firmware updates) ● CD–ROM drives for installing software ● Printer for printing measurement results To install a USB device 1.
-
Page 34: Switching On Or Off The Instrument
® Switching On or Off the Instrument R&S DVMS1 Switching On the Instrument 5 Switching On or Off the Instrument Shock hazard Observe the basic safety instructions at the beginning of this manual, especially the instructions on electrical safety. 5.1 Switching On the Instrument... -
Page 35: Switching Off The Instrument
® Switching On or Off the Instrument R&S DVMS1 Checking the Provided Software Options 5.2 Switching Off the Instrument Risk of losing data If you switch off the running instrument using the rear panel switch or by disconnecting the power cord before shutting it down, the instrument loses its current settings. Fur- thermore, program data can be lost. -
Page 36: Sample Application
® Sample Application R&S DVMS1 Setting Up the R&S DVMS 6 Sample Application Follow the instructions in this chapter to perform your first measurement with the R&S DVMS. For an expanded selection of measurement examples and background information, refer to the user manual or the help system. -
Page 37: Creating A Basic Configuration
® Sample Application R&S DVMS1 Checking the TS Synchronization 6.3 Creating a Basic Configuration In the TS analyzer monitoring application, create the basic configuration. 1. In the toolbar, select "Instrument Configuration" to open the "Instrument Configura- tion" dialog. 2. On the "Signal Interface" tab, select the following: a) In the "Interface Settings"... -
Page 38: Performing The Measurement
® Sample Application R&S DVMS1 Performing the Measurement 4. Under "1st Priority Error", check the "TS Sync" statistics counter. ● In the "Locked" state, the value is "0". Under "SITE", the LED symbol is green. At the rear panel, the LED correspond- ing to the TS IN input switches to green. -
Page 39: Checking The Net Bit Rate Of The Connected Ts
® Sample Application R&S DVMS1 Performing the Measurement 2. In the "View Selector" dialog, click the icon for the bit rate measurement. 3. Read the current bit rate of the connected TS from the TS elements table. The value is given in units of megabits per second (Mbit/s). The value shown is the gross value of all transport stream packets per second, including TS packet header and TS packet payload. - Page 40 ® Sample Application R&S DVMS1 Performing the Measurement Figure 6-1: Extended Checks I tab 3. In the first line, activate the "Bit Rate" option for overall bit rate limits monitoring. 4. The second line shows the current (default) settings for the monitoring TS bit rate.
-
Page 41: Activating The Monitoring Error For Ts Bit Rate Monitoring
® Sample Application R&S DVMS1 Performing the Measurement Figure 6-2: Monitoring view 7. Compare this value to the gross value from before (see Chapter 6.5.1, "Checking the Gross Bit Rate of the Connected TS", on page 32). Since only the packet payload of all TS packets is examined for net bit rate calcula- tion, the net value should be lower by a factor of approximately 184/188. -
Page 42: Checking The Content Of The Psi Table Pat
® Sample Application R&S DVMS1 Performing the Measurement Every second, "Bite Rate - TS bit rate higher than specified limit" log entries are inserted at the end of the log. In addition, the "Bit Rate" statistics counter is incre- mented every second. Also, under "INPUT", a red LED symbol at the selected input indicates an active monitoring fault. - Page 43 ® Sample Application R&S DVMS1 Performing the Measurement 1. In the toolbar, click "View Selector". 2. In the "View Selector" dialog, click the icon for the Table/PES/T2‑MI interpreter. 3. Under "INPUT", expand the PSI/SI node and select the PAT element.
-
Page 44: Operating The R&S Dvms In A Lan
® Operating the R&S DVMS in a LAN R&S DVMS1 7 Operating the R&S DVMS in a LAN The R&S DVMS is equipped with a network interface and can be connected to an Ethernet LAN (local area network). The network card operates with 10/100/1000 Base‑T Ethernet. -
Page 45: Connecting The R&S Dvms To The Network
® Operating the R&S DVMS in a LAN R&S DVMS1 Connecting the R&S DVMS to a Computer 7.1 Connecting the R&S DVMS to the Network Risk of network failure/virus infection Before connecting the R&S DVMS to the network or configuring the network, do the following: ●... -
Page 46: Other Operating Systems
® Operating the R&S DVMS in a LAN R&S DVMS1 Configuring the Network Card 2. Connect the computer and the R&S DVMS with a standard RJ.45 cross-over cable (LAN cable). After approx. 16 seconds, the connection is established. 3. To address the R&S DVMS, use the computer name. -
Page 47: Firewall Settings
Naming rule for the default computer name The default computer name is composed as follows: <instrument short name>-<serial number> Example: RS-DVMS1-100104 The serial number consists of 6 digits and is printed on the cabinet of the R&S DVMS. Networks without DHCP server In networks that assign fixed IP addresses, the network administrator usually config- ures the network card. -
Page 48: Installed Software
® Installed Software R&S DVMS1 Operating System 8 Installed Software The firmware and the operating system are already installed on the R&S DVMS. For further information: ● Performing a firmware update: see the release notes. ● Installing software options: see the user manual or the help system. -
Page 49: Windows 7 Start Menu
® Installed Software R&S DVMS1 Backup and Restore of the System Partition 8.1.2 Windows 7 Start Menu The Windows 7 Start menu provides access to the Windows 7 functionality and the installed programs. Under "Control Panel", the system settings are grouped. For details, see the Windows 7 documentation. - Page 50 ® Installed Software R&S DVMS1 Backup and Restore of the System Partition Tip: The navigation in the BIOS settings is explained in the lower right pane. 4. Select the "Advanced" tab. 5. Select "HW Monitor". 6. Press ENTER. Getting Started 2113.7619.02 ─ 12...
- Page 51 ® Installed Software R&S DVMS1 Backup and Restore of the System Partition "Watchdog Timeout" is already selected. 7. Press ENTER to open the "Watchdog Timeout" dialog. 8. Select "Disabled". 9. Press ENTER. Getting Started 2113.7619.02 ─ 12...
- Page 52 ® Installed Software R&S DVMS1 Backup and Restore of the System Partition 10. Select the "Save & Exit" tab. "Save Changes and Exit" is already selected. 11. Press ENTER. 12. Press ENTER to save the changes and proceed with the system boot.
-
Page 53: Backup And Restore Application
® Installed Software R&S DVMS1 Backup and Restore of the System Partition 13. Continue as described in Chapter 8.3.2, "Backup and Restore Application", on page 47. After a successful boot with the default option "Firmware" in the boot dialog or a restored backup, the hardware watchdog will automatically be re-enabled by the R&S DVMS system software. - Page 54 ® Installed Software R&S DVMS1 Backup and Restore of the System Partition The main dialog is displayed. It provides access to all functions of the backup and restore application. Figure 8-1: Main dialog (example) Getting Started 2113.7619.02 ─ 12...
- Page 55 ® Installed Software R&S DVMS1 Backup and Restore of the System Partition (1) = Header showing instrument type (2) = Header showing instrument name (3) = Free memory space on backup partition (4) = List of backups already created (5) = Description of currently selected backup To continue, see one of the following chapters: ●...
- Page 56 ® Installed Software R&S DVMS1 Backup and Restore of the System Partition 8.3.2.2 Restoring a Selected Backup Version Using this function, you can restore the selected instrument installation and its configu- ration. Malware protection When restoring a backup, the Windows operating system and installed anti-malware software are probably outdated.
-
Page 57: Maintenance
® Maintenance R&S DVMS1 Replacing the Fuses 9 Maintenance The R&S DVMS does not need periodic maintenance. Clean the outside of the instru- ment when necessary and check the rated data from time to time. If any problem arises, contact one of our customer support centers. The addresses of our customer support centers are provided at the beginning of this manual. -
Page 58: Storing The Instrument
® Maintenance R&S DVMS1 Storing the Instrument To replace the fuses 1. Open the lid of the AC power connector. 2. Lift the fuse holder out of its slot. 3. Exchange the two fuses. 4. Put the fuse holder back in its slot. -
Page 59: Index
® Index R&S DVMS1 Index Symbols External devices ..............26 1 PPS REF IN connector ..........16 10 MHz REF IN connector ..........15 Firewall settings ..............41 Firmware Options ............... 29 AC power supply connector ..........15 Update ................ 42 AC power switch ............... - Page 60 ® Index R&S DVMS1 Status display INSTRUMENT READY ..........14 Network POWER ..............13 Configuring card ............40 REMOTE ..............14 Connecting to .............. 39 Storing the instrument ............52 Disconnecting from ............. 39 Switching off the instrument ..........29 Non-volatile RAM ..............
Need help?
Do you have a question about the DVMS1 and is the answer not in the manual?
Questions and answers