Table of Contents

Advertisement

Thank You
for your purchase of one of the finest outboards available. You
have made a sound investment in boating pleasure. Your
outboard has been manufactured by Mercury Marine, a world
leader in marine technology and outboard manufacturing
since 1939. These years of experience have been committed
to the goal of producing the finest quality products. This led to
Mercury Marine's reputation for strict quality control,
excellence, durability, lasting performance and being the best
at providing after the sale support.
Please read this manual carefully before operating your
outboard. This manual has been prepared to assist you in the
operation, safe use and care of your outboard.
All of us at Mercury Marine took pride in building your outboard
and wish you many years of happy and safe boating.
Again, thank you for your confidence in Mercury Marine.
EPA Emissions Regulations
Outboards sold by Mercury Marine in the United States are
certified to the United States Environmental Protection
Agency as conforming to the requirements of the regulations
for the control of air pollution from new outboard motors. This
certification is contingent on certain adjustments being set to
factory standards. For this reason, the factory procedure for
servicing the product must be strictly followed and, wherever
practicable, returned to the original intent of the design.
Maintenance, replacement, or repair of the emission
control devices and systems may be performed by any
marine engine repair establishment or individual.
Engines are labeled with an Emission Control Information
decal as permanent evidence of EPA certification.
The engine exhaust from this product contains chemicals
known to the state of California to cause cancer, birth defects
or other reproductive harm.
WARNING
!
i

Advertisement

Table of Contents
loading
Need help?

Need help?

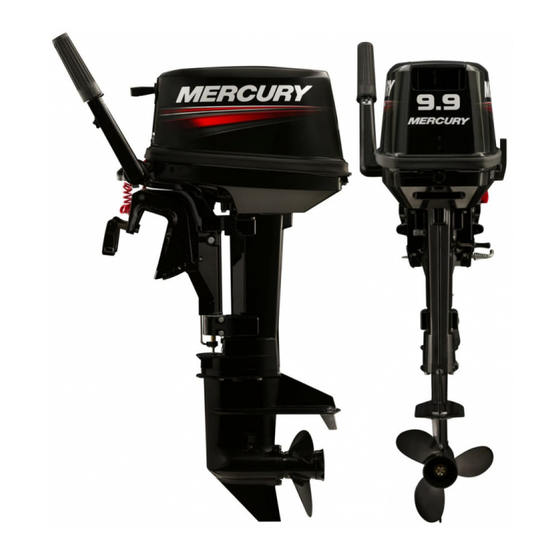
Do you have a question about the 9.9 EH and is the answer not in the manual?

Questions and answers

Alan Theriault
May 18, 2025

After clearing all the external hoses and ports and replacing the impeller with plenty of water pressure to the intake, I still have no tell tale. The pump casing looked fine. Should I install a whole new pump kit instead of just the impeller? What/where should I check next?

1 comments:
Mr. Anderson
May 23, 2025

If there is no tell tale after replacing the impeller on a Mercury 9.9 EH outboard motor, the next step is to flush the internal water passages with fresh water to check for clogs or blockages that may be preventing water flow.

This answer is automatically generated

Patrick Dorsch Sr.
January 26, 2025

I need a manual for model 1F10201BK

1 comments:
Mr. Anderson
May 14, 2025

The manual is for the Mercury 9.9 EH outboard engine.

This answer is automatically generated

John mea
April 5, 2025

How to remove lower unit

Subscribe to Our Youtube Channel

Summary of Contents for Mercury 9.9 EH

  • Page 1 This manual has been prepared to assist you in the operation, safe use and care of your outboard. All of us at Mercury Marine took pride in building your outboard and wish you many years of happy and safe boating.
  • Page 2 Warranty Message The product you have purchased comes with a limited warranty from Mercury Marine, the terms of the warranty are set forth in the Warranty Information Section of this manual. The warranty statement contains a description of what is covered, what is not...
  • Page 3 ICOMIA 38/94 Engine type: Outboard Fuel type: Gasoline Combustion cycle: 2‑Stroke This declaration is issued under the sole responsibility of Mercury Marine and Brunswick Marine in EMEA Inc. Name and function: Mark D. Schwabero President, Mercury Marine, Fond du Lac, WI USA...
  • Page 5: Table Of Contents

    TABLE OF CONTENTS Warranty Information Transfer of Warranty..............1 Warranty Registration United States and Canada.......1 Warranty Registration Outside the United States and Canada. . .2 FourStroke Outboard Limited Warranty United States, Canada, Europe and Confederation of Independent States......3 FourStroke Outboard Limited Warranty (Middle‑East, and Africa) .....................6 3 Year Limited Warranty Against Corrosion........9 Warranty Coverage and Exclusions..........
  • Page 6 TABLE OF CONTENTS INSTALLATION Installing Outboard..............40 Installing the Remote Control Devices........42 Battery Installation..............47 Propeller Selection..............48 TRANSPORTING Removing the Motor..............49 Carrying the Motor..............49 Storing the Motor...............49 Trailering Boat/Outboard............50 Transporting Portable Fuel Tanks..........51 FUEL AND OIL Fuel Recommendations.............53 Oil Recommendation..............55 Mixing Fuel and Oil..............55 ENGINE BREAK‑IN..............56 Filling Fuel Tank................56...
  • Page 7 TABLE OF CONTENTS OPERATION Pre‑Starting Check List..............67 Operating in Freezing Temperatures.........67 Operating in Saltwater or Polluted Water........67 Operating at High Elevations.............68 Operating Outboard as an Auxiliary Engine......68 Pre‑Starting Instructions............68 Engine Break‑in Procedure............70 Warming Up the Engine............. 71 Starting The Engine..............71 Gear Shifting................75 Stopping The Engine..............78 Emergency Starting..............79...
  • Page 8 Engine Runs Erratically............100 Performance Loss..............100 Battery Will Not Hold Charge...........100 OWNER SERVICE ASSISTANCE Local Repair Service..............101 Service Away from Home............101 Parts and Accessories Inquiries..........101 Service Assistance..............101 Mercury Marine Service Offices..........102 MAINTENANCE LOG Maintenance Log..............104 ACCESSORIES Propeller Table................105 Accessories................106 viii...
  • Page 9 TABLE OF CONTENTS ASSOCIATED PARTS Associated Parts..............108 NOTE:..................109 WIRING DIAGRAMS 9.9, 15, 18................110 EH Models................112 E Models..................114 Single Remote Control Box.............116 Wire Color Code Abbreviations..........117...
  • Page 11: Warranty Information

    Warranty Registration United States and Canada 1. You may change your address at any time, including at time of warranty claim, by calling Mercury Marine or sending a letter or fax with your name, old address, new address, and engine serial number to Mercury Marine’s warranty registration...
  • Page 12: Warranty Registration Outside The United States And Canada

    2. To be eligible for warranty coverage, the product must be registered with Mercury Marine. At the time of sale, the dealer should complete the warranty registration and immediately submit it to Mercury Marine via MercNET, E‑mail, or mail.
  • Page 13: Fourstroke Outboard Limited Warranty United States, Canada, Europe And Confederation Of Independent States

    Independent States Outside the United States, Canada, Europe and Confederation of Independent States ‑ check with local distributor. WHAT IS COVERED: Mercury Marine warrants its new products to be free of defects in material and workmanship during the period described below.
  • Page 14 WARRANTY COVERAGE: Warranty coverage is available only to retail customers that purchase from a Dealer authorized by Mercury Marine to distribute the product in the country in which the sale occurred, and then only after the Mercury Marine specified pre–delivery inspection process is completed and documented.
  • Page 15 Mercury dealer authorized to service the product. If purchaser cannot deliver the product to such a dealer, written notice must be given to Mercury. We will then arrange for the inspection and any covered repair. Purchaser in that case shall pay for all related transportation charges and/or travel time.
  • Page 16: Fourstroke Outboard Limited Warranty (Middle-East, And Africa)

    No individual or entity, including Mercury Marine authorized dealers, has been given authority by Mercury Marine to make any affirmation, representation or warranty regarding the product, other than those contained in this limited warranty, and if made, shall not be enforceable against Mercury Marine.
  • Page 17 WARRANTY COVERAGE: Warranty coverage is available only to retail customers that purchase from a Dealer authorized by Mercury Marine to distribute the product in the country in which the sale occurred, and then only after the Mercury Marine specified pre–delivery inspection process is completed and documented.
  • Page 18 Mercury dealer authorized to service the product. If purchaser cannot deliver the product to such a dealer, written notice must be given to Mercury. We will then arrange for the inspection and any covered repair. Purchaser in that case shall pay for all related transportation charges and/or travel time.
  • Page 19: Year Limited Warranty Against Corrosion

    No individual or entity, including Mercury Marine authorized dealers, has been given authority by Mercury Marine to make any affirmation, representation or warranty regarding the product, other than those contained in this limited warranty, and if made, shall not be enforceable against Mercury Marine.
  • Page 20 WARRANTY COVERAGE: Warranty coverage is available only to retail customers that purchase from a Dealer authorized by Mercury Marine to distribute the product in the country in which the sale occurred, and then only after the Mercury Marine specified predelivery inspection process is completed and documented.
  • Page 21 Mercury dealer authorized to service the product. If purchaser cannot deliver the product to such a dealer, written notice must be given to Mercury. We will then arrange for the inspection and any covered repair. Purchaser in that case shall pay for all related transportation charges and/or travel time.
  • Page 22 Mercury Precision Parts or Quicksilver MerCathode system and/ or Galvanic Isolator. Corrosion damage caused by improper application of copper base anti‑fouling paints is also not covered by this limited warranty.
  • Page 23: Warranty Coverage And Exclusions

    WARRANTY INFORMATION Warranty Coverage and Exclusions The purpose of this section is to help eliminate some of the more common misunderstandings regarding warranty coverage. The following information explains some of the types of services that are not covered by warranty. The provisions set forth following have been incorporated by reference into the Three Year Limited Warranty Against Corrosion Failure, the International Limited Outboard Warranty, and the United States and Canada Limited...
  • Page 24 8. Use of other than Mercury Precision or Quicksilver parts when making warranty repairs. 9. Oils, lubricants, or fluids changed as a matter of normal...
  • Page 25 WARRANTY INFORMATION 16. Our limited warranty does not apply to any damage to our products caused by the installation or use of parts and accessories which are not manufactured or sold by us. Failures which are not related to the use of those parts or accessories are covered under warranty if they otherwise meet the terms of the limited warranty for that product.
  • Page 26: General Information

    GENERAL INFORMATION Boater's Responsibilities The operator (driver) is responsible for the correct and safe operation of the boat and safety of its occupants and general public. It is strongly recommended that each operator (driver) read and understand this entire manual before operating the outboard. Be sure at least one additional person onboard is instructed in the basics of starting and operating the outboard and boat handling in case the driver is unable to operate the boat.
  • Page 27: Boat Horsepower Capacity

    GENERAL INFORMATION Boat Horsepower Capacity WARNING Exceeding the boat's maximum horsepower rating can cause serious injury or death. Overpowering the boat can affect boat control and flotation characteristics or break the transom. Do not install an engine that exceeds the boat's maximum power rating.
  • Page 28: Remote Steering Notice

    GENERAL INFORMATION WARNING Starting the engine with the drive in gear can cause serious injury or death. Never operate a boat that does not have a neutral‑safety‑protection device. 26779 Remote Steering Notice WARNING Improper fasteners or improper installation procedures can result in loosening or disengagement of the steering link rod.
  • Page 29: Lanyard Stop Switch

    GENERAL INFORMATION Lanyard Stop Switch The purpose of a lanyard stop switch is to turn off the engine when the operator moves far enough away from the operator's position (as in accidental ejection from the operator's position) to activate the switch. Tiller handle outboards and some remote control units are equipped with a lanyard stop switch.
  • Page 30 GENERAL INFORMATION Important Safety Information: The purpose of a lanyard stop switch is to stop the engine when the operator moves far enough away from the operator's position to activate the switch. This would occur if the operator accidentally falls overboard or moves within the boat a sufficient distance from the operator's position.
  • Page 31: Protecting People In The Water

    GENERAL INFORMATION Accidental or unintended activation of the switch during normal operation is also a possibility. This could cause any, or all, of the following potentially hazardous situations: • Occupants could be thrown forward due to unexpected loss of forward motion ‑ a particular concern for passengers in the front of the boat who could be ejected over the bow and possibly struck by the gearcase or propeller.
  • Page 32: Passenger Safety Message - Pontoon Boats And Deck Boats

    GENERAL INFORMATION Shift outboard into neutral and shut off the engine before allowing people to swim or be in the water near your boat. Passenger Safety Message ‑ Pontoon Boats and Deck Boats Whenever the boat is in motion, observe the location of all passengers.
  • Page 33: Wave And Wake Jumping

    GENERAL INFORMATION BOATS WITH FRONT MOUNTED, RAISED PEDESTAL FISHING SEATS Elevated fishing seats are not intended for use when the boat is traveling faster than idle or trolling speed. Sit only in seats designated for traveling at faster speeds. Any unexpected, sudden reduction in boat speed could result in the elevated passenger falling over the front of the boat.
  • Page 34: Impact With Underwater Hazards

    GENERAL INFORMATION WARNING Wave or wake jumping can cause serious injury or death from occupants being thrown within or out of the boat. Avoid wave or wake jumping whenever possible. There is another less common hazardous result from allowing your boat to launch off a wave or wake.
  • Page 35: Safety Instructions For Hand-Tilled Outboards

    Operating a boat or engine with impact damage can result in product damage, serious injury, or death. If the vessel experiences any form of impact, have an authorized Mercury Marine dealer inspect and repair the vessel or power package. Safety Instructions for Hand‑Tilled Outboards No person or cargo should occupy the area directly in front of the outboard while the boat is in motion.
  • Page 36: Exhaust Emissions

    GENERAL INFORMATION MODELS WITH CLAMP SCREWS: Some outboards come with transom bracket clamp screws. The use of clamp bracket screws alone, is insufficient to properly and safely secure the outboard to the transom. Proper installation of the outboard includes bolting the engine to the boat through the transom.
  • Page 37 GENERAL INFORMATION GOOD VENTILATION Ventilate passenger area, open side curtains or forward hatches to remove fumes. 21622 Example of desired air flow through the boat POOR VENTILATION Under certain running and/or wind conditions, permanently enclosed or canvas enclosed cabins or cockpits with insufficient ventilation may draw in carbon monoxide.
  • Page 38: Selecting Accessories For Your Outboard

    The misuse of approved accessories or the use of nonapproved accessories can damage the product. Some accessories not manufactured or sold by Mercury Marine are not designed to be safely used with your outboard or outboard operating system. Acquire and read the installation, operation, and maintenance manuals for all your selected accessories.
  • Page 39 GENERAL INFORMATION Know and obey all nautical rules and laws of the waterways. Boat operators should complete a boating safety course. Courses are offered in the U.S.A. by 1) the U.S. Coast Guard Auxiliary, 2) the Power Squadron, 3) the Red Cross, and 4) your state boating law enforcement agency.
  • Page 40: Recording Serial Number

    GENERAL INFORMATION Report accidents. Boat operators are required by law to file a Boating Accident Report with their state boating law enforcement agency when their boat is involved in certain boating accidents. A boating accident must be reported if 1) there is loss of life or probable loss of life, 2) there is personal injury requiring medical treatment beyond first aid, 3) there is damage to boats or other property where the damage value exceeds $500.00, or 4) there is...
  • Page 41: Note

    GENERAL INFORMATION NOTE:...
  • Page 42: Specifications

    Transom height UL=689 mm (52.0 in.) 9.9 MH=41.0 kg (90.3 lb), 42.0 kg (92.6 lb), 43.0 kg (94.8 lb) Weight 9.9 EH=44.0 kg (97.0 lb), 45.0 kg (99.2 lb), 46.0 kg (101.4 lb) Output 7.3 kW Max operating range 4500–5300 rpm...
  • Page 43 NGK B7HS‑10/BR7HS‑10 Spark plugs or CHAMPION L82C/RL82C (gap 1.0 mm/0.039 in.) Trim system Manual, 6 positions Mercury/Quicksilver 2‑stroke engine oil 1: Engine oil mixing ratio Unleaded gasoline 50 Mercury/Quicksilver gear oil API GL5, Gear oil SAE #80–90, approximately 370 mL...
  • Page 44: Component Identification

    GENERAL INFORMATION Component Identification 40465 MH Models...
  • Page 45 GENERAL INFORMATION Tilt handle Top cowl Bottom cowl Reverse lock lever Cooling water check port Drive shaft housing Water strainer Anti‑ventilation plate Anode/trim tab 10 - Sub water intake 11 - Propeller 12 - Oil plug (upper) 13 - Water plug 14 - Oil plug (lower) 15 -...
  • Page 46 GENERAL INFORMATION 40466 EH Models...
  • Page 47 GENERAL INFORMATION Tilt handle Top cowl Bottome cowl Reverse lock lever Cooling water check port Drive shaft housing Water strainer Anti‑ventilation plate Anode/trim tab 10 - Sub water intake 11 - Propeller 12 - Oil plug (upper) 13 - Oil plug (lower) 14 - Water plug 15 -...
  • Page 48 GENERAL INFORMATION 40467 E Models...
  • Page 49 GENERAL INFORMATION Tilt handle Top cowl Bottom cowl Reverse lock lever Cooling water check port Drive shaft housing Water intake Anti‑ventilation Anode/trim tab 10 - Sub water intake 11 - Propeller 12 - Oil plug (upper) 13 - Water plug 14 - Oil plug (lower) 15 -...
  • Page 50: Installing Outboard

    INSTALLATION Installing Outboard NOTE: If outboard is a remote control electric start model, follow instructions in the outboard installation manual (provided with the outboard) for installing remote steering shift and throttle cables and remote wiring harness. INSTALLING OUTBOARD ON TRANSOM IMPORTANT: Most boats are rated and certified in terms of their maximum horsepower, and this is shown on the boat's certification plate, Do not equip your boat with an outboard that exceeds this...
  • Page 51 INSTALLATION 2. Twin engine: Position the outboard engines approximately 580 mm (22.8 in.) apart, measured from the center line of each engine, and equal distance (a) from the center of the transom. 580 mm 37509 3. Transom matching: Be sure that the anti‑ventilation plate of the outboard is below the water surface when running with the throttle wide open.
  • Page 52: Installing The Remote Control Devices

    INSTALLATION 5. Fasten outboard by drilling two 7.9 mm (5/16 in.) holes through the transom using transom clamp holes as a template. Fasten with two bolts, flat washers and locknuts. The use of clamp handles alone is insufficient to properly and safely secure the outboard to the transom.
  • Page 53 INSTALLATION 2. Installation of the remote control box: Follow the instruction manual provided with the remote control box. 37529 3. Installing of the remote control cable (engine side) and the cord assembly (wiring harness). Fitting of holdercap and sleeve B guide •...
  • Page 54 INSTALLATION • Shift side: Attach the sleeve B guide to the end of the cable and secure it with the nut. 40469 Cable outer groove Lock pin Shift cable Spring Spring pin Sleeve B guide Fitting of remote control cable to the engine •...
  • Page 55 INSTALLATION • Shift side: Set the shift cable to the cable clip and insert the lock pin at the shift lever fitting hole and turn it 90° to lock it. 40470 Cable of the shift side Spring Cotter pin -Washer Spring Grommet B is installed on the lower cowl...
  • Page 56 INSTALLATION NOTE: Confirm whether the engine side shift is in gear when shifting the control lever of the remote control box to its first position in Forward (F) or Reverse (R) , about 32° and whether the throttle of the carburetor is fully open when shifting the lever further. Confirm whether the carburetor's throttle is fully closed when the control lever is shifted to the Neutral (N) position.
  • Page 57: Battery Installation

    INSTALLATION Battery Installation MOUNTING BATTERY Follow the battery manufacturer's instructions carefully. Mount battery securely to the hull in a place free from splashing water. NOTE: Electric starting outboards must have the battery cables connected to a battery whenever the engine is running, even if started manually, as damage to the charging system could result.
  • Page 58: Propeller Selection

    INSTALLATION IMPORTANT: Please follow the instructions below: • Hydrogen gas is generated when charging a battery. Keep the battery in a well‑ventilated area during charging. Remove the battery from the boat; this will protect your hull and interior from damage. Electric sparks, cigarette smoking, and other sources of fire must be avoided in the charging area to prevent explosion of the battery.
  • Page 59: Transporting

    TRANSPORTING Removing the Motor 1. Stop the engine. 2. Disconnect the fuel connector, the remote control cable, the battery cables, bracket fixing bolts and nuts etc., from the motor. 3. Remove the motor from the hull and completely drain the water from the outboard.
  • Page 60: Trailering Boat/Outboard

    TRANSPORTING NOTE: If you store the motor horizontal posture, lay the motor down on the ground with the handles facing upward. 40803 Trailering Boat/Outboard The boat should be trailered with the outboard tilted down in a vertical (normal running),fully down position. NOTE: Trailering in the tilted position may cause damage to the motor, boat, etc.
  • Page 61: Transporting Portable Fuel Tanks

    TRANSPORTING If additional ground clearance is required, the outboard should be tilted up using an accessory outboard support device. Refer to your local dealer for recommendations. Additional clearance may be required for railroad crossings, driveways, and trailer bouncing. IMPORTANT: The tilt lock and shallow water drive feature (tiller handle models) on the outboard are not intended to support the outboard in the tilted position when trailering.
  • Page 62 TRANSPORTING 2. Install tether cap over the fuel line connector stem. This will protect the connector stem from being accidently pushed‑in, thus, allowing fuel or vapor to escape. 26794 Connector stem Tether cap...
  • Page 63: Fuel And Oil

    FUEL RATINGS Mercury Marine engines will operate satisfactorily when using a major brand of unleaded gasoline meeting the following specifications: USA and Canada ‑ having a posted pump Octane Rating of 87 (R +M)/2 minimum.
  • Page 64 FUEL AND OIL The fuel system components on your Mercury Marine engine will withstand up to 10% alcohol content in the gasoline. We do not know what percentage your boat's fuel system will withstand. Contact your boat manufacturer for specific recommendations on the boat's fuel system components (fuel tanks, fuel lines, and fittings).
  • Page 65: Oil Recommendation

    For added protection and lubrication, Mercury or Quicksilver Premium Plus TC‑W3 2‑Cycle oil is recommended. If Mercury or Quicksilver outboard oil is not available, substitute another brand of 2‑cycle outboard oil that is NMMA Certified TC‑W3. Severe engine damage may result from use of an inferior oil.
  • Page 66: Engine Break-In

    FUEL AND OIL MIXING PROCEDURE Pour the full amount of oil along with approximately one gallon of gasoline into an approved container. Shake the two together until they are thoroughly mixed. Add the remainder of gasoline and shake container to ensure mixing. ENGINE BREAK‑IN Engine Break-in Fuel Mixture Use a 1:25 oil/gaoline mixture in the first tank of fuel.
  • Page 67 FUEL AND OIL PORTABLE FUEL TANK PLACEMENT IN THE BOAT Place the fuel tank in the boat so the vent is higher than the fuel level under normal boat operating conditions.
  • Page 68: Features & Controls

    FEATURES & CONTROLS Remote Control Features Your boat may be equipped with the remote control shown. If not, consult your dealer for a description of the functions and operations of the remote control. 37982 Remote control handle Ignition key switch Throttle only lever Lanyard stop switch Tilt Up and Tilt Down...
  • Page 69: Shallow Water Operation

    FEATURES & CONTROLS 3. Tilt the engine all the way up until it locked in place. 37535 Reverse lock lever 4. Tilt down: Pull the reverse lever upward until it stops. This is the tilt down position. 5. Lift up the engine slightly, and then allow gravity to lower it for you.
  • Page 70 FEATURES & CONTROLS 1. Stop the engine. 2. Tilt up: Put the reverse lock lever in the tilt up position, and tilt up the engine to put the engine in the shallow water running position. 37535 Reverse lock lever 3. Tilt down: Pull the reverse lock lever in the tilt down position, slightly lift up the engine, then put it down.
  • Page 71: Trim Angle Adjustment

    FEATURES & CONTROLS NOTE: Please follow the instructions below. • Make sure that the water inlet is submerged at all times and that water is continuously running out of the cooling water check port. • Be sure to run the engine slowly when using the shallow water drive.
  • Page 72: Steering Friction Adjustment

    FEATURES & CONTROLS • Trim down: If the trim angle is excessive, the bow will rise out of the water and the speed will decrease. Furthermore, the bow may sway or the bottom may slam the water while cruising. In this case, decrease the trim angle by setting the trim position pin in a lower position.
  • Page 73 FEATURES & CONTROLS WARNING Insufficient friction adjustment can cause serious injury or death due to loss of boat control. When setting the friction adjustment, maintain sufficient steering friction to prevent the outboard from steering into a full turn if the tiller handle or steering wheel is released.
  • Page 74: Throttle Grip Turning Friction Adjustment

    FEATURES & CONTROLS Throttle Grip Turning Friction Adjustment Turn the friction adjustment screw to set and maintain the throttle at desired speed. Turn screw clockwise to tighten friction and turn screw counterclockwise to loosen friction. 38388 Loosen friction Tighten friction Trim Tab Adjustment Propeller steering torque will cause the boat to pull in one direction.
  • Page 75 FEATURES & CONTROLS The trim tab is located under the anti‑ventilation plate. • If the boat steers toward the left, set the trim tab in the direction of B. • If the boat steers toward the right, set the trim tab in the direction of C.
  • Page 76 FEATURES & CONTROLS To adjust the load of the remote control lever, turn the throttle friction adjustment screw on the front of the remote control box. Turn clockwise to increase the friction and counterclockwise to decrease it. 38385 Turn counterclockwise to decrease the friction Turn clockwise to increase the friction Throttle friction adjustment screw...
  • Page 77: Pre-Starting Check List

    OPERATION Pre‑Starting Check List • Operator knows safe navigation, boating, and operating procedures. • An approved personal flotation device of suitable size for each person aboard and readily accessible (it is the law). • A ring type life buoy or buoyant cushion designed to be thrown to a person in the water.
  • Page 78: Operating At High Elevations

    Wash the outboard exterior and flush out the exhaust outlet of the propeller and gearcase with fresh water after each use. Each month, spray Mercury Precision or Quicksilver Corrosion Guard on external metal surfaces. Do not spray on corrosion control anodes as this will reduce the effectiveness of the anodes.
  • Page 79 OPERATION NOTICE Without sufficient cooling water, the engine, the water pump, and other components will overheat and suffer damage. Provide a sufficient supply of water to the water inlets during operation. 2. Loosen the air vent screw on the tank cap. 37518 3.
  • Page 80: Engine Break-In Procedure

    Mixing ratio (1:50) : Unleaded gasoline 50: Genuine engine oil or recommended engine oil (TCW‑3) 1 ENGINE BREAK-IN FUEL MIXTURE Use a 1:25 oil/gasoline mixture in the first tank of fuel. Use Mercury or Quicksilver engine oil or the recommended oil (TCW‑3). BREAK-IN Break-in period...10 hours...
  • Page 81: Warming Up The Engine

    OPERATION Warming Up the Engine Warm the engine at low engine speeds for about three minutes. This allows the lubrication oil to circulate to all parts of the engine, Operating the engine without warming it up shortens the engine life. Be sure to check that cooling water is coming out of the water cheek port when warming up the engine.
  • Page 82 OPERATION IMPORTANT: If no water is coming out of the water pump indicator hole, stop engine and check cooling water intake for obstruction. No obstruction may indicate a water pump failure or blockage in the cooling system. These conditions will cause the engine to overheat.
  • Page 83 OPERATION 3. Pull out the choke knob all the way. (No choke operation is necessary when the engine is warm.) 37521 4. 9.9, 15, 18 : Pull the starter handle slowly until you feel resistance. Then pull it quickly. 37523 Pull slowly Pull quickly 5.
  • Page 84 OPERATION IMPORTANT: If use the choke knob for the engine start, push it back when the engine has started. 7. E Models:Insert the main switch key. 8. Set the control lever in the Neutral (N) position. Raise the Neutral (N) warm‑up lever. 37715 Fully opened Ignition key...
  • Page 85: Gear Shifting

    OPERATION IMPORTANT: Choke operation is not necessary if the engine is warm. 37466 Push to operate choke 10. Stop pushing the key when the engine has started. The key returns to the original position automatically. NOTE: The neutral warm‑up lever can not raise when the control lever shift in Forward (F) or Reverse (R).
  • Page 86 OPERATION 9.9, 15, 18, EH Models 37713 Reverse (R) Forward (F) 1. Forward: Turn the throttle grip to reduce engine speed. When the engine reaches trolling speed, quickly pull the shift lever to the Forward position. 2. Reverse: As when shifting to Forward, reduce the engine speed, when the engine reaches trolling speed, quickly push the shift lever to the Reverse position.
  • Page 87 OPERATION 3. E Models 39483 Fully opened Reverse (R) Throttle Fully closed Forward (F) Neutral warm‑up lever Shift Lock button Neutral (N) 4. Forward: Quickly push the control lever to the Forward (F) position at 32°, where the gear is connected, while lifting up on the lock button located at the bottom of the control lever grip.
  • Page 88: Stopping The Engine

    OPERATION Stopping The Engine 9.9, 15, 18, EH Models 1. Turn the throttle grip to the low speed position. 2. Put the shift lever into Neutral position. Run the engine for 2– 3 minutes at idling speed if it has been running at full speed. 3.
  • Page 89: Emergency Starting

    OPERATION 2. Turn the main switch key to the OFF position or pull out the stop switch lock. 37716 Hook Lanyard stop switch IMPORTANT: Please follow the instructions below. • After stopping the engine, close the air vent screw on the tank cap.
  • Page 90 OPERATION 2. Use a 10 mm socket wrench as a handle on the rope. 37880 WARNING High voltage is present any time the key is turned on, especially when starting or operating the engine. Do not touch ignition components or metal test probes and stay clear of spark plug leads when performing live tests.
  • Page 91: Maintenance

    Record maintenance performed in the Maintenance Log at the back of this book. Save all maintenance work orders and receipts. SELECTING REPLACEMENT PARTS FOR YOUR OUTBOARD We recommend using original Mercury Precision or Quicksilver replacement parts and Genuine Lubricants. Inspection and Maintenance Schedule BEFORE EACH USE •...
  • Page 92: Flushing The Cooling System

    This will help prevent a buildup of deposits from clogging the internal water passages. Use a Mercury Precision or Quicksilver accessory (or equivalent) flushing attachment. 1. These items should be serviced by an authorized dealer.
  • Page 93 MAINTENANCE WARNING Rotating propellers can cause serious injury or death. Never operate the boat out of the water with a propeller installed. Before installing or removing a propeller, place the drive unit in neutral and engage the lanyard stop switch to prevent the engine from starting.
  • Page 94: Top Cowl Removal And Installation

    MAINTENANCE Top Cowl Removal and Installation REMOVAL 1. Unlock the rear latch by pushing lever down. 29054 2. Lift rear of cowl and disengage front hook. 26851 INSTALLATION 1. Engage the front hook and push cowl back over the cowl seal.
  • Page 95: Fuel System

    MAINTENANCE Fuel System WARNING Fuel is flammable and explosive. Ensure the key switch is off and the lanyard is positioned so that the engine cannot start. Do not smoke or allow sources of spark or open flame in the area while servicing.
  • Page 96: Exterior Care

    MAINTENANCE 1. Fuel tank filter: Loosen the fuel pickup elbow shown, remove it and clean the fuel filter. 37711 Filter Fuel pickup elbow 2. Engine filter: Remove cap, then clean the fuel filter in the engine. 40475 Carburetor Fuel filter 3.
  • Page 97: Fuse Replacement - Electric Start Remote Control Models

    MAINTENANCE Fuse Replacement ‑ Electric Start Remote Control Models IMPORTANT: Always carry spare SFE 20 AMP fuses. The electric starting circuit is protected from overload by an SFE 20 AMP fuse. If the fuse is blown, the electric starter motor will not operate.
  • Page 98: Propeller Replacement

    MAINTENANCE Two anodes are fitted at the gear case and the mount bracket. When the anodes has been eroded more than 2/3, replace it immediately. 37879 Anode/Trim tab IMPORTANT: Please follow the instructions below. 1. Never grease or paint the node. 2.
  • Page 99 MAINTENANCE 2. Remove the spark plug leads to prevent engine from starting. 26899 3. Place a block of wood between gearcase and propeller to hold propeller and remove propeller nut. 27296 4. Pull propeller straight off shaft. If propeller is seized to the shaft and cannot be removed, have the propeller removed by an authorized dealer.
  • Page 100 MAINTENANCE 5. Coat the propeller shaft with Quicksilver or Mercury Precision Lubricants Anti‑Corrosion Grease or 2‑4‑C with Teflon. 27305 Tube Ref Description Where Used Part No. Anti-Corrosion Propeller shaft 92-802867Q 1 Grease 2-4-C with Teflon Propeller shaft 92-802859A 1 IMPORTANT: To prevent the propeller hub from corroding and...
  • Page 101 MAINTENANCE 6. Install forward thrust hub, propeller, rear thrust hub, propeller nut, and cotter pin onto the shaft. 37520 Cotter pin Propeller Propeller thrust hub Washer Propeller shaft 7. Place a block of wood between gearcase and propeller and tighten propeller nut. 27341 8.
  • Page 102: Spark Plug Inspection And Replacement

    MAINTENANCE Spark Plug Inspection And Replacement WARNING Damaged spark plug boots may emit sparks which can ignite fuel vapors under the engine cowl, resulting in serious injury or death from a fire or explosion. To avoid damaging the spark plug boots, do not use any sharp object or metal tool to remove the spark plug boots.
  • Page 103: Lubrication Points

    Spark plug Lubrication Points Only let an authorized Mercury service shop perform service or maintenance on this product. Be sure to use genuine parts, genuine lubricants, or recommended lubricants. Changing gear oil 1. Place the outboard in a vertical operating position.
  • Page 104: Submerged Outboard

    Lower oil plug 5. Install the upper oil plug, and then remove oil tube nozzle and install the lower oil plug. IMPORTANT: Mercury/Quicksilver gear recommended one (APL GL‑5: SAE #80 to #90). Required volume: Approximate 370 ml (0.10 gal.) Submerged Outboard...
  • Page 105: Storage

    STORAGE Pre‑season check 1. Check the electrolyte level, and measure the voltage and specific gravity of the battery. Specific Gravity at 20 °C Terminal Voltage (V) Charge Condition 1.120 10.5 Fully discharged 1.160 11.1 1/4 charged 1.210 11.7 1/2 charged 1.250 12.0 3/4 charged...
  • Page 106: Protecting External Outboard Components

    Lubricate all outboard components listed in Maintenance ‑ Inspection and Maintenance Schedule. • Touch up any paint nicks. See your dealer for touch‑up paint. • Spray Quicksilver or Mercury Precision Lubricants Corrosion Guard on external metal surfaces (except corrosion control anodes). Tube Ref Description Where Used Part No.
  • Page 107: Protecting Internal Engine Components

    • With engine running at fast idle, stop the fuel flow by disconnecting the remote fuel line. When engine begins to stall, quickly spray Quicksilver or Mercury Precision Lubricants Storage Seal into carburetor until engine stops from lack of fuel.
  • Page 108 STORAGE • Remove the battery from the boat and check water level. Recharge if necessary. • Store the battery in a cool, dry place. • Periodically check the water level and recharge the battery during storage.
  • Page 109: Troubleshooting

    TROUBLESHOOTING Starter Motor Will Not Crank The Engine (Electric Start Models) POSSIBLE CAUSES • Remote control models ‑ Blown 20 amp fuse in the starting circuit. Refer to Maintenance section. • Outboard is not shifted to neutral position. • Weak battery or battery connections are loose or corroded. •...
  • Page 110: Engine Runs Erratically

    TROUBLESHOOTING Engine Runs Erratically POSSIBLE CAUSES • Spark plugs fouled or defective. Refer to Maintenance section. • Incorrect setup and adjustments. • Fuel is being restricted to the engine. • Engine fuel filter is obstructed. Refer to Maintenance section. • Fuel tank filter obstructed. •...
  • Page 111: Owner Service Assistance

    2. Should you have a question, concern, or problem that cannot be resolved by your dealership, please contact Mercury Marine Service Office for assistance. Mercury Marine will work with you and your dealership to resolve all problems. The following information will be needed by the service office: •...
  • Page 112: Mercury Marine Service Offices

    Model and serial number of your outboard • The name and address of your dealership • Nature of problem Mercury Marine Service Offices For assistance, call, fax, or write. Please include your daytime telephone number with mail and fax correspondence. United States Telephone (920) 929‑5040...
  • Page 113 OWNER SERVICE ASSISTANCE Japan Telephone 81‑053‑423‑2500 Mercury Marine - Japan Anshin-cho 283-1 Hamamatsu 81‑053‑423‑2510 Shizuoka-ken, Japan 435-0005 Japan Asia, Singapore Telephone 5466160 Mercury Marine Singapore 72 Loyang Way 5467789 Singapore, 508762...
  • Page 114: Maintenance Log

    MAINTENANCE LOG Maintenance Log Record all maintenance performed on your outboard here. Be sure to save all work orders and receipts. Date Maintenance Performed Engine Hours...
  • Page 115: Propeller Table

    ACCESSORIES Propeller Table Use a genuine propeller. A propeller must be selected so that the engine RPM measured at wide open throttle while eruising is within the recommended range: 9.9 = 4500 to 5300 RPM; 15, 18 = 5200 to 5800 RPM. Light boats ‑‑‑‑‑‑‑‑‑‑‑‑‑‑‑‑‑‑‑‑‑‑‑‑‑‑‑‑‑‑‑‑‑‑‑‑‑‑‑‑‑‑‑‑‑‑‑‑‑...
  • Page 116: Accessories

    ACCESSORIES Accessories OPTIONAL ACCESSORIES 40476...
  • Page 117 ACCESSORIES Tachometer unit kit Tachometer Mercury/Quicksilver grease (250 g) Mercury/Quicksilver gear oil (500 mL) Touch‑up paint Mercury/Quicksilver engine oil (0.4 L, 1 L, 4 L, 20 L) Flushing attachment Extension cord for light (Lights are available on the market)
  • Page 118: Associated Parts

    ASSOCIATED PARTS Associated Parts Name Quantity Dimensions Tool bag Pliers Socket wrench 10 x 13 mm Service tools Socket wrench 21 mm Socket wrench handle Screwdriver Starter rope 1000 mm NGK B7HS‑10 or Spare parts Spark plug Champion L82C (Gap: 1.0 Cotter pin Fuel tank Primer bulb...
  • Page 119: Note

    ASSOCIATED PARTS NOTE:...
  • Page 120: Wiring Diagrams

    WIRING DIAGRAMS 9.9, 15, 18 39493...
  • Page 121: Wiring Diagrams

    WIRING DIAGRAMS Remote control box (optional) Battery Extension cord (optional) Fuse Rectifier Extension cord for light (optional) Receptacle plug (optional) Lamp (12V 80W) [AC] (available on the market) Tachometer (optional) Tachometer, lead wire (optional) Separate cord, white (optional) Separate cord, white (optional) -Flywheel magneto Spark plug Ignition coil...
  • Page 122: Eh Models

    WIRING DIAGRAMS EH Models 39494...
  • Page 123 WIRING DIAGRAMS Main switch Neutral switch Starter motor Starter cord Starter solenoid Fuse Rectifier Tachometer Tachometer lead wire (optional) Separate cord, yellow (optioal) Separate cord, white (optioal) Flywheel magneto -Spark plugs Ignition coil CD unit Stop switch 12V 40AH or 12V 70AH (abilable on the market)
  • Page 124: E Models

    WIRING DIAGRAMS E Models 39495...
  • Page 125 WIRING DIAGRAMS Cord assembly 12V 40AH or 12V 70AH battery (available on the market) Tachometer Battery cord (+) Tachometer lead wire (optional) Fuse 15A Starter solenoid Flywheel magneto Spark plugs Ignition coil CD unit Lead wire, black -Lead wire, brown Starter moter Choke solenoid Battery cord...
  • Page 126: Single Remote Control Box

    WIRING DIAGRAMS Single Remote Control Box 39496...
  • Page 127: Wire Color Code Abbreviations

    WIRING DIAGRAMS Neutral switch Main switch Stop switch Cord assembly Wire Color Code Abbreviations Wire Color Abbreviations Black Blue Brown Gray Green ORN or ORG Orange Pink PPL or PUR Purple White Yellow LT or LIT Light DK or DRK Dark...

This manual is also suitable for:

9.9 mh18 m15 mh15 e

Table of Contents

Save PDF