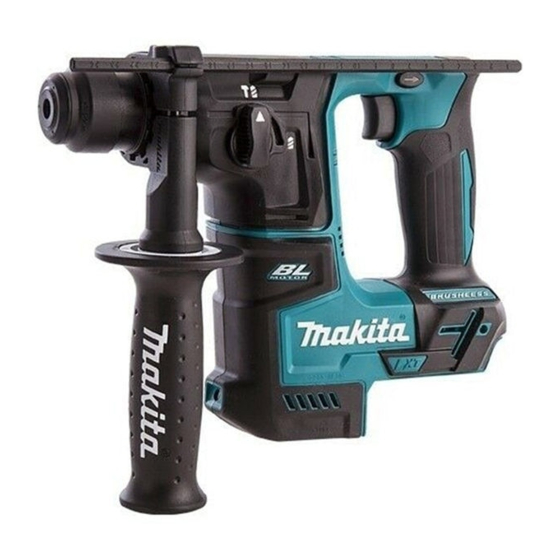
Makita DHR171 Instruction Manual
Cordless rotary hammer
Hide thumbs
Also See for DHR171:
- User manual ,
- Instruction manual (500 pages) ,
- Instruction manual (57 pages)
Table of Contents
Advertisement
Available languages
Available languages
Quick Links
EN
Cordless Rotary Hammer
Perforateur Sans Fil
FR
Akku-Bohrhammer
DE
Martello rotativo a batteria
IT
NL
Accuboorhamer
Martillo Rotativo Inalámbrico
ES
Martelete Rotativo a Bateria
PT
DA
Akku-borehammer
EL
Φορητό σφυροτρύπανο
Akülü Kırıcı Delici
TR
DHR171
INSTRUCTION MANUAL
MANUEL D'INSTRUCTIONS
BETRIEBSANLEITUNG
ISTRUZIONI PER L'USO
GEBRUIKSAANWIJZING
MANUAL DE
INSTRUCCIONES
MANUAL DE INSTRUÇÕES
BRUGSANVISNING
ΕΓΧΕΙΡΙΔΙΟ ΟΔΗΓΙΩΝ
KULLANMA KILAVUZU
6
12
19
26
33
40
47
53
59
66
Advertisement
Table of Contents

Subscribe to Our Youtube Channel
Related Manuals for Makita DHR171


Summary of Contents for Makita DHR171
- Page 1 Perforateur Sans Fil MANUEL D’INSTRUCTIONS Akku-Bohrhammer BETRIEBSANLEITUNG Martello rotativo a batteria ISTRUZIONI PER L’USO Accuboorhamer GEBRUIKSAANWIJZING MANUAL DE Martillo Rotativo Inalámbrico INSTRUCCIONES Martelete Rotativo a Bateria MANUAL DE INSTRUÇÕES Akku-borehammer BRUGSANVISNING Φορητό σφυροτρύπανο ΕΓΧΕΙΡΙΔΙΟ ΟΔΗΓΙΩΝ Akülü Kırıcı Delici KULLANMA KILAVUZU DHR171...
- Page 2 Fig.1 Fig.5 Fig.6 Fig.2 Fig.7 Fig.3 Fig.8 Fig.4...
- Page 3 Fig.9 Fig.13 Fig.10 Fig.14 Fig.11 Fig.15 Fig.12 Fig.16...
- Page 4 Fig.20 Fig.17 Fig.21 Fig.18 Fig.22 Fig.19...
- Page 5 Fig.23 Fig.24 Fig.25...
-
Page 6: Specifications
ENGLISH (Original instructions) SPECIFICATIONS Model: DHR171 Drilling capacities Concrete 17 mm Steel 10 mm Wood 13 mm No load speed 0 - 680 min Blows per minute 0 - 4,800 min Overall length 273 mm Rated voltage D.C. 18 V... -
Page 7: Battery Life
13. Do not touch the bit, parts close to the bit, or workpiece immediately after operation; they CAUTION: Only use genuine Makita batteries. may be extremely hot and could burn your skin. Use of non-genuine Makita batteries, or batteries that 14. Some material contains chemicals which may have been altered, may result in the battery bursting be toxic. -
Page 8: Functional Description
FUNCTIONAL DESCRIPTION NOTE: Depending on the conditions of use and the ambient temperature, the indication may differ slightly from the actual capacity. CAUTION: Always be sure that the tool is Tool / battery protection system switched off and the battery cartridge is removed before adjusting or checking function on the tool. The tool is equipped with a tool/battery protection sys- Installing or removing battery cartridge tem. This system automatically cuts off power to the motor to extend tool and battery life. The tool will auto- matically stop during operation if the tool or battery is... - Page 9 Grease CAUTION: Always check the direction of rotation before operation. Coat the shank end of the drill bit beforehand with a CAUTION: Use the reversing switch only after small amount of grease (about 0.5 - 1 g). the tool comes to a complete stop. Changing the This chuck lubrication assures smooth action and lon- direction of rotation before the tool stops may dam- ger service life. age the tool. Installing or removing drill bit CAUTION: When not operating the tool, always set the reversing switch lever to the neu- Clean the shank end of the drill bit and apply grease...
-
Page 10: Operation
Before installing the dust cup set, remove the bit from Hammer drilling operation the tool if installed. Install the spacer so that the grooves on the spacer fit CAUTION: in the protrusions on the tool barrel while widening it. There is tremendous and sudden Be careful for the spring not to come off from the slit of twisting force exerted on the tool/drill bit at the time of spacer. hole break-through, when the hole becomes clogged ► Fig.14: 1. Spacer 2. Spring with chips and particles, or when striking reinforcing rods embedded in the concrete. Always use the side ► Fig.15 grip (auxiliary handle) and firmly hold the tool by Install the side grip (optional grip base set and standard... -
Page 11: Maintenance
Discoloration, deformation or cracks may result. To maintain product SAFETY and RELIABILITY, repairs, any other maintenance or adjustment should be performed by Makita Authorized or Factory Service Centers, always using Makita replacement parts. OPTIONAL ACCESSORIES CAUTION: These accessories or attachments are recommended for use with your Makita tool specified in this manual. The use of any other accessories or attachments might present a risk of injury to persons. Only use accessory or attachment for its stated purpose. If you need any assistance for more details regard- ing these accessories, ask your local Makita Service Center. • Carbide-tipped drill bits (SDS-Plus carbide-tipped bits) •... -
Page 12: Spécifications
FRANÇAIS (Instructions originales) SPÉCIFICATIONS Modèle : DHR171 Capacités de perçage Béton 17 mm Acier 10 mm Bois 13 mm Vitesse à vide 0 à 680 min Frappes par minute 0 à 4 800 min Longueur totale 273 mm Tension nominale 18 V CC... - Page 13 Conservez toutes les mises en 14. Certains matériaux contiennent des produits chimiques qui peuvent être toxiques. Prenez garde et instructions pour réfé- garde de ne pas avaler la poussière et évitez tout contact avec la peau. Suivez les données rence ultérieure. de sécurité...
-
Page 14: Description Du Fonctionnement
CONSERVEZ CES et la batterie, ils peuvent vous glisser des mains, et INSTRUCTIONS. s’abîmer ou vous blesser. ► Fig.1: 1. Voyant rouge 2. Bouton 3. Batterie ATTENTION : N’utilisez que des batteries Pour retirer la batterie, faites-la glisser hors de l’outil Makita d’origine. L’utilisation de batteries de marque tout en faisant glisser le bouton à l’avant de la batterie. autre que Makita ou de batteries modifiées peut pro- voquer l’explosion des batteries, ce qui présente un Pour mettre en place la batterie, alignez la languette sur la risque d’incendie, de dommages matériels et corpo- batterie avec la rainure sur le compartiment et insérez-la. rels. Cela annulera également la garantie Makita pour Insérez-la à fond jusqu’à ce qu’un léger déclic se fasse l’outil et le chargeur Makita. - Page 15 Allumage de la lampe avant Témoins Charge restante ► Fig.4: 1. Gâchette 2. Lampe Allumé Éteint Clignotant ATTENTION : Évitez de regarder directement Anomalie le faisceau lumineux ou sa source. possible de la batterie. Enclenchez la gâchette pour allumer la lampe. La lampe reste allumée tant que la gâchette est enclen- chée. La lampe s’éteint environ 10 secondes après avoir relâché la gâchette. NOTE : Selon les conditions d’utilisation et la tem- pérature ambiante, l’indication peut être légèrement NOTE : Retirez la saleté sur la lentille de la lampe différente de la capacité réelle.
- Page 16 Collecteur de poussières ASSEMBLAGE (accessoire en option) ATTENTION : Assurez-vous toujours que Utilisez le collecteur de poussières pour éviter que la l’outil est hors tension et que sa batterie est reti- poussière ne tombe sur l’outil et sur vous-même lorsque rée avant d’effectuer toute tâche dessus. vous percez au-dessus de votre tête. Fixez le collecteur de poussières au foret comme illustré sur la figure. Le Poignée latérale (poignée auxiliaire) collecteur de poussières peut être fixé aux forets des tailles suivantes. ATTENTION : Utilisez toujours la poignée Modèle Diamètre du foret...
- Page 17 Pour retirer l’ensemble du collecteur de poussières, N’appliquez pas plus de pression lorsque le trou est tenez la base du collecteur de poussières et sortez-le. bouché par des copeaux ou particules. Laissez plutôt ► Fig.20: 1. Collecteur de poussières l’outil tourner au ralenti et retirez partiellement le foret du trou. En répétant cette opération plusieurs fois, le NOTE : Si le bouchon se détache du collecteur de trou se débouchera et vous pourrez reprendre le per- poussières, fixez-le avec le côté imprimé tourné vers çage normalement. le haut de sorte que la rainure sur le bouchon s’insère NOTE : Lorsque l’outil fonctionne à vide, il se peut dans la périphérie interne de l’accessoire. que le foret tourne de manière excentrique. L’outil se ► Fig.21 centrera lui-même automatiquement lors de l’utilisa- tion avec charge. La précision du perçage n’est donc Crochet pas affectée.
-
Page 18: Entretien
ACCESSOIRES EN OPTION ATTENTION : Ces accessoires ou pièces complémentaires sont recommandés pour l’utili- sation avec l’outil Makita spécifié dans ce mode d’emploi. L’utilisation de tout autre accessoire ou pièce complémentaire peut comporter un risque de blessure. N’utilisez les accessoires ou pièces complé- mentaires qu’aux fins auxquelles ils ont été conçus. Pour obtenir plus de détails sur ces accessoires, contactez votre centre d’entretien local Makita. -
Page 19: Technische Daten
DEUTSCH (Original-Anleitung) TECHNISCHE DATEN Modell: DHR171 Bohrkapazitäten Beton 17 mm Stahl 10 mm Holz 13 mm Leerlaufdrehzahl 0 - 680 min Schlagzahl pro Minute 0 - 4.800 min Gesamtlänge 273 mm Nennspannung 18 V Gleichstrom Standard-Akku BL1815N / BL1820 / BL1820B / BL1830 / BL1830B / BL1840 /... - Page 20 Bewahren Sie alle Warnungen 13. Vermeiden Sie eine Berührung des Einsatzes, der umliegenden Teile oder des und Anweisungen für spätere Werkstücks unmittelbar nach der Bearbeitung, weil die Teile noch sehr heiß sind und Bezugnahme auf. Hautverbrennungen verursachen können. Der Ausdruck „Elektrowerkzeug“ in den Warnhinweisen 14. Manche Materialien können giftige bezieht sich auf Ihr mit Netzstrom (mit Kabel) oder Akku Chemikalien enthalten.
- Page 21 DIESE ANWEISUNGEN Halten Sie das Werkzeug und den Akku beim Anbringen oder Abnehmen AUFBEWAHREN. des Akkus sicher fest. Wenn Sie das Werkzeug und den Akku nicht sicher festhalten, können VORSICHT: Verwenden Sie nur Original- sie Ihnen aus der Hand rutschen, was zu einer Makita-Akkus. Die Verwendung von Nicht-Original- Beschädigung des Werkzeugs und des Akkus und zu Makita-Akkus oder von Akkus, die abgeändert Körperverletzungen führen kann. worden sind, kann zum Bersten des Akkus und ► Abb.1: 1. Rote Anzeige 2. Knopf 3. Akku daraus resultierenden Bränden, Personenschäden und Beschädigung führen. Außerdem wird dadurch Ziehen Sie den Akku zum Abnehmen vom Werkzeug die Makita-Garantie für das Makita-Werkzeug und ab, während Sie den Knopf an der Vorderseite des...
- Page 22 Schalterfunktion Anzeigelampen Restkapazität WARNUNG: Vergewissern Sie sich vor dem Erleuchtet Blinkend Einsetzen des Akkus in das Werkzeug stets, dass 75 % bis der Ein-Aus-Schalter ordnungsgemäß funktio- 100 % niert und beim Loslassen in die AUS-Stellung zurückkehrt. 50% bis 75% ► Abb.3: 1. Ein-Aus-Schalter 25% bis 50% Drücken Sie zum Einschalten des Werkzeugs einfach den Ein-Aus-Schalter. Die Drehzahl erhöht sich durch...
-
Page 23: Montage
Wahl der Betriebsart Montage und Demontage des Bohrereinsatzes ANMERKUNG: Betätigen Sie den Betriebsart- Umschaltknopf nicht bei laufendem Werkzeug. Reinigen Sie das Schaftende des Bohrereinsatzes, und Das Werkzeug kann sonst beschädigt werden. tragen Sie Schmierfett auf, bevor Sie den Bohrereinsatz montieren. ANMERKUNG: Um schnellen Verschleiß des ► Abb.9: 1. Schaftende 2. Schmierfett Betriebsartwechselmechanismus zu vermeiden, vergewissern Sie sich, dass sich der Betriebsart- Führen Sie den Bohrereinsatz in das Werkzeug ein. Umschaltknopf immer richtig in einer der Drehen Sie den Bohrereinsatz, und drücken Sie ihn Betriebsartpositionen befindet. -
Page 24: Betrieb
BETRIEB HINWEIS: Der standardmäßige Seitengriff kann nicht verwendet werden, wenn der Staubfangtellersatz am Werkzeug montiert ist. Wenn der Staubfangtellersatz am Werkzeug instal- VORSICHT: Montieren Sie stets den liert ist, entfernen Sie den Griff vom standardmäßi- Seitengriff (Zusatzgriff), und halten Sie das gen Seitengriff, und bringen Sie ihn am optionalen Werkzeug während der Arbeit mit beiden Händen Griffbasissatz an. am Seitengriff und Schaltergriff fest. VORSICHT: Bevor Sie den Staubfangtellersatz anbringen, entfernen Vergewissern Sie sich vor der... -
Page 25: Wartung
VORSICHT: Die folgenden Zubehörteile oder Sie aber das Werkzeug gut festhalten, damit es Vorrichtungen werden für den Einsatz mit dem in nicht ruckartig herausgestoßen wird. dieser Anleitung beschriebenen Makita-Werkzeug empfohlen. Die Verwendung anderer Zubehörteile VORSICHT: Spannen Sie Werkstücke stets oder Vorrichtungen kann eine Verletzungsgefahr in einen Schraubstock oder eine ähnliche darstellen. Verwenden Sie Zubehörteile oder... - Page 26 Makita Europe N.V. Jan-Baptist Vinkstraat 2, 3070 Kortenberg, Belgium Makita Corporation 3-11-8, Sumiyoshi-cho, Anjo, Aichi 446-8502 Japan 885596-997 EN, FR, DE, IT, NL, ES, PT, DA, EL, TR www.makita.com 20170404...
Need help?
Do you have a question about the DHR171 and is the answer not in the manual?
Questions and answers