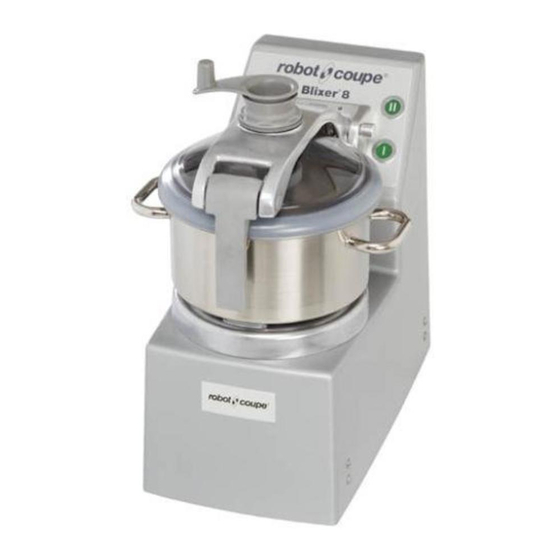
Robot Coupe Blixer 8 User Manual
Hide thumbs
Also See for Blixer 8:
- Operating instructions manual (56 pages) ,
- Safety and operating instructions (2 pages) ,
- Manual (48 pages)

Subscribe to Our Youtube Channel
Related Manuals for Robot Coupe Blixer 8


Summary of Contents for Robot Coupe Blixer 8
- Page 1 Blixer 8 • Blixer 10 • Blixer 15 • Blixer ® ® ® ® Blixer 8 V.V. • Blixer 10 V.V. • Blixer 15 V.V. • Blixer 20 V.V. ® ® ® ® 25/07/2017...
- Page 2 www.robot-coupe.com Register your product on line...
- Page 3 EU Declaration of Conformity Robot-Coupe SNC declares that the machines identified by • the provisions of the following harmonized European standards and the standards specifying the safety and hygiene requirements: their type above, comply with: - EN ISO 12100:2010 Safety of machinery – General principles •...
-
Page 4: Table Of Contents
SUMMARY WARRANTY MAINTENANCE • Dismantling the blade assembly IMPORTANT WARNING • Scraper arm • Blades INTRODUCTION TO YOUR NEW Blixer 8 • ® • Seal Blixer 10 • Blixer 15 • Blixer 20 • ® ® ® • Lid seal Blixer 8 V.V. -
Page 5: Warranty
ROBOT-cOUPE ., LIMITED WARRAnTY Labour to sharpen and/ or replacements SHIPPING DAMAGES. Visible and latent Your new ROBOT-COUPE appliance is defects are the responsibility of the freight carrier. for blades which have become blunt, chipped or warranted to the original buyer for a The consignee must inform the carrier and consi- worn after a normal or excessive period of use. - Page 6 RECOMMENDATIONS CONCERNING THE INSTALLATION OF VARIABLE-SPEED APPLIANCES AND PERSONAL SAFETY These recommendations apply to machines equip- • You must connect the machine to a 200-240 V • Several variable-speed appliances are connected to the same GFCI. ped with an induction motor and a single-phase or / 50 or 60 Hz single-phase alternating current three-phase wobbulator.
-
Page 7: Important Warning
W A R N I N G IMPORTANT WARNING KEEP THESE INSTRUCTIONS IN A SAFE PLACE WARNING: In order to limit accidents such as electric shocks or personal injury, and in order to limit material damage due to misuse of the appliance, please read these instructions carefully and follow them strictly. -
Page 8: Introduction To Your New Blixer
SWITCHING ON INTRODUCTION TO YOUR Blixer 8 V.V. • Blixer 10 V.V. Single phase ® ® THE MACHINE NEW Blixer 8 • Blixer Robot-Coupe equips these models with variators ® ® supplied with: • Blixer 15 • Blixer 20 • ®... -
Page 9: Assembly
ASSEMBLY • If the lid parts are already assembled: W A R N I N G 4) Place the lid assembly • MACHINE There is a green safety indicator light on the in the correction position. control panel of the motor unit. If this green Next, insert the metal pin 1) With the motor base light does not come on, consult the relevant... -
Page 10: Hygiene
The bowl can be prewashed by pouring hot water HYGIENE into it and running the machine for a few minutes. • WARNING: NEVER USE PURE BLEACH. • BLADE (See page 13) - Correctly diluate the detergent following the The Blixer 8 is supplied with a fine-serrated 2-blade ®... -
Page 11: Maintenance
MAINTENANCE • SCRAPER ARM • SEAL The scraper arm is equipped with rubber pieces The seal on the motorshaft should be lubricated • DISMANTLING THE BLADE ASSEMBLY which are wearing parts. They should be replaced regularly using a food safe lubricant. occasionally to always ensure an optimum efficiency In order to keep the motor completely watertight, it is 1) Blixer... -
Page 12: Diagnostic System
DIAGNOSTIC SYSTEM 2) Flashing green light • Test sequence: When the green light flashes, start by pressing button R E M E M B E R Your appliance is equipped with a light that indicates I to test that it is working properly (as the buttons are the operational status of your machine: used to test the machine, it is only logical to check After switching your appliance on, open... - Page 13 Level 3: The flashing of the green light indicates which element needs to be checked. If you have not been using your machine intensively, A rapidly flashing light indicates that either the base when it may be quite normal for the motor to overheat (ISBC) or the lid (ISCO) presence sensor is posing a and trigger the thermal relay and/or overload problem.
-
Page 14: Fitting And Using The Blade Assembly
FITTING AND USING THE BLADE ASSEMBLY Plastic Narrow Blade Screw Blade Long ring ring spacer shaft • 2-BLADE ASSEMBLY: • 3-BLADE ASSEMBLY (except for the Blixer ® We recommend you use the two-blade assembly for processing We recommend you use the 3-blade assembly for processing large quantities of more than half small amounts. -
Page 15: Technical Specifications
TECHNICAL • WORKING HEIGHT Blixer 10 dual-speed Three-phase appliance ® We recommend that you position the Blixer Speed 1 Speed 2 Intensity SPECIFICATIONS ® Motor (rpm) (rpm) (Amp.) Blixer 8 V.V. - Blixer 10 - Blixer 10 V.V. on a ®... -
Page 16: Safety
Blixer 20 dual-speed Three-phase appliance These models are fitted with a thermal failsafe which ® automatically switches the motor off if it is overloaded Speed 1 Speed 2 Intensity or has been left running for too long. Motor (rpm) (rpm) (Amp.) If this happens, allow the machine to cool completely 230 V = 16,3... - Page 29 25/07/2017...
- Page 30 25/07/2017...
- Page 31 25/07/2017...
- Page 32 25/07/2017...
- Page 33 Head Office, French, Robot Coupe Australia Pty Ltd: Robot-Coupe U.K. LTD: Export and Marketing Department: Unit 3/43 Herbert St Fleming Way, Isleworth, 48, rue des Vignerons Artarmon NSW 2064 Australia Middlesex TW7 6EU 94305 Vincennes Cedex- France Tel.: (02) 9478 0300 Tel.: 020 8232 1800...
Need help?
Do you have a question about the Blixer 8 and is the answer not in the manual?
Questions and answers