
Subscribe to Our Youtube Channel
Related Manuals for GDD Instrumentation MPP-EM2S+

Summary of Contents for GDD Instrumentation MPP-EM2S+
- Page 1 MPP PROBE Model MPP-EM2S+ with Android software Instruction Manual 860 boul. de la Chaudière, suite 200 Québec (Qc), Canada, G1X 4B7 Tel.: +1 (418) 877-4249 Fax: +1 (418) 877-4054 E-Mail: gdd@gdd.ca Web site: www.gdd.ca...
-
Page 2: Table Of Contents
Table of contents WARNINGS: Measure Stability and Battery Discharge ..............2 1. Introduction ............................4 2. Mineral Conductivity – General Rules ..................... 5 3. Android software..........................6 4. Equipment List ............................ 7 5. Batteries ............................... 8 6. Probe buttons and switches ......................10 7. -
Page 3: Warnings: Measure Stability And Battery Discharge
WARNINGS: Measure Stability and Battery Discharge Measure Stability (Drift) The MPP-EM2S+ is a useful geophysical instrument that will help you to get the information that you need to design an appropriate geophysical survey. In order to obtain stable values (which should be around 0) and avoid signal drift, it is highly recommended to leave the probe ON during one hour before taking the first measurement. - Page 4 Battery Discharge *** For the probe, when the level of the AA batteries charge is low, the value of the readings could be inaccurate and you could not be able to initialize the probe. The specifications described in this Instructions Manual is valid at temperatures between 0°C and 70°C.
-
Page 5: Introduction
1. Introduction Thank you for choosing the MPP-EM2S+ Multi Parameter Probe developed by Instrumentation GDD inc. to help you optimize your prospecting efforts. This probe will help you to better determine the nature, the exact position as well as the intensity of magnetic/conductive horizons along your cores and samples. -
Page 6: Mineral Conductivity - General Rules
2. Mineral Conductivity – General Rules Pyrrhotite often occurs in thin but continuous veins. It causes multiple and very high EM anomalies. Chalcopyrite is hardly detectable for two reasons. 1- It is 20 times less conductive than pyrrhotite. 2- It occurs, more often, in disseminated grains or clusters rather than in continuous beds, as the pyrrhotite or graphite that extend in horizons of hundreds of meters. -
Page 7: Android Software
3. Android software The MPP Probe model MPP-EM2S+ can be used with any Android devices supporting Bluetooth or Serial (RS-232) communication. The GDD MPP Android software is available on Google Play (https://play.google.com/store/apps/details?id=com.gddinstrumentation.gddmpp). Generally, Android devices don’t have any RS-232 port. To use the probe with the serial communication cable, you would need an USB/RS-232 adapter like the one shown below. -
Page 8: Equipment List
5. One (1) standard serial communication cable 6. One (1) MPP Instruction Manual 7. One (1) MPP utilities CD-ROM / USB Stick 8. One (1) black carrying box Do not hesitate to communicate with GDD Instrumentation Inc. if needed. Instrumentation GDD Inc. 2018-11-09... -
Page 9: Batteries
5. Batteries 5.1 Android device battery When the GDD MPP Android software is running on your device, the automatic screen save mode is disabled. To reduce battery usage, please make sure to close MPP software when you don’t use it for long time. - Page 10 Lights signification Time remaining in Time remaining in cable Lights on Status wireless mode** mode** The batteries are fully Red, yellow, green 7.5 hours 9 hours charged The batteries are Red, yellow 0-4 hours 0-4 hours partially discharged The batteries are not enough charged to 2-3 minutes 2-3 minutes...
-
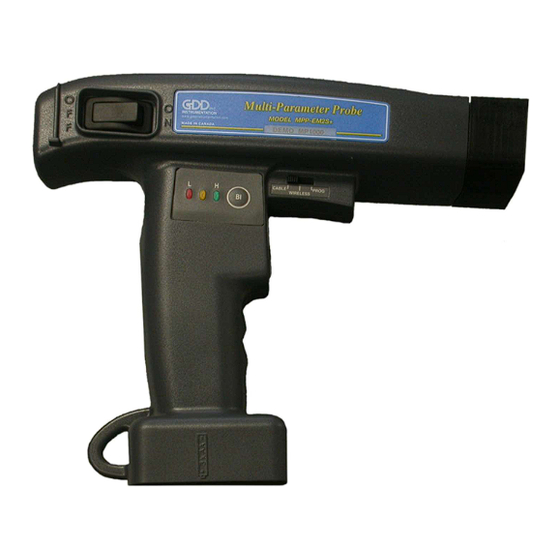
Page 11: Probe Buttons And Switches
6. Probe buttons and switches 6.1 On / Off Switch Turn on the probe with the On / Off toggle switch. 6.2 Cable / Wireless / Prog Switch The Cable / Wireless / Prog. switch is used to select the operating mode. *** It is important to place the switch in the position wanted before turning the probe on. - Page 12 6.3 STAMP and MEM buttons There are two buttons on the handle of the MPP–EMS2+ probe. These buttons have the same utility as the Stamp and Mem buttons in the GDD MPP Android software and were designed to facilitate handling. Pressing the both buttons together initializes the probe, so it makes the same action as Initialize button in the GDD MPP Android software (for the firmware versions starting from MPPi5_6).
-
Page 13: Starting
7. Starting 7.1 Starting – Wireless (Bluetooth) mode *** It is highly recommended to leave the probe ON during one hour before taking the first measurement. 1. Install the GDD MPP software on your Android device. This software is available on Google Play (https://play.google.com/store/apps/details?id=com.gddinstrumentation.gddmpp). - Page 14 3. Place the Cable – Wireless – Prog switch in Wireless position. 4. Turn on the probe with the On/Off switch placed on the right side of the probe. 5. On your Android device, go to Settings->Bluetooth, verify that Bluetooth is ON, find your MPP probe and pair it with the code 1234.
- Page 15 6. Run the GDD MPP program. Go to the Config menu->Settings->Connection. Make sure that Connection type is Bluetooth and your MPP Probe is selected as Bluetooth device. Config menu Instrumentation GDD Inc. 2018-11-09...
- Page 16 7. Come back to the GDD MPP software main screen and connect to the probe with Connection button. 8. Set the different parameters you need to use (see Section 10 – Manage Projects) according to the reading mode you chose (see Section 9 – Reading Modes). Once the setting is finished, come back to the GDD MPP software main screen, keep the end of the probe far from metal objects (point it towards the sky) and initialize it by taping on Initialize button.
- Page 17 9. The initialization… message will turn for few seconds and after this, the reading screen should appear. You are ready to take readings according to the reading mode you chose (see Section 9 – Reading Modes). Instrumentation GDD Inc. 2018-11-09...
- Page 18 7.2 Starting – Cable mode *** Use the cable mode only if the Wireless (Bluetooth) mode does not work. 1. Connect the serial RS-232 cable with the adapters between the probe and your Android device. Note: You need to plug together three cables to make a serial (RS-232) communication. 1.
- Page 19 2. Install the GDD MPP software on your Android device. This software is available on Google Play (https://play.google.com/store/apps/details?id=com.gddinstrumentation.gddmpp). 3. Turn and pull the cap of the battery holder, and insert 3 AA batteries into the probe. Push and turn the cap to close it. Or, plug the wall external power supply in the power jack.
- Page 20 4. Place the Cable – Wireless – Prog switch in Cable position. 5. Turn on the probe with the On/Off switch placed on the right side of the probe. Instrumentation GDD Inc. 2018-11-09...
- Page 21 6. Run the GDD MPP program. Go to the Config menu->Settings->Connection. Make sure that Connection type is Serial. Config menu Instrumentation GDD Inc. 2018-11-09...
- Page 22 7. Come back to the GDD MPP software main screen and connect to the probe with Connection button. 8. Set the different parameters you need to use (see Section 10 – Manage Projects) according to the reading mode you chose (see Section 9 – Reading Modes). Once the setting is finished, come back to the GDD MPP software main screen, keep the end of the probe far from metal objects (point it towards the sky) and initialize it by taping on Initialize button.
- Page 23 9. The initialization… message will turn for few seconds and after this, the reading screen should appear. You are ready to take readings according to the reading mode you chose (see Section 9 – Reading Modes). Instrumentation GDD Inc. 2018-11-09...
-
Page 24: Display
8. Display Here are the sections of the main screen. Project name Function menu Config menu Reading mode Probe battery Core info and edit Core name Add core Measurements Memory count Current depth Current spacing Add spacing Time till next Action buttons initializing Instrumentation GDD Inc. - Page 25 Project name Indicate the name of the current open project (see Section 10 – Manage Projects). Function menu This menu contains the functions to manipulate data and projects. 8.2.1 New Project, Open Project, Project Manager (see Section 10 – Manage Projects). 8.2.2 Back Memory Allows to delete the last stored reading in the selected project and core.
- Page 26 8.2.3 Graph This function allows to switch between text and graph data view. In graph view, you can PAUSE/RUN graphic by clicking on the graphic area. You can also ZOOM IN/OUT the scale of the vertical axe. Instrumentation GDD Inc. 2018-11-09...
- Page 27 8.2.4 Show results This function allows to view all previously saved readings in the current project. Select the number of readings on the page Select the core that you want to see Zoom IN/OUT the view Navigate the pages 8.2.5 Export Files (see Section 11 –...
- Page 28 Config menu The Config menu contains following items: 8.3.1 Settings Instrumentation GDD Inc. 2018-11-09...
- Page 29 8.3.1.1 General Enable Sound activates/deactivates all kind of sound notifications in the software (buttons, initialization, alerts, HF Response Threshold, …). Enable HFR Threshold activates/deactivates the sound on HF Response Threshold. This sound is the one you hear when a conductive material is detected. HFR Threshold defines the HF Response Threshold.
- Page 30 Core name Select a core from the current project. The following readings will be associated with that core. Add core Add a core to the current project. Core info and edit See or edit details of the selected core. Measurements Several times per second, the probe measures and displays three physical properties which are: HF RESPONSE: Conductor response measured in Hertz (Hz).
- Page 31 8.15 Action buttons Connection – use this button to connect to the probe. Initialize – use this button to initialize the probe. Mem – use this button to take a reading in Punctual mode and Single Reading mode. REC – use this button to START/STOP recording the readings in Continuous mode. Stamp –...
-
Page 32: Reading Modes
9. Reading Modes It is possible to take readings by using three different methods with the MPP-EM2S+. These methods are Punctual, Continuous and Single Reading modes. Punctual mode In this mode, each time you click MEM button in the GDD MPP software or you press MEM button on the probe, one reading is stored in the current project. - Page 33 Single Reading mode In this mode, you have to initialize the probe before taking a single reading. After the probe is initialized, you have 15 seconds to take a reading before you have to reinitialize the probe. The reading values will be displayed on the screen with a resolution of 10 SI for readings lower than 10 x 10 SI.
- Page 34 This reading is associated to the selected Core and taken at the current Depth position. If the current Spacing is not 0, the current Depth is incremented by the value of Spacing and the next reading will be stored at this Depth position. Instrumentation GDD Inc.
-
Page 35: Manage Projects
3: Half Sample checkbox 10. Manage Projects Before starting to get readings, you have to create or open a project. In order to help you with manipulations, when the GDD MPP Android software is started with no existing project in memory, the software automatically creates and opens DemoProject with one DemoCore and default configuration. - Page 36 While creating a project, you have to define a core. This is the first core in the project. You will be able to add any core with Add core button on the main screen. Add core Instrumentation GDD Inc. 2018-11-09...
- Page 37 The sample can be one of two types: Wall or Cylinder. If you are scanning a core, select the Cylinder option. For a rock of flat surface, select the Wall. Both types need the starting Depth to be specified. Enter the core Diameter in millimeters. The Depth unit (Meter or Foot) depends of the project configuration made previously.
-
Page 38: Export Files
In ordeto establish communication between the handheld computer and a desktop PC, you need to 11. Export Files install the ActiveSync software, which is available on the CD supplied by GDD. Function menu-> Export Files allows to save the stored readings in several formats. Normally, you will find the saved files in \Documents\GDDMPP folder of your Android device (the folder name and path may vary between Android devices). - Page 39 Open the Microsoft Excel software. In the tool bar, select File and Open. In Type of files, select All Files (*.*). In Look in, you have to localize your file. This is very important in order to find the file you need. The file extension is .txt. Then select the file you want to open and click on Open.
- Page 40 It is very important that you save your file at this point. To do so, go to the tool bar and select: File, Save as: In the Save in: field, choose the folder in which you want to save it. In the Save as type: field, select Microsoft Excel Workbook (*.xls).
-
Page 41: Readings Interpretation
12. Readings interpretation 12.1 HF/Cond Distinction In the case of conductive sulphides: The HF response provides an indication of sulphides quantity. The Conductivity (Mhos/m) provides an indication of sulphides quality. The conductivity of a small and a large aluminium foil will be similar but the HF response will increase with the size of the aluminium surface. -
Page 42: Troubleshooting
13. Troubleshooting 13.1 Errors while starting the MPP software Problem: In Bluetooth mode, the probe is not responding and cannot connect to the Bluetooth communication. Solutions: In Config menu->Settings->Connection->Bluetooth Device, verify that the probe serial number corresponds to the Bluetooth Device selected. ... - Page 43 13.2 Errors during the measuring process Problem: After initialization, the readings seem to drift. Solutions: As mentioned in the Warnings on the first page of this manual, it is highly recommended that you leave the probe ON for one hour before taking the first measures. ...
- Page 44 Problem: The probe disconnects during measuring process. Solutions: In Config menu->Settings->Connection->Bluetooth Device, make sure to select the correct Bluetooth Device you are using. Verify the batteries of the probe (see Section 5.3 – Battery level indicator). Instrumentation GDD Inc.
-
Page 45: Technical Support
14. Technical Support If you encounter a problem not described in this manual, do not hesitate to contact Instrumentation GDD Inc. for help at: Telephone: +1(418) 877-4249 Fax: +1(418) 877-4054 Toll free line: 1-877-977-4249 (in Canada) E-Mail: support@gdd.ca Emergency out of business hours: Pierre Gaucher Home phone: + 1 (418) 657-5870 Cell phone:...
Need help?
Do you have a question about the MPP-EM2S+ and is the answer not in the manual?
Questions and answers