Table of Contents
Advertisement
Advertisement
Table of Contents

Related Manuals for FlashPoint eVOLV 200 R2


Summary of Contents for FlashPoint eVOLV 200 R2
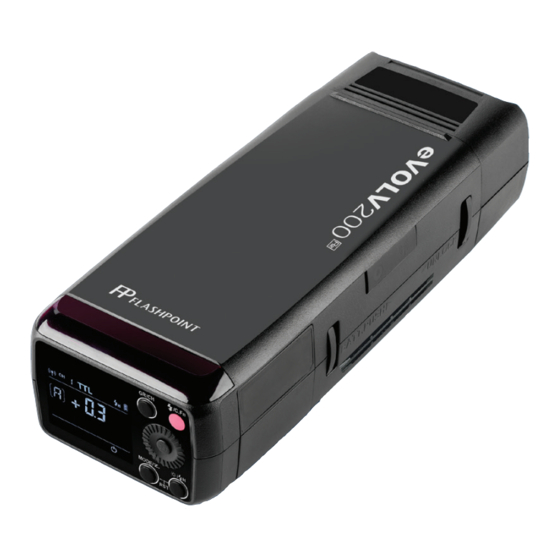
- Page 1 eVOLV 200 200ws TTL Modular Flash with integrated R2 radio Receiver FPLFEV200...
-
Page 2: Intro
Add the pro LED modeling light feature and the picture is complete. The eVOLV200 is the next evolution of the Flashpoint R2 radio system, totally compatible with the Canon, Nikon and Sony systems, for remote power control and shooting. With a focus on portable... - Page 3 Pro quality 360 degree Bare- 8 stop range. bulb flash tube which accepts all modifiers and accessories from the Flashpoint Streak- Power adjusts from full power to 1/128 light. Bare bulb flash head in reflector GN in 1/3 stop increments.
-
Page 4: For Your Safety
For Your Safety • Always keep this product dry. Do not use in rain or in damp conditions. • This product contains high-voltage electronic parts. Touching the high-voltage circuit inside it may result in electric shock. Do not disassemble. Should repairs become necessary, this product must be sent to an authorized maintenance center. -
Page 5: Table Of Contents
Contents Intro ..............................2 For your safety ..........................4 Name of Parts ..........................6 Control Panel............................ 7 LCD Panel............................7 eVOLV200 kit contents ......................... 8 Separately Sold Accessories....................... 8 Attaching Flash Heads ......................... 9 Battery ..............................10 Power Management ........................11 Modeling Lamp ..........................11 Flash Modes ............................11 Flash Mode—... -
Page 6: Name Of Parts
Name of Parts Figure C Figure A 1. Barebulb Flash Head 12. Lithium Battery 2. Fresnel “Speedlite” Flash Head 3. Head Mounting System 4. Support Mounting Socket (¼”x20 thread) 5. Power Switch Figure B Figure D 6. R2 Wireless Radio and Optic Light Sensor 7. -
Page 7: Control Panel
Control Panel: Figure E 15. LCD Panel <SET> Set Button 16. <GR/CH>Group/Channel Button < > Modeling Lamp Button/ (long press for 2 seconds) High Speed Sync Button (long press for 2 17. Flash Ready Indicator, < / C.Fn> seconds) < MODE / >... -
Page 8: Evolv200 Kit Contents
eVOLV200 part by part Figure G 1- eVOLV200 flash body 1- Barndoor 1- Barebulb Flashhead Module 1- Grid 1- Barebulb Flashtube 4 - Magnetized Color Gels 1- Fresnel Speedlite Flashhead Module 1- Protecting bag 1- Stand/Umbrella holder 1- Instruction manual 1- Battery charger 1- Lithium battery pack Optional Accessories... -
Page 9: Attaching Flash Heads
Speedlite and Bare Bulb Modular Flash Heads Figure I Figure H Figure J Figure K Attaching the Bare Bulb Flash Head 1. Start with a removing an attached flash 4. Take the Barebulb flashtube and align the head by the sliding catch lock to the left (fig pins of the tube carefully with the tube B / 11) and pulling gently on the head to slip socket by matching the 3 pins on the base of... -
Page 10: Battery
Battery Level Indicator Features Make sure the battery pack is securely 1. The Flashpoint eVOLV200 uses a high capac- locked in the chamber of the flash. (fig D) ity Li-ion polymer battery which has long Check the battery level indication on the runtime. -
Page 11: Power Management
Flash Modes Power Management Figure L The ON/OFF Power Switch (fig L) controls the state of the flash unit. Turn off the power pack if the flash unit will not be used for an extend- ed period. The automatic hibernation feature puts the power supply to sleep when there is This flash has three flash modes: TTL (Auto), no operation for 30 minutes. -
Page 12: Fec: Flash Exposure Compensation
FEC: Flash Exposure Compensation S1 Optical Slave Setting In M manual flash mode, press the < C.Fn > With FEC function, the eVOLV200 can adjust button for 2 seconds to enter the menu. Select the the auto exposure bias from -3 to +3 in 1/3rd C.FN-F2 and choose the S1 function, so that this stops. -
Page 13: Flash Mode-Multi/Stroboscopic Flash
Display Flash Duration Operation: Calculating the Shutter Speed During stroboscopic flash, the shutter remains 1. Long press the C.Fn button for 2 seconds to open until the firing stops. Use the formula below enter C.FN function. to calculate the shutter speed and set it with the camera. -
Page 14: High-Speed Sync
Maximum Stroboscopic Flashes: Flash Output 1/16 1/32 1/64 1/128 12-14 15-19 20-50 60-199 Flash Output 1/16 1/32 1/64 1/128 High-Speed Sync High Speed Sync (FP flash) enables the flash to synchronize with virtually all camera shutter speeds. This is convenient when you want to use aperture priority for fill-flash portraits, outdoor brightly lit subjects or to overpower the sun as the main source of light. -
Page 15: Wireless Flash Shooting: R2 Radio (2.4G) Transmission
R2 Wireless Flash Operation The eVOLV200 adopts the R2 2.4G wireless radio system, which has absolute compatibility with other R2 Family flashes and transmitters. As a slave unit, the eVOLV 200 senses and switches automatically to be compatible with Canon, Nikon, and Sony R2 TTL according to the master unit employed. -
Page 16: Ratio Lighting Examples
Optical Wireless Flash Mode Positioning and Operation Range (Examples of R2 wireless flash setup) See the Manual Mode section on page 12 for Optical Slave instructions. TTL Auto flash with R1 Wireless Remote one slave unit Control Function The flash unit is built in with a Wireless Control Port so that you can wirelessly adjust the power level of the flash and the flash triggering. -
Page 17: C.fn: Setting Custom Functions
C.Fn: Setting Custom Functions Custom Function Setting Setting & Functions Limitations Display Display Descriptions Number Beeper S1/S2 mode S1 Mode M mode selection S2 Mode 30 min Auto hibernate with- Auto hibernate 60 min out any operation 90 min Can be triggered as M/Multi Delay flash OFF,... -
Page 18: Mask Custom Function 5
MASK Custom Function 5 The MASK Custom Function 5, adds the power of creating photographic digital masks that can be used in layers within photo editing software, to mask subjects, isolating them from backgrounds without the use of special computer based post production techniques. A great time saver. You need to establish the link from the transmitting R2 Rapid or XPLOR 600 Custom Function corresponding to the MASK feature. -
Page 19: Temperature Protection Function
Temperature Protection Function • To avoid overheating and deteriorating the flash heads, do not fire more than 100 continuous flashes in fast succession at 1/1 full power. After 100 continuous flashes, allow a rest time of at least 10 minutes. •... -
Page 20: Technical Data
Firmware Upgrade This flash supports firmware upgrade through the USB port. Update information will be released on our official website. A USB cord is not included in this product. The USB port is a standard Micro USB socket. Note: Press <... - Page 21 Technical Data (Continued) Delay Flash 0.01~30 seconds Mask √ Beeper √ Modeling Lamp (LED) √ Optic Slave Flash S1/S2 Flash Duration Indication √ Wireless Flash Wireless Flash R2 2.4G radio and optical reception Wireless flash function Slave, Off Controllable slave groups 5 (A, B, C, D, and E) R2 Radio reception range 330ft/100m...
-
Page 22: Maintenance
You can always contact us at BRANDS@ADORAMA.COM for personal technical support. Our web site contains a wide range of Support and FAQ pages with valuable technical assistance. Flashpoint is a registered trademark of ADORAMA CAMERA. © 2017 Adorama Camera, Corp. All Rights Reserved. -
Page 23: Warranty And Customer Service
Flashpoint’s option, to repair or replace the hardware, provided that the hardware is returned to the point of purchase or such other place as Flashpoint may direct with a copy of the sales receipt or dated itemized receipt. Flashpoint may, at its option, replace...
Need help?
Do you have a question about the eVOLV 200 R2 and is the answer not in the manual?
Questions and answers