
Related Manuals for FlashPoint Zoom Li-on TTL Flash R2


Summary of Contents for FlashPoint Zoom Li-on TTL Flash R2
- Page 1 Zoom Li-on TTL Flash for Olympus/Panasonic with integrated R2 Radio Transceiver FPLFSMZL2O...
-
Page 2: Included Items
Thank You for Choosing Flashpoint! The new Flashpoint Zoom Li-on TTL Speedlight for Olympus/ Panasonic with Integrated R2 Radio Transceiver is a hotshoe speedlight which is fully compatible with the Olympus/ Panasonic TTL system that delivers the benefits of a generous internal interchangeable 11.1 volt Lithium Ion battery without... -
Page 3: For Your Safety
For Your Safety • Always keep this product dry. Do not use in rain or in damp conditions. • This product contains high-voltage electronic parts. Touching the high-voltage circuit inside it may result in electric shock. Do not disassemble. Should repairs become necessary, this product must be sent to an authorized maintenance center. -
Page 4: Name Of Parts
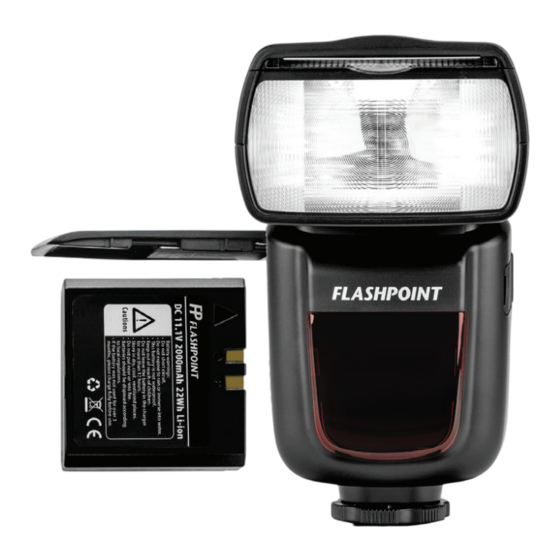
Name of Parts Body 1. Retractable Bounce Card 7. Hotshoe 2. Retractable Wide Angle 8. Dot-matrix LCD Panel Diffuser 9. Lock Ring 3. Flash Head 10. Battery Compartment 4. Optical Control Sensor 11. USB Port for Firmware 5. R1 Wireless Control Port Upgrades 6. - Page 5 LCD Panel TTL Autoflash Zoom zoom display (Page 17) Focal length (Page 17) High-speed sync Automatic (Page 8) Manual (Page 8) TTL autoflash Distance indicator display Flash exposure compensation (Page 8) Flash exposure compensation amount • The display will only show the settings currently applied. •...
-
Page 6: Loading And Unloading The Battery
Radio Transmission Shooting • Master Unit • Slave Unit Battery Features and Warnings This flash unit uses LI-ion polymer battery which has long runtime and takes only 2.5 hours to fully charge by using the standard battery charger. The approximate charge-and-dis- charge times are 500. -
Page 7: Power Management
Power Management Use ON/OFF Power Switch to power the flash unit on or off. Turn off the unit if it will not be used for an extended period of time. Set as a master flash, it will turn the power off automatically after approximately 90 seconds of idle use. - Page 8 FEC: Flash Exposure Compensation With FEC function, this flash can adjust from -3 to +3 in 1/3rd stops. Feature is useful for minor adjusting of the TTL system. Setting FEC: Press Function Button 2 < >. The icon < > flash exposure compensa- tion amount will be high- lighted on the LCD panel.
- Page 9 With this function, the flash will ignore a single “preflash” from the main flash and will only fire in response to the second, actual flash from the main unit. Manual Off Camera High-speed Setting (Non-Flashpoint wireless R2 system) In M, manual flash mode, press Function Button 4 <...
- Page 10 Flash Modes – Multi / Stroboscopic With stroboscopic flash, a rapid series of flashes is fired. It can be used to capture a multiple images of a moving subject in a single photograph. You can set the firing frequency (number of flashes per sec. expressed as Hz), the number of flashes, and the flash output.
-
Page 11: Maximum Stroboscopic Flashes
As a slave unit, this Zoom Li-on TTL Speedlite for Olympus / Panasonic is compatible with Flashpoint R2 series transmitters for receiving the signal for triggering from R2T-C (for Canon), R2T-N (for Nikon), R2T-S (for Sony), R2T-F (for Fuji), and R2T-O (for Olympus / Panasonic) . - Page 12 Slave Unit Setting Press < > button so that < > < > are displayed on the LCD panel. The backlight now turns orange to indicate Slave Mode R2. 2. Setting Master Unit’s Flash Mode Press Function Button 4 < >...
- Page 13 Slave Unit Setting • Set the other camera flash as the wireless slave unit. (Page 12) • The slave unit can be set as A/B/C. Check the communication channel • Set the master unit and slave unit(s) to the same channel.
- Page 14 5. M: Wireless Flash Shooting with Manual Flash Advanced multiple wireless shooting, using manual flash, can be achieved by designating Groups. You can shoot with a different flash output setting for each slave unit firing group. All of the setting parameters are made on the master unit. Setting the flash mode to <M>...
- Page 15 Positioning and operating range (example of wireless flash shooting) Autoflash Setup with One Slave Unit Transmission distance is about 100m. • Use the supplied mini stand to position the slave unit. • Before shooting, perform a test flash and test shooting. •...
- Page 16 R2 transmitter. To control the flash wirelessly, you need a Flashpoint R1 Transmitter and Receiver Set for the Zoom Flash (FT-16S) FPLFSMZLRR. Insert the receiver into the Wireless Control Port on the flash and insert the transmitter into the camera hot shoe.
- Page 17 Creating a Catchlight With the catch light panel, you can create a catchlight in the subject’s eyes to add life to the facial expression. Point the flash head up- ward to 90°. Pull out the wide angle diffusion panel. The catch light panel will come out at the same time.
-
Page 18: C.fn: Setting Custom Functions
Using the Wide Panel Pull out the wide panel and place it over the flash head as shown. The flash coverage will then be extended to 7 mm. • The catchlight panel will come out at the same time. Push the catchlight panel back into place. -
Page 19: Firmware Upgrade
Firmware Upgrade This flash supports firmware upgrade through the USB port. Update information will be released on our official website. USB connection cord is not included in this product. The USB port is a standard Micro USB socket. Protection Functions 1. -
Page 20: Compatible Camera Models
2. Other Protections The system provides real-time protection to secure the device and your safety. The following lists prompts for your reference: Meaning Prompts on LCD Panel A failure occurs on the recycling system so that the flash cannot fire. Please restart the flash unit. -
Page 21: Troubleshooting
Troubleshooting If there is a problem, refer to this Troubleshooting Guide. The Camera Flash cannot be charged. • The battery is installed in the wrong direction. • Install the battery in the correct direction. • The camera flash’s internal battery is exhausted. •... -
Page 22: Technical Data
Technical Data Model FPLFSMZL2O • Type Compatible Cameras Olympus / Panasonic cameras (refer to compatible camera models) Guide No. 60 (m ISO 100) (1/1 output @ 200mm) 190 (feet ISO 100) Flash Coverage 20 to 200mm (135 system) or 14 to 133mm (APS) •... -
Page 23: Fcc Warning
This equipment complies with FCC radiation exposure limits set forth for an uncontrolled environment. This transmitter must not be collocated or operating in conjunction with any other antenna or transmitter. For assistance, you can always email Brands@Adorama.com Flashpoint Accessories R2 Radios R1 Radios Blast Power Pack BP-960 Hexapop/Parapop...
Need help?
Do you have a question about the Zoom Li-on TTL Flash R2 and is the answer not in the manual?
Questions and answers
Hi, when I switch ON my flashlight has all indicators on display but after 2 sec is showing permanently this message on display: E3. What to do to go in normal menu and having access to all settings. Thank you!
The E3 error message on the FlashPoint Zoom Li-on TTL Flash R2 means the voltage on two outlets of the flash tube is too high. To resolve this issue, the product must be sent to a maintenance center.
This answer is automatically generated
what is the maintenance center who can fix this, where to send it?