Advertisement
Quick Links
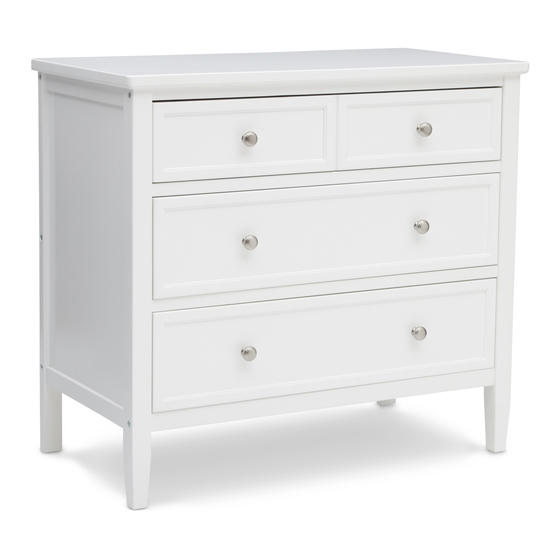
3 Drawer Dresser
THIS PRODUCT IS NOT INTENDED FOR
INSTITUTIONAL OR COMMERCIAL USE.
When contacting Delta Consumer Care please reference the above information. Before contacting Delta
Consumer Care please ensure that the information above matches the information found on the label on
.
the Back Panel
please reference the information found on the product when contacting Delta Consumer
Care.
To register your product for important safety alerts and updates to your product please visit
www.DeltaChildren.com and click on Product Registration.
Jun 20, 2014 25101-76303-R0
Read all instructions before assembly and use.
KEEP INSTRUCTIONS FOR FUTURE USE.
ADULT ASSEMBLY REQUIRED
Due to the presence of small parts during assembly, keep out of
reach of children until assembly is complete.
Consumer Care:
www.DeltaChildren.com
Delta Children's Products
114 West 26th Street
New York, NY 10001
Tele.212-645-9033
Style #:
Lot:
Date:
76303
___________
___________
A
REV
©2014 DELTA ENTERPRISE CORP.
Advertisement

Related Manuals for Delta Children 76303


Summary of Contents for Delta Children 76303
- Page 1 Delta Consumer Care. To register your product for important safety alerts and updates to your product please visit www.DeltaChildren.com and click on Product Registration. Jun 20, 2014 25101-76303-R0 ©2014 DELTA ENTERPRISE CORP.
- Page 2 - Do not scratch or chip the finish. - Inspect the product periodically, contact delta children's products for replacement parts or questions. - Do not store the product or any parts in extreme temperatures and conditions such as a hot attic or a damp, cold basement.
- Page 3 PARTS: HARDWARE KITS PART #25100 D.Top Front Rail x1 C. Top x1 Part #25087 Part #25093 A.Left Side x1 B. Right Side x1 Part #25085 Part #25086 G. Drawer rail x2 F. Bottom Front Rail x1 E. Top Back Rail x1 Part # 25091 Part #25089 Part #25088...
- Page 4 PARTS: MAKE SURE THAT ALL PRE-ASSEMBLED PARTS ARE TIGHT. BB. 40mm Bolt x 8 DD. Barrel Nut x 10 AA. 30mm Bolt x4 EE. Plastic Barrel Nut X 15 CC. 75mm Bolt x 10 HH. Screw X20 GG. Drawer Screw X15 FF.
- Page 5 This page is intentionally blank...
- Page 6 STEP 1: CC. 75mm Bolt x 5 DD. Barrel Nut x 5 KK. 8mm Dowel x 2 D. Top Front Rail x1 J. Bottom Back Rail x1 A. Left Side x1 E. Top Back Rail x1 F. Bottom Front Rail x1 Attach the Back Bottom Rail (Part J), Top Front Rail (Part D), Top Back Rail (Part E), and Bottom Front Rail (Part F) to the Left Side (Part A) using (2) Dowels (Part KK), (5) 75mm Bolts (Part CC) and (5) Barrel Nuts(Part DD).
- Page 8 STEP 2: G. Drawer rail x2 Insert the (2) Drawer Rails (Part G) as shown with the rounded edges facing the front.
- Page 10 STEP 3: CC. 75mm Bolt x 5 DD. Barrel Nut x 5 B. Right Side x1 KK. 8mm Dowel x 2 Insert (2) Dowels (Part KK) into the Back Bottom rail. Align the Right Side (Part B) With The Dowels and Rails. Attach the Side using (5) 75mm Bolts (Part CC) and (5) Barrel Nuts (Part DD).
- Page 12 STEP 4: BB. 40mm Bolt x 8 AA. 30mm Bolt x4 KK. 8mm Dowel x 4 C. Top x1 Insert (2) Dowels (Part KK) into the top of Both Sides. Align the Top (Part C) with the Dowels. Attach the Top Using (4) 40mm Bolts (Part BB) in the Top Front Rail, (4) 40mm Bolts (Part BB) in the Top Back Rail, And (2) 30mm Bolts in each of the Sides.
- Page 14 STEP 5: HH. Screw X20 H. Back Panel x1 Install Back Panel (Part H) with the Notch to the top using (25) Screws (Part HH). Tighten with a Phillips Screwdriver.
- Page 15 HH. Screw X20 H. Back Panel x1...
- Page 16 STEP 6: N. Top Drawer Front x1 L. Drawer RightSide x3 M. Drawer Left Side x3 P.Lower Drawer Front x2 GG. 25mm Screw x12 Attach the Right and Left Drawer Sides (Parts L and M) to the Drawer Front (Parts N and P) with (4) 25mm Screws (Part GG). Note: Grooves In Bottom Must Align.
- Page 17 N and P Align Grooves N and P...
- Page 18 STEP 7: S. Drawer Support x3 JJ. 6mm Dowel x6 K. Drawer Bottom x3 GG. 25mm Screw x3 EE. Plastic Barrelx15 FF. 40mm Screw x15 Install the Drawer Support (Part S) and Drawer Back (Part R), using (1) 25mm Screws (Part GG) (5) 40mm Screws (Part LL) and (5) Plastic Barrel Nuts (Part EE).
- Page 19 Slide Drawer Bottom (Part K) into the grooves. Install the Drawer Support (Part S) using (2) 6mm Dowels (Part JJ).
- Page 20 STEP 8: MM. Knob And Screw X6 Attach (1) Knob (Part MM1) with (1) Knob Screw (Part MM2). Tighten With The Phillips Screwdriver.
- Page 21 STEP 9: Install the Drawers.
- Page 22 Style Number and Lot Number available. Use the space below to make note of those numbers. They can be found on the label on the Back Panel. STYLE No: 76303 COLOR Lot No. : _______________________ Pack Date:_____________________...
Need help?
Do you have a question about the 76303 and is the answer not in the manual?
Questions and answers