Advertisement
Quick Links
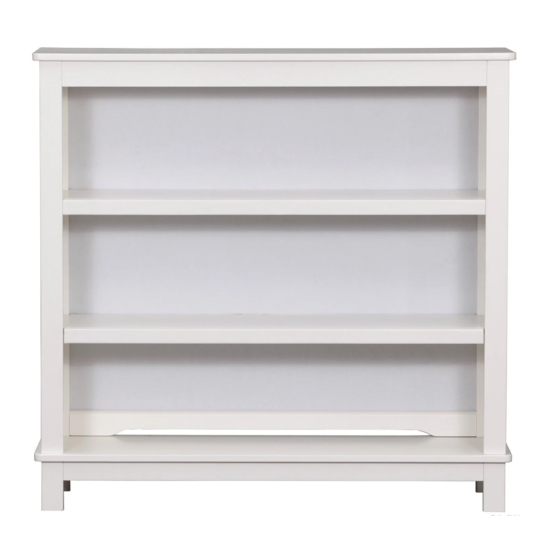
Convertible Bookcase
Bibliothèque convertible
Consumer Care:
www.DeltaChildren.com
Delta Children's Products
114 West 26th Street
New York, NY 10001
Tele.212-645-9033
This product is not intended for institutional or commercial use.
Ce produit ne pas destine a un usage institutionnel ou commercial.
When contacting Delta Consumer Care please reference the above information. Before contacting Delta
Consumer Care please ensure that the information above matches the information found on the label on
the Back Panel, please reference the information found on the product when contacting Delta Consumer
Care.
Lorsque vous contactez le Service client de Delta, veuillez faire référence aux informations ci-dessus.
Avant de contacter le Service client de Delta, veuillez vous assurer que les informations ci-dessus
correspondent aux informations indiquées sur l'étiquette qui se trouve sur Panneau arrière; veuillez faire
référence aux informations indiquées sur le produit lorsque vous contactez le Service client de Delta.
To register your product for important safety alerts and updates to your product please visit
www.DeltaChildren.com and click on Product Registration.
Pour enregistrer votre produit afin de recevoir des alertes de sécurité et des mises à jour importantes
relatives à votre produit, veuillez visiter le site www.DeltaChildren.com, puis cliquer sur Enregistrement
de produits.
February 26, 2015-78800-24154-R1
Read all instructions before assembly and use.
KEEP INSTRUCTIONS FOR FUTURE USE.
ADULT ASSEMBLY REQUIRED
Due to the presence of small parts during assembly, keep out of
reach of children until assembly is complete.
Lisez toutes les instructions avant l'assemblage et
l'utilisation. CONSERVEZ LES INSTRUCTIONS
POUR UN USAGE ULTERIEUR.
L'ASSEMBLAGE DOIT ETRE FAIT
PAR UN ADULTE
A cause de la presence de petites pieces, pendant l'assemblage gardez
hors de portee des enfants jusqu'a ce que celui-ci soit termine.
Need Help?
Please visit www.DeltaChildren.com/assembly-videos to
watch our easy and effective assembly videos
Besoin d'aide?
Veuillez visiter www.DeltaChildren.com/assembly-videos
pour regarder nos vidéos faciles et efficaces concernant
l'assemblage
Style #:
Lot:
Date:
___________
___________
___________
©2015 DELTA ENTERPRISE CORP.
A
REV
Advertisement

Related Manuals for Delta Children Bennington 78800-108


Summary of Contents for Delta Children Bennington 78800-108
- Page 1 Besoin d’aide? Veuillez visiter www.DeltaChildren.com/assembly-videos pour regarder nos vidéos faciles et efficaces concernant l’assemblage Consumer Care: www.DeltaChildren.com Delta Children’s Products 114 West 26th Street Style #: ___________ New York, NY 10001 Tele.212-645-9033 Lot: ___________ This product is not intended for institutional or commercial use.
- Page 2 - Do not scratch or chip the finish. - Inspect the product periodically, contact Delta Children's Products for replacement parts or questions. - Do not store the product or any parts in extreme temperatures and conditions such as a hot attic or a damp, cold basement.
- Page 3 Hardware System - Review Before Assembly Quincaillerie – Lire Avant D’effectuer Le Montage CC. M6x50mm Bolt Boulon M6x50mm BB.Crescent Washer Rondelle en Croissant 1. Insert the Dowels in the Rail into the holes in the Post. 1. Insérer les chevilles dans le rail dans les orifices dans le poteau.
- Page 4 Install (1) bolt and (1) crescent washer at a time. Tighten until it looks like the picture. Installez (1) boulon et (1) rondelle en croissant à la fois. Serrez jusqu'à ce que cela ressemble à l'image. Tighten the bolt with the ball end screwdriver.
- Page 5 PARTS: MAKE SURE THAT ALL PRE-ASSEMBLED PARTS ARE TIGHT. PIÈCES: ASSUREZ-VOUS QUE TOUTES LES PIÈCES PRÉLASSÂMES SONT BIEN AJUSTÉES. F. Top Panel x1 Panneau avant D. Top Back Rail x1 Barre supérieur arrière # 24144 # 24140 B. Right Side x1 A.
- Page 6 PARTS: Hardware kits part# 24153 L'ensemble de quincaillerie - pièce n°24153 PIÈCES: Note: Fasteners are shown full size Remarque: Les dispositifs de fixation sont Montrés en taille réelle AA. M6x80mm Bolt x4 CC.M6x50mm Bolt x12 Boulon M6x80mm Boulon M6x50mm # 5473 # 5467 GG.
- Page 7 STEP #1 ÉTAPE N°1 FF. Φ8x30mm Wood Dowel x6 CC.M6x50mm Bolt x3 Cheville en Bois Φ8x30mm Boulon M6x50mm BB. Crescent Washer x3 Rondelle en Croissant M4 Allen Wrench M4 Ballend Screwdriver Clé Allen M4 Tournevis M4 à tête sphérique Install (6) Dowels (Part FF) as shown. Carefully align all of the Dowels with the holes in the Left Side (Part A). Attach the Bottom Back Rail (Part E), Top Front Rail (Part C) and Top Back Rail (Part D) to the Left Side (Part A) using (3) 50mm Bolts (Part CC) and (3) Crescent Washers (Part BB) following the instructions on pages 3 and 4.
- Page 8 STEP #2 ÉTAPE N°2 FF. Φ8x30mm Wood Dowel x6 CC.M6x50mm Bolt x3 Cheville en Bois Φ8x30mm Boulon M6x50mm BB. Crescent Washer x3 Rondelle en Croissant M4 Allen Wrench M4 Ballend Screwdriver Clé Allen M4 Tournevis M4 à tête sphérique Install (6) Dowels (Part FF) as shown. Carefully align all of the Dowels with the holes in the Right Side (Part B).
- Page 9 STEP #3 ÉTAPE N°3 FF. Φ8x30mm Wood Dowel x4 CC.M6x50mm Bolt x4 GG. M6x30mm Bolt x8 Cheville en Bois Φ8x30mm Boulon M6x50mm Boulon M6x30mm Attached the Top Panel (Part F) to the base of the case. Ensure (4) Dowels (Part FF) from the Side are aligned properly before installing any bolt.
- Page 10 STEP #4 ÉTAPE N°4 UU. M6x25mm Bolt x4 Boulon M6x25mm Carefully align the Fixed Shelf (Part L), attach with (4) 25mm Bolts (Part UU). Tighten all bolts with Allen Wrench. Alignez avec soin la tablette inamovible (pièce L), Fixez à l’aide de (4) boulons de 25 mm (pièce UU). Serrez tous les boulons à...
- Page 11 STEP #5 ÉTAPE N°5 EE. 15mm Back Panel Screw x30 Vis Du Panneau Arrière 15mm Attach Back Panel - Upper (Part G) and Back Panel - Lower (Part T) using (30) Back Panel Screws (Part EE). Tighten with a Phillips Screwdriver. Fixez le panneau arrière - Supérieur (pièce G) et le panneau arrière - Inférieur (pièce T) à...
- Page 12 STEP #6 ÉTAPE N°6 EE. 15mm Back Panel Screw x13 Vis Du Panneau Arrière 15mm Insert The Joint Cover Rail (Part U) on the Back Panel - Lower, then insert the back Panel - Middle (Part H) into the slot of Joint Cover Insérez le garde de couvre-joint (pièce U) sur le panneau arrière - Inférieur, puis insérez le panneau...
- Page 13 STEP #7 ÉTAPE N°7 FF. Φ8x30mm Wood Dowel x6 CC.M6x50mm Bolt x2 Cheville en Bois Φ8x30mm Boulon M6x50mm BB. Crescent Washer x2 Rondelle en Croissant M4 Ballend Screwdriver Tournevis M4 à tête sphérique GG. M6x30mm Bolt x2 M4 Allen Wrench Boulon M6x30mm Clé...
- Page 14 STEP #8 ÉTAPE N°8 FF. Φ8x30mm Wood Dowel x2 GG. M6x30mm Bolt x6 Cheville en Bois Φ8x30mm Boulon M6x30mm Attach the Book Shelf Bottom (Part N) to the base of the bookcase using (6) 30mm Bolts (Part GG) and (2) Dowels (Part FF). Tighten with the Allen Wrench. Fixez la Partie inférieure de la bibliothèque (partie N) à...
- Page 15 STEP #9 ÉTAPE N°9 AA. M6x80mm Bolt x4 Boulon M6x80mm DO NOT complete this step if using as a Hutch. This step is for Bookcase ONLY. N’exécutez PAS cette étape en cas d’utilisation comme bahut. Cette étape concerne UNIQUEMENT la bibliothèque. Install (4) 80mm Bolts (Part AA) through the Book Shelf Sides.
- Page 16 STEP #10 ÉTAPE N°10 HH. Shelf Support x4 Taquet Insert (4) Shelf Supports (Part HH) in to the predrilled holes in the side. Insérez (4) taquets (pièces HH) dans les trous pré-percés sur le côté.
- Page 17 STEP #11 ÉTAPE N°11 Insert the Removable Shelf (Part K) in the Hutch and place shelf on the supports. Insérez la tablette amovible (pièce K) dans le bahut, puis posez la tablette sur les taquets.
- Page 18 BOOKCASE ASSEMBLY Ensemble bibliothèque...
- Page 19 STEP #12 ÉTAPE N°12 LL. 15mm Plate screw x8 KK. Metal Plate x2 Vis de plaque 15 mm Plaque de métal DO NOT complete this step if assembled as a Bookcase. This step is for Hutch ONLY. N’exécutez PAS cette étape en cas d’utilisation comme bibliothèque.
- Page 20 STEP #13 ÉTAPE N°13 HH. Shelf Support x4 Taquet Insert (4) Shelf Supports (Part HH) in to the predrilled holes in the side. Insérez (4) taquets (pièces HH) dans les trous pré-percés sur le côté.
- Page 21 STEP #14 ÉTAPE N°14 Insert the Removable Shelf (Part K) in the Hutch and place shelf on the supports. DO NOT use the Removable Shelf when using base unit as a changing surface. Insérez la tablette amovible (pièce K) dans le bahut, puis posez la tablette sur les taquets. N’utilisez PAS la tablette amovible lorsque vous utilisez l’unité...
- Page 22 HUTCH ASSEMBLY Ensemble bahut 78806 NOT Included - See Retail Store or Contact Delta Children's Products 78806 NON compris – Rendez-vous dans un magasin de détail ou contactez Delta Children's Products...
-
Page 23: Warranty
Consumer Care: www.DeltaChildren.com Delta Children’s Products 114 West 26th Street New York, NY 10001 Tele.212-645-9033 Warranty: This Delta product is warranted to be free from defects for a period of 90 days from the date of purchase under normal use. This warranty extends only to the original retail purchaser and is valid only when supplied with proof of purchase, or if received as a gift, when the registration is on file with Delta.
Need help?
Do you have a question about the Bennington 78800-108 and is the answer not in the manual?
Questions and answers