Table of Contents
Advertisement
Advertisement
Table of Contents

Related Manuals for Opticum HD AX 150


Summary of Contents for Opticum HD AX 150
- Page 1 HD AX 150...
-
Page 2: Table Of Contents
Content 1. Reference ....................4 1.1 General Features ................4 2. Product Overview ..................5 2.1 Front Panel ..................5 2.2 Rear Panel ..................5 2.3 Remote Control Unit (RCU) ............6 3. Installation....................7 3.1 Antenna Settings ................7 3.2 Fast scan .................. - Page 3 8.2 EPG ....................15 8.3 Subtitle ..................15 8.4 Teletext ..................16 9. Additional Information ................16 9.1 Trouble Shooting ................16 9.2 Technical Specification ..............18...
- Page 4 Safety Precaution This STB has been designed and manufactured to satisfy the international safety standards. Please read the following safety precautions carefully before operating this receiver. Main Supply: Before operating, please check the units operating voltage is 90~250V AC 50/60Hz.
-
Page 5: Reference
1. Reference 1.1 General Features DVB-S/DVB-S2 Satellite Compliant (MPEG-II/ MPEG-IV/ H.264) SCPC & MCPC receivable from Ku and C band satellites Universal, Single, Single S & C Band Wideband LNB Sensitive Tuner with Loop-Through DiSEqC1.0/1.1/1.2/1.3 (USALS) Blind search supported Auto DiSEqC Search PAL/NTSC Conversion True full Color (16 bits) on screen display (OSD) Storing memory: 100 satellite, 2000 transponders and 4000 channels... -
Page 6: Product Overview
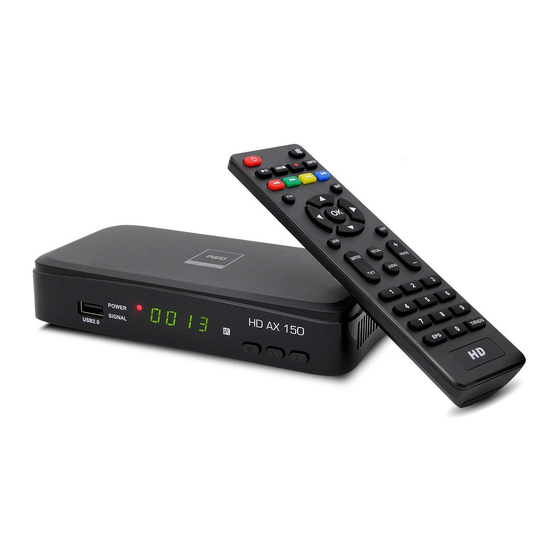
2. Product Overview 2.1 Front Panel 1. USB2.0:One USB 2.0 Host Port. 2.Power LED :Power indicator. 3.Signal LED:Signal indicator. 4.Display:It displays channel information. 5. Power button :Switch between operation and standby modes. 6.▲╱▼:Change channel in viewing mode and move the cursor up/down in menu mode 2.2 Rear Panel 1. -
Page 7: Remote Control Unit (Rcu)
2.3 Remote Control Unit (RCU) You can control this receiver by this remote controller with full function. 1. POWER: Power button. 2.MUTE: Turn the sound On/Off. 3. ► II:Play/ Pause/Go to timeshift function . 4. USB /■: Stop function or enter USB menu . 5. -
Page 8: Installation
3. Installation You should install the receiver when powering on your product for the first time after purchase. Tip: The default password is 0000. If you have forgotten your password, please contact your local product distributor. 3.1 Antenna Settings Antenna Settings allows you to configure the antenna setting parameters. 1. -
Page 9: Fast Scan
3.2 Fast scan To fast search channels by different providers 3.3Factory Default You can restore the product to the factory default and you can also setup it according to the wizard. Input the password. Highlight the option you want and press the OK button to execute it. -
Page 10: Edit Channel
4. Edit Channel 4.1 TV/Radio Channels TV/Radio Channels enables you to move, delete, lock/unlock, rename the channels channel list conveniently. 4.2 Favorites Add the Favorite channel you want to set up , and change the types. You can add or remove channels from the favorite groups. -
Page 11: Settings
5. Settings 5.1 System Settings 1.Menu Language: menu language. 2. Audio1: Set the preferred audio language. 3. Audio2: Set the sub-prime audio language. 4. Subtitle Language: Set the subtitle language. 5. Subtitle Control: Set the subtitle on or off 6. EPG Language: Set the EPG language. 7. -
Page 12: Osd Setup
5.2 OSD Setup 1. Menu Transparency: Set the transparency of all menus. 2. TXT Transparency: Set the transparency of teletext. 3. Display Mode: Set the HD format . 4. TV Type: Set the TV Type . 5. Screen Mode: Set the display format according to the screen ratio. -
Page 13: Color Setting
5.4.2 Event Timer You can set 8 timer events. It will record or play the program automatically according to the timer event list that yourselt. Press the Red button to setup a timer, and press the OK button to save the timer after setup. -
Page 14: Games
6 Games Menu-> games Games offer 9 funny games you can play. 7. Expansion 7.1 USB can play many kinds of media files, you can record program and playback it and you can do various operations when using USB HDD or USB disk. Note: It supports FAT, FAT32 and NTFS format USB disk or USB HDD. - Page 15 OK: View the photo. ▕◀ ◀ : Play the previous file. : Play the next file. ▶ ▶ ▏ : Play or Pause. ▶ ▏ ▏ EXIT: Exit the current menu. 3. Movie It supports *.3GP, *.AVI,*.MKV, *.MP4, *.MOV, *.MPG, *.TS, *.M2TS, *.DAT, *.VOB format movie files.
-
Page 16: Ip Setting
7.4 IP Setting First you must connect the Ethernet cable to the LAN port. Then in this menu, you can set IP address manually, also you can get IP address automatically. If the Ethernet cable is connected fine, it will display “Connected”. 8. -
Page 17: Teletext
8.4 Teletext You can view the teletext information of this program. 1. Press the TXT button. 2. Press the ▲╱▼ button to page up or page down. 3. Press the NUMERIC(0-9) buttons can go to the designated page directly. 4. Press the color button can back to the previous page. 9. - Page 18 • Check if the channel is currently on air. Contact the broadcaster to ensure that the channel is running. 3. Poor picture/sound quality • Make sure there is no mobile phone or microwave oven near the product. • [Satellite] Check that your dish alignment is correct. •...
-
Page 19: Technical Specification
9.2 Technical Specification Tuner & Channel No. of Tuners Frequency 950 MHz to 2150 MHz Range Signal Level -25 to -65 dBm LNB Power 13V/18V/VOFF, Imax = 400mA LNB Tone 22KHz+/-2KHz, 0.6Vpp+/-0.2V Switch DiSEqC Control Version DiSEq C 1.0/1.1/1.2/1.3(USALS)Compatible, Tone burst A/B MPEG Transport MPEG-2 ISO/IEC 13818Transport stream specification... - Page 20 Consumption Protection Separate internal fuse. Input shall have lightening Protection Physical Specification Weight (Net) About 2.5kg Operating 0℃ to + 40℃ Temp Storage Temp -40℃ to + 65℃ Declaration of conformity. The manufacturer here with declares the conformity of that product with the following directives and standards: Low Voltage Directive 2014/35/EU EN60065:2014...
Need help?
Do you have a question about the HD AX 150 and is the answer not in the manual?
Questions and answers