
Related Manuals for Opticum HD X406p


Summary of Contents for Opticum HD X406p
- Page 1 ’ ’ Model ID: HD X406p 03/2012 ak...
-
Page 2: Table Of Contents
Content Safety Precaution ....................3 Environment protection……………………………………………………………… 4 1. General information ····························································································· 5 1.1 General Features ······················································································ 5 1.2 Accessories ······························································································· 6 2. Product Overview ································································································ 7 2.1 Front Panel ······························································································· 7 2.2 Rear Panel ································································································ 8 2.3 Remote Control Unit (RCU) ······································································ 9 3. - Page 3 7.2 Event Timer ····························································································· 29 7.3 Sleep Timer ····························································································· 30 7.4 Standby hour ··························································································· 31 8. Expansion ·········································································································· 32 8.1 Games ···································································································· 32 8.2 USB ········································································································· 32 8.2.1 Basic Operations ·················································································· 32 9. About STB ········································································································· 38 10. Basic Operation ······························································································· 39 10.1 Audio ·····································································································...
-
Page 4: Safety Precaution
Safety Precautions This STB has been designed and manufactured to satisfy the international safety standards. Please read the following safety precautions carefully before operating this receiver. Main Supply: Before operating, please check the units operating voltage is 90~250V AC 50/60Hz. -
Page 5: Environment Protection
Environment protection Attention! Your product Is marked with this symbol. It means that used electrical and electronic products should not be mixed with general household waste. There is a separate collection system for these products. Information on Disposal for Users (private households) in the European Union Used electrical and electronic equipment must be treated separately and In accordance with legislation that requires proper treatment, recovery and recycling of used electrical and electronic equipment. -
Page 6: General Information
1. General information 1.1 General Features DVB-S/DVB-S2 Satellite Compliant (MPEG-II/ MPEG-IV/ H.264) SCPC & MCPC receivable from Ku and C band satellites Universal, Single, Single S & C Band Wideband LNB Sensitive Tuner with Loop-Through DiSEqC1.0/1.1/1.2/1.3 (USALS) Unicable Supported Blind search supported Auto DiSEqC Search PAL/NTSC Conversion True full Color (32 bits) on screen display (OSD) -
Page 7: Accessories
1.2 Accessories - Users manual - Remote Control Unit - Batteries Figure 1.Accessories... -
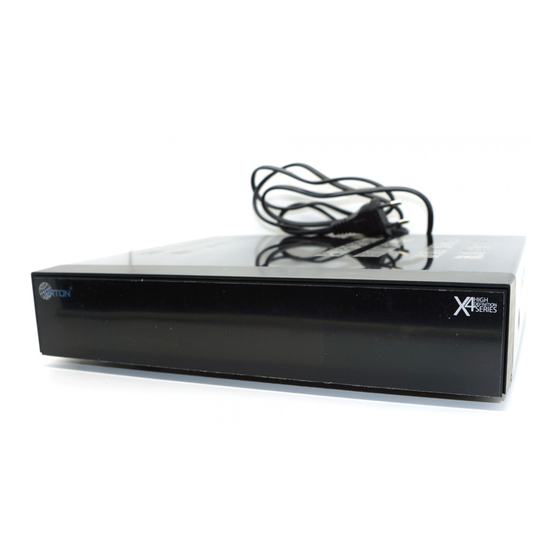
Page 8: Product Overview
2. Product Overview 2.1 Front Panel Figure 2. Front Panel 1. Signal LED (green) Signal indicator. 2. Power LED (red) Power indicator 3. Display It displays channel information. In standby mode it displays current time. Press front panel on the middle, above LED display, to open front panel flap. Figure 3. -
Page 9: Rear Panel
Power button Switch between operation and standby modes. 3. MENU Button Activate the main menu in viewing mode. 4. Exit Button Exit current menu one menu level per one pressing. 5. OK Button Enters to the highlighted sub menu in menu mode or activates the channel list in viewing mode. -
Page 10: Remote Control Unit (Rcu)
Connect another receiver. 4. LNB IN Connect the satellite antenna cable. 5. ON/OFF Power on/off. 6. LAN Connect to the internet using an Ethernet cable. 7. SPDIF Digital Audio output (Optical). 8. TV SCART Connect to the TV using a Scart cable 9. - Page 11 12. FAV: Display favorite channel list you set before. 13. SAT: Show the scanned satellite list. 14. RECALL: Move to the previous viewed channel. 15. EPG (Electronic Program Guide): Display the program guide. 16. EXIT: Exit current menu step by step. 17.
-
Page 12: Connection With Other Devices
3. Connection with other Devices The following diagram shows the connections among receiver, TV, LNB and other equipment, please read this first if you are not sure about correct connection. 3.1 Connecting to TV Figure 5. Connecting to TV & VCR... -
Page 13: Connecting To Antenna
3.2 Connecting to Antenna To connect to the dish with one single LNB, plug-in antenna cable directly to the LNB IN. Figure6. Connecting to Dish with single LNB... - Page 14 To connect to the dish with more than one LNB, connect antennas by DiSEqC 1.0 or 1.1 switch. Connect receiver LNB IN to DiSEqC port output. When using DiSEqC 1.0 or 1.1 switch, remember to set proper DiSEqC port in Installation Menu.
-
Page 15: Installation
4. Installation After connecting antenna you should install the receiver after powering on your product for the first time after purchase. Tip: The default password is 0000. If you have forgotten your password, please contact your local product distributor. 4.1 Powering On 1. - Page 16 4. LNB Power: Press the VOL+/VOL- button to select the required LNB power. 5. 22kHz: Press the VOL+/VOL- button to select ON, OFF or Auto. 6. DiSEqC 1.0: Press the VOL+/VOL- button to select the required DiSEqC1.0 input. 7. DiSEqC 1.1: Press the VOL+/VOL- button to select the required DiSEqC1.1 input.
- Page 17 In this menu, you can Select the satellite that you want to move from the satellite list using the CH+/CH- keys. Select satellite and press OK, you will be asked where to move the satellite, input the destination number and press OK. Then you can move another one satellite from one position to other.
- Page 18 Transponder which you want to use, then press OK to confirm the setting. Add Here you can input new Transponder frequency, choose polarization (Vertical, Horizontal), input new Symbol rate, and choose FEC: 1/2, 2/3, 3/4, 6/5, 7/8, Auto . Press OK to confirm the settings, and this new Transponder will be added to the TP list in ascending order sorted by frequency.
- Page 19 your DiSEqC Switch before press the OK to mark them. 3. Press Exit will start searching programs of the satellites you have marked. C: Blind Search 1. Highlight the Satellite and press the OK button to enter satellite list. And then select one satellite you want to search.
-
Page 20: Store Position
4.2.4 Antenna Settings for Motor Menu-> INTALLATION ->Antenna Settings->Motor Motor Mode: Select DiSEqC 1.2 or USALS using the VOL+/VOL- button. DiSEqC 1.2: General motor antenna using DiSEqC 1.2. USALS: Motor antenna using USALS system. Move Auto[W/E] Press VOL+/VOL- button, the dish will be motorized to East/West continuously, it will stop until it find the best signal. -
Page 21: Factory Default
Go to Reference Press OK button to move the dish to 0 position. Set West Limit You can set the maximum motor limit for both West to prevent damage to the antenna. Set East Limit You can set the maximum motor limit for both East to prevent damage to the antenna. -
Page 22: Usals Setup
3. Highlight the option you want and press the OK button to execute it. 1) All: All data and settings will be deleted. Tip: If you select “yes”, all data and setting will be lost. Then waiting a moment, you will view the OSD language menu where you can select the language according your mind. -
Page 23: Edit Channel
5. Edit Channel 5.1 Edit Channel Menu Edit Channels enables to move, delete, rename, lock/unlock, swap the channels in the channel list conveniently. Menu->EDIT CHANNEL->TV Channels Menu->EDIT CHANNEL-> Radio Channels : Radio Channels operation similar to the TV Channels. : in Edit Channel->TV channels you can press the Sat button to choose different satellite according to the help information, press OK to confirm, then... - Page 24 1.1 Move Group Channels 1) Highlight one channel you want to group move. Then press the button to mark the channel. 2) Press the CH+/CH- or VOL+/ VOL- button to highlight other channels you want to group move. Then press the button to sign the channel one by one.
-
Page 25: Edit Favorite
press the BLUE button to complete. 5. Swap Channels 1) Highlight the Swap function using VOL+/ VOL- button. 2) Highlight the channel you want to swap with another. 3) Press the OK button to confirm. 4) Input new position of a channel and press OK. Channels position will be replaced. -
Page 26: User Channel List
in this favorite list. To exit from FAV list press OK button to display list, and press CH+/CH- button until you switch to All channels position. 5.3 User Channel List User Channel List allows you to save or load all the data and settings. 1. - Page 27 5. Teletext language: set the language of Teletext. 6. Digital Audio: If a channel has AC3 and PCM audio language at the same time, when you select RAW it will set AC3 audio language as default output and when you select PCM it will set PCM audio language as default output. 7.
-
Page 28: Osd Setup
12. Front panel Light: Allows to adjust setting of 4-digit LED display on front panel. There are 5 brightness levels available. 6.2 OSD Setup Menu->SETTINGS->OSD Setup Menu Transparency: Set the transparency of all menus. TXT Transparency: Set the transparency of teletext. Display Mode: Set the HD screen resolution format between 1080p, 1080i, 720p, 576i or 576p. -
Page 29: Ca Menu
5. Change PIN: allow to change PIN. Input new PIN and confirm it by inputting again. Remember your new PIN. 6.4 CA menu Receiver provides one Conditional Access slot for Smart Card. Receiver has build in module with CONAX system. By using cards in this system provided by operators, it is possible to watch many scrambled channels coded in this system. -
Page 30: Times
7. Times 7.1 Time Settings Menu->TIMES->Time Settings Time Settings will set the time mode, time zone and summer time. 1.Time Mode You can switch the Time Mode to Auto or Manual by pressing VOL+/VOL- button. If the Time Mode is Manual you can change the current time and current date. -
Page 31: Sleep Timer
It will record or play the program automatically according to the timer event settings. 1. To add timer press Menu->TIMES-> Event Timer->(RED) Add, or in EPG menu press RED button or during watching press TIME button directly. 2. Press the RED button to setup a timer, and press the OK button to save the timer after setup. -
Page 32: Standby Hour
SLEEP Timer can set the automatic turn off receiver after selected time. 1. Menu->TIMES-> Sleep Timer. 2. Press the VOL+/VOL- button to select the option or input the number at “-- M” option. 3. Press the OK button to save. 7.4 Standby hour Standby hour can show current time on front panel display in standby mode. -
Page 33: Expansion
8. Expansion 8.1 Games Menu->EXPANSION-> Games This menu offers many funny games you can play. 8.2 USB Menu->EXPANSION-> USB or press the USB button directly With you can play many kinds of media files, you can record programs and playback it and you can do various operations when using USB HDD or USB disk. Note: receiver supports FAT, FAT32 and NTFS format USB disk or USB HDD. - Page 34 Delete Press the RED button and Highlight the Press the OK button can delete the file or folder. Move Files Highlight the file or folder. Move to Press the RED button and Highlight the Select a destination folder. Press the OK button to move the highlight folder or file to destination folder. ...
-
Page 35: Record Mode
Press the OK button can upload the data and setting to USB disk. Upload to FTP (Optional) Highlight the file or folder. Press the YELLOW button and highlight the Upload to FTP. Press the OK button can upload the highlight file or folder to FTP. Note: this function depend on FTP server. -
Page 36: Play Files
Record Time Set the Record Default Time Off, 30, 60, 90, 120 minute or input number directly. Auto Timeshift Set to start the Timeshift automatically, after every switching channel. Timeshift Buffer Size(MB) Set the Timeshift Buffer Size off, Auto, 100, 200, 400, 800, 1600, 3200, 6400MB. Timeshift Need Save Set the Timeshift if need to Save . - Page 37 ■ : Stop playing file. I: Play the previous file. I: Play the next file. : Fast rewind. : Fast forward. PAUSE/||: Pause. VOL+/VOL- : Adjust volume. EXIT: Exit playing state and return to file list menu. 2. Photo 1) Press the VOL+/VOL- to highlight the Photo.
-
Page 38: Play List
3. PVR 1) Press the VOL+/VOL- to highlight the PVR. 2) Press the CH+/CH- to change the folder or file and press the OK button to open the folder or play the PVR file. Note:. Recorded files are saved as default in folder named ALIDVRS2. OK: View play list or play the highlighted file in the play list. -
Page 39: About Stb
list. 2) In the photo/music Play List, press FAV key to add the all available files to the Play List. (Just according to the help information) 3) In the movie/ photo/music Play List, highlight the movie/photo/music file and press the Red button to mark it, then move it to the destination press OK to confirm, then you can move the marked file to destination. -
Page 40: Basic Operation
10. Basic Operation 10.1 Audio You can select the language you prefer in Audio if the current program is available in multiple audio languages. 1. Press the AUDIO button. 2. Press the OK button to select the audio language you prefer. 3. -
Page 41: Epg
1. Press the SAT button. 2. Highlight the satellite that you want. 3. Press the OK button, then it can enter the channel list which only includes the channels of this satellite. 4. Press the RED button to hide or show the satellite. If it is hidden, the channels of this satellite will be hidden in the channel list. -
Page 42: Subtitle
1) Press the CH+/CH- button to change channel. 2) Press the VOL+/VOL- button to change EPG event of the highlighted channel. 3) Press the BLUE button to display the detail information of the highlighted EPG event. 4) Highlight the EPG event which you want, press the RED button to enter Timer Setup menu. -
Page 43: Program Information
Or by pressing Blue button in OK List/FAV List. 10.8 Program Information You can view the program information by pressing the INFO button while watching a program. 1. General Information : It is a FTA program. : It is a scramble program. : The sound of current program is not Dolby. - Page 44 : Current program is locked. : Current program is not a HD program. : Current program is a HD program. 2. EPG Information Press the INFO button twice to view detailed EPG information, press the VOL+/VOL- to switch current and next and press the INFO button once more to hide the detailed EPG information.
-
Page 45: Channel List
11. Channel List This chapter will help you manipulate the channel list. : You can press the Sat button to choose different satellite when you are operating on a channel list, press OK to confirm, then all the channels of this sat will be display. -
Page 46: Favorite List
11.2 Favorite List 1) If you have set several favorite lists, press the FAV button can enter the favorite list. 2) Press the VOL+/VOL- button to change different favorite list and press the OK button can select the a program in current favorite list. 3) Press the RED button to sort the channels of the favorite list. -
Page 47: Usb Control
12. USB Control 12.1 Recording and Timeshift 12.1.1 Recording You can watch another channel from the same TP while recording. And at the same time, you can record two channels in the same TP. You can also do many operations while recording. 1. -
Page 48: Pvr List
the recording time. And press the INFO button twice can display the detail information of the recording. Press the button will enter the playback mode. ● Press the button can set the record duration. Press the PAUSE/|| button can pause or play the program. -
Page 49: Network
13. Network By connecting to internet you might have access to selected internet services. 13.1 Connecting to Network 13.1.1 Connecting to the LAN Connect one end of the Ethernet cable to the product and the other end to the LAN router. Menu->Expansion->IP Setting If the Ethernet cable is connected fine, it will display “Connect”. -
Page 50: Network Application
the right password. Enter Menu-> Network->Wireless Setting->IP Situation. If the Network is connected, it should get the correct IP address and display the “Connected”. 13.3 Network Application 13.3.1 Weather Forecast Here you can input the city name to browse the weather of this city in future days. -
Page 51: Additional Information
14. Additional Information 14.1 Trouble Shooting Before contacting your local service centre, please read the tips below carefully. If the problem persists after completing the following procedure, please contact your local product distributor or service centre for further instructions. 1. No message displayed on the front display. (The product will not switch on, nothing on display) •... - Page 52 • Make sure there is no mobile phone or microwave oven near the product. • Check that your dish alignment is correct. • Change the satellite dish for a larger one as this will increase the signal levels received. • Replace the LNB with a lower noise factor in cases where the noise factor is too high.
-
Page 53: Declaration Of Conformity
14.2 Declaration of conformity The manufacturer herewith declares the conformity of that product with the following directives and standards: Low Voltage Directive 2006/95/EC EN 60065:2002+A1:2006+A11:2008 EMC Directive 2004/108/EC EN 55 013:2001+A1:2003+A2:2006 EN 55 020:2007 EN 61 000-3-2:2006+A1:2009+A2:2009 EN 61 000-3-3:2008 Model: Digital Satellite Receiver DVB-S2... -
Page 54: Technical Specification
14.3 Technical Specification Tuner & Channel Frequency Range 950 MHz to 2150 MHz Signal Level -25 to -65 dBm LNB Power 13V/18V/14V/19V OFF, Imax = 400mA LNB Tone Switch 22KHz+/-2KHz, 0.6Vpp+/-0.2V DiSEqC Control Version DiSEq C 1.0/1.1/1.2/1.3(USALS)Compatible, Tone burst A/B MPEG Transport Stream MPEG-2 ISO/IEC 13818Transport stream specification...
Need help?
Do you have a question about the HD X406p and is the answer not in the manual?
Questions and answers