Table of Contents
Advertisement
Quick Links
THANK YOU!
We are grateful for your purchase of HYT product. We believe this easy–to-use radio will provide you
with dependable and reliable communications. This HYT portable two-way radio is a precision device.
Treat it with care, and you will enjoy years of reliable operation.
MODELS COVERED IN THIS MANUAL
TC2108U: UHF Two-way Radio
1
Advertisement
Table of Contents

Related Manuals for HYT TC2108U


Summary of Contents for HYT TC2108U
- Page 1 THANK YOU! We are grateful for your purchase of HYT product. We believe this easy–to-use radio will provide you with dependable and reliable communications. This HYT portable two-way radio is a precision device. Treat it with care, and you will enjoy years of reliable operation.
- Page 2 User Safety Information PLEASE READ THIS IMPORTANT INFORMATION BEFORE USING YOUR HYT PORTABLE TWO-WAY RADIO. ◇ Only qualified technicians are allowed to maintain this product. ◇ To avoid electromagnetic interference, turn off your radio in places where posted notices instruct you to do so. Hospitals or health care facilities may be using equipment that is sensitive to external RF energy.
-
Page 3: Table Of Contents
CONTENTS Product Inspection Battery Charging Information Accessory Information Battery Antenna Belt Clip Getting Started LCD Display Basic Operations Features Monitor Channel Scan Priority Channel Scan Scan Revert Channel Selectable CTCSS/CDCSS Selectable Squelch Level High/Low power Key lock Time Out Timer (TOT) Battery Save Low Battery Alert Busy Channel Lockout... -
Page 4: Product Inspection
Product Inspection Thank you for your purchase of HYT portable two-way radio model: TC2108. Before use, please inspect the product as follows. First check the shipping carton for any signs of damage. If any damage has occurred, please contact your dealer immediately. Confirm the supplied product against the packing slip to assure accuracy. -
Page 5: Battery Charging Information
Battery Charging Information Standard Charger Insert the radio and battery or battery alone into the charging cup. Charging begins and the red LED will light continuously. When the charging cycle is complete, the red LED will change to green. Charging time is less than 2.5 hours. -
Page 6: Antenna
Antenna Attaching the Antenna (See figure○ 1, Align the threaded end of the antenna with the radio’s antenna connector. 2, Turn the antenna clockwise to tighten. Removing the Antenna (See figure○ 1.Turn the antenna counter-clockwise until you can remove it. Belt Clip Attaching the Belt Clip (See figure○... -
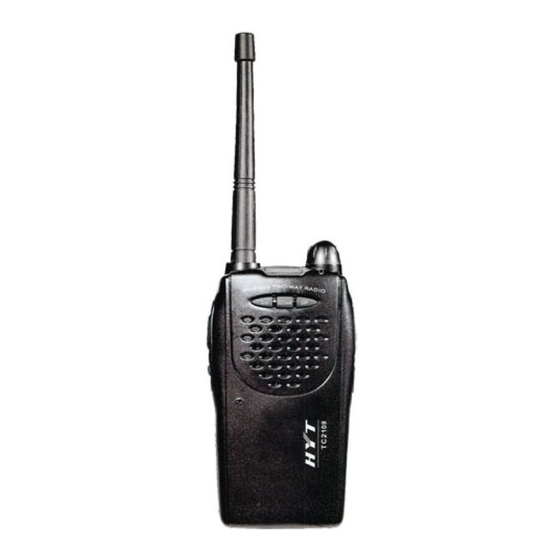
Page 7: Getting Started
Getting Started 1. Antenna Used to receive or transmit signals. 2. LCD Displays operation status of the radio. 3. LED indicator In transmit mode, the red LED will turn on. In receive mode, the green LED will turn on. A flashing red LED indicates that the battery is low. - Page 8 8. PTT button To transmit, press and hold PTT button. To receive, release PTT button. 9. MONI button In receive mode, press the MONI key to monitor other activity on your selected channel . 10. Microphone When transmitting, speak into the microphone holding the radio 2-4 inches from your mouth. 11.
-
Page 9: Lcd Display
LCD Display Appears when the transmit power of the current channel is set for low power. Appears when the dealer disables the radio’s speaker. (Must use audio accessory to operate.) Appears when the keys are locked. Display the current channel number. -
Page 10: Basic Operations
Basic Operations To Turn On the Radio Turn the POWER/VOL knob clockwise until a click is heard. To Receive 1. Press UP or DOWN key to select the desired channel. 2. Turn POWER/VOL knob to adjust the volume. Pressing the MONI key will provide noise so that the volume can be adjusted accordingly. -
Page 11: Features
Features Monitor Press the MONI button to monitor any activity on the channel. Wait for this activity to clear before transmitting. Channel Scan Channel scan is set to monitor desired activities on all channels in scan list. When channel scan is enabled, the radio will automatically scan all channels in scan list until activity is detected on a channel. -
Page 12: Selectable Squelch Level
Press the [UP] key while holding down the [MONI] key to enter CTCSS/CDCSS set mode. In this mode, press [UP] or [DOWN] to select CTCSS/CDCSS. Press [SCAN], LCD display toggles between OFF/CTCSS/CDCSS/-CDCSS: CTCSS/CDCSS OFF: 00 CTCSS: 01— 38 CDCSS: 01— 83 -CDCSS: -01—... -
Page 13: Time Out Timer (Tot)
1, Press [SCAN] while holding down [MONI] to lock keys. When keys are locked, [UP],[DOWN] and [SCAN] keys are inoperable, but [PTT] and [MONI] keys will still function. 2, Press [SCAN] while holding down [MONI] to unlock keys. 3, lock symbol appears on LCD: Time Out Timer (TOT) Time Out Timer is to prevent user from transmitting on the same channel for extended periods of time. -
Page 14: Troubleshooting Guide
Troubleshooting Guide Please check the following items before requesting service. Review operation procedures. Replace or recharge the battery. If reception is poor, check the antenna to make sure it is undamaged and operating in a vertical position. Try another location with fewer obstructions. If you cannot communicate with your group members, make sure you are using the same frequency and CTCSS/CDCSS. -
Page 15: Ctcss/Cdcss Table
CTCSS/CDCSS Table CTCSS Freq(Hz) Freq(Hz) Freq(Hz) NO TONE 103.5 162.2 67.0 107.2 167.9 71.9 110.9 173.8 74.4 114.8 179.9 77.0 118.8 186.2 79.7 123.0 192.8 82.5 127.3 203.5 85.4 131.8 210.7 88.5 136.5 218.1 91.5 141.3 225.7 94.8 146.2 233.6 97.4 151.4 241.8... - Page 17 Your radio must be properly licensed Federal Communications Commission prior to use. Your HYT Wireless dealer can assist you in meeting these requirements. Your dealer will program each radio with your authorized frequencies, signaling codes, etc., and will be there to meet your communications needs as your system expands.
- Page 18 source. • Do not place the radio in excessively dusty, humid areas, nor on unstable surfaces. • The SAR measured values of this equipment are: of body-worn is 1.525 mW/g and face-held is 0.975mW/g. • Hold the radio in one to two inches (2.5 to 5 cm) away from your lips. •...
Need help?
Do you have a question about the TC2108U and is the answer not in the manual?
Questions and answers