Table of Contents
Advertisement
Quick Links
Advertisement
Table of Contents

Related Manuals for HP iPAQ Business Navigator


Summary of Contents for HP iPAQ Business Navigator
- Page 1 HP iPAQ Product Guide...
- Page 2 © Copyright 2007 Hewlett-Packard Development Company, L.P. HP iPAQ products are powered by Microsoft® Windows Mobile® 6 Professional with Messaging and Security Feature Pack. Microsoft Windows, the Windows logo, Outlook, Windows Mobile Device Center, and ActiveSync are trademarks of Microsoft Corporation in the U.S.
-
Page 3: Table Of Contents
Step 2: Install the battery and replace the battery cover ..............8 Step 3: Charge the battery ........................9 Step 4: Turn on your HP iPAQ ......................9 Protect your HP iPAQ with a password ....................9 Find the serial and model number ...................... 10 Status Icons ............................ - Page 4 Use the keypad ..........................19 Smart-Touch Navigation wheel ..................19 Answer/Send key ....................... 19 End key ..........................19 Enter key ..........................19 Back space key ........................19 Softkeys ..........................19 3-Way Thumb-Wheel ......................... 19 Call features ............................20 Make a call ......................... 20 Answer a call ........................
- Page 5 Add Tele-typewriter (TTY) functionality ....................29 Add TTY functionality for people who are deaf or hard-of-hearing ........29 Enable TTY support ......................30 Make a phone call using the TTY enabled HP iPAQ ............30 Disable TTY support ......................30 Voice notes ............................31 Create voice votes ......................
- Page 6 11 Synchronization Synchronization software ........................42 Copy files ............................42 Migrate data from Palm Desktop to Microsoft Windows Mobile 6 ............42 Wireless Synchronization Cost Saving Tips ..................43 Troubleshoot synchronization Issues ....................43 Customized links in WMDC ........................ 45 12 Tasks Set start and due dates for a task ......................
- Page 7 Bluetooth terms ........................64 Bluetooth manager ......................65 Connect to a computer via Bluetooth ................. 65 Use your HP iPAQ as a wireless modem with Bluetooth ........... 65 Bluetooth device profiles ....................66 Create, end, and accept a Bluetooth partnership .............. 66 Rename a Bluetooth partnership ..................
- Page 8 Windows Media Player ........................86 Clear the Now Playing List ....................86 Update a Library ........................ 86 Use HP Voice Commander to play media files ..............86 MS Office applications ........................86 Word Mobile ........................86 Excel Mobile ........................87 PowerPoint Mobile ......................
- Page 9 Wireless LAN 802.11b Devices ..................101 Wireless LAN 802.11g Devices ..................101 Bluetooth Devices ......................101 Taiwan DGT Notice .......................... 101 Korean Notice ........................... 102 21 Frequently Asked Questions I am having trouble turning on my HP iPAQ. What should I do? ............103...
- Page 10 Why does the HP iPAQ operate slowly at times? ................104 Why do I see the Today screen layout error message on my HP iPAQ display screen? ....104 I have trouble charging my battery. What should I do? ..............104 I am unable to use the ActiveSync feature.
- Page 11 Manage your profile. ● Sign up for free support alerts, software updates, and personalized newsletters. After registering your HP iPAQ, you will receive an e-mail message regarding special offers and promotions. Visit http://www.register.hp.com to register your HP iPAQ or update your mail or e-mail address after registration.
-
Page 12: Box Contents
Listening to personal stereo equipment at full volume for long periods can damage hearing. To reduce the risk of hearing loss, do not spend much time listening to personal stereo equipment at full volume. HP recommends use of the headset manufactured by Merry, part number XXX, that is included with your HP iPAQ. -
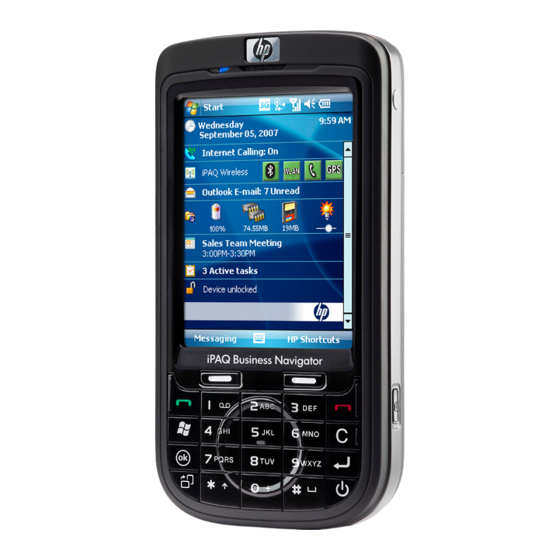
Page 13: Components
Enter Key Press to open an application or insert a line break while typing messages. Power Key Press and hold to switch your HP iPAQ on or off. Smart-Touch Navigation Wheel Use to navigate and scroll through items on the screen. -
Page 14: Top And Bottom Panel Components
Press to display the Start menu. (12) Answer/Send Key Press to answer a call or to view the on-screen keypad. (13) Left SoftKey Press to launch HP iPAQ Shortcuts from the Today screen. ● (14) LEDs Solid Red – Charging ●... -
Page 15: Left And Right Side Components
3-Way Thumb-Wheel Use to navigate and scroll through items on the screen and confirm your selection. HP Voice Commander Key Press to launch the HP Voice Commander application. Camera Key Press to use the camera and click pictures. Test Port Use to receive GPS signal. -
Page 16: Back Panel Components
Use the mirror lens to center your own image for a self-photograph. Camera With the camera turned on, frame the subject in the camera lens and view it on your HP iPAQ screen before capturing the photo. Stylus Remove and use to select elements on the screen and input information. -
Page 17: Set Up Your Hp Ipaq
Set up your HP iPAQ Step 1: Remove the battery cover and insert the SIM card Press the cover latch on the battery cover and slide the cover down and away from the HP iPAQ. Slide the SIM card slot cover and open it. -
Page 18: Step 2: Install The Battery And Replace The Battery Cover
Step 2: Install the battery and replace the battery cover Align the battery connectors on the battery with the housing pins in the battery compartment, and insert the battery. Place the battery cover down and slide up until it locks into place. Chapter 4 Set up your HP iPAQ... -
Page 19: Step 3: Charge The Battery
HP iPAQ. Step 4: Turn on your HP iPAQ Press and hold the Power key to turn on your HP iPAQ. Next, follow the instructions on the screen to complete the setup. Use the on-screen keypad to enter information. Protect your HP iPAQ with a password You can secure data on your HP iPAQ by setting a password. -
Page 20: Find The Serial And Model Number
Locate the serial and model numbers before contacting HP Customer Support, particularly if you are calling for in-warranty support. View the serial number and model ID by tapping Start > Programs > HP Help and Support > Serial and Model Number. - Page 21 Icon Status Icon Status Ringer off Speaker phone on Wi-Fi on Bluetooth Roaming General Packet Radio Service (GPRS) available GPRS available in roaming GPRS in use Enhanced Data Rates for GSM Evolution EDGE available in roaming (EDGE) available EDGE in use Signal strength Phone connection unavailable or network Radio off...
-
Page 22: Learn The Basics
Learn the basics Get started with your HP iPAQ by learning basic functions such as knowing the Today screen, entering text, and synchronizing data. The Today screen The Today screen displays the date and time and provides a quick status of the remaining battery capacity, upcoming appointments, your current profile, and the number of unread text messages. -
Page 23: Enter Text
To switch between T9 and multipress mode while entering text, press and hold * key on the keypad. NOTE: To disable the Smart-Touch Navigation wheel while entering text, press and hold the ok key on the left panel of your HP iPAQ. Enter text... -
Page 24: Customize Your Hp Ipaq
Z and numbers from 0 to 9, and cannot contain spaces. Enter owner information Enter your personal information, such as your name and address, so that the HP iPAQ can be returned to you if it is lost. Tap Start > Settings > Personal > Owner Information. -
Page 25: Adjust The Volume
Change the power management settings Tap Start > Settings > System > Power. Tap Advanced and select the length of time the HP iPAQ stays on when using battery power or AC power. Dim or adjust the brightness of the backlight You can set the backlight to dim after a specified amount of time has elapsed. -
Page 26: Install And Remove Programs
You can also remove the unused programs from your device to increase the available memory. If programs are lost from your HP iPAQ for any reason, most of them can be re-installed using any synchronization software. On your computer, click Options > Add/Remove Programs > check the program to be added >... -
Page 27: Shortcut Menus
Shortcut menus A shortcut menu is displayed when you tap and hold an item. This menu displays the most common commands for a specific item. For example, you can delete an appointment or send a text message to a contact by using commands on a shortcut menu. When the shortcut menu displays, tap the action you want to perform. -
Page 28: Lock And Unlock Your Hp Ipaq
You can place an emergency call at anytime, without entering the PIN. Battery saving tips You can adjust the settings on your HP iPAQ to fit your individual needs and to help your battery last as long as possible between charges. Here are some recommendations to conserve battery life: ●... -
Page 29: Use Your Business Navigator
Softkeys Press the left softkey to open the HP iPAQ Shortcuts application and the right softkey to open the Messaging application. 3-Way Thumb-Wheel Use the 3-Way Thumb-Wheel to navigate through on-screen menus, play songs, change settings, and view information. -
Page 30: Call Features
Call a contact You can call a number stored in the contact list. As you enter a contact's name, the HP iPAQ searches the Contacts, Call History, Speed Dial lists, and the SIM card to find a matching name and number. -
Page 31: Make A Call From The Today Screen
(Answer/Send) key to place a call. TIP: If you have a long list of contacts, enter the first few letters of a contact's name. Your HP iPAQ searches the entire contact's list to display the name. Change the default number for a contact The Mobile phone number is set as the default number for a contact. -
Page 32: Voice Mail
With a data connection, you can browse the Web, download e-mail, or synchronize with the server without using wires. NOTE: Your HP iPAQ has already been configured to allow you to browse and chat. Contact your service provider for information on mobile Internet plans, configuring e-mail or wireless synchronizing with the server. -
Page 33: Mute A Call
Mute a call You can mute the microphone during an active call. On making a call the other party will not be able to hear anything you say, but you can still hear the other party. To mute the microphone during a call: ▲... -
Page 34: Call History
HP iPAQ. Press the HP Voice Commander key to launch the HP Voice Commander application. Wait for the audio cue to say Say command, and then begin saying a command into the microphone. -
Page 35: Check Connection And Signal Strength
Schedule A Call To (Contact) to call a contact Check connection and signal strength When you slide your SIM card into your HP iPAQ, your unit automatically connects to your mobile phone service provider's network. The (Signal strength) icon indicates that you are connected. The more the vertical bars, the better the connection. -
Page 36: Change Service Settings
Once your phone service is set up through your mobile phone service provider, you can change service settings on your HP iPAQ. For example, you might want to block certain types of incoming and/or outgoing calls, forward incoming calls to a different phone number, be notified of incoming calls when you are already in a phone session, or let others know your identity when making calls. -
Page 37: Limit Calls To Specific Area Codes Or Phone Numbers
Select the network setting options you want to change. NOTE: The current phone network your HP iPAQ is using is listed at the top of the screen and remains active until you change it, lose your signal, or change your SIM. -
Page 38: Manually Selecting A Phone Network
To assign network preferences: On the screen, tap Menu > Options… > Network. Tap Set Networks and select your preferred networks. To set the network preference order, tap Move Up or Move Down. Tap ok. In the Network screen, tap the Network selection list. Tap Automatic. -
Page 39: Select A Frequency Band Automatically
TTY tones instead of the human voice. To use TTY with the HP iPAQ, an optional TTY audio adapter must be plugged into the HP iPAQ earbud jack (also called the earbud connector). This TTY audio adapter converts the pin-out of the earbud jack, which is designed for a wired earbud and stereo headphones, to the pin-out required by most TTY devices. -
Page 40: Enable Tty Support
Once you enable TTY support, you can remove the 2.5 mm connector and TTY remains enabled on the HP iPAQ until you disable it. Connect the TTY device to the TTY audio adapter. -
Page 41: Voice Notes
If you plan to use the HP iPAQ in both normal and Tele-typewriter (TTY) audio mode, HP recommends disabling TTY support when the HP iPAQ is not being used for TTY to allow the special network resources to be used by others. -
Page 42: Rename Voice Notes
Access (WCDMA) which is based on 3G technology, and offers better compression and codecs.Your HP iPAQ supports HSDPA 3.6 to 7.2 mbps that uses WCDMA for high speed downloads. HP iPAQ also supports WCDMA over three different frequency bands (850/1900/2100). When WCDMA or HSDPA is available, the device uses the technology and reverts back to GSM/GPRS/EDGE if WCDMA or HSDPA is unavailable. -
Page 43: Camera
Camera Use the camera Use the built-in digital camera on your HP iPAQ to capture and view photos. Capture photos You can capture photos and store them in your HP iPAQ or storage card. Press the Camera key or tap Start > Programs > Camera. -
Page 44: Change Mode Settings
(Frame) button to change the frame type. Video recorder Record videos You can use the built-in camcorder on your HP iPAQ to create short videos and share them with your friends and family. Tap Start > Programs > Camera. (Video) button to go into the video mode. -
Page 45: Configure Video Format
Transfer images Use GPRS When the phone radio is turned on for the first time, the HP iPAQ DataConnect application detects the mobile phone service provider and automatically populates the MMS settings on the HP iPAQ. To transfer pictures using MMS: Tap Start >...
Need help?
Do you have a question about the iPAQ Business Navigator and is the answer not in the manual?
Questions and answers