Maico MA 42 Operating Instructions Manual
Hide thumbs
Also See for MA 42:
- Operation manual (82 pages) ,
- Service manual (59 pages) ,
- Quick manual (2 pages)
Table of Contents
Advertisement
Quick Links
Advertisement
Table of Contents

Related Manuals for Maico MA 42


Summary of Contents for Maico MA 42
- Page 1 Operating Instructions MA 42...
-
Page 3: Table Of Contents
3.4 Rear panel connections ................7 4. Working with the MA 42 ................. 8 4.1 Using the control panel of the MA 42 ............ 8 4.2 Functionality of Operating Elements ............9 4.3 The display of the MA 42 ..............11 5 Measurement Methods of Audiometry ............ - Page 4 Operating Instructions MA 42 5.5 Documentation of the Results .............. 31 5.6 Patient Management ................33 6 Quick reference guide ................35 6.1 General Setup ..................35 6.1.1 Startup settings ................35 6.1.2 Receiver selection ................35 6.1.3 Signal selection ................35 6.2 Tone and speech audiometry ...............
-
Page 5: Introduction
CE-symbol according to Medical Directive 93/42/EEC. In designing the MA 42 we placed particular importance in making it a user- friendly device, meaning its operation is simple and easy to understand. All functions of the MA 42 are software controlled, allowing easy upgrades of new features and function in the future. -
Page 6: Description
Results can also be printed directly by a USB printer or stored as PDF file on the included SD memory card or USB flash drive. The MA 42 can be connected to the PC via USB to track the session and store the results in NOAH or the MAICO Database. -
Page 7: Getting Started
3 Getting Started 3.1 Unpacking the instrument The MA 42 was carefully inspected and packed for shipping. However, it is a good practice to thoroughly inspect the outside of the shipping box for signs of damage. If any damage is noted, please notify the carrier immediately. - Page 8 The use of non-calibrated audiometers can lead to incorrect results! 3.3 Where to setup The MA 42 should be operated in a quiet room, so that the audiometric examinations are not influenced by outside noises. Ambient sound pressure levels in an audiometry test room shall not exceed the values specified in the norm ISO 8253-1 or ANSI S3.1-1999.
-
Page 9: Rear Panel Connections
17: Phone right channel 9: Mon monitor phone output socket Place the MA 42 on a stable counter or table. Plug the power cord into the power socket on the rear panel. Connect all accessories with the adequate sockets as shown above. Plug the power cord into a grounded outlet. -
Page 10: Working With The Ma 42
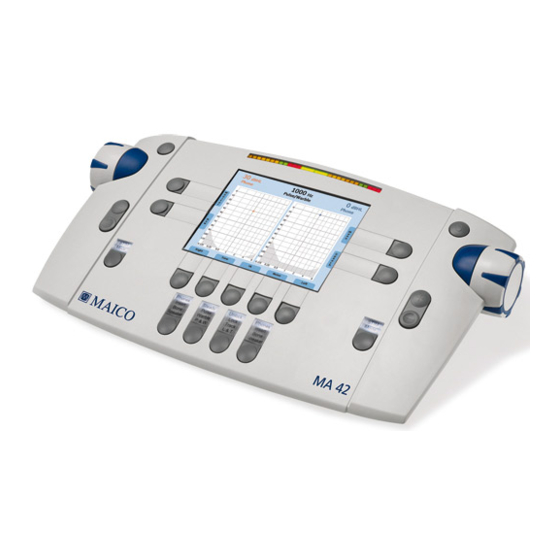
4.1 Using the control panel of the MA 42 The main functions of the MA 42 are directly accessible by using the functional buttons which are located around the display. As the buttons have changing functionality, the actual function of each button is shown in blue boxes adjacent to the button. -
Page 11: Functionality Of Operating Elements
The following table describes the main functions of each button for the tone and speech audiometry screen: Figure 3 - Control panel MA 42 Level control, adjusts the hearing level for the left/right ear STIM bar, presents or interrupts the signal for the left/right ear... - Page 12 Operating Instructions MA 42 (10) Receiver select button, to choose between Phones, Insert, Bone and Speaker (only calibrated receivers are available) (11) Functional selector button, function is displayed on the screen Tone: Signal selector, to choose between tone, narrow band noise, white...
-
Page 13: The Display Of The Ma 42
The Display has an energy saver function: the backlight of the display is automatically dimed after approximately three minutes. Any action with the MA 42 such as pressing a button or rotating the dial switches the backlight immediately on again. -
Page 14: Measurement Methods Of Audiometry
(see chapter 9) after testing. 5.1 Tone Audiometry The MA 42 supports the main tone audiometric testing methods. The following testing methods can be started out of the tone audiometry mode and the results will be documented in the instrument. -
Page 15: Pure-Tone Testing
Operating Instructions MA 42 5.1.1 Pure-tone Testing In the pure tone audiometry, the hearing threshold of the patient is measured in comparison with the normal hearing threshold. The examination starts with air conduction on the ear with better hearing. Upon opening the Tone screen the following settings are displayed. - Page 16 Operating Instructions MA 42 Use the frequency plus (4) or minus (5) keys to increase or decrease the frequency. Press the STIM button (the blue part next to the attenuator knobs) to present or interrupt the tone. The status LED above the STIM Mode button will flash when the tone is presented.
- Page 17 Operating Instructions MA 42 5.1.1.1 Masking When measuring a pure tone audiogram you assume that the measured hearing threshold is correct. But if you recognize that sound is also transmitted through bone conduction over the entire skull it is probable that the opposite ear has also received sound.
-
Page 18: High Tone Audiometry (Optional)
Automatic masking: With the manual masking, as described before, you have to readjust the masking level every time you change the test signal level. The MA 42 has a tracking feature for easy masking. Adjust the test signal using the level control dial and with the opposite level control dial the corresponding masking level. -
Page 19: Sound Field Testing
Operating Instructions MA 42 If you are using bone conductor with contra lateral masking transducer like the BKH 10, connect the contra phone to the left insert phone socket (14, Fig. 1). If masking is switched on, the masking noise will be always routed to this output. -
Page 20: Uncomfortable Loudness (Ucl) Testing
The continuous test tone is increased by 1 dB for a period of 0.2 seconds every 4.8 seconds. Whenever the increment is heard the patient has to press the response switch. The MA 42 calculates the percentage of detected increments. The SISI test information and the test score are shown on the LCD- display. - Page 21 Operating Instructions MA 42 5.1.6.1 Preparation of the SISI Test To start the test select SISI with the functional selector button (13), choose OT Tests and SISI Test. Figure 6 Start screen SISI Test Select the test frequency with the frequency keys (4), (5). For the test you should choose the frequency where the maximum bone conduction hearing loss is measured as described in chapter 5.1.2.
- Page 22 Operating Instructions MA 42 5.1.6.3 Performing the SISI Test When the patient is ready, set the increment to 1dB and press the Start (19) button to run the SISI test. Now 20 increments will be presented to the patient. You can delay the test by pressing the Pause (9) button. This could be helpful in determining if the patient malingers.
-
Page 23: The Threshold Decay (Carhart) Test
Operating Instructions MA 42 5.1.7 The Threshold Decay (Carhart) Test This examination is conducted as a fatigue test in cases of sensitivity loss. To start the test select Decay with the functional selector button (13), choose OT Tests and Decay Test. Make sure that the correct transducer is selected in advance. -
Page 24: Ablb
Operating Instructions MA 42 5.1.8 ABLB The Alternate Binaural Loudness Balance test is a recruitment test. Alternating tones between the two ears with headphones are used. The intensity of the tone in the better hearing ear is varied until the loudness of the tone is judged by the patient to be equivalent to a tone at a constant intensity in the normal ear. -
Page 25: Stenger
Operating Instructions MA 42 To start the test select OT Test with the functional selector button (13), choose MLB, then the MLB test screen will be displayed: Figure 9 – MLB screen Select the left or right ear by the functional selector button (9). Then select the both frequencies left and right frequency up or down buttons (4) or (5). -
Page 26: Langenbeck
Operating Instructions MA 42 5.1.11 Langenbeck The Langenbeck noise audiometry investigates the hearing threshold of pure tones while masking noise is presented simultaneously to the same ear with a constant level for all frequencies. The tone in noise hearing threshold is typically as high as the level of the noise. -
Page 27: Speech Audiometry
5.2.1 Input Calibration The MA 42 must be calibrated to the particular speech test to ensure valid test levels. That means every time you change the speech test CD you must recalibrate the instrument. -
Page 28: Performing The Test
Operating Instructions MA 42 Store the calibration and leave the calibration mode with the Exit button on the left side of the display. 5.2.2 Performing the Test Use the functional button Speech on the right side of the tone screen (18) to switch to speech testing. -
Page 29: Speech Audiometry With Microphone Or Cd Player
Connect the microphone or CD player to corresponding input (10) on the rear side of your MA 42. Set the signal of the test channel to microphone or CD by the functional selector button (11), (15). Make sure that the input signal is calibrated correctly, like described above. -
Page 30: Speech Audiometry With Wave Files
Operating Instructions MA 42 5.2.4 Speech Audiometry with WAVE Files If Wave is selected by the speech signal selector (11) or (15) a menu will pop- up with available word lists, stored on the SD memory card. A word list can be selected by using the level control (1) to scroll through the list. -
Page 31: Masking
Operating Instructions MA 42 Figure 13 - Speech Audiometry with Wave Files Press the functional button List (6) to load another word list. 5.2.5 Masking Speech audiometry has similar masking rules to those described in chapter 5.1.1.1 for pure tone audiometry. The signal of the non-testing ear is set to speech noise (SN) by the functional selector button signal (11) or (15). -
Page 32: Master Hearing Aid (Mha)
Operating Instructions MA 42 5.2.7 Master Hearing Aid (MHA) After you have completed the speech audiometry testing you may wish to demonstrate to the patient the difference a hearing aid can make. Use the MA 42 master hearing aid to adjust various frequency slopes for speech signals. -
Page 33: Monitoring
Operating Instructions MA 42 5.3 Monitoring All signals presented to the patient can be monitored by the examiner via a monitoring headset or the speakers, integrated in the device. For this purpose, press the monitor button (6) and the monitor screen will appear. The monitor level of the left and right channel can be adjusted with the corresponding level control dial (1). - Page 34 Operating Instructions MA 42 card slot (20) or a USB flash drive connected to the USB socket (4) on the rear side of the device. When the examination is completed, press the Menu button (19) in the tone or speech test mode. The User Menu is opened and the functionality of the functional buttons (11), (13) and (15) changes to PDF, Print and Patients.
-
Page 35: Patient Management
Operating Instructions MA 42 5.6 Patient Management The patient management enables storing the results of the audiological tests on the SD memory card. The results can be loaded later on to review, edit or print them. The patients can be stored by numbers or by entering name and birth date. - Page 36 Operating Instructions MA 42 Figure 17 - New Patient Enter the characters of the name by scrolling through the alphabet by the level controls (1) and enter the selected character by the stimulus button (2). Jump to the next or previous field with the frequency up (4) or down (5) button. You can enter the date as well by the level control.
-
Page 37: Quick Reference Guide
Operating Instructions MA 42 6 Quick reference guide 6.1 General Setup 6.1.1 Startup settings Air conduction on both channels Pure tone on both channels 30 dB on both channels Presenter mode 6.1.2 Receiver selection Next select the transducer to be used, headphones (Phones) or insert phones (Insert), by pressing the appropriate button. -
Page 38: Tone Audiometry
Operating Instructions MA 42 6.2.2 Tone audiometry Frequency selection Use one of the two sets of frequency keys (4) or (5) to select the frequency. The maximum and minimum frequency depends on the receiver you have selected. Warble tone Press the Test signal button (12) to activate the warble tone. The LED will highlight Warble. -
Page 39: Speech Audiometry
Operating Instructions MA 42 Talk over microphone Press and hold the STIM MODE (8) to activate Talk forward. Adjust the level by turning one of the attenuator knobs (1) while in the mode. Talkback microphone and Monitor volume control Press the Monitor key on the left side of the display and the volume control bars for Talk Back and monitor are shown. - Page 40 Operating Instructions MA 42 Store results as PDF Enter the User Menu by pressing the functional button (19) and press the button PDF (11) to save the results as PDF file on the SD memory card or USB flash drive.
-
Page 41: User Menu
Operating Instructions MA 42 7 User Menu The User Menu provides extensive possibilities to adjust the device perfectly to your habits and needs. The menu offers also the opportunity to printout the results on a USB printer or to store the results as PDF on the SD memory card. - Page 42 Operating Instructions MA 42 These menu items are available: Frequency Frequency Default frequency Set (On/Off): Set default Settings frequency if side, transducer or signal type has changed Frequency roll Back: Frequency control jumps to 1000 Hz if the highest and lowest...
- Page 43 Operating Instructions MA 42 Default signal types Defines which signals are Signal selected by default: Signal/Noise or Signal/Signal Swap function Defines what happens if Swap is selected: - Swap Ears, the left and right ear is interchanged, the signals of the channels...
- Page 44 Operating Instructions MA 42 Change frequency Moves to next test Store Properties after store frequency after storing a threshold(on) or stays on same frequency after storing (off) Change level after Change in level after store storing a threshold (Stay at...
- Page 45 Operating Instructions MA 42 Display in speech test Diagram(on) or Table(off) Diagram Settings Number of diagrams in None audiogram, only the tone test level and frequency, one combined audiogram or two separate audiograms for left and right Bone Lines On/Off, displays a dotted...
-
Page 46: Set Up Date And Time
Operating Instructions MA 42 7.1 Set up Date and Time Select the item Date/Time in the User Menu by scrolling down with the left or right level control and select the sub item Set Date/Time by the stimulus presenter bar. The following screen will appear: Figure 19 - Date and Time settings Set the date format to International or US by the functional button (9). - Page 47 Operating Instructions MA 42 Save the settings and return to the User Menu by pressing the functional button OK (7) Test your printer settings by a sample print before starting the audiological assessment. Wrong settings may require a restart of the device.
-
Page 48: Disinfection
After receiving the key, store it as text file with the name Key.txt on your SD memory card, then insert the card to the SD card slot of your MA 42 and switch it on. The feature will be activated automatically and the functionality will be available. -
Page 49: Connection To The Pc
Install the according software on your PC. The driver for the device will be installed automatically. Connect the MA 42 by USB cable to the PC and switch on the device. The required driver will be installed. Please follow the installation procedure. -
Page 50: Technical Data
Operating Instructions MA 42 12 Technical Data The MA 42 audiometer is an active, diagnostic medical product according to the class Ia of the EU medical directive 93/42/EEC. Standards: IEC 601-1 class I, protection class B IEC 645-1/ EN 60 645-1: Type 2 IEC 645-2 : Type A ANSI S3.6-1996 : Type 2 A... - Page 51 Operating Instructions MA 42 Speech Signals: External CD-Player, Microphone, Wave file from SD memory card Modulation: Pulse tone: 0.25/0.5 s on time Warble tone: 5% sinus frequency modulation, repetition rate 5 Hz Tests: Tone: HL, MCL, UCL Speech: SRT, WRS, MCL, UCL...
- Page 52 Operating Instructions MA 42 Mode of Operation: Continuous 15 - 35 ̊ C / 59 - 95 ̊ F (operation) Environment Conditions: 5 - 50 ̊ C / 41 - 122 ̊ F (transport) Humidity: 30-90% Dimensions: W x D x H: 34,5 x 20 x 8 cm / 13.4”...
- Page 53 Operating Instructions MA 42 9 10 13 14 Figure 23 – Connection sockets of the MA 42 Connection sockets: Specification 2: power (100 ... 240 V~ 50/60 Hz) Ethernet 3: Network USB 2.0 4: USB out USB 2.0 5: USB in = 500 ...
- Page 54 Operating Instructions MA 42 Standard accessories: Items Article Number MA 42 audiometer including: 8013740 DD45 headphones 8010880 B71W bone conductor 8102514 Patient response switch 8011091 Power cable 8011237 Gooseneck microphone 8006479 SD memory card (2 GB) 8010775 Optional accessories: Item...
-
Page 55: Warranty, Maintenance And After-Sales Service
The MA 42 may be repaired and serviced only by your dealer or by an authorized service centre. We urgently advise you against attempting to rectify any faults by yourself or commissioning non-experts to do so. -
Page 56: Safety Regulations
READ THIS ENTIRE MANUAL BEFORE ATTEMPTING TO USE THIS SYSTEM. 14.1 Electrical Safety The MA 42 audiometer is constructed to comply with protection class I of the international standard IEC 601-1 (EN 60601-1). The instruments are not intended for operation in areas with an explosion hazard. -
Page 57: Measuring Security
Operating Instructions MA 42 14.2 Measuring security To guarantee that the audiometer works properly, the instrument has to be checked and calibrated at least once a year. The service and calibration must be performed by an authorized service center. In accordance with the regulations of the EU medical directive we will drop our liability if these checks are not done. -
Page 58: Appendix A: Checklist For Subjective Audiometer Testing
Operating Instructions MA 42 Appendix A: Checklist for subjective audiometer testing - Clean the ear and head cushion! Instrument:........- Untangle all lines when necessary! Manufacturer:…........ - Are the headphone cushions in good condition? If not replace Serial No.:......... -
Page 59: Appendix B: Calibration Values And Maximum Levels
Operating Instructions MA 42 Appendix B: Calibration values and maximum levels Calibration values and Max Levels: Headphone DD45 Coupler IEC 60318-3, Force 4-5 N, ANSI and IEC Frequency Tone RETSPL NBN RETSPL Max Tone Max NBN [Hz] dB re 20µPa dB re 20µPa... - Page 60 Operating Instructions MA 42 Calibration values and Max Levels: Headphone TDH39 Coupler IEC 60318-3, Force 4-5 N, ANSI and IEC Frequency Tone RETSPL NBN RETSPL Max Tone Max NBN [Hz] dB re 20µPa dB re 20µPa [dBHL] [dBHL] 45.0 49.0 25.5...
- Page 61 Operating Instructions MA 42 Calibration values and Max Levels: Headphone HDA 300 Ear simulator IEC60318-1 with adapter, Force 8.8 N ± 0.5 N, ANSI and IEC Frequency Tone RETSPL RETSPL Max Tone Max NBN [Hz] [dBSPL] [dBSPL] [dBHL] [dBHL] 27.0 31.0...
- Page 62 Operating Instructions MA 42 Calibration values: Insert phone Eartone 3A Reference equivalent threshold sound pressure level Frequency Tone IEC NBN IEC Tone sound [Hz] 60318-5 60318-5 Max Level Max Level damping RETSPL dB re RETSPL dB re [dBHL] [dBHL] [dB] 20µPa...
- Page 63 Operating Instructions MA 42 Calibration values: Sound field (0 degree incidence) Reference equivalent threshold sound pressure level and maximum hearing levels For Canton CD 220 / Maico SBC speaker ISO 389 – 7 and ANSI S3.6-1996 Frequency [Hz] Tone RETSPL...
- Page 64 Operating Instructions MA 42 Specifications are subject to change without notice MAICO Diagnostic GmbH Salzufer 13/14 10587 Berlin, Germany Tel.: +49 3070 71 46 50 Fax: +49 30 70 71 46 99 E-mail: sales@maico.biz Internet: www.maico.biz Operating_Instructions_8100460-6_MA42_e_15a 8100460-6 1/15...
Need help?
Do you have a question about the MA 42 and is the answer not in the manual?
Questions and answers