
Related Manuals for Samsung NV75N5641RS


Summary of Contents for Samsung NV75N5641RS
- Page 1 Built-in Oven User & Installation manual NV75N5641RS NV75N5641RS_EU_DG68-01057C-03_EN+DE.indb 1 2018-02-09 8:43:00...
-
Page 2: Table Of Contents
Contents Auto cook Using this manual Steam cleaning The following symbols are used in this User Manual: Timer Sound on/off Safety instructions Cooking smart Important safety precautions Correct Disposal of This Product (Waste Electrical & Electronic Equipment) Manual cooking Auto energy saving function Auto cook programmes Test dishes Installation... -
Page 3: Using This Manual
Using this manual Safety instructions Thank you for choosing SAMSUNG Built-In Oven. Installation of this oven must be performed only by a licensed electrician. The This User Manual contains important information on safety and instructions installer is responsible for connecting the appliance to the mains power supply in intended to assist you in the operation and maintenance of your appliance. - Page 4 Safety instructions Safety instructions If the supply cord is damaged, it must be replaced by the Do not use harsh abrasive cleaners or sharp metal scrapers to manufacturer, its service agent or similarly qualified persons in clean the oven door glass since they can scratch the surface, order to avoid a hazard.
- Page 5 If your oven needs repair, contact during use. Care should be taken to avoid touching heating a SAMSUNG Service center or your dealer. elements. Children less than 8 years of age shall be kept away Electrical leads and cables should not be allowed to touch the oven.
-
Page 6: Correct Disposal Of This Product (Waste Electrical & Electronic Equipment)
WARNING: Do not disconnect the appliance from the main power supply even after other commercial wastes for disposal. the cooking process is completed. For information on Samsung’s environmental commitments and product specific WARNING: Do not leave the door open while oven is cooking. regulatory obligations e.g. REACH visit: samsung.com/uk/aboutsamsung/ samsungelectronics/corporatecitizenship/data_corner.html... -
Page 7: Installation
What’s included Make sure all parts and accessories are included in the product package. If you have a problem with the oven or accessories, contact a local Samsung customer centre or the retailer. Wire rack Wire rack insert *... -
Page 8: Prepare To Install The Oven
Cabinet mount If installing the oven in a built-in cabinet, the cabinet must have its plastic surfaces and adhesive parts resistant up to 90 °C. Samsung is not responsible for damage to Phillips Screwdriver Drill furniture from the oven’s heat emission. - Page 9 Built-in cabinet (mm) Mounting the oven Min. 550 Make sure to leave a gap (A) of at least 5 mm between the oven and each side of Min. 560 the cabinet. Min. 50 Min. 590 - Max. 600 Min. 460 x Min. 50 NOTE The built-in cabinet must have vents (E) to ventilate heat and circulate the air.
-
Page 10: Before You Start
Installation Before you start Initial settings After installation is complete, remove the protective film, tape, and other packing material, and take out the provided accessories from inside the oven. To remove When you power on the oven for the first time, the default time of “12:00” appears the oven from the cabinet, first disconnect power to the oven and remove on the display where the hour element (“12”) blinks. -
Page 11: New Oven Smell
New oven smell Accessories Before using the oven for the first time, clean inside the oven to remove the new For first time use, clean the accessories thoroughly with warm water, detergent oven smell. and a soft clean cloth. 1. Remove all accessories from inside the oven. •... - Page 12 Before you start Universal tray * The universal tray (depth : 30 mm) is used for cooking and Telescopic rails * Use the telescopic rail plate to insert the tray as follows: roasting. Use the wire-tray insert to prevent liquid from 1.
-
Page 13: Flexible Door
Flexible Door How to use the full door 1. Hold the lever-less area of the handle, This oven has a unique Flexible Door that is hinged in the middle, so you only and then pull. need to open the top half to access the upper cavity. When you’re using the Dual Cook capability, you can access the top oven space much more easily and with greater energy efficiency. -
Page 14: Mechanical Lock (Applicable Models Only)
Before you start Mechanical lock (applicable models only) Dual cook mode You can use both the upper and lower compartments to cook two different recipes, Installation or simply choose one compartment to cook with. 1. Insert the thin part (A) of the Insert the divider in level 3 to separate the mechanical lock into the corresponding cooking chamber in two compartments. -
Page 15: Operations
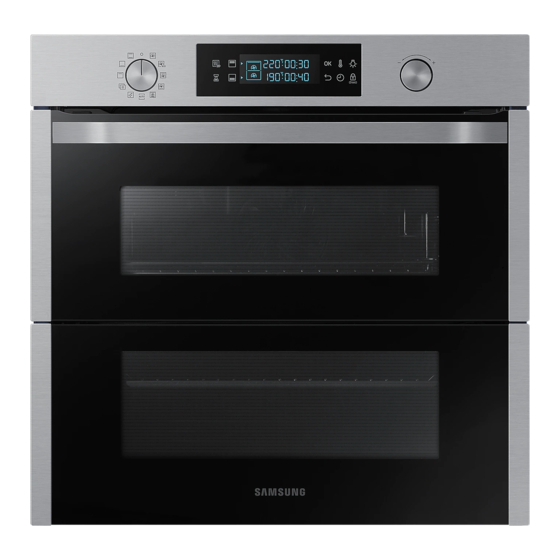
Operations Control panel 10 Oven light Press to turn the internal light on or off. The oven light turns on automatically when the door is open or when the The front panel comes in a wide range of materials and colours. For improved oven operation starts. -
Page 16: Common Settings
Operations Common settings Cooking time 1. Turn the mode selector to choose a It is common to change the default temperature and/or cooking time across all mode or function. cooking modes. Follow the steps below to adjust the temperature and/or cooking time for the selected cooking mode. - Page 17 End time Delay End Delay End is designed to make cooking more convenient. 1. Turn the mode selector to choose a mode or function. Case 1 Suppose you select a one-hour recipe at 2:00 PM and you want the oven to finish cooking at 6:00 PM.
- Page 18 Operations To clear the cooking time To clear the end time You can clear the cooking time. This is useful if you want to stop the oven You can clear the end time. This is useful if you want to stop the oven manually at manually at any time during the process.
-
Page 19: Cooking Modes (Except For Grill)
Cooking modes (except for grill) Dual cook mode You can use the provided divider to separate the cooking chamber in the upper 1. Turn the mode selector to select an and lower compartments. This allows users to enable two different cooking modes cooking mode. - Page 20 Operations 5. When done, press OK. 3. Plug the probe connector into the socket on the leftsided wall. Make sure you see the Meat Probe indicator with the current temperature of the meat’s core on the display. The oven starts preheating until the internal temperature reaches the target temperature.
- Page 21 Cooking modes (except for grill) Temperature range (°C) Suggested The cooking modes with an asterisk (*) are available for fast preheating and Mode temperature Dual disabled for temperatures set at less than 100 °C. Single (°C) Upper Lower Temperature range (°C) Suggested 80-200 Mode...
-
Page 22: Cooking Modes (Grill)
Operations Cooking modes (grill) 2. Turn the mode selector to select . By default, only Large grill (G 1) is selected 1. Turn the mode selector to select automatically. 3. Use the value dial to set the temperature, and then press OK. 2. -
Page 23: Dual Cook Mode Temperature Setting Range
Dual cook mode temperature setting range Upper compartment is limited to (°C) If Lower is set to You can use both the upper and lower compartments simultaneously for different (°C) Minimum Maximum cooking operations. In Dual Cook mode, the temperature range of one compartment is affected by the temperature settings of the other compartment. -
Page 24: To Stop Cooking
Operations To stop cooking Special function Add special or additional functions to improve your cooking experience. Special While cooking is in process, turn the mode functions are not enabled in Dual cook mode. selector to “ ”. The oven turns off in a few seconds. -
Page 25: Auto Cook
Auto cook Dual cook mode 1. Insert the divider in level 3 to activate For inexperienced cooks, the oven offers a total of 50 auto cooking recipes. Take Dual cook mode. advantage of this feature to save you time or shorten your learning curve. The cooking time and temperature will be adjusted according to the selected recipe. -
Page 26: Steam Cleaning
Operations 4. Turn the value dial to select a 3. Press OK to start cleaning. programme for the upper compartment, Steam cleaning runs for 26 minutes. and press OK. 5. Turn the value dial to select a serving 4. Use a dry cloth to clean inside the oven. size. -
Page 27: Timer
Cooking smart Timer Manual cooking Timer helps you check the time or operating duration while cooking. WARNING on acrylamide 1. Press Acrylamide produced while baking starch-contained food such as potato chips, French fries, and bread may cause health problems. It is recommended to cook these foods at low temperatures and avoid overcooking, heavy crisping, or burning. - Page 28 Cooking smart Baking Type of Time Food Accessory Level Temp. (°C) We recommend to preheat the oven for best results. heating (min.) Type of Time Apple pie Wire rack, 160-170 65-75 Food Accessory Level Temp. (°C) heating (min.) ø 20 cm tin Sponge cake Wire rack, ø...
- Page 29 Grilling Type of Time Food Accessory Level Temp. (°C) We recommend preheat the oven using large grill mode. Turn over after half of heating (min.) time. Poultry (Chicken/Duck/Turkey) Type of Time Chicken, Wire rack + 65-80 * Food Accessory Level Temp.
- Page 30 Cooking smart Frozen ready-meal Pro-Roasting This mode includes an automatic heating-up cycle up to 220 °C. The top heater Type of Time and the convection fan are operating during the process of searing the meat. After Food Accessory Level Temp. (°C) heating (min.) this stage the food is cooked gently by the low temperature of pre-selection.
- Page 31 Dual cook No. Cavity Food Accessory Level Type of Temp. Time Before using dual cook function insert the divider into the oven. We recommend heating (°C) (min.) preheat the oven for best results. Upper Chicken, Wire rack 230-250 30-35 The following table presents 5 dual cook guides we recommended for cooking, drumstick + Universal roasting and baking.
- Page 32 Cooking smart You can also use upper or lower compartment only to save power. The cooking ECO convection time can be extended when you use separated compartment. We recommend This mode uses the optimized heating system so that you save the energy during preheat the oven for best results.
-
Page 33: Auto Cook Programmes
Auto cook programmes Dual cook – eco convection mode You can alse use eco convection mode at upper or lower compartment to save power. CAUTION The times of this category are sugessted to not be preheated before cooking for Foods that can easily spoil (such as milk, eggs, fish, meat, or poultry) should not saving more energy. - Page 34 Cooking smart Code Food Weight (kg) Accessory Level Code Food Weight (kg) Accessory Level 1.2-1.5 Wire rack 0.4-0.5 Wire rack Prepare pasta gratin using 22-24 cm ovenproof Put the dough into a black metal buttered Pasta bake Fruit flan base dish.
- Page 35 Code Food Weight (kg) Accessory Level Code Food Weight (kg) Accessory Level 0.8-1.2 Wire rack Wire rack 0.8-1.3 Put fresh fruits (raspberries, blackberries, apple Universal tray slices, or pear slices) into oven dish 22-24 cm. A 20 Roast sirloin of beef Season the beef and leave in refrigerator for A 14 Fruit crumbles...
- Page 36 Cooking smart Code Food Weight (kg) Accessory Level Code Food Weight (kg) Accessory Level Wire rack 0.3-0.8 Universal tray 1.0-1.5 Universal tray A 32 Sole Put sole on baking paper on the universal tray. A 26 Chicken, Whole Cut surface with knife. Rinse and clean chicken.
- Page 37 Dual cook Code Food Weight (kg) Accessory Level The following table presents 10 auto programmes for cooking, roasting and 0.8-1.3 Universal tray baking. You can use only upper cavity or lower cavity and use the upper and lower Prepare homemade pizza with the yeast dough cavity at the same time.
- Page 38 Cooking smart Code Food Weight (kg) Accessory Level Code Food Weight (kg) Accessory Level 0.5-1.0 Universal tray 0.3-0.8 Wire rack Cut large potatoes (each 200 g) into halves Start programme, after preheating beep Baked potato halves lengthways. Put with cut side up on universal sounds, put the frozen pizza on the middle Frozen Pizza tray and brush with olive oil, herbs and...
-
Page 39: Test Dishes
Test dishes 2. Grilling Preheat the empty oven for 5 minutes using Large Grill function. According to standard EN 60350-1 Type of Time Type of food Accessory Level Temp. (°C) 1. Baking heating (min.) The recommendations for baking refer to a preheated oven. Do not use the fast White bread Wire rack preheat function. -
Page 40: Collection Of Frequent Auto Cook Recipes
Cooking smart Collection of frequent auto cook recipes Lasagne Ingredients 2 tbsp olive oil, 500 g minced beef, 500 ml tomato sauce, Potato gratin 100 ml beef stock, 150 g dried lasagne sheets, 1 onion (chopped), 200 g grated cheese, 1 tsp each of dried parsley Ingredients 800 g potatoes, 100 ml milk, 100 ml cream, 50 g beaten flakes, oregano, basil... - Page 41 Quiche Lorraine Directions Sift the flour with the salt above a big bowl. Sift the castor sugar and vanilla sugar with it. Cut with 2 knives the butter Ingredients • Pastry: 200 g plain flour, 80 g butter, 1 egg through the flour in small cubes.
- Page 42 Cooking smart Homemade pizza Herb roasted lamb chops Ingredients • Pizza dough: 300 g flour, 7 g dried yeast, 1 tbsp olive oil, Ingredients 1 kg lamb chops (6 pieces), 4 large garlic cloves (pressed), 200 ml warm water, 1 tbsp sugar and salt 1 tbsp fresh thyme (crushed), 1 tbsp fresh rosemary(crushed), •...
-
Page 43: Maintenance
01 Water collector Samsung service center. Catalytic enamel surface (applicable models only) The removable parts are coated with dark grey catalytic enamel. They can be soiled with oil and fat spattered by the circulating air during convection heating. -
Page 44: Detaching The Door
Maintenance Detaching the door Side racks (applicable models only) 1. Press the top line of the left side rack, WARNING and lower by approximately 45°. The oven door is heavy. 1. Open the door and flip open the clips at both hinges. -
Page 45: Replacement
Replacement Checkpoints If you encounter a problem with the oven, first check the table below and try the Bulbs suggestions. If the problem continues, contact a local Samsung service centre. 1. Remove the glass cap by turning anti- Problem Cause Action clockwise. - Page 46 Troubleshooting Problem Cause Action Problem Cause Action The door cannot be • If there is food residue • Clean the oven well Cooking is finished, • The fan automatically • This is not a product opened properly. stuck between the door and then open the door but the cooling fan runs for a certain...
-
Page 47: Information Codes
Button problem around them. Turn off the oven Occurs when a button is pressed and C-d0 and try again. If the problem held for a period of time. continues, contact a local Samsung service centre. English 47 NV75N5641RS_EU_DG68-01057C-03_EN+DE.indb 47 2018-02-09 8:43:15... -
Page 48: Technical Specifications
Troubleshooting Technical specifcations SAMSUNG strives to improve its products at all times. Both the design specifications and these user instructions are thus subject to change without Code Meaning Action notice. The divider must not be removed during cooking in Dual... -
Page 49: Appendix
Do not open the door frequently during cooking to maintain the oven temperature and to save energy. Model identification NV75N5641RS / NV75N5641RB / • Plan oven use to avoid turning the oven off between cooking one item and the NV75N5641BS / NV75N5642BS next to save energy and reduce the time for re-heating the oven. - Page 50 Memo NV75N5641RS_EU_DG68-01057C-03_EN+DE.indb 50 2018-02-09 8:43:15...
- Page 51 Memo NV75N5641RS_EU_DG68-01057C-03_EN+DE.indb 51 2018-02-09 8:43:15...
- Page 52 ITALIA 800-SAMSUNG (800.7267864) www.samsung.com/it/support CYPRUS 8009 4000 only from landline, toll free www.samsung.com/gr/support 80111-SAMSUNG (80111 726 7864) only from land line GREECE (+30) 210 6897691 from mobile and land line LUXEMBURG 261 03 710 www.samsung.com/be_fr/support NETHERLANDS 088 90 90 100 www.samsung.com/nl/support...
Need help?
Do you have a question about the NV75N5641RS and is the answer not in the manual?
Questions and answers
what turns on the control panel back lighting? There's power connected as the burners and oven work, but the control panel stays dark.
The control panel backlighting on a Samsung NV75N5641RS oven is activated when oven operation starts. It turns off automatically after a period of inactivity to save power.
This answer is automatically generated
@Mr. Anderson