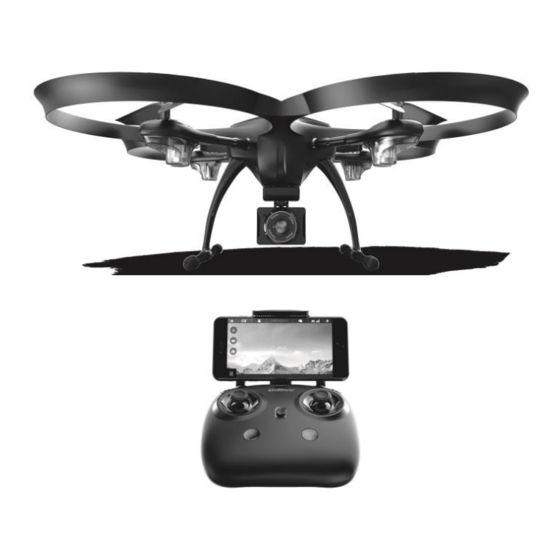
udir/c Discovery 2 U818A Plus Operation Manual
Equipped with 120 wide-angle 720p hd wifi cavera
Hide thumbs
Also See for Discovery 2 U818A Plus:
- Operation manual (29 pages) ,
- User manual (28 pages) ,
- Operation manuals (2 pages)
Table of Contents
Advertisement
Advertisement
Table of Contents

Related Manuals for udir/c Discovery 2 U818A Plus


Summary of Contents for udir/c Discovery 2 U818A Plus
-
Page 2: Table Of Contents
www.udirc.com Catalog Liability ......................3 Safety Precautions ..................3 Safety Warning for the Drone’s Battery ............4 Charging Instructions for the Drone’s Battery ..........5 Pre-Flight Checklist ..................5 Instructions for Drone and Transmitter ............6 Pre-flight Operation Instructions ..............9 Introduction to the Functions .............. -
Page 3: Liability
www.udirc.com Liability Thank you for buying our product. People who are under 14 years of age are not qualified to use this for important safety reasons. Please read this brochure carefully before using it to ensure that you readily understand how to use it to the best of your current ability. -
Page 4: Safety Warning For The Drone's Battery
www.udirc.com (4) Keep Away From Humid Environments The internal components of the drone consist of precise electronic equipment. Humidity and water vapor may cause damage to them and result in an accident, so take care to watch where you are flying it. (5) Safe Operation Please operate the drone in accordance with your flying skill and overall experience level. -
Page 5: Charging Instructions For The Drone's Battery
www.udirc.com - Only use the recommended charger only. Check the charger’s wire, plug, and surface regularly. Do not use a charger that is damaged or broken. Charging Instructions for the Drone’s Battery 1. Connect the battery to the USB cable and choose one of the charging methods below. -
Page 6: Instructions For Drone And Transmitter
www.udirc.com Instructions for Drone and Transmitter Specifications Drone Size 334x334x127mm Charging Time for Drone 180mins Battery Drone Weight 248g Max Flight Distance/Radius 150m Propeller Diameter 147mm Streaming video range Flying Time 13~15mins Camera Resolution 1280x720P Drone Battery 7.4V 1000mAh Main Motor 1020x4 Frequency 2.4Ghz... - Page 7 www.udirc.com Name Name Name Drone Cover Housing Lampshade Switch A Propeller B propeller Receiver Board Holder Upper Motor Cover A Upper Motor Cover Power Board Gear Front LED Board Camera (Green) Adapter Board AL Main Shaft Motor Holder Battery Box Bearing C-Pb Square Tube Battery...
- Page 8 www.udirc.com Transmitter Brief Introduction to Button Functions Left Stick Move the Stick forward / backward / left / right up / down / turn left / turn right. Right Stick Move the Stick to go forward / backward / left / right Power Switch Push up the power switch to turn on the transmitter, and pull down to turn off.
- Page 9 www.udirc.com Battery installation: Open the battery cover on the back side of the transmitter and put 4 alkaline batteries (AA, not included) into the box in accordance with the electrode instructions, as shown below. 1. Make sure the electrodes are correct. 2.
-
Page 10: Pre-Flight Operation Instructions
www.udirc.com Pre-flight Operation Instructions Frequency Pairing 1. Turn on the transmitter switch (Picture 7) and the power indicator light will flash rapidly. Push the Left stick all the way down to the lowest position and then release. The Left stick will move back to the middle position automatically (Picture 8/9). The power indicator light flashes slowly, which indicates the transmitter is ready for frequency pairing. - Page 11 www.udirc.com Flight Checklist 1. Make sure the camera is in front of the drone and facing away from you. 2. Power on the drone and check the direction of the rotating propellers; the left front and right rear A propellers should be rotating clockwise, while the right front and left rear B propellers should be rotating counterclockwise.
- Page 12 www.udirc.com Flying Control Notice: Always start the motors by moving the Left stick and Right stick as indicated in picture 12 before takeoff.
-
Page 13: Introduction To The Functions
www.udirc.com Introduction to the Functions Take off/ One button take off/Landing modes Method 1 (Take off): After frequency pairing is successful, push the Left and Right sticks, as shown in Picture 12, to start the motor. Release the sticks and push the Left stick upward until you achieve the desired altitude. - Page 14 www.udirc.com Altitude Hold Mode Altitude hold mode indicates that the drone maintains a consistent altitude while allowing roll, pitch, and yaw to be controlled normally. This mode makes controlling the drone much easier for beginners and makes the drone more stable for aerial photography.
-
Page 15: Low Battery Alarm
www.udirc.com Low Battery Alarm When the drone is low on battery, the transmitter will beep twice to remind the user the land the drone as soon as possible. When the remote is low on battery, the transmitter will beep twice to remind the user to land the drone as soon as possible. -
Page 16: Using The Application
www.udirc.com Using the Application Downloading and Installing Flyingsee Flyingsee is an application for mobile phones with iOS and Android systems: -Search “Flyingsee” in the App Store to download the app onto iOS devices. -Search “Flyingsee” in the Google Play store to download the app onto Android devices. - Page 17 www.udirc.com Introduction for APP Icons Home Page Icons Explore UDIRC Drone Help Learn the operation of Drone Media Remote control interface Remote Control Interface Home Page Icon Click on the icon and back to home page. Virtual Reality Mode Click on the icon to enter virtual reality mode to experience first person view (only available when using with a VR headset).
- Page 18 www.udirc.com Remote Control Signal To show the drone’s WiFi signal strength. Settings Click on this icon to set some parameters as below, and click again to exit. - Click on “Save” to save trimming setting. - Choose “Reset” for factory reset. - Select “720P”...
- Page 19 www.udirc.com Video Click on this icon to record video. The recording time will show at the bottom of the screen. Click on this icon again to finish recording. Photo Click on this icon to take photos. Heading Hold Mode Click on this icon and it turns red, which indicates that the drone enter Heading Hold Mode.
- Page 20 www.udirc.com the drone is calibrating. When the drone body front light changes to a solid color, this will indicate that a successful calibration has been completed and that the drone is ready to be controlled. App Flying Control 1. If you cannot find the WiFi signal to connect to, turn off WiFi and turn it back on again to search and connect.
- Page 21 www.udirc.com Display the photos and videos Notice: The Flyingsee app must be authorized to access the phone gallery. If it’s not authorized to do so, you will not be able to display the videos and photos. The photos are stored in the local phone gallery and TF card, while the videos are only stored in the TF card.
-
Page 22: Spare Parts Installation Instruction
www.udirc.com Spare Parts Installation Instruction Landing Gear Installation Install the left and right landing gear to the bottom housing position as shown in Picture 19. Then, use the screwdriver to turn the screws clockwise. Camera Box Installation Insert the camera buckle into the underside of the drone as shown in Picture 20. Then, fasten it as shown in Picture 21. - Page 23 www.udirc.com Propeller Replacement 1. Turn the screw shown in Picture 24 counter clockwise to remove the damaged propeller. 2. Put the new propeller into the housing and reattach the screw, now turning clockwise, as shown in Picture 25. Motor Installation 1.
-
Page 24: Spare Parts
www.udirc.com Receiver Board Soldering Spare Parts... - Page 25 www.udirc.com...
-
Page 26: Troubleshooting Guide
www.udirc.com Troubleshooting Guide Problem Problem Cause Solution 1. Low battery. 1. Replace the transmitter battery. 2. The battery’s positive and negative 2. Install the battery in accordance with transmitter poles are in reverse order. the user manual. indicator light is off 3. - Page 27 www.udirc.com FCC Note This equipment has been tested and found to comply with the limits for a Class B digital device, pursuant to Part 15 of the FCC Rules. These limits are designed to provide reasonable protection against harmful interference in a residential installation.
Need help?
Do you have a question about the Discovery 2 U818A Plus and is the answer not in the manual?
Questions and answers