Table of Contents
Advertisement
Quick Links
USER
MANUAL
This product supports GPS positioning and is recommended for outdoor flight!
This wifi camera pinpoint is 5G, please confirm whether the phone is supported.
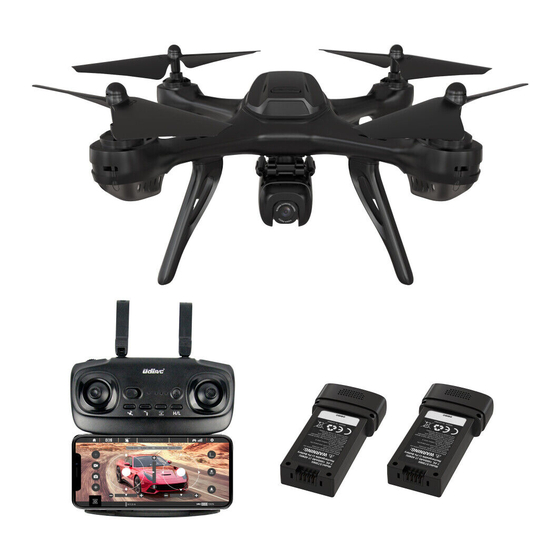
U59
▲This product is suitable for users over 14 years old.
▲Stay away from the rotating propeller
▲Read the "important statement and safety guidelines" carefully.
Advertisement
Table of Contents

Related Manuals for udir/c U59


Summary of Contents for udir/c U59
- Page 1 USER MANUAL This product supports GPS positioning and is recommended for outdoor flight! This wifi camera pinpoint is 5G, please confirm whether the phone is supported. ▲This product is suitable for users over 14 years old. ▲Stay away from the rotating propeller ▲Read the “important statement and safety guidelines”...
- Page 2 Ready before take off Drone preparation Front Propeller A Propeller B Power switch Drone cover Battery Propeller B Propeller A Rear Front Front LED (Green) Front LED (Green) Bottom of the drone Camera box Rear LED (Red) Rear LED (Red) Battery lock Rear...
-
Page 3: Battery Charger
Battery Charger Battery power is insufficient in the original plant. It must be charged saturated before it can be used. Connect the original charging cable with the drone battery, and then connect other USB charging port. The charger line indicator is red when charging and the light turns green when fully charged. -
Page 4: Landing Gear Installation
Landing gear installation Installation: Aim the landing gear frame to the body and place it to the right place. Disassembly:Pull out the landing gear. Note: Make the landing gear close to the fuselage surface of the drone, otherwise it will be unstable and affect the stability of the drone. -
Page 5: Transmitter Battery Installation
Transmitter battery installation Open the battery cover on the back side of the transmitter ,according to the "+-" electrode instruction in the battery groove, place the battery with the same type of saturated power (battery not include). Battery Cover 4*1.5V AA Batteries Mobile Phone Installation ②... -
Page 6: Flight Operations
Flight Operations Mobile phone connect with Drone Download and install APP: UDIGPS This software is suitable for mobile phones in the IOS and Android system. For detailed operation, please check the system “HELP” of APP. Transmitter connect with drone Frequency Pairing ②... -
Page 7: Compass Calibration
Compass calibration Rotate the drone horizontally until the transmitter sounds "di... "Level correction to complete. When the left light turns to long light and the right light flashes, enter vertical correction. Rotate the drone vertically until the transmitter sounds "di... "A sound, vertical correction over. - Page 8 Control stick operation Left stick Go up Counterclockwise turn Go down clockwise turn Right stick Forward Fly to the left Backward Fly to the right Take off After unlocking the motor,push up the left stick slowly and the drone rise slowly. Landing During the flight,push down the left stick slowly and the drone land slowly until landing.
- Page 9 Return During the flight, press the "return " button, and the transmitter will sound "di", and the drone will automatically return to the take off point. (during returning, the transmitter will continuously sound "di". To stop homing, just press this button again.) During the return, the right stick are not able to control the drone.
- Page 10 Encircling mode In flight, press the “Encircling ”button, and the transmitter will sound of "di". Then it goes to the function of encircling flight. The drone will fly to a default radius then it waits for the direction controlled by the user. Adjust the speed and direction of the drone by manipulating the right stick.
- Page 11 Gimbal adjustmen Scroll Gimbal button to adjust the camera angle. Tilting -90° to 0° Photo Video Press “photo ”button once to take a Press the "video" button the transmitter picture. will sound “didi” to remind user to enter the recording state ,and repeat this When taking photos, the transmitter action to stop recording and save video.
-
Page 12: Low Battery Alarm
Low Battery Alarm When the battery power of the point remote is quickly exhausted, it will make the sound of “di”“di”“di” constantly to alarm you, now you should land the drone as soon as possible to replace the battery of transmitter. Automatic Return While flying, in case that the battery of the drone is quickly exhausted, it will make the sound of “di”.“di”... - Page 13 Flying Trimmer Forward / Backward Trimmer When flying, if the drone tilts forward , push the left stick Press down down and push the right stick down. Otherwise push it up. Left / Right Tilts Trimmer Press down When flying, if the drone tilts to the left, push the right stick down,meantime push the right stick to the right.
-
Page 14: Parts Replacement
Parts replacement Propeller replacement Disassembly:First screw out the screw then pull out the propeller. Installation:Make sure that the propeller aims at the hole direction of the drone hole then press it down to the bottom, screw the screw. The propeller hole on the propeller fit the motor hole. -
Page 15: Troubleshooting
Troubleshooting Problem Problem cause Solution Low battery. Replace the controller battery. The controller The batteries are incorrectly. Install the batteries following the polarity indicators. Indicator light is off. Clean the dirt between the battery and the The batteries are incorrectly positioned. battery contacts. -
Page 16: Fcc Note
The device can be used in portable exposure condition with out restriction. Manufacturer company: SHANTOU CITY CHENGHAI UDIRC TOYS CO., LTD Manufacture address: Guangfeng Industrial Zone, Guangyi Street, Chenghai District, Shantou City, Guangdong Province, China Model: U59 Manufacture time: MADE IN CHINA...
Need help?
Do you have a question about the U59 and is the answer not in the manual?
Questions and answers