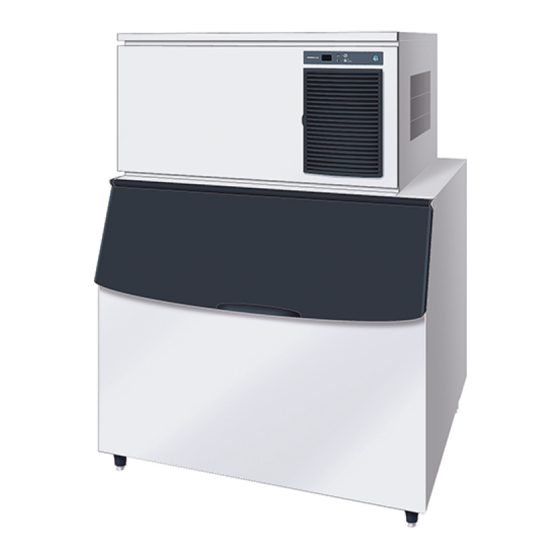
Hoshizaki IM-240DNE Instruction Manual
Self-contained cuber
Hide thumbs
Also See for IM-240DNE:
- Installation manual (88 pages) ,
- Service manual (81 pages) ,
- Instruction manual (26 pages)
Summary of Contents for Hoshizaki IM-240DNE
- Page 1 SELF-CONTAINED CUBER IM-240DNE IM-240XNE IM-240DWNE INSTRUCTION MANUAL IM-240DNE Telford 70 Stafford Park 7, Telford, Shropshire TF3 3BQ UK L1E1CK113 (050818)
-
Page 2: Table Of Contents
IMPORTANT SAFETY INFORMATION ............................1 I. INSTALLATION INSTRUCTIONS ..............................3 1. CONSTRUCTION ................................3 2. ACCESSORIES ...................................3 3. UNPACKING ..................................4 4. LOCATION ...................................4 5. INSTALLATION ..................................5 6. STACKING ICEMAKERS ..............................6 7. ELECTRICAL CONNECTIONS ............................7 8. WATER SUPPLY AND DRAIN CONNECTIONS .........................7 II. OPERATING INSTRUCTIONS ..............................9 1. -
Page 3: Important Safety Information
ENGLISH IMPORTANT SAFETY INFORMATION Throughout this manual, notices appear to bring your attention to situations which could result in death, serious injury, or damage to the unit. Indicates a hazardous situation which, if not avoided, could result in death or WARNING serious injury. - Page 4 * If the supply cord is damaged, it must be replaced by a replacement cord available from Hoshizaki Parts/Service Centres. * Do not touch the electrical parts or operate the switches with damp hands. * This appliance is not intended for use by persons (including children) with reduced physical,...
-
Page 5: Installation Instructions
Power Cord (Air-cooled Model) Front Cover Top Kit IMD Bin Door Storage Bin Handle Adjustable Legs 2. ACCESSORIES IM-240DNE IM-240XNE IM-240DWNE Inlet Hose Outlet Hose 1/2-3/4 Nipple Ice Chute Mounting Bracket Hex Head Bolt w/Washers 5 x 12 Bolt 8 x 16... -
Page 6: Unpacking
NOTICE Remove shipping carton, tape(s) and packing. If packing material is left in the icemaker, it will not work properly. Note: This icemaker needs a storage bin. Hoshizaki recommends the following ice storage bins: B801SA (Top Kit IMD) ------- IM-240D/IM-480D/IM-720D... -
Page 7: Installation
ENGLISH IMPORTANT Normal operating ambient temperature should be within 1°C to 40°C. Water connection is cold water only. Operation of the icemaker, for extended periods, outside of these normal temperature ranges may affect production capacity. Allow the clearance specified below for proper air circulation and ease of maintenance and/or service should they be required. [Air-cooled model] Top View Side View Rear 30cm... -
Page 8: Stacking Icemakers
ENGLISH 6. STACKING ICEMAKERS NOTICE Check the icemaker models. A D-type icemaker and an X-type icemaker will be required for stacking two icemakers. A D-type icemaker and two X-type icemakers will be required when stacking three icemakers. The D-type icemaker is designed for the upper unit, and the X-type for the middle and lower units. -
Page 9: Electrical Connections
ENGLISH 7. ELECTRICAL CONNECTIONS WARNING THIS APPLIANCE MUST BE EARTHED To prevent possible severe electrical shock to individuals or extensive damage to the unit, the icemaker must be connected via the flexible supply cord supplied with the icemaker to an appropriate outlet socket installed in accordance with local codes and regulations i.e. AS / NZS 3000. Disconnect the main power supply before any maintenance, repairs or cleaning is undertaken. * This appliance requires a separate 220 - 240VAC, 10A supply. - Page 10 [Connection to the water-cooled condenser] * Hoshizaki recommends that the water-cooled condenser should be connected to a closed circuit recirculating type cooling system utilizing a tower, water chiller or similar. Water make up should be via a ball valve/break tank arrangement.
-
Page 11: Operating Instructions
ENGLISH * Pressure loss in the water circuit inside the unit will be 5 to 6 m Flow Control Valve when the cooling water flows at the ratio of 4 to 5 lit/min. * Select a circulating pump referring to the above values of heat flow. Icemaker Cooling Tower * Do not use a cascade pump, or the water regulator will vary the flow and stop it during the defrost cycle. -
Page 12: Maintenance
[c] Storage Bin Interior Cleaning/Sanitisation (Weekly) Thumbscrew 1) Open the storage bin door, and remove all ice. Note: Hoshizaki recommends various types of storage bin for the icemaker which vary in size and design. The following instructions are therefore for general guidance only. -
Page 13: Before Calling For Service
If the icemaker does not work properly or does not work at all and no error code is indicated on the display, before calling for service, check that: * The power is supplied to the unit. * The water is turned on. * The air filter is clean (air-cooled model). * The cooling water circuit has a proper flow (water-cooled model). For further assistance or advice, contact your local Hoshizaki service agent. -
Page 14: Disposal
4. WARRANTY Hoshizaki warrants to the original owner/user that all Hoshizaki branded products shall be free of defects in material and/or workmanship for the duration of the “warranty period”. The warranty shall be effective for two years from the date of installation. - Page 15 ENGLISH Model IM-240DWNE Type Water-cooled, cube ice Power Supply 1 phase 220 - 240V 50Hz Electric Consumption 1300W Ice Production per 24h 230kg (5mm) / 240kg (15mm) (ambient temp 10°C, water temp 10°C) Dimensions 1084mm(W) x 700mm(D) x 500mm(H) Refrigerant R404A, 0.45kg (GWP: 3920, CO2: 1.764t) Insulation Foam Blowing Agent...


Need help?
Do you have a question about the IM-240DNE and is the answer not in the manual?
Questions and answers