Table of Contents
Advertisement
Quick Links
Advertisement
Table of Contents

Subscribe to Our Youtube Channel
Related Manuals for Doro 540X


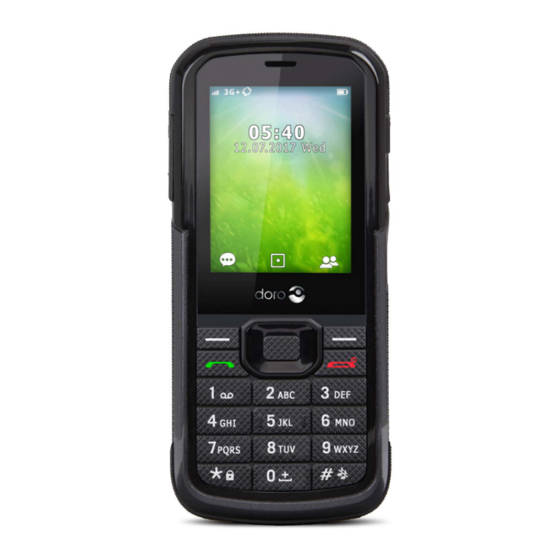
Summary of Contents for Doro 540X
- Page 1 Doro 540X English...
- Page 2 The items supplied with your phone might vary depending on the soft- ware and accessories available in your region or offered by your service provider. You can obtain additional accessories from your local Doro deal- er. The supplied accessories provide the best performance with your phone.
-
Page 3: Table Of Contents
English Contents Congratulations on your purchase ............... 1 Get started..................... 1 Insert SIM card, memory card and battery.......... 1 Charge the phone.................. 3 Get to know your phone ................4 Turn the phone on and off ..............4 Keypad lock ................... 4 How to navigate the phone.............. - Page 4 English Images......................21 Profiles ......................21 Connect the phone to a computer .............22 Settings ......................23 Phone settings..................23 Call settings ..................26 Data settings ..................28 Security settings ..................29 Restore factory settings ..............30 Reset all ....................31 Sound effects ..................31 Connectivity ..................31 ®...
- Page 5 English Care and maintenance ................42 Warranty.......................43 Specifications ....................43 Copyright and other notices..............44 Specific Absorption Rate (SAR) ............45 Correct disposal of this product ............46 Correct disposal of batteries in this product ........46...
-
Page 6: Congratulations On Your Purchase
Then treat yourself to a tougher phone that won't flinch even after being dropped onto a concrete surface or exposed to wet, sandy or muddy surroundings. For more information about accessories or other Doro products please visit www.doro.com. Get started Insert SIM card, memory card and battery... - Page 7 English IMPORTANT! This device accepts micro SIM or 3FF SIM card. Use of incompatible SIM cards may damage the card or the device, and may corrupt data stored on the card. Press the card’s lid carefully down until it clicks. Lift the lid to an upright position. Place the card in the compartment with the cut-off corner up to the left.
-
Page 8: Charge The Phone
English Insert the battery and replace the back cover Insert the battery by sliding it into the battery compartment with the contacts facing down to the left. Replace the back cover. To maintain the water- and dust-protection (IP67) of the de- vice, make sure that the phone’s red rubber seal and the back cover is clean and free from foreign objects. -
Page 9: Get To Know Your Phone
English The battery charge indicator is animated while charging. It takes ap- proximately 3 hours to fully charge the battery. When charging is completed, is displayed on the screen. If the phone is turned off with the charger connected the battery charge indicator is displayed. -
Page 10: How To Navigate The Phone
English How to navigate the phone Standby mode When the phone is ready to use, and you have not keyed in any charac- ters, the phone is in standby. Tip: You can always press to return to standby. Navigation keys In this document, press Menu and press OK refers to pressing the icon/key. -
Page 11: Enter Text
English Enter text Enter text manually Select character • Press a numerical key repeatedly until the desired character is shown. Wait a few seconds before entering the next character. Special characters Press * for a list of special characters. Select the desired character with the arrow keys and press OK to confirm. -
Page 12: Volume Control
English Input mode Press # to change input mode. The icon on the top left of the display in- dicates the input mode. UPPER CASE with predictive text lower case with predictive text Sentence case with predictive text UPPER CASE lower case Sentence case Numerals... -
Page 13: Call From The Phonebook
English Tip: For international calls, always use + before the country code for best operation. Press and hold 0 for the international prefix +. Call from the phonebook Press Contacts to open the phonebook. Use arrow keys to scroll through the phonebook, or quick search by pressing the key corresponding to the first letter of the entry, see En- ter text, p.6. -
Page 14: Call Information
English Press H-Free to activate. Speak clearly into the phone microphone at a maximum distance of 1 m. Use volume keys to adjust the loud- speaker volume. Press H-Held to return to normal mode. Note! Loud background noises (music, etc.) may interfere with the sound quality. -
Page 15: Phonebook
English • Save to Phonebook to save the number in the phonebook Add new contact to create a new contact, or Replace existing to edit an existing contact. • Add to Blacklist to block the number. • Edit before call to change the number before dialling. •... -
Page 16: Phonebook Settings
English • Add to favourite to set the entry as one of the first 10 contacts listed in the phonebook. • Delete to delete the selected contact. Press Yes to confirm or No to abort. • Copy To Phone to copy all phonebook contacts from the SIM card to the phone memory, or To SIM to copy all contacts from the phone memory to the SIM card. - Page 17 English Add speed dial numbers Press Speed dial. Press Status On to enable the feature. Press Set numbers and select 2 Edit and select an entry from the phonebook. Repeat to add speed dial entries for buttons 3 – 9 . Voicemail 1 If your subscription includes an answering service, callers can leave a voi- cemail message when you are unable to answer a call.
-
Page 18: Assistance Button
English If needed, enter PIN2 and press OK to confirm. Note! You can save parts of phone numbers. For example, if you save 01234, allows calls to all numbers starting with 01234. It is possible to place an SOS call by entering the main local emergency number followed even when fixed dial is activated. -
Page 19: Make An Assistance Call
English the assistance function is activated before use, enter recipients in the numbers list and edit the text message. Make an assistance call When help is needed, press and hold the assistance button for 3 seconds, or press it twice within 1 second. The assistance call begins after a delay of 5 seconds. - Page 20 English Assistance Select how to activate the assistance function using the assistance button. Press Menu Settings Assistance Activation: • On Normal to press and hold the button for approximately 3 seconds, or press it twice within 1 second. • On (3) to press the button 3 times within 1 second. •...
- Page 21 English Create assistance message Press Menu Settings Assistance Message. Select Edit and write the message, see Enter text, p.6. Press OK to confirm. Note! You must write a message if you activate the SMS function. Confirm with 0 You can activate the Confirm with 0 function. This is especially recom- mended if there is a risk that the assistance call is answered by a voice mail or answering service.
-
Page 22: Messages
English Messages Create and send a message (SMS/MMS) Note! Before you can send any text messages, you need to save your message centre number. The number to your service centre is supplied by your service provider and is usually set on the SIM card. If not, you can enter the number yourself in Message settings/Text message. -
Page 23: E-Mail
Sign in to Gmail/Yahoo E-mail accounts, like Gmail and Yahoo require you to change an account setting before you are able to access e-mails on your new Doro phone. To avoid problems signing in, you may need to log-into your Gmail / Yahoo account. -
Page 24: E-Mail Settings
E-mail settings Enables you to review and create e-mails using your e-mail account. In or- der to utilize the e-mail service on your Doro 540X you need to have an already configured e-mail account such as Google Mail, Yahoo or Hotmail. -
Page 25: Camera
English Set up other accounts Follow the steps below if your service provider is not in the list. Contact your service provider for correct settings. From E-mail Other Email accounts Select and fill in the re- quired information that is provided by your email provider. Press OK to confirm. -
Page 26: Images
English Press Options for options. Press Back to return. Video camera adjustments Use }/{ to zoom in and out. • • Press Options for options and video camera settings. Note! Zoom may reduce video quality. Images View your saved pictures. Press Menu Images. -
Page 27: Connect The Phone To A Computer
English Press Menu Profiles. Use the arrow keys to select a profile. Press Options: • Activate to activate the profile. • Customize to customize the profile. • Reset to reset the profile. Connect the phone to a computer Connect the phone to a computer and start transferring pictures, music and other file types. -
Page 28: Settings
English Settings Phone settings Time and date Set time/date Press Menu Settings Phone settings Time and date: • Set home city to enter the timezone/city nearest you. • Set time/date to enter the time/date/daylight saving. • Set format to set the format for Time/Date/Date separator. •... - Page 29 English Press Menu Settings Phone settings Display Wallpaper: • System to select from preinstalled files. • User defined to select from your own pictures. Use }/{ to display available wallpapers. Press OK to confirm. Screen auto lock Select the time for the screen to lock. Press Menu Settings Phone settings...
- Page 30 English Clock type In standby mode the display can show one or two clocks or an analog clock. Press Menu Settings Phone settings Display Clock type: Select Single clock, Dual clock or Analog. Press OK to confirm. Note! Show date and time must be set to On to be able to show any clock.
-
Page 31: Call Settings
English Tip: To enable you can also press and hold the Power button and then activate/deactivate Flight mode. Misc. settings LCD backlight You can adjust the brightness of the display and set the delay time for the display backlight. Press Menu Settings Phone settings Misc. - Page 32 English Tip: Repeat and select Deactivate to disable call waiting, or Query status to display if call waiting is active or not. Call divert You can divert calls to an answering service or to another phone number. Set up which calls should be diverted. Select a condition and press OK, then select Activate, Deactivate or Query status for each.
-
Page 33: Data Settings
English Select Cancel all to cancel all call barring (password needed). Press OK to confirm. Select Change barring password: • Enter current password and press OK. • Enter new password and press OK. Repeat to confirm. Advanced settings Press Menu Settings Call settings Advanced settings:... -
Page 34: Security Settings
English IMPORTANT! If you set your phone to use GSM only or WCDMA only, you will not be able to make any calls, including emergency calls, or use other features requiring a network connection, if the selected network is unavailable. Network information View your current network settings. -
Page 35: Restore Factory Settings
English Phone security The phone lock protects your phone from unwanted usage. If activated, phone is locked after restart and the phone code needs to be entered to unlock. Press Menu Settings Security settings Phone security Phone lock. Select On to enable, or Off to disable. Press OK to confirm. -
Page 36: Reset All
English Tip: The default phone code is 0000. Reset all Press Menu Settings Security settings. Select Reset all to delete phone settings and content such as con- tacts, number lists and messages (SIM memory and memory card is not affected). Enter the phone code and press OK to reset. -
Page 37: Bluetooth
English • Proxy user name to enter user name. • Proxy password to enter password. • Primary DNS to enter Primary DNS address. • Secondary DNS to enter Secondary DNS address. • IP address to enter IP address. • Subnet mask to enter Subnet mask. Press Done, and press Yes to save or No to return. - Page 38 Delete all to delete all devices from the list. My name Press Menu Settings Bluetooth My name. Enter the name your Doro 540X should appear with for other Blue- tooth devices. Press Options Done to confirm. Advanced Audio path Press Menu...
-
Page 39: Files
English Sharing permission Press Menu Settings Bluetooth Advanced Sharing permission: • Full control to allow a connected device to read/write/delete on your phone. • Read only to allow a connected device to only read your phone. Press OK to confirm. My address Displays your phones hardware address, also called the MAC address. -
Page 40: Torch Button Setting
English • Delete all files to delete all files in selected folder. • Details to view detailed information about the file, e.g. date, size, copyright. Press OK to confirm. Supported formats: • Picture format: BMP/GIF/JPG/PNG. Photos taken with the built in camera are saved as JPG. -
Page 41: Alarm
English Options Press Menu Organiser Calendar Options: • View to show tasks for the selected date. • View all to show all tasks. • Delete event to delete one or more events. • Jump to date and enter the date. •... -
Page 42: Additional Functions
English • Enter date and time. • Enter subject, see Enter text, p.6. • Set if the task should have an alarm. • Set if the task should be recurring. • Set the priority for the task. • Enter if the task should have any further details. •... -
Page 43: Safety Instructions
English Convert Use the Unit converter to convert different entities. Torch Press On/Off to turn on/off. Note! Press and assistance/torch button to turn on the torch. Press again to turn off. The assistance feature and torch shares the same physical button. When you first startup the phone the button is set for the torch feature. -
Page 44: Operating Environment
English Operating environment Follow the rules and laws that apply wherever you are, and always turn off the unit whenever its use is prohibited or can cause interference or hazards. Only use the unit in its normal user position. Parts of the unit are magnetic. The unit can attract metal objects. Do not keep credit cards or other magnetic media near the unit. -
Page 45: Li-Ion Battery
English Li-Ion battery This product contains a Li-Ion battery. There is a risk of fire and burns if the battery pack is handled improperly. WARNING Danger of explosion if battery is incorrectly replaced. To reduce risk of fire or burns, do not disassemble, crush, puncture, short external contacts, expose to temperature above 60°... -
Page 46: Vehicles
English Vehicles Radio signals can affect electronic systems in motor vehicles (for example, electronic fuel injection, ABS brakes, automatic cruise control, air bag systems) that have been in- correctly installed or are inadequately protected. Contact the manufacturer or its repre- sentative for more information about your vehicle or any additional equipment. -
Page 47: Care And Maintenance
English • Run an antivirus program on your device before you launch newly-downloaded ap- plications and files. • Do not edit registry settings or modify the device’s operating system. Care and maintenance Your unit is a technically advanced product and should be treated with the greatest care. Negligence may void the warranty. -
Page 48: Warranty
Please note that this is a voluntary manufacturer’s warranty and provides rights in addi- tion to, and does not affect statutory rights of end-users. This guarantee does not apply if batteries other than DORO original batteries are used. Specifications Network bands (MHz) -
Page 49: Copyright And Other Notices
Doro reserves the right to revise this document or withdraw it at any time without prior notice. -
Page 50: Specific Absorption Rate (Sar)
Doro does not provide a warranty for or take any responsibility for the functionality, con- tent, or end-user support of third-party apps provided with your device. By using an app, you acknowledge that the app is provided as is. -
Page 51: Correct Disposal Of This Product
English The World Health Organization (WHO) has stated that current scientific information does not indicate the need for any special precautions when using mobile devices. If you are interested in reducing your exposure, they recommend you reduce your usage or use a hands-free accessory to keep the device away from your head and body. - Page 52 Doro 540X (1011) English Version 1.0 © 2017 Doro AB. All rights reserved. www.doro.com REV 17865 — STR 20170920...
Need help?
Do you have a question about the 540X and is the answer not in the manual?
Questions and answers