Table of Contents
Advertisement
Quick Links
Advertisement
Table of Contents

Related Manuals for Doro 5517


Summary of Contents for Doro 5517
- Page 1 Doro 5517 English...
- Page 3 The items supplied with your phone might vary depending on the soft- ware and accessories available in your region or offered by your service provider. You can obtain additional accessories from your local Doro deal- er. The supplied accessories provide the best performance with your phone.
-
Page 4: Table Of Contents
English Contents Congratulations on your purchase ............... 1 Get started..................... 1 Insert SIM card, memory card and the battery ........1 Charge the phone.................. 2 Get to know your phone ................3 Assistive functions................. 3 Turn the phone on and off ..............3 Start-up wizard .................. - Page 5 Main menu................... 41 Wallpaper.....................42 Text size ..................42 Idle display ...................42 Themes ..................42 LCD backlight..................42 Brightness ..................42 ® My Doro Manager ..................43 Create account ..................43 Log in/Log out ..................43 Options....................43 Sync. intervals ..................44 Account details ..................44 File manager....................44 Internet......................45 Use the web browser................46...
- Page 6 English Organiser...................... 47 Alarm ....................47 Calendar....................47 Daily reminder ..................48 Notes ....................49 More ......................49 FM radio ....................49 Torch.....................50 Calculator..................... 51 Games....................51 Weather......................52 Status ......................52 Additional functions ..................53 Display status symbols ...............53 Display main symbols .................53 Reset settings..................54 Safety instructions..................54 Network services and costs..............55 Operating environment ...............55 Medical units ..................55...
-
Page 7: Congratulations On Your Purchase
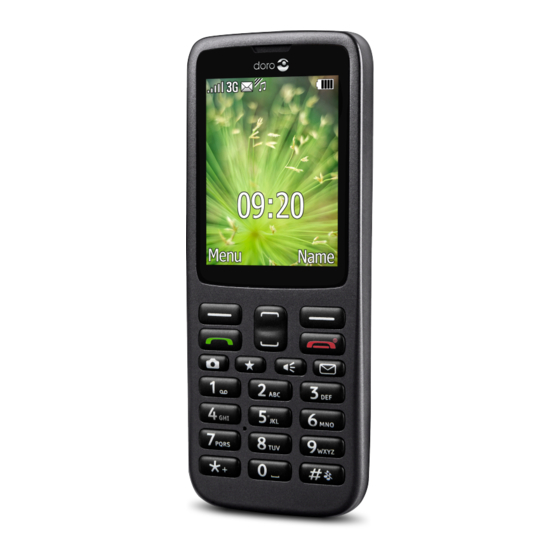
English Congratulations on your purchase Doro 5517 is an easy to use camera phone in a classic, bar style design. Separated keys and a large display make calling and texting easier. There are shortcut keys for the camera, favourite contacts, torch and mes- sages, and you can also easily send photos and videos, read e-mails or browse the internet. -
Page 8: Charge The Phone
English Insert the battery by sliding it into the battery compartment with the contacts facing downwards to the right. Replace the battery cover. IMPORTANT! This device accepts micro SIM or 3FF SIM card. Use of incompatible SIM cards may damage the card or the device, and may corrupt data stored on the card. -
Page 9: Get To Know Your Phone
English Save energy When you have fully charged the battery and disconnected the charger from the device, unplug the charger from the wall socket. Get to know your phone Assistive functions Use the symbols below to guide you through supporting sections in the manual. -
Page 10: Navigate The Phone
• Press Menu Phonebook -New contact- Add. To perform the example on your Doro 5517 you should do the following: Press Menu, scroll to Phonebook and press OK. Select -New contact- and press Add. Enter text Enter text manually Select character •... - Page 11 English Move the cursor within text • to move the cursor within the text. Upper case, lower case and numerals • Press # to choose between upper case, lower case and numerals. See Input mode, p.5. Change writing language Press and hold # for a list of available languages. Select language with and press OK to confirm.
-
Page 12: Volume Control
English Sentence case with predictive text UPPER CASE with predictive text lower case with predictive text Sentence case UPPER CASE lower case Numerals Volume control During a call • to adjust the sound volume. The volume level is indi- cated on the display. If you use a hearing aid or have hearing difficulties when using the tele- phone in a noisy environment, you can adjust the phone's audio settings, see Audio setup , p.40. -
Page 13: Phone Settings
English newer wireless technologies that have not been tested yet for use with hearing aids. To ensure that a specific hearing aid works well with this phone, test them together before making a purchase. The standard for hearing aid compatibility contains two types of ratings: •... - Page 14 English • Time format 12 hours or 24 hours. • Date format and select the desired date format. Press OK to confirm. Language The default language for the phone menus, messages, etc. is determined by the SIM card. You can change this to any other language supported by the phone.
- Page 15 English Phone lock The phone lock protects your phone from unwanted usage. If activated, phone is locked after restart and the phone code needs to be entered to unlock. Press Menu Settings Security Phone lock. Select On to enable, or Off to disable. Press OK to confirm.
-
Page 16: Calls
English Calls Make a call Enter the phone number including the area code. Delete with Clear. Press to make a call. Press Abort to cancel the call. Press to end the call. Tip: For international calls, always use + before the country code for best operation. -
Page 17: Speed Dial
English Options (left selection button) • Volume to adjust the volume. • Hold/Retrieve to hold/retrieve the current call. • End single call to end the current call (same as • New call to call another number (Conference). • Phonebook to search the phonebook. •... -
Page 18: Call Log
English Some networks accept calls to emergency numbers without a valid SIM card. Contact your service provider for more information. Call log Received, missed and made calls are saved in a combined call log. 20 calls of each type can be stored in the log. For multiple calls related to the same number, only the most recent call is saved. - Page 19 English Press OK to confirm. Answer mode Press Menu Settings Calls Answer mode. Select Any key On to be able to answer incoming calls by press- ing any button (exemption Press OK to confirm. Caller ID Display or hide your phone number on the recipient's phone when you call.
- Page 20 English • Unreachable to divert incoming calls if the phone is turned off or out of range. • No reply to divert incoming calls if unanswered. • If busy to divert incoming calls if the line is busy. • Cancel diverts to cancel all call divert settings. Press OK to confirm.
-
Page 21: Phonebook
English Note! The PIN2-code is needed to apply fixed dial. Contact your service provider to get the PIN2-code. Press Menu Settings Security Fixed dial: • Mode On to enable or Off to disable. • Fixed numbers Add and enter the first allowed number. Alternatively, select an entry and press Options Add, Edit or Delete. -
Page 22: Manage Phonebook Contacts
English Tip: For international calls, always use + before the country code for best operation. Press * twice for the international prefix +. Manage phonebook contacts Press Menu Phonebook. Select a contact, then press Options: • View to show details for the selected contact. Phone = stor- age set to Phone and SIM = storage set to SIM, see Phone-... -
Page 23: Phonebook Settings
English Press OK to confirm. Phonebook settings Owner number The phone number assigned to your SIM card is saved as Owner number if this is allowed by the card. Add numbers Press Menu Phonebook Owner number Empty Add. Enter name and number, see Enter text , p.4. -
Page 24: Ice (In Case Of Emergency)
English Press Menu Settings Phonebook Voice mail: Select Empty Add: • Phonebook to add a contact from the Phonebook. Press OK to confirm. • Manual and enter name and number. Press OK to confirm. To edit or delete an existing entry, select it and press Options Edit or Delete. -
Page 25: Assistance Button
English • Name: enter your name. • Birth: enter your date of birth. • Height: enter your height. • Weight: enter your weight. • Address enter your home address. • Language: enter your preferred language. • Insurance: enter your insurance provider and policy number. Contact 1:, Contact 2: and Doctor: •... -
Page 26: Make An Assistance Call
English Make an assistance call When help is needed, press and hold the assistance button for 3 seconds, or press it twice within 1 second. The assistance call begins after a delay of 5 seconds. In this time you can prevent a possible false alarm by pressing An assistance text message (SMS) is sent to all recipients. -
Page 27: Number List
English • On Normal to press and hold the button for approximately 3 seconds, or press it twice within 1 second. • On (3) to press the button 3 times within 1 second. • Off to disable the assistance button. Press OK to confirm. -
Page 28: Assistance Settings
English Note! You must write a message if you activate the SMS function. Assistance settings Confirm with "0" You can activate the Confirm with "0" function. This is especially recom- mended if there is a risk that the assistance call is answered by a voice mail or answering service. -
Page 29: Create And Send Picture Message (Mms)
English Press Add to add more recipients. Tip: You can modify the recipients by selecting one, press Options Edit/Delete/Delete all. When done, press Send. Note! If you choose to add multiple recipients, you will be charged for each recipient (maximum 10). For international calls, always use + before the country code for best operation. -
Page 30: Create And Send Voice Message
English Press Send to send. Create and send voice message A voice message uses the same technology as a picture message. Both you and the recipient must have subscriptions that support picture mes- sage. The settings for picture message are supplied by your service pro- vider and can be sent to you automatically via text message. -
Page 31: Inbox, Outbox And Sent
English From Options Add picture: • My pictures to select a file. • Take picture to use the camera to take a picture. You can also Add sound and Add video using the Options menu. Press Send to send. Switch between accounts If you create more than two e-mail accounts, you can switch between them. -
Page 32: Message Settings
English • Use address to display e-mail addresses contained in the message. • Options Save Create new or Update. • Options Send mail to write a new e-mail. • Use number to display all phone numbers contained in the message as well as the sender's number. •... - Page 33 English Memory status From SMS settings, select Memory status to display the memory space used on the SIM card and in the phone memory. Phone mem- ory can store up to 450 messages. Press Back to return. Storage From SMS settings, select Storage: •...
- Page 34 English plain alphabet characters, e.g. Î becomes I. Each message can contain 160 characters. From SMS settings, select Input method: • Automatic (default) to allow special characters. • GSM alphabet to convert any special character to plain alpha- bet characters. •...
- Page 35 English From MMS settings, select MMS profile. Select your service provider and press Options Activate. Add new MMS profile Follow the steps below if your service provider is not in the list. Contact your service provider for correct settings. From MMS profile, select Add: •...
- Page 36 Enables you to review and create e-mails using your personal or company e-mail account. In order to utilize the e-mail service on your Doro 5517 you need to have an already configured e-mail account such as Google Mail, Yahoo or Hotmail.
- Page 37 English • Enter Password. • Enter Account name. Select Check interval. • Off is default. • 5 min • 30 min • 1 hour • 2 hours Press OK to confirm. To edit or delete an existing entry, select it and press Options Edit/ Delete.
-
Page 38: Camera
English Press Menu Settings Messages Delivery report: Select On to enable, or Off to disable. Press OK to confirm. Delete Delete all messages or all within a folder. Press Menu Settings Messages Delete. Select Inbox, Outbox, Sent or Delete all Yes to delete all messages. -
Page 39: Video Camera
English Video camera To get sharp videos, wipe the lens clean with a dry cloth. Press Menu Camera Video camera. Press to start recording. Press to stop recording. Select Yes to save. Press Options: • Play • Send Send by MMS, see Create and send picture message (MMS), p.23. -
Page 40: Camera Settings
English • Storage to view pictures and videos on Phone or Memory card. • Delete to delete. Press Yes to confirm or No to return. • Use (picture only) Wallpaper to save as display background. • Use (picture only) Phonebook picture to save as phonebook contact. -
Page 41: Connectivity
English If you insert a compatible external memory (micro SD) card into your Doro 5517, you can change the default storage location, see Storage, p.28. This allows you to save more files on your device, like pictures and videos. Connectivity ®... -
Page 42: Internet Profile
Portable alarm button Doro 3500 The alarm button 3500 is a comfortable, small and discreet alarm trans- mitter that works with your Doro 5517. The alarm button 3500 allows you to initiate an assistance alarm by pressing the button. The alarm button is water-resistant according to the IP68 standards, which means that it can withstand continuous immersion in water. -
Page 43: Mobile Data, Data Counter And Data Roaming
Using data services can be costly. We recommend that you check your data rates with your service provider. Function on or off Restricts features like internet browser, Facebook, Connect & Care, ® Weather, My Doro Manager , MMS and e-mail. Select Off to avoid data charges. Press Menu Settings... -
Page 44: Network Setup
English Press OK to confirm. Data counter The data counter gathers traffic information from internet browser, ® Weather, My Doro Manager , MMS and e-mail. Press Menu Settings Connectivity Mobile data Data counter. • Sent. • Received. • Reset all. -
Page 45: Connect The Phone To A Computer
English Service selection • GSM service only. • 3G service only. • Automatic: switch between GSM and 3G for best service. IMPORTANT! If you set your phone to use GSM only or 3G only, you will not be able to make any calls, including emergency calls, or use other features requiring a network connection, if the selected network is unavailable. -
Page 46: Sound & Display
English Note! Computer instructions may vary depending on your operating system. See the documentation of your computer's operating system for more information. Sound & Display Note! Silent needs to be set to Off to access Tone setup, Volume, Alert type and Extra tone. Audio setup If you use a hearing aid or have hearing difficulties when using the device in a noisy environment, you can adjust the audio settings. -
Page 47: Silent
English Press OK to confirm. Silent Press Menu Settings Sound Silent. Select On to enable, or Off to disable. Press OK to confirm. Tip: From standby mode, press and hold shortcut button # to activate or deactivate silent mode. Alert type Select to use ringtone and/or vibration for incoming calls. -
Page 48: Wallpaper
English Wallpaper Press Menu Settings Display Wallpaper: • System to select predefined images. • User to select user defined images, see File manager, p.44. to display available wallpapers. Press OK to confirm. Text size You can adjust the text size for the menu and messages. Press Menu Settings Display. -
Page 49: My Doro Manager
Create an Doro Experience account to get the most out of your phone. Access the phone using any web browser, www.doro.com. Easily view and share your photos or videos. Note! You need to have Internet access to use most of the features in My ®... -
Page 50: Sync. Intervals
Information to view more information. Press OK to confirm. Sync. intervals You can select different synchronisation intervals. Press Menu Settings My Doro Manager Sync. intervals: • Manual to synchronise manually. No automatic synchronising. • Every 15 minutes to synchronise automatically every 15 minutes. -
Page 51: Internet
English Supported video format: AVI/MP4/3GPP. Only playback is possible. Press Menu Settings File manager. Select Phone/Memory card Open. Select a folder, eg Photos and press Open. Select a file and press Options: • Play (audio/video/music), press to Play or to Stop. •... -
Page 52: Use The Web Browser
English Use the web browser Press Menu Internet Browser. ™ Press Accept to accept the End User License for using the Opera Mobile browser. If not, press Exit. Navigate the web browser • In order to navigate the web browser, scroll up and down with the buttons , use the Camera button to scroll to the left, and... -
Page 53: Organiser
English Add browser speed dials Use the navigation buttons to select + and press Add. Press Edit to enter a web address or use the navigation buttons to scroll the list of visited pages and select Done. Tip: Select the browser speed dial and press Open to view. Organiser Organizer menu contains: Daily reminder... -
Page 54: Daily Reminder
English Enter subject, see Enter text , p.4. When done, press OK. Options Press Menu Organiser Calendar Options: • Select View to show tasks for the selected date. • Select Jump to date and enter the date. Press OK to confirm. View all Press Menu Organiser... -
Page 55: Notes
English Notes Press Menu Organiser Notes Add. Enter your note using the keypad, see Enter text , p.4. Press OK to confirm. Tip: For more options select an existing entry, and press Options View, Edit, Delete or Delete all. More More menu contains: FM radio Torch... -
Page 56: Torch
English Switch off • Press Menu FM radio Options Switch off. Tip: Disconnecting the headset will also turn off the radio. Loudspeaker Press Menu FM radio Options Loudspeaker Select On. to adjust the sound volume. To turn off, select Off. Channel list (editing the channel list) Press Menu FM radio Options... -
Page 57: Calculator
English Access via the shortcut button The torch is lit as long as the button is pressed. Press and hold shortcut button to turn on the torch. Release to turn off. Access via the main menu The torch is lit according to your choices in Settings. Press Menu More Torch. -
Page 58: Weather
English • Continue to continue game. • Start game to start a new game. • Game level to select difficulty level. • Best grades to view your best results. Press Back to return or Reset to reset the scores. • Help to view instructions for the game. -
Page 59: Additional Functions
English • Press Menu Status. to scroll the list. Press Back to return to standby mode. Additional functions Display status symbols Signal strength No network coverage Ring only Data transmission Ring + vibration Alarm active Vibration only Battery level Silent Call divert activated Bluetooth on, visible to Roaming (in other network) -
Page 60: Reset Settings
English Missed call. Press Read to Searching see the missed calls. vCard message Call on-hold SOS calls only Volume control Processing, please wait Assistance button call SMS/MMS unread SMS/MMS read SMS/MMS unsent SMS/MMS sent E-mail without and with at- E-mail without and with at- tachment unread tachment read Reset settings... -
Page 61: Network Services And Costs
English Network services and costs Your device is approved for use on the WCDMA 900/2100 MHz, GSM 850/900/1800/ 1900 MHz networks. To use the device, you need a subscription with a service provider. Using network services may result in traffic costs. Some product features require sup- port from the network, and you may need to subscribe to them. -
Page 62: Li-Ion Battery
English Follow the restrictions that apply to the use of radio equipment near places where fuel is stored and sold, chemical factories and places where blasting is in progress. Areas with risk for explosion are often – but not always – clearly marked. This also ap- plies to below decks on ships;... -
Page 63: Vehicles
English availability. Please note that functionality may be reduced or prevented in certain envi- ronments such as building interiors or areas adjacent to buildings. CAUTION Do not use GPS functionality in a manner which causes distraction from driving. Vehicles Radio signals can affect electronic systems in motor vehicles (for example, electronic fuel injection, ABS brakes, automatic cruise control, air bag systems) that have been in- correctly installed or are inadequately protected. -
Page 64: Care And Maintenance
English • Do not visit untrusted websites. • Delete suspicious messages or email from unknown senders. • Set a password and change it regularly. • Deactivate wireless features, such as Bluetooth, when not in use. • If the device behaves abnormally, run an antivirus program to check for infection. •... -
Page 65: Warranty
As a matter of precaution, we recommend disconnecting the charger during a thunderstorm. Batteries are consumables and are not included in any guarantee. This guarantee does not apply if batteries other than DORO original batteries are used. Specifications Network:... - Page 66 Doro does not provide a warranty for or take any responsibility for the functionality, con- tent, or end-user support of third-party apps provided with your device. By using an app, you acknowledge that the app is provided as is.
-
Page 67: Hearing Aid Compatibility
226 43 Lund, Sweden. To be valid, such a request must be made within three (3) years from the date of the distribution of this product by Doro AB, or in the case of code li- censed under the GPL v3 for as long as Doro AB offers spare parts or customer support for this product model. -
Page 68: Correct Disposal Of This Product
English Head SAR: 1.029 W/kg Body SAR: 1.735 W/kg During normal use, the SAR values for this device are usually well below the values sta- ted above. This is because, for purposes of system efficiency and to minimize interfer- ence on the network, the output power of your mobile device is automatically decreased when full power is not needed for the call. -
Page 69: Declaration Of Conformity
Declaration of Conformity Doro hereby declares that Doro 5517 conforms to the essential requirements and other relevant regulations contained in the Directives 1999/5/EC (R&TTE) and 2011/65/EU (RoHS). A copy of the Declaration of Conformity is available at www.doro.com/dofc. - Page 70 Model: DFB-0070 Doro 5517 (2011) English Version 1.0 1588 © 2016 Doro AB. All rights reserved. www.doro.com REV 16281 — STR 20160801...
Need help?
Do you have a question about the 5517 and is the answer not in the manual?
Questions and answers