
Related Manuals for Baldor SERIES 5


Summary of Contents for Baldor SERIES 5
- Page 1 ADJUSTABLE SPEED DRIVE SERIES 5 MICRO INVERTER NEMA-1 / IP-40 Installation and Operation Manual For Catalog Number - ID5601- EO MN785...
-
Page 2: Table Of Contents
Electrical Connections ....................15 Important Application Information ..................17 Setting Selectable Jumpers .....................19 Trimpot Adjustments ......................21 Drive Operation........................24 Pilot Light and Diagnostic LED’s..................25 10 Troubleshooting .......................26 Baldor District Offices ......................31 Limited Warranty....................Back Cover Tables Page Standard Features ......................4 Performance Features .....................4 Protection Features......................5 Selectable Jumpers ......................5... -
Page 3: Introduction
Stop-Reverse Switch is required for Manual Start This product complies with all CE directives pertinent at the time of manufacture. Contact your local Baldor District Office for Declaration of Conformity. Installation of a CE approved RFI filter is required. Additional shielded cable and/or AC line cables may be... -
Page 4: Standard Features
TABLE 1 - STANDARD FEATURES Feature Description Does not require programming. Uses Simple to Operate trimpots and jumpers which are factory set for most applications. Controls 208 – 230 Volt AC, 50 & 60 Hz, Dual AC Line Voltage (115 or 208/230 Volt AC 3-phase motors from 115 or 208/230 Volt Operation) AC line. -
Page 5: Protection Features
TABLE 3 - PROTECTION FEATURES Feature Description Provides motor overload protection which Motor Overload (I t) with RMS Current Limit prevents motor burnout and eliminates nuisance trips*. Eliminates harmful inrush AC line current Electronic Inrush Current Limit (EICL™) during startup. Shuts down the drive if a short circuit Short Circuit occurs at the motor (phase-to-phase). -
Page 6: Optional Accessories
TABLE 6 - OPTIONAL ACCESSORY Description Catalog No. Forward-Stop-Reverse Switch: Provides motor reversing, stop, and manual ID5FRS-2 start functions. TABLE 7 - ELECTRICAL RATINGS AC Line Input Output Net Weight Fuse or Volts AC Maximum Voltage Maximum Maximum lbs. Catalog Circuit 50/60 HZ, Current-... -
Page 7: General Performance Specifications
TABLE 8- GENERAL PERFORMANCE SPECIFICATIONS Factory Description Specification Setting 115 Volt AC Line Input Voltage Operating Range (Volts AC) 115 (±15%) ── 208 (-15%) / 208/230 Volt AC Line Input Voltage Operating Range (Volts AC) ── 230 (+15%) Maximum Load (% Current Overload for 1 Minute) ──... -
Page 8: Safety Notice
SAFETY NOTICE WARNING - STATEMENT INDICATES A POTENTIALLY HAZARDOUS SITUATION WHICH, IF NOT AVOIDED, COULD RESULT IN INJURY OR DEATH. CAUTION - Statement indicates a potentially hazardous situation which, If not avoided, could result in damage to property. Note - Additional information that is not critical to the installation or operation. WARNING! READ ALL SAFETY WARNINGS, ON PAGE 8, BEFORE USING THE DRIVE. - Page 9 SAFETY NOTICE(Continued) WARNING! HIGH VOLTAGE IS PRESENT IN THIS DRIVE. DISCONNECT MAIN POWER BEFORE MAKING CONNECTIONS TO THE DRIVE. THE COVER MUST BE PROPERLY INSTALLED AFTER ALL SETUP, CONNECTIONS, AND ADJUSTMENTS ARE COMPLETE. IT REDUCES ELECTRICAL SHOCK HAZARD. FAILURE TO OBSERVE THIS WARNING COULD RESULT IN ELECTRICAL SHOCK OR ELECTROCUTION.
- Page 10 SAFETY NOTICE (Continued) CAUTION! 1. Some motors have low speed characteristics, which cause overheating and winding failure under light load or no load conditions. If the motor is operated in this manner for an extended period of time, it is recommended that the unloaded motor current be checked from 2 - 15 hz (60 - 450 rpm) to ensure motor current does not exceed the nameplate rating.
-
Page 11: Quick-Start Instructions
2 QUICK-START INSTRUCTIONS Important: You must read these simplified instructions before proceeding. These instructions are to be used as a reference only and are not intended to replace the details provided herein. You must read the “ALL” Safety Warnings on, page 8, before proceeding. Note: This drive contains bus capacitors which must be reconditioned if the drive has been in storage for over 1 year. -
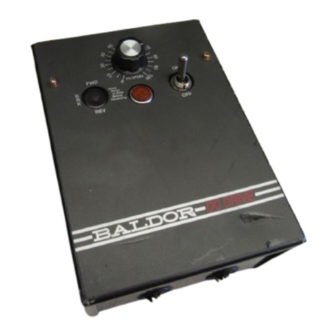
Page 12: Cover Layout
“W”), as shown in Figure 1, on page 10. (Load reactors may be required for cable lengths over 100 ft. (30 m) – contact the local Baldor District Office). See Section 4.3, on page 16. 2.6 JUMPER SETTINGS: All jumpers have been factory set for most applications, as shown in Figure 3, on page 10. -
Page 13: Drive Layout
FIGURE 3 – DRIVE LAYOUT... -
Page 14: Mechanical Specifications
FIGURE 4 – MECHANICAL SPECIFICATIONS (INCHES/MM) -
Page 15: Mounting Instructions
MOUNTING INSTRUCTIONS The drive is designed with a NEMA-1 / IP-40 enclosure for indoor use. It is recommended that the drive be mounted vertically on a flat surface with adequate ventilation. Leave enough room below the drive to allow for AC line, motor connections, and any other wiring that is required. Care should be taken to avoid extreme hazardous locations where physical damage can occur. -
Page 16: Ac Line Input, Motor, And Ground Connections
The rated AC line voltage of the drive must FIGURE 5 – AC LINE INPUT, MOTOR match the actual AC line input voltage AND CONNECTIONS setting of Jumper J1. The drive is factory set for 208/230 Volt AC line input (Jumper J1 not installed). -
Page 17: Important Application Information
Do not use motor if the motor current exceeds the nameplate rating. 2. It Is Recommended that the Drive be used with Inverter Duty or TENV Motors. Note: Some fan-cooled motors can be used over a wider speed range. Consult your Baldor District Office for details. -
Page 18: Maximum Allowed Motor Torque Vs. Speed
FIGURE 7 – MAXIMUM ALLOWED MOTOR TORQUE SPEED INVERTER DUTY AND TENV MOTORS MAXIMUM ALLOWED FAN COOLED TEFC AND MOTOR OPEN VENTILATED MOTORS TORQUE % 0 10 20 30 40 50 60 70 80 90 100 MOTOR SPEED (%) external cooling FIGURE 8 - OPEN VENTILATED MOTOR provided,... -
Page 19: Setting Selectable Jumpers
SETTING SELECTABLE JUMPERS WARNING! ELECTRICAL SHOCK CAN CAUSE SERIOUS OR FATAL INJURY. BE SURE THAT ALL POWER IS DISCONNECTED FROM DRIVE BEFORE THE COVER IS OPENED. OPENING OF THE COVER IS REQUIRED TO MAKE INSTALLATION CONNECTIONS. ELECTRICAL SHOCK CAN CAUSE SERIOUS OR FATAL INJURY IF THE COVER IS REMOVED AND POWER IS STILL APPLIED. -
Page 20: Automatic Or Manual Start And Reset Selection (Jumper J3)
6.3.1 Manual Start and Reset*: In Manual Start Mode, the drive must be manually restarted, after a fault has cleared, using the optional Forward-Stop-Reverse Switch. If a Short Circuit or I t Fault occurs, the drive can be restarted by setting either the On/Off AC Line Switch to the “OFF”... -
Page 21: Trimpot Adjustments
For 120 Hz output with 60 Hz motor, set Jumper J4 to the “2X” position and be sure Jumper J5 is set to the “60Hz” position. For 100 Hz output with 50 Hz motor, set Jumper J4 to the “2X” position and set Jumper J5 to the “50Hz” position. -
Page 22: Maximum Speed Trimpot (Max) Range
FIGURE 17 - MAXIMUM SPEED 7.2 MAXIMUM SPEED (MAX): Sets the maximum TRIMPOT RANGE speed of the motor. The MAX Trimpot is factory set for 100% of frequency setting. For a lower maximum speed setting, rotate the MAX Trimpot, counterclockwise. For a higher maximum speed setting, rotate the MAX Trimpot clockwise. -
Page 23: Current Limit Trimpot (Cl) Range
The slip compensation may be adjusted as follows: A. Connect an AC RMS ammeter in series with one motor phase. B. Run the motor and set the unloaded speed to approximately 50% (900 RPM on 4-pole 1500/1725 RPM motors). C. Using a tachometer, record the unloaded speed. D. -
Page 24: Drive Operation
The current limit may be adjusted as follows: A. Connect an AC RMS ammeter in series with one motor phase. B. Set the CL Trimpot fully counterclockwise. C. Adjust the speed setting to 30%. D. Lock the motor shaft and adjust the CL Trimpot to 160% of the motor nameplate rated current. -
Page 25: Pilot Light And Diagnostic Led's
8.2.2 Drive Set for Manual Start and Reset *:. In Manual Start Mode, the drive must be manually restarted after a fault has cleared, using the optional Forward-Stop- Reverse Switch. If a Short Circuit or I t Fault occurs, the drive must be restarted by setting either the On/Off AC Line Switch to the “OFF”... -
Page 26: Troubleshooting
TROUBLESHOOTING WARNING! HIGH VOLTAGE IS PRESENT IN THIS DRIVE. DISCONNECT MAIN POWER BEFORE MAKING CONNECTIONS TO THE DRIVE. THE COVER MUST BE PROPERLY INSTALLED AFTER ALL SETUP, CONNECTIONS, AND ADJUSTMENTS ARE COMPLETE. IT REDUCES ELECTRICAL SHOCK HAZARD. FAILURE TO OBSERVE THIS WARNING COULD RESULT IN ELECTRICAL SHOCK OR ELECTROCUTION. -
Page 27: Troubleshooting Guide
TABLE 12 - TROUBLESHOOTING GUIDE Symptom Possible Cause Suggested Solution See Table 7, on page 6, for the The line fuse or circuit breaker correct line fuse circuit installed is the incorrect rating. Line fuse blows or breaker rating. circuit breaker trips. Check and replace defective Drive or Motor Failure. -
Page 28: Fault Recovery And Setting Drive
TABLE 13 - FAULT RECOVERY AND RESETTING THE DRIVE* Fault Automatic Start Mode (Factory Setting) Drive will automatically start after the bus voltage returns Undervoltage to the operational level or when the drive is first turned on (power up). Drive will automatically start after the bus voltage returns Overvoltage to the operational level. - Page 29 - Notes -...
- Page 30 - Notes -...
-
Page 31: Baldor District Offices
BALDOR DISTRICT OFFICES UNITED STATES MICHIGAN TEXAS CHINA ARIZONA DETROIT HOUSTON SHANGHAI JIAHUA BUSINESS CENTER PHOENIX 33782 STERLING PONDS BLVD. 4647 PINE TIMBERS ROOM NO. A-8421 4211 S 43RD PLACE STERLING HEIGHTS, MI 48312 SUITE # 135 808 HONG QIAO ROAD... - Page 32 LIMITED WARRANTY For a period of 2 years from the date of original purchase, Baldor will repair or replace without charge, controls which our examination proves to be defective in material or workmanship. This warranty is valid if the unit has not been tampered with by unauthorized persons, misused, abused, or improperly installed and has been used in accordance with the instructions and/or ratings supplied.
Need help?
Do you have a question about the SERIES 5 and is the answer not in the manual?
Questions and answers