Hach DR 2800 User Manual
Hide thumbs
Also See for DR 2800:
- User manual (126 pages) ,
- Instruction sheet (4 pages) ,
- Procedures manual (814 pages)

Related Manuals for Hach DR 2800


Summary of Contents for Hach DR 2800
- Page 1 Catalog Number DOC022.53.00720 DR 2800 USER MANUAL September 2005, Edition 1 © Hach Company, 2005. All rights reserved. Printed in the U.S.A. te/dk...
- Page 2 Visit us at www.hach.com...
-
Page 3: Table Of Contents
Table of Contents Section 1 Specifications ......................5 Section 2 General Information ....................7 2.1 Safety Information ........................7 2.1.1 Use of Hazard Information ....................7 2.1.2 Precautionary Labels ......................7 2.1.3 Class 1 LASER ........................8 2.2 Overview of Product/Function ..................... 8 Section 3 Installation ......................9 3.1 Unpacking the Instrument ...................... - Page 4 Table of Contents 5.5.2 Selecting the Measuring Range ..................40 5.5.3 Selecting the Chemical Evaluation Form ................40 5.5.4 Setting Basic Test and Sample Data Settings ..............41 5.5.5 Sample Blank ........................42 5.5.6 Updating a Barcode Test ....................42 Section 6 Advanced Operations ..................47 6.1 User Programs ..........................47 6.1.1 Programming a New User Method ...................48 6.1.2 Selecting a User Program ....................56...
-
Page 5: Section 1 Specifications
10 to 40 °C (50 to 104 °F), max. 80% relative humidity (non-condensing) Storage Requirements –40 to 60 °C (–40 to 140 °F) max. 80% relative humidity (non-condensing) General Specifications DR 2800: 15VDC/30VA (output) External power supply: 100–240 VAC/50-60 Hz input Power Requirements Lithium battery pack,11.1 V, 4.4 Ah, rechargeable... - Page 6 Visit us at www.hach.com...
-
Page 7: Section 2 General Information
Section 2 General Information 2.1 Safety Information Please read this entire manual before unpacking, setting up, or operating this equipment. Pay attention to all danger and caution statements. Failure to do so could result in serious injury to the operator or damage to the equipment. To ensure that the protection provided by this equipment is not impaired, do not use or install this equipment in any manner other than that specified in this manual. -
Page 8: Class 1 Laser
Stored Programs (pre-installed tests), Barcode Programs, User Programs, Favorite Programs, Single Wavelength Mode, Multi-Wavelength Mode, and Time Course Mode. The DR 2800 Spectrophotometer provides digital readouts in direct concentration units, absorbance, or percent transmittance. When a user-generated or programmed method is selected, the on-screen menus and prompts direct the user through the test. -
Page 9: Section 3 Installation
Installation CAUTION Only qualified personnel should conduct the tasks described in this section of the manual. 3.1 Unpacking the Instrument The DR 2800 Spectrophotometer comes packaged with the following items: • DR 2800 Spectrophotometer • External power supply with country-specific adapter plugs •... -
Page 10: Power Connections
Adapter Plug Lock/Release Button Power Supply Power Supply with Adapter Plug Installed 3.4 Battery Power The DR 2800 can also be powered using an optional lithium battery pack. Refer to section 7.2 on page 74 for more information on battery replacement and charging. - Page 11 Installation Figure 2 Interfaces On/Off Switch Cover USB Type B for PC to DR 2800 connection USB Type A: for printer, USB stick, or keyboard External Power Supply Socket...
-
Page 12: Cell Compartments, Cell Adapters, Light Shield, And Protective Cover
Installation 3.6 Cell Compartments, Cell Adapters, Light Shield, and Protective Cover 3.6.1 Cell Compartments and Adapters The DR 2800 has two cell compartments (Figure 3). Cell Compartment #2 uses adapters (Figure 4) to accommodate different cell types. Only one cell type at a time can be used for a measurement. -
Page 13: Installing Cell Adapters
Installation Figure 4 Cell Adapters Adapter A (Cat. No. LZV583): 10 mm square cell adapter Adapter B (Cat. No. LZV585): 1 inch Pour-Thru and multi-path adapter Adapter C (Cat. No. LZV584): 1 inch round cell adapter 3.6.2 Installing Cell Adapters 1. - Page 14 Installation Figure 5 Installing a Cell Adapter...
-
Page 15: Using The Light Shield For Tntplus Or Test 'N Tube Measurements
Cell Compartment #1. The Light Shield is required only when using Test ‘N Tube or TNTplus vials. The DR 2800 is shipped with the Light Shield installed. Remove the Light Shield before using Cell Compartment #2. The Light Shield... -
Page 16: Using The Protective Cover For Field Measurements
Installation 3.6.4 Using the Protective Cover for Field Measurements The Protective Cover (Figure 8) prevents bright light and rain from interfering with sample measurements. Use the Protective Cover when both of the following conditions occur: 1. Tall cells (multi-path or 25-mL sample cells) are used in Cell Compartment #2 (these cells prevent the sliding door from closing). - Page 17 Installation 2. Press the Protective Cover lightly into the correct position until the cell compartment is completely sealed and the cover cannot slip off. Figure 9 Protective Cover Installed...
- Page 18 Visit us at www.hach.com...
-
Page 19: Section 4 Start Up
20 seconds before switching the instrument on again, otherwise you may damage the electronic and mechanical systems. 4.2 Language Selection The DR 2800 Spectrophotometer software includes several language options. The first time the instrument is powered on, the language selection screen will appear. - Page 20 Start Up If the instrument detects any deviation relative to the last calibration, it is recommended to perform a system check. 1. Remove the cell from the cell compartment, if present. Close the lid and press START The system check is carried out (duration approximately 6 minutes).
-
Page 21: Section 5 Standard Operations
Section 5 Standard Operations 5.1 Getting Started 5.1.1 Tips for Using the Touch Screen The entire screen is touch-activated. To make a selection, press the screen with a fingernail, fingertip, pencil eraser, or a stylus. Do not press the screen with a sharp object, such as the tip of a ball point pen. -
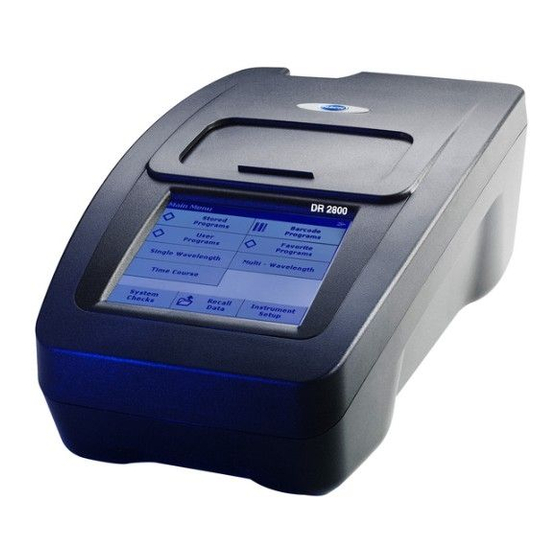
Page 22: Main Menu
Stored programs are pre-programmed methods that make use of reagents, cell tests, and pipette tests. STORED PROGRAMS BARCODE PROGRAMS Refer to the DR 2800 Procedure Manual for step-by-step procedures for analyses using stored programs. User programs make "made to measure analysis" possible: Users can program methods they have developed themselves USER PROGRAMS Stored methods can be saved as user programs. -
Page 23: Instrument Setup Mode
Standard Operations 5.2 Instrument Setup Mode 1. Select in the Main Menu. INSTRUMENT SETUP A number of options are displayed to configure the basic instrument settings. 5.2.1 Setting the Operator ID Use this option to enter up to 30 sets of operator initials (up to five characters each) into the instrument. -
Page 24: Setting The Sample Id
Standard Operations 5.2.2 Setting the Sample ID Use this option to enter up to 30 Sample Identification tags (up to 13 characters each) into the instrument.Sample IDs can be used to specify the sample location or other sample specific information. 1. -
Page 25: Setting The Date And Time
Standard Operations 5.2.3 Setting the Date and Time 1. From Instrument Setup, press DATE & TIME 2. The date and time are subdivided over a number of fields. Press the appropriate field and use the arrow keys to change the highlighted value. 3. -
Page 26: Printer And Pc Communications
Standard Operations 2. Select one of the options under Standby mode to set the length of the idle period that can elapse before the instrument switches to the Standby mode. Press Note: In Standby mode, the instrument backlight is turned off. To return the instrument to active operation, touch anywhere on the display. -
Page 27: Setting Security Options (Password Protection)
Standard Operations 5.2.6.2 Printing Data 1. From the Main Menu, press RECALL DATA 2. Select the data source, where the data to be printed are stored. 3. Select the data record that is to be printed from this list. 4. Press the icon to send the data (table, graph) PRINTER immediately to the printer. -
Page 28: Storing, Recalling, Sending And Deleting Data
Standard Operations 5.2.7.1 Deleting or Changing a Password 1. From Instrument Setup, press PASSWORD 2. Use the alphanumeric keypad to enter the former Password and press to confirm. 3. Press SET PASSWORD 4. Press to deactivate the former Password and return back to the Password menu. - Page 29 Standard Operations 5.3.1.2 Recalling Stored Data from the Data Log 1. From the Main Menu, press RECALL DATA 2. Press . A listing of the stored data is displayed. DATA LOG 3. Press FILTER: ON/OFF 4. The function Filter Settings is used to search for specific items. 5.
-
Page 30: Time Course
Standard Operations 5.3.1.4 Deleting Stored Data from the Data Log 1. From the Main Menu, press RECALL DATA 2. Press > and then DATA LOG OPTIONS DELETE 3. Activate Single Point or Filtered data or All data and press Note: The number in parenthesis is the total number of data sets assigned to this selection. - Page 31 Standard Operations 5.3.2.2 Recalling Stored Data from Time Course 1. From the Main Menu, press . Select RECALL DATA TIME to display the required data. If the program is already COURSE running, press > > OPTIONS MORE RECALL DATA 2. Press to view data in a graph or table.
- Page 32 Standard Operations 5.3.2.3 Sending Data from Time Course Option1 The files will be automatically sent as CSV files (Comma Separated Value) to a ”TCData“ (Time Course Data) file, which can be processed using a spreadsheet program. The file name will be formatted as: ”TCData_X.csv”...
-
Page 33: Stored Programs
Standard Operations 5.4 Stored Programs The DR 2800 Spectrophotometer contains more than 200 programmed procedures that you can access through the Stored Programs menu. 5.4.1 Selecting a Stored Program 1. From the Main Menu, press to view an STORED PROGRAMS alphabetical list of stored programs with program numbers. -
Page 34: Using Program Timers
Standard Operations Table 3 Stored Program Options (continued) Options Description A corrective dilution factor can be entered in order to take account of certain properties. The number entered at the dilution factor prompt will be multiplied by the result to compensate for Dilution Factor Off/On the adjustment. -
Page 35: Setting The Dilution Factor
Standard Operations A general purpose timer is also available in many programs. When the timer icon is visible, press the icon and select GENERAL TIMER A new screen will appear. Enter the length of the timed interval and press to start the timer. The timer will beep when the timed interval ends. -
Page 36: Running A Standard Adjust
Standard Operations 5.4.5 Running a Standard Adjust The Standard Adjust functions allows the calibration curve for a stored program to be adjusted based on analysis of a known standard solution. The Accuracy Check section of written procedures often suggests a standard solution concentration for this purpose. -
Page 37: Running A Reagent Blank
Standard Operations 5.4.7 Running a Reagent Blank Some of the stored tests/methods include the "Reagent Blank" function. This enables the reagent blank value to be measured and then taken into account in calculating the measurement result. Measurement/Analysis of a Reagent Blank 1. -
Page 38: Analysis Of Samples
Standard Operations 5.4.8 Analysis of Samples 1. Press and select a program. STORED PROGRAMS 2. Insert the blank cell into the cell holder. 3. Press ZERO 4. Remove zero solution cell and insert sample cell into the cell compartment. Press .The result will be displayed. -
Page 39: Barcode Programs
Standard Operations 5.5 Barcode Programs A special barcode reader in the cell compartment automatically reads the coded information on each TNTplus™ (13-mm) vial while the vial completes a single rotation (Figure 10). The instrument uses the barcode identification to automatically set the correct wavelength for the analysis and calculates the result immediately with stored calibration information. -
Page 40: Selecting The Measuring Range
Standard Operations 3. Insert the sample cell or blank (depending on the working procedure) into the cell compartment. The measurement process and the result are displayed automatically. To evaluate other TNTplus cell tests and other parameters, place the prepared cell in the cell compartment and read the result. 5.5.2 Selecting the Measuring Range Some tests can be used for different measuring ranges. -
Page 41: Setting Basic Test And Sample Data Settings
Standard Operations 2. In the result display, press > > OPTIONS MORE CHEMICAL FORM 3. A list of available evaluation forms appears. Select the default setting. Press to confirm. 4. Press and then EDIT SAVE The current result and all further measurements will be displayed in the new chemical form. -
Page 42: Sample Blank
Standard Operations 5.5.5 Sample Blank Turbidity and color in the sample matrix can falsify the results of a photometric analysis. The interference factors come from the sample or are created by reactions with the reagents. The influence of turbidity and/or color can be eliminated or reduced by taking a sample blank reading. - Page 43 Standard Operations Enter the Name Check the working procedure in advance to determine whether this point needs to be changed. 1. Highlight the line containing Name and press . Use the EDIT alphanumeric keypad to enter the name indicated in the working procedure.
- Page 44 Standard Operations Enter the Variables (Factors, Wavelength and Conversion Factors) For detailed information on entering Variables, see Appendix B Free Programming on page Check the working procedure in advance to determine whether this point needs to be changed. 1. Activate the Variables line in the data overview and press EDIT 2.
- Page 45 Standard Operations Option 2: Manual Check/Revision of Test Data If an incorrect entry was made during the data update and is not recognized via the barcode of the cell (e.g. an incorrect measuring range), another option is available for checking, and if necessary revising, the test data.
- Page 46 Visit us at www.hach.com...
-
Page 47: Section 6 Advanced Operations
Section 6 Advanced Operations 6.1 User Programs User programs provide the opportunity of performing "made to measure" analyses. The User Programs database is empty when the instrument leaves the factory and is used to accommodate programs created by users for specific needs. Here are a few examples of entries: •... -
Page 48: Programming A New User Method
Advanced Operations 6.1.1 Programming a New User Method All input steps and their significance and options are explained in the following sections. 1. From Program Options, select New. Program Number: Specific test number, with which the program can subsequently be called up from the selection list in the User Programs menu or the Favorites menu. - Page 49 Advanced Operations 6.1.1.1 Single Wavelength Programming Selecting Units of Measure Select the required unit from the list and press NEXT Note: Units of measure not included in this list can be added in the edit program under Select PROGRAM OPTIONS>EDIT. UNITS>EDIT>NEW There is no “/”...
- Page 50 Advanced Operations 6.1.1.2 Multi-wavelength Programming Units of Measure Select the required unit from the list and press NEXT Note: A user-specific unit that is not included in this list can be added in the edit program under PROGRAM OPTIONS>EDIT Absorbance Formula The Absorbance Formula menu is used to define the wavelengths and the coefficients used in the formula.
- Page 51 Advanced Operations Press a factor key and use the alphanumeric keypad to enter a factor. If the formula includes more than one factor, press another factor key and enter another factor, and repeat until all the factors have been entered. Press .
- Page 52 Advanced Operations Calibration by Entering Calibration Values 1. Select the Enter Values and press NEXT 2. To enter the standard concentrations and corresponding absorbance values in the displayed table, press the "+" symbol. Use the alphanumeric keypad to enter the values. Note: For faster data entry, enter all the concentration values, then all the absorbance values, or vice versa.
- Page 53 Advanced Operations Calibration by Reading Standards 1. Select Read Standards and press NEXT 2. To enter the standard concentrations in the displayed table, press the "+" symbol. Use the alphanumeric keypad to enter the standard concentration. Press 3. Press the " "...
- Page 54 Advanced Operations Calibration by Entering the Formula 1. Select Enter Formula and press NEXT 2. Press the formula key (key that contains an equation). A list of available formulas (linear and 2nd and 3rd order polynomial) is displayed. Up to 4 coefficients can be entered, depending on the selected formula.
- Page 55 Advanced Operations Upper and Lower limits of the Measuring Range Enter a maximum (upper) and minimum (lower) measurement value to define when an error message is displayed for readings above the upper limit or below the lower limit. 1. Highlight the appropriate line in the overview of the program data and press EDIT 2.
-
Page 56: Selecting A User Program
Advanced Operations 6.1.2 Selecting a User Program 1. From the Main Menu, press to view an USER PROGRAMS alphabetical list of user programs with program numbers. The User Programs list will appear. Note: Highlight the selection by pressing it or press SELECT BY to search for the program by number. -
Page 57: Standard Additions-Monitoring/Checking Results
Does the test need a specific sample temperature? • Is the sample pH in the correct range? 2. Consult the procedure in the DR 2800 Procedure Manual to answer these questions. 3. Follow the instructions in Troubleshooting on page 79 to check the performance of the instrument. -
Page 58: Using The Standard Addition Option
Advanced Operations 6.2.1 Using the Standard Addition Option 1. From the Main Menu, select . Select the STORED PROGRAMS required programs. 2. Press START 3. Analyze a sample without added standard solution in accordance with the instructions in the Procedures Manual. When the measurement is complete, leave the sample cell in the cell holder. - Page 59 Advanced Operations 7. Press the keys to enter the standard addition volumes. Use the alphanumeric keypad to enter the new data and press 8. A table of the reading is displayed. • The first column shows the standard addition volume. 0 mL stands for a sample containing no added standard.
-
Page 60: Single Wavelength Mode
Advanced Operations 6.3 Single Wavelength Mode The Single Wavelength Mode can be used in three ways. For sample measurements at a single wavelength, the instrument can be programmed to measure the absorbance, % transmittance, or concentration of the analyte. 6.3.1 Setting Up Single Wavelength Mode 1. -
Page 61: Performing A Single Wavelength Measurement
Advanced Operations Setting the Concentration Factor 1. From the Options menu, press CONCENTRATION FACTOR: . Select On to activate this feature. 2. Press the key and use the alphanumeric keypad to FACTOR enter the factor by which absorbance readings are to be multiplied. -
Page 62: Multi-Wavelength Mode
Advanced Operations 6.4 Multi-Wavelength Mode In the multi-wavelength mode, absorbance values can be measured at up to four wavelengths and the results can be mathematically processed to obtain sums, differences and relationships. 6.4.1 Setting the Reading Mode at Different Wavelengths 1. - Page 63 Advanced Operations Absorbance Formula: 1. Press ABSORBANCE FORMULA 2. The formula selected in the top key determines the number of wavelength and coefficient keys that will appear below. To change the absorbance formula, press the top key, select a formula from the displayed list, and press OK. When a new formula is selected, the number of variables changes to match.
-
Page 64: Performing A Measurement In The Multi-Wavelength Mode
Advanced Operations Selecting the Concentration Resolution: 1. From the Options menu, press CONCENTRATION RESOLUTION 2. Select the resolution and press 6.4.2 Performing a Measurement in the Multi-Wavelength Mode 1. Insert the blank cell into the cell holder. Press ZERO Note: The key does not become active until the zero READ measurement has been performed. - Page 65 Advanced Operations Table 11 Time Course Setup Options Option Description Store (folder) icon Stores the scanned data. Time & Interval Enters the total time for data collection and the time interval between the collection of data points. λ (Wavelength) Enters the wavelength setting. Displays readings in absorbance or % transmittance.
-
Page 66: Time Course Scan Reading
Advanced Operations 6.5.2 Time Course Scan Reading After the parameters have been selected, the instrument must be zeroed, then the sample can be analyzed. 1. Insert the blank cell into the cell holder. Press ZERO The blank reading is shown on the display. 2. -
Page 67: System Check
Advanced Operations The corresponding absorbance and the elapsed time is highlighted where the cursor is positioned on the curve. Table 12 Navigating the Time Scan Cursor/Zoom Function Description Choice of Cursor Mode. Cursor Mode Single: The cursor moves to each selected measurement point of the scan. Delta mode: A second cursor is activated. -
Page 68: Instrument Information
3. Locate the appropriate download and follow the prompts for saving the file(s) to the USB memory stick. 4. On the DR 2800, press INSTRUMENT UPDATE 5. Connect the USB stick to the USB interface on the DR 2800 (Figure 2 on page 11). Press .The link is established automatically and the software is updated. - Page 69 Advanced Operations 6.6.3.1 Wavelength Check The Wavelength Check test is used to check wavelength accuracy at 807 nm. The wavelength check requires the Filter Set (Cat. No. LZV537). 1. From the Optical Checks menu, press WAVELENGTH CHECK 2. Insert Adapter A for 10-mm rectangular cells in Cell Compartment #2 and insert the sample cell (Neodym or BG20/2) in the adapter.
- Page 70 Advanced Operations 7. The result is displayed and is to be compared with the nominal data of the sample cell. 8. Press to return to Optical Checks. CANCEL 6.6.3.3 Stray Light Check The Stray Light test is used to measure the stray light in the instrument at 340 nm.
-
Page 71: Output Checks
Advanced Operations 6.6.4 Output Checks From the System Checks menu, press OUTPUT CHECKS If a printer is connected, a test printing of the current screen will be printed. 6.6.5 Lamp History The Lamp History menu provides the amount of time that the lamp has been on (Hours). -
Page 72: Recalling A Favorite Program
Advanced Operations 6.7.1 Recalling a Favorite Program 1. From the Main Menu, press FAVORITE PROGRAMS The Favorite Programs list will appear. 2. Highlight the selection by pressing it or press SELECT BY to search for the program by number. NUMBER Note: Use the scroll bar to scroll through the list quickly. -
Page 73: Section 7 Maintenance
7.1 Cleaning Requirements DANGER Always disconnect the power and remove the battery from the DR 2800 before attempting any cleaning operations. 7.1.1 Spectrophotometer • Clean the enclosure, cell compartments, and all accessories with a soft damp cloth. A mild soap solution can also be used. -
Page 74: Battery Replacement
Maintenance 7.2 Battery Replacement CAUTION Pay special attention to the following information for the Lithium battery pack: • Do not short-circuit the contacts. • Keep the battery away from fire. • Do not expose the battery to temperatures above 60°C (such temperatures may occur, for example, in a car left in the sun, or in direct sunlight). -
Page 75: Charging The Battery
The specified power supply and its plug shape, voltage rating (12V, 2A) and electromagnetic characteristics are critical to ensure DR 2800 performance and the safety of the user. Important Note: Optimal ambient temperature for charging the lithium battery to 100% is 10–30 °C (50–86 °F). -
Page 76: Lamp Replacement
Maintenance 7.3 Lamp Replacement The source lamp operates at high temperatures. To avoid a possible electric shock, disconnect the instrument from the power source before servicing the lamp. Make sure that the instrument cannot be accidentally switched on again. To prevent a possible burn, allow the lamp to cool at least 30 minutes before handling. - Page 77 Maintenance 22. Reset the Lamp History, see section 6.6.5 on page Figure 12 Removing the Lamp Cover Screw Lamp Housing Lamp Housing Screw (2X) Figure 13 Replacing the Lamp Halogen Lamp Plug Panel Lamp Base Rounded Part of Lamp Base...
- Page 78 Visit us at www.hach.com...
-
Page 79: Section 8 Troubleshooting
Section 8 Troubleshooting Problem/Display screen Likely Cause Action Dilute the sample and repeat the Absorbance > 3.5! The measured absorbance exceeds 3.5 measurement Calculated concentration is higher than Dilute the sample and repeat the Concentration too high! 999999 measurement Error Discrepancy between barcode test data Barcode control number? Data updating... - Page 80 Visit us at www.hach.com...
-
Page 81: Section 9 Replacement Parts And Accessories
Cell Adapter C, 1 inch round LZV584 Dust Cover HYH019 Filter set, certified, for self-checks (6 precision glass filters with target values) LZV537 Hach Data Trans (PC software for data transfer) LZY274 Lamp, tungsten LZV565 Light Shield LZV646 Pour-Thru Cell Kit... - Page 82 Visit us at www.hach.com...
-
Page 83: Section 10 How To Order
Brief description or model number • Quantity International Customers Hach maintains a worldwide network of dealers and distributors. To locate the representative nearest you, send an e-mail to: intl@hach.com or contact: Hach Company World Headquarters; Loveland, Colorado, U.S.A. Telephone: (970) 669-3050; Fax: (970) 669-2932 Technical and Customer Service (U.S.A. -
Page 84: Section 11 Repair Service
Section 11 Repair Service Authorization must be obtained from Hach Company before sending any items for repair. Please contact the Hach Service Center serving your location. In the United States: Hach Company Ames Service 100 Dayton Avenue Ames, Iowa 50010 (800) 227-4224 (U.S.A. -
Page 85: Section 12 Limited Warranty
In the event that a defect is discovered during the warranty period, Hach Company agrees that, at its option, it will repair or replace the defective product or refund the purchase price excluding original shipping and handling charges. - Page 86 Visit us at www.hach.com...
- Page 87 Pour-Thru Cell creating the potential for equipment damage and chemical exposure for the analyst. The Pour-Thru module is an optional accessory for the DR 2800 Spectrophotometer. Working with the module improves measurement accuracy, as zeroing, measurements, and measurement comparisons are carried out under the same optical conditions.
- Page 88 Pour-Thru Cell A.3 Assembling the Pour-Thru Module Installing the Pour-Thru Cell 1. Open the cell compartment. 2. Insert the Pour-Thru Cell Adapter B in Cell Compartment #2 so that the light path arrow on the adapter points left (see Figure 5 on page 14).
- Page 89 Pour-Thru Cell A.4 Using the Pour-Thru Cell The Pour-Thru Cell is intended primarily for those methods that specifically call for its use. These use liquid reagents, and are typically denoted as ULR or Rapid Liquid methods. These methods obtain maximum benefit from the Pour-Thru Cell by avoiding turbidity from un-dissolved reagents, and provide the precision and sensitivity required to determine very low concentrations.
- Page 90 Pour-Thru Cell A.5 Pour-Thru Cell Maintenance Important Note: Do not use solvents (e.g. acetone or alcohol) to clean the Pour-Thru Cell. A dilute acid solution can be used for cleaning. Rinse thoroughly with deionized water. If windows are cloudy or soiled, or bubbles form, add 50 mL of a detergent solution to the cell and wait for a few minutes to allow it to take effect.
- Page 91 Appendix B Free Programming Free Programming is an advanced option for entering original user-developed methods. When the Free Programming option is selected, an overview of the specifications of the programmed test is displayed. Each input option can be modified to develop the user method.
- Page 92 Free Programming B.1.1 Entering a New Element of a Measuring Sequence Important Note: Each component of the measurement process must be entered in the order in which it will be performed. 1. Highlight the Measurement Process line in the data overview and press EDIT 2.
- Page 93 Free Programming { } Key Elements of the measurement sequence that are to be repeated are placed in brackets. The left bracket "{"marks the start of the sequence that is to be repeated and the right bracket "}" marks the end. Note: The key showing the right bracket remains inactive until a left bracket is entered.
- Page 94 Free Programming 2. Select the line C1: Off and press EDIT 3. Select C1: Off again and press . The display changes to EDIT C1: On. 4. Select the next line C1 = to define the formula and press EDIT Refer to Table 16 for detailed information on the Edit...
- Page 95 Free Programming Table 16 Edit Formula Key Descriptions (continued) Screen Description Press +-/*, to enter a mathematical operation. Select the operation and confirm your input by pressing OK. The available choice of mathematical operations depends on the defined formula. This means that functions such as "( )" or "ln"/"log" etc. are only active if a term in parentheses or the calculation +-/* of a logarithm is mathematically permissible in the...
- Page 96 Free Programming Select Conc. Key If an already defined formula, in this case C1, is to be taken into account in the formula for C2, press SELECT CONC Enter the number of the formula (e.g. 1 for C1) and press to confirm.
Need help?
Do you have a question about the DR 2800 and is the answer not in the manual?
Questions and answers