Table of Contents
Advertisement
Quick Links
Table of Contents
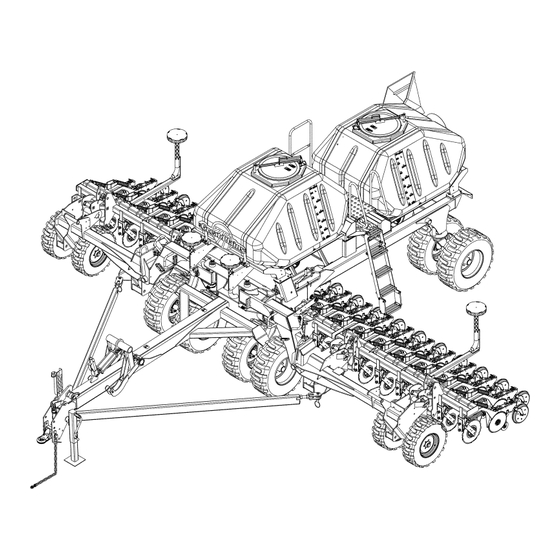
9m/30ft No-Till Heavy Duty Air Drill
Read the operator manual entirely. When you see this symbol, the subsequent
instructions and warnings are serious - follow without exception. Your life and
the lives of others depend on it!
Illustrations may show optional equipment not supplied with standard unit.
ORIGINAL INSTRUCTIONS
© Copyright 2019
Table of Contents
Index
Operator Manual
NTA907HD and NTA3007HD
Manufacturing, Inc.
www.greatplainsmfg.com
Printed 02/26/2019
Index
29423
EN
166-207M
Advertisement
Table of Contents

Related Manuals for GREAT PLAINS NTA907HD


Summary of Contents for GREAT PLAINS NTA907HD
- Page 1 Table of Contents Index Operator Manual NTA907HD and NTA3007HD 9m/30ft No-Till Heavy Duty Air Drill Manufacturing, Inc. www.greatplainsmfg.com Read the operator manual entirely. When you see this symbol, the subsequent instructions and warnings are serious - follow without exception. Your life and...
- Page 2 166-207M Table of Contents Index Great Plains | 166-207M | 02/26/2019 Table of Contents Index...
-
Page 3: Serial Number
Machine Identification Record your machine details in the log below. If you replace this manual, be sure to transfer this information to the new manual. If you or the dealer have added options not originally ordered with the machine, or removed options that were originally ordered, the weights and measurements are no longer accurate for your machine. - Page 4 2SF24 and 2SF30...
- Page 5 Great Plains Manufacturing, Inc. assumes no responsibility for errors or omissions. Neither is any liability assumed for damages resulting from the use of the information contained herein. Great Plains Manufacturing, Inc. reserves the right to revise and improve its products as it sees fit.
- Page 6 Appendix A - Reference Information ........143 Specifications and Capacities........143 NTA907HD Export Models ........143 NTA3007HD North America Models ......144 Tire Inflation Chart ............144 Dimensions (Transport) NTA907HD Export Model ..145 Seed Hose Port Maps ...........146 Monitor Setup Data............152 Torque Values Chart .............153 Chain Routing..............154 Contact Drive Chains ..........154...
- Page 7 Be Familiar with Safety Decals Read and understand “Safety Decals” on page 6, thoroughly. Read all instructions noted on the decals. Keep decals clean. Replace damaged, faded and illegible decals. Great Plains | 166-207M | 02/26/2019 Table of Contents Index...
- Page 8 Wear protective gloves and safety glasses or goggles when working with hydraulic systems. If an accident occurs, seek immediate medical assistance from a physician familiar with this type of injury. Great Plains | 166-207M | 02/26/2019 Table of Contents Index...
-
Page 9: Permit-Required Confined Space
If obstruction removal or repair requires hopper entry, have the work performed by a team trained in confined space procedures. See “Hopper Entry” on page 109. Great Plains | 166-207M | 02/26/2019 Table of Contents Index... - Page 10 Keep clear of overhead power lines and other obstructions when transporting. Refer to transport dimensions under “Specifications and Capacities” on page 143. Do not fold or unfold the Air Drill while the tractor is moving Great Plains | 166-207M | 02/26/2019 Table of Contents Index...
- Page 11 Wear snug-fitting clothing to avoid entanglement with moving parts. Watch out for wires, trees, etc., when folding and raising Air Drill. Make sure all persons are clear of working area. Great Plains | 166-207M | 02/26/2019 Table of Contents Index...
-
Page 12: Safety Decal
Keep all safety decals clean and legible. Replace all damaged or missing decals. Order new decals from your Great Plains dealer. Refer to this section for proper decal placement. When ordering new parts or components, also request... - Page 13 See “Transport Safety Information” on page 40. Danger: Electrocution, Auger (Option) 29424 NTA907HD: 848-409C NTA3007HD: 818-627C On auger tube near lower handles; one total See “Auger Safety Information” on page 48. Great Plains | 166-207M | 02/26/2019 Table of Contents Index...
- Page 14 On side of tongue; one total Danger: Rotating Auger (Option) 29424 NTA907HD: 848-411C NTA3007HD: 818-634C On auger tube near Missing Guard decal; 1 total See “Auger Safety Information” on page 48. Great Plains | 166-207M | 02/26/2019 Table of Contents Index...
- Page 15 818-437C Rev. B On side of tongue at hitch; 29424 29428 one total See “Hydraulic Hose Hookup” on page 19. See “Hydraulic Maintenance Safety Information” on page 111 Great Plains | 166-207M | 02/26/2019 Table of Contents Index...
- Page 16 3 total See “Auger Safety Information” on page 48. On each side of inner marker arm; 4 total See “Marker Safety Information” on page 60. Great Plains | 166-207M | 02/26/2019 Table of Contents Index...
-
Page 17: Safety Information
Warning: Pinch Point, Auger (Option) NTA907HD: 838-368C NTA3007HD: 818-623C On outside face of auger arm, on auger tube near operating controls; 29424 2 total See “Auger Safety Information” on page 48. Great Plains | 166-207M | 02/26/2019 Table of Contents Index... - Page 18 On rear main frame; total See “Transport Safety Information” on page 40. Caution: Read Operator Manual NTA907HD: 838-358C NTA3007HD: 818-587C On side of tongue near hitch; 29424 29428 one total Great Plains | 166-207M | 02/26/2019 Table of Contents Index...
- Page 19 8 total See “Unfolding Safety Information” on page 25. See “Folding Safety Information” on page 34. See “Down-Force Safety Information” on page 84. See “Weight Transfer Safety Information” on page 90. Great Plains | 166-207M | 02/26/2019 Table of Contents Index...
- Page 20 See “Transport Safety Information” on page 40. 29424 Caution: Towing NTA907HD: 838-358C NTA3007HD: 848-394C On outside of each wing gauge wheel tire; 29424 29428 4 total See “Transport Safety Information” on page 40. Great Plains | 166-207M | 02/26/2019 Table of Contents Index...
-
Page 21: Document Family
Table of Contents Index Introduction Introduction Great Plains welcomes you to its growing family of new product owners. Your 9m/30ft No-Till Heavy Duty Air Drill has been designed with care and built by skilled workers using quality materials. Proper setup, maintenance, and safe operating practices will help you get years of satisfactory use from the machine. - Page 22 Refer to Figure 2 Your machine’s parts were specially designed and should only be replaced with Great Plains parts. Always use the serial and model number when ordering parts from your Great Plains dealer. The serial-number plate is located on the left side main frame, below crank.
- Page 23 Replace if damaged. See “Safety Decals” on page 6. Inflate tires to pressure recommended and tighten wheel bolts as specified. See “Tire Inflation Chart” on page 144. Great Plains | 166-207M | 02/26/2019 Table of Contents Index...
- Page 24 Connect hydraulic hoses (page 19). 8. Connect brake hoses (option, page 20). 9. Connect electrical cables (page 22). 10. Remove and store main tongue parking stand. Figure 4 29403 Jack in Storage Location Great Plains | 166-207M | 02/26/2019 Table of Contents Index...
-
Page 25: Power-Beyond-Port
Only trained personnel should work on system hydraulics! Great Plains hydraulic hoses are color coded to help you hookup hoses to your tractor outlets. Hoses that go to the same remote valve are marked with the same color. -
Page 26: Single-Line
Check screen condition. 16. Connect the “Brake” , “Service” or “Control” line first. This line is Blue-coded. Figure 8 29578 This line operates the drill brakes. Air Brake Reservoir Great Plains | 166-207M | 02/26/2019 Table of Contents Index... -
Page 27: Quick Disconnect
Braking Hazard: Do not use the NTA907HD with a “single-line” air brake system. This drill is designed for transport speeds that require an air brake system to be “dual-line”. A single-line tractor system cannot charge the tank that powers the drill brakes. - Page 28 Always Figure 11 29523 have two bolts in use, through two sets of hitch holes and Initial Tongue Height two sets of tongue holes. Great Plains | 166-207M | 02/26/2019 Table of Contents Index...
- Page 29 Marker Setup Prior to first use, check and adjust: • “Initial Marker Setup” on page 162. Prior to each planting session, check and adjust: • “Marker Disk Adjustment” on page 98. Great Plains | 166-207M | 02/26/2019 Table of Contents Index...
- Page 30 The CFM “MASTER” switch is the master for the CFM Lift Auger Marker Hooks only. It does not affect power to the monitor terminal or other drill functions. Neutral Neutral Neutral Neutral Great Plains | 166-207M | 02/26/2019 Table of Contents Index...
- Page 31 Unfold only with markers resting in transport cradles. Unfold only if hydraulics are bled free of air and fully charged with hydraulic oil. Do not unfold with openers lowered, or machine damage will result. Great Plains | 166-207M | 02/26/2019 Table of Contents Index...
- Page 32 5. Disengage the transport hook lock channel. Figure 14 29381 Transport Hook Lock Channel 6. Retract the transport hook cylinder: Unhook: Hydraulic Circuit Operation Fan, Fold, Tilt, Transport Lift Auger Marker Hooks Neutral Neutral Neutral Retract Great Plains | 166-207M | 02/26/2019 Table of Contents Index...
- Page 33 Briefly perform a tilt-up. Figure 17 29380 CFM Tilt Enable for Un-Weight Tilt Un-Weight: Hydraulic Circuit Operation Fan, Fold, Tilt, Transport Lift Auger Marker Hooks Retract Neutral Neutral then Neutral Neutral Great Plains | 166-207M | 02/26/2019 Table of Contents Index...
- Page 34 Tilt-Down: Hydraulic Circuit Operation Refer to Figure 20 Fan, Fold, Tilt, Transport 12. On the CFM switch, enable Tilt with MASTER and Lift Auger Marker Hooks Tilt on. Neutral Neutral Extend Neutral Great Plains | 166-207M | 02/26/2019 Table of Contents Index...
- Page 35 Tilt-Down Complete: Circuit Operation center section may stop last), hold the openers in the raised position by setting circuit to Neutral. Fan, Fold, Tilt, Transport Lift Auger Marker Hooks Neutral Neutral Neutral Neutral Great Plains | 166-207M | 02/26/2019 Table of Contents Index...
- Page 36 Figure 24 29391 Wing Unfold Progression a. Do not set tractor parking brake if tractor parking brake activates trailer (“service”) brake system. Great Plains | 166-207M | 02/26/2019 Table of Contents Index...
- Page 37 Neutral Neutral Neutral Neutral 23. Disable the Fold solenoid valve. If no markers are installed, you may also set the MASTER switch to off. Figure 26 29380 CFM Unfold Complete Great Plains | 166-207M | 02/26/2019 Table of Contents Index...
- Page 38 Neutral 4. If down-pressure has been adjusted (page 84), leave the circuit in Extend. If down-pressure has not been adjusted, or if not planting immediately, set the circuit to Neutral. Great Plains | 166-207M | 02/26/2019 Table of Contents Index...
- Page 39 5. Set circuit to Neutral to temporarily hold openers End Lift: Hydraulic Circuit Operation raised. Fan, Fold, Tilt, Transport Lift Auger Marker Hooks Neutral Neutral Neutral Great Plains | 166-207M | 02/26/2019 Table of Contents Index...
- Page 40 Fold only with markers resting in transport cradles. Fold only if hydraulics are bled free of air and fully charged with hydraulic oil. Do not fold with openers lowered, or machine damage will result. Great Plains | 166-207M | 02/26/2019 Table of Contents Index...
- Page 41 Refer to Figure 28 At wing end , mid wing , and side of mainframe on each side (6 locations total), reconfigure locks from: FIELD to ROAD Figure 28 29423 Transport Lock Locations Great Plains | 166-207M | 02/26/2019 Table of Contents Index...
- Page 42 Park, set tractor parking brake , and release optional drill parking brakes. a. Do not set tractor parking brake if tractor parking brake activates trailer (“service”) brakes. Great Plains | 166-207M | 02/26/2019 Table of Contents Index...
- Page 43 Figure 33 29394 Tongue Hook Released Refer to Figure 25 12. Continue folding until wing locks are above the transport hooks. Figure 34 29396 Wing Fold Progression Great Plains | 166-207M | 02/26/2019 Table of Contents Index...
- Page 44 Extend Neutral 17. Observe the tilt-up operation. When movement Tilt-Up Initiate: Hydraulic Circuit Operation stops, end cylinder extension. Fan, Fold, Tilt, Transport Lift Auger Marker Hooks Neutral Neutral Neutral Neutral Great Plains | 166-207M | 02/26/2019 Table of Contents Index...
- Page 45 Fan, Fold, Tilt, Transport Lift Auger Marker Hooks Neutral Neutral Neutral Neutral Refer to Figure 14 22. Engage the transport hook lock channel. Figure 40 29381 Transport Hook Lock Channel Great Plains | 166-207M | 02/26/2019 Table of Contents Index...
- Page 46 An installation of optional brakes on the drill does not reduce tractor capability requirements or increase maximum transport speed. Great Plains | 166-207M | 02/26/2019 Table of Contents Index...
- Page 47 Comply with all national, regional and local safety laws when traveling on public roads. Release all brakes and travel with caution. Typical NTA907/3007HD Drill Weights NTA907HD NTA3007HD NTA907HD NTA3007HD NTA907HD NTA3007HD -3610 (36 rows) -4875 (48 rows) -6006 (60 rows)
-
Page 48: Parking Brake
The parking brake system is not a true emergency brake system, as there is no safe way to set the cable-operated brakes when the drill is in motion. This manual therefore refers to it only as a Parking brake system. Great Plains | 166-207M | 02/26/2019 Table of Contents... - Page 49 Tractor and drill reservoir tanks must be pressurized. Drill service braking may not be immediately available upon tractor hookup with the air/ hydraulic system. Figure 43 29578 Air/Hydraulic Brakes Great Plains | 166-207M | 02/26/2019 Table of Contents Index...
- Page 50 2. Ascend and descend the ladder while facing the drill. 3. Use the handrails when on the higher steps. Storing Ladder Pull the horizontal pivot pin to the rear. Great Plains | 166-207M | 02/26/2019 Table of Contents Index...
-
Page 51: Loading Materials
Refer to Figure 47 and Figure 48 2. Swing handle out until hook releases from U- bolt. 3. Move hook clear of U-bolt and re-close handle. Figure 47 26345 Hopper Lid Unlatched Great Plains | 166-207M | 02/26/2019 Table of Contents Index... - Page 52 The doors need to close and seal tightly during planting. Figure 50 26346 Periodically inspect the lever clamps for proper Meter Doors Closed tension, and inspect the elastomer seals for integrity and resiliency. Great Plains | 166-207M | 02/26/2019 Table of Contents Index...
- Page 53 4. Swing the other clamp handle up past vertical. 5. Inspect the door closure for possible air leaks. Replace any deformed elastomer seal or damaged latch clamp. Great Plains | 166-207M | 02/26/2019 Table of Contents Index...
- Page 54 Allow only operators near auger during use. Keep hands away from auger support linkage during deployment and storage. If there is difficulty storing the auger, check that hydraulic hoses are not being pinched. Great Plains | 166-207M | 02/26/2019 Table of Contents Index...
- Page 55 For material unloading, leave the arm pinned at the Figure 54 storage height unless it needs to be lowered for the 29410 Arm Lift & Tube Swivel Pins unloading operation. Great Plains | 166-207M | 02/26/2019 Table of Contents Index...
- Page 56 Do not remove or modify any guards. 2. Check that the auger direction control valve is still Keep children well clear of work area. OFF (as set at step 3 on page 49). Great Plains | 166-207M | 02/26/2019 Table of Contents Index...
- Page 57 6. Set the auger direction control valve to center-OFF. Shut down tractor hydraulics, or set the auger/fan circuit to Neutral or Float. 8. Set the auger/fan selector valve to FAN. Great Plains | 166-207M | 02/26/2019 Table of Contents Index...
- Page 58 8. Close clamping straps at cradles. 9. Secure latches. Make sure latch locks engage, leaving a gap between lock lever and latch handle. Figure 60 29414 Strap Closed, and Locked Great Plains | 166-207M | 02/26/2019 Table of Contents Index...
- Page 59 Grain bridges and crusts are especially dangerous. When hazardous fumes or low oxygen levels are present, you can be quickly overcome even in an empty hopper with the hopper lid open. Great Plains | 166-207M | 02/26/2019 Table of Contents Index...
-
Page 60: Rear Hopper
12. Open lid of hopper to be loaded (page 45). 13. Check that the strainer basket is in place in the top of the bin. Remove any foreign material from basket. Figure 61 26340 Hopper Unloading Door Great Plains | 166-207M | 02/26/2019 Table of Contents Index... - Page 61 Close lids and latch securely. Figure 62 29415 28. Return ladder storage/transport position Auger Set for Rear Hopper Load (page 44). Hopper fill level indications are molded into the side of the hopper. Great Plains | 166-207M | 02/26/2019 Table of Contents Index...
- Page 62 The crank is used for two common tasks: • calibration of the meter setting for planting, and • clean-out of the meter flute chamber. Figure 63 29416 Hand Crank in Storage Great Plains | 166-207M | 02/26/2019 Table of Contents Index...
- Page 63 “80” if the final drive range gears are in Low Range mode. To change variable rate gearbox and final drive range gearing see “Setting Material Rates” on page 71. Great Plains | 166-207M | 02/26/2019 Table of Contents Index...
- Page 64 Avoid fan direction reversal. A fan running in reverse cannot generate sufficient airflow for planting. If fan cannot reach target rpm, check for reversed circuit connections or improper drain connection. Great Plains | 166-207M | 02/26/2019 Table of Contents Index...
- Page 65 10. Shut off the fan by carefully moving the circuit lever to Fan, Fold, Tilt, Transport Float or Neutral. Avoid moving the lever into Retract. Lift Auger Marker Hooks Float or Extend Neutral Neutral Neutral Great Plains | 166-207M | 02/26/2019 Table of Contents Index...
- Page 66 Extending a marker when folded may damage the tractor. Additional Marker Topics See also: “Initial Marker Setup” on page 162, “Marker Adjustments” on page 97, and; “Marker Maintenance” on page 130. Great Plains | 166-207M | 02/26/2019 Table of Contents Index...
- Page 67 Use the following tables to develop a final checklist for your tractor/Air Drill configuration. Additional or fewer steps may be necessary depending on tractor features, Air Drill options and planting accessories. Figure 68 29380 CFM Marker Enable Great Plains | 166-207M | 02/26/2019 Table of Contents Index...
- Page 68 Frame Mounted Coulter Checklist Page Coulter to row alignment Coulter down-force Row Units Checklist Page Preset depth handles alike. Preset down force springs alike, except in tracks. Check wheel scraper gaps (if installed) Great Plains | 166-207M | 02/26/2019 Table of Contents Index...
-
Page 69: Planting Depth
Meter rate monitoring Hook wings • Ground speed monitoring CFM MASTER off Consult the DICKEY-john Air Cart Control manual for Lights ON for transport how to configure reporting and alerts. Great Plains | 166-207M | 02/26/2019 Table of Contents Index... - Page 70 Transport Lift Auger Marker Hooks 4. Shut down hydraulics or set Fan/Auger circuit to Float or Neutral. Float or Neutral Neutral Neutral Neutral 5. Open lid slightly on rear hopper. Great Plains | 166-207M | 02/26/2019 Table of Contents Index...
- Page 71 11. Check that auger controls are at center/off. Figure 72 26401 Open Calibration Door Great Plains | 166-207M | 02/26/2019 Table of Contents Index...
- Page 72 18. When material stops flowing into the collection bin or vehicle, set the auger controls to center/off. Figure 74 26341 19. Shut down hydraulic circuit for auger. Withdraw and Meter Doors Open store auger (page 52). Great Plains | 166-207M | 02/26/2019 Table of Contents Index...
- Page 73 Unload the rear hopper first. Then use the same steps as for unloading the rear hopper, with these changes: 7a. Before step 7(b) on page 65, remove the auger inlet hopper. 7c. After step 7(b), maneuver inlet hopper under inlet. Great Plains | 166-207M | 02/26/2019 Table of Contents Index...
- Page 74 Large top hole is reserved for fan/ auger case drain line. 9. Disconnect hydraulic brake line (option). 10. Disconnect the safety chain. 11. Unhitch from tractor or leading implement. Great Plains | 166-207M | 02/26/2019 Table of Contents Index...
- Page 75 16. Clean Air Drill of mud, dirt, excess oil and grease. 17. Grease exposed cylinder rods to prevent rust. 18. Use touch-up paint to cover scratches, chips and worn areas to prevent rust. Great Plains | 166-207M | 02/26/2019 Table of Contents Index...
-
Page 76: Opener Sub-Frame
Planting depth uniformity in tire tracks Opener Disk Adjustments Seed depth, seed-to-soil contact Inside Scrapers Reliable disk operation Seed Firmer Adjustments (Option) Seed-soil contact Press Wheel Adjustment Effective soil coverage Great Plains | 166-207M | 02/26/2019 Table of Contents Index... - Page 77 On a “4 star” shaft, each outlet contains 4 flute sets, with Figure 77 26426 no fillers between adjacent drops. Checking Flute Shafts To change meter flutes, see “Changing Meter Flutes” on page 164. Great Plains | 166-207M | 02/26/2019 Table of Contents Index...
- Page 78 Continuing the example: To find the rate to check at calibration: Field rate: 500 kg/ha 250 = 500 x 0.5 CalRate FieldRate TwinFactor Calibrate each meter to 250 kg/ha Great Plains | 166-207M | 02/26/2019 Table of Contents Index...
- Page 79 “Total Number of Towers” - This is the number of primary hoses coming off the rear meter box (this is always 4 for NTA907HD and NTA3007HD). “Calibration Constant” - This is the number listed in the seed rate charts for the rate you are planting or the number obtained from running the calibration routine for your specific seed.
- Page 80 “Channel Width” - is your Implement Width (swath) in inches (cm). Precise row/swath data is found on page 143 (for NTA907HD) and page 144 (NTA3007HD). If the monitor inputs are correctly entered, the monitor is a handy tool for fine tuning the variable rate gearbox setting.
- Page 81 • reduce gearbox and meter wear • during calibration, to avoid clogging air tubes at the meter not under test, and; • avoid metering undesired material in the field. Great Plains | 166-207M | 02/26/2019 Table of Contents Index...
- Page 82 Seed Rate chart entry for half the desired application rate. Do not use a half scale setting - the effect of the variable rate gearbox control arm is not linear. Great Plains | 166-207M | 02/26/2019 Table of Contents Index...
- Page 83 The Fertilizer Rate chart is based on a representative granular fertilizer. Great Plains recommends calibrating for the exact materials you intend to apply. Calibration determines two very important settings for achieving accurate rates: •...
- Page 84 Calibration Constant. The “# Meter Revs” parameter is used for a progress bar displayed during calibration. Great Plains | 166-207M | 02/26/2019 Table of Contents Index...
- Page 85 RateDifference = 17 kg OldChart = 201.3 NewChart OldChart RateDifference – NewChart = 201.3 - 17, which is: 183.9 To raise for the next rate: nearest chart value is: 183.5 NewChart OldChart RateDifference Great Plains | 166-207M | 02/26/2019 Table of Contents Index...
- Page 86 Check tire size and inflation (page 144). Use tire sizes specified by Great Plains, at recommended pressures. The remaining steps of this section cannot be used to compensate for...
- Page 87 Adjust for 12mm (0.47in) or more slot clearance, and equal clearance on both sides of each ground drive arm assembly. Secure upper jam nut with lower. Great Plains | 166-207M | 02/26/2019 Table of Contents Index...
- Page 88 The monitor has a level sensor below the hopper or seed box to warn when seed box is empty. Approximately 530 liters (15bu) of seed remains in the system when the sensor first indicates box empty. Great Plains | 166-207M | 02/26/2019 Table of Contents Index...
-
Page 89: Row Unit Spring
07HD Coulter and Row Unit • opener wear (page 94), which over time can cause established T-handle settings to be too shallow. Great Plains | 166-207M | 02/26/2019 Table of Contents Index... - Page 90 Use only conditions, and leads to premature wear on opener enough down pressure to cut a furrow and maintain components. proper soil-firming over seed. Excessive opener down Great Plains | 166-207M | 02/26/2019 Table of Contents Index...
- Page 91 Decrease weight transfer a. When adjusting wing down-pressure, re-check performance in field, and re-adjust weight transfer as needed. b. When adjusting weight transfer, re-check performance in field, and re-adjust down-pressure as needed Great Plains | 166-207M | 02/26/2019 Table of Contents Index...
- Page 92 See your tractor dealer for proper means of providing constant flow to openers 3. At bypass valve , release locking disk and close bypass valve for no oil flow by turning knob clockwise completely. Great Plains | 166-207M | 02/26/2019 Table of Contents Index...
-
Page 93: Open Center
Always operate the drill with the bypass valve locked closed. • Open Center (OC): The NTA907HD and NTA3007HD drills are not presently compatible with tractors that have Open- Center hydraulics. If you are unsure what type of hydraulic system is on your tractor, contact your tractor manufacturer. - Page 94 140 bar (2100 psi). consistently operate the drill with very high opener down pressure, you may need a bypass-valve setting above 140 bar (2100 psi). Great Plains | 166-207M | 02/26/2019 Table of Contents Index...
- Page 95 3. Use the top holes in the shim stack to remove or re- insert shims 4. Re-tighten nuts 5. Re-check opener-ground alignment field Figure 95 29431 conditions. Wing Shim Details Great Plains | 166-207M | 02/26/2019 Table of Contents Index...
- Page 96 ( , , page 84) before adjusting weight transfer. 8. Lock hydraulic lever forward during field operation for constant hydraulic flow to openers. See step 2 on page 86 for details. Great Plains | 166-207M | 02/26/2019 Table of Contents Index...
- Page 97 In addition to checking depths at setup, be sure to check actual seeding results while planting. Replace coulter blades when their diameter is worn to less than 40cm (15 in). Great Plains | 166-207M | 02/26/2019 Table of Contents Index...
- Page 98 (at the covered by warranty. gauge wheels), resulting in uneven coulter depth and/ or uneven seed depth. If the drill is already operating at maximum down-pressure, reduce coulter depth. Great Plains | 166-207M | 02/26/2019 Table of Contents Index...
-
Page 99: Press Wheels
NTA907HD and NTA3007HD, including frame-mounted coulter, which is mounted independently of the row unit) From front to back, a Great Plains 07HD Series row unit can include the following capabilities (some optional): HD Down Pressure Spring: standard... -
Page 100: Opener Disk
If the contact Figure 101 26395 region varies with blade rotation, one or both blades is Checking Disk Contact likely bent and in need of replacement. Great Plains | 166-207M | 02/26/2019 Table of Contents Index... - Page 101 As field conditions vary, scrapers may need to be adjusted. In damp conditions, lower scrapers. If openers Figure 103 are not turning freely, raise scrapers. To adjust, loosen 26463 bolt and move scraper as needed. Opener Disk Scraper Great Plains | 166-207M | 02/26/2019 Table of Contents Index...
- Page 102 Refer to Figure 105 To lock up Seed-Lock wheels: Raise lever 2. Pull up on Seed-Lok arm 3. Release lever. Figure 105 24453 Seed-Lok™ Lock-Up Great Plains | 166-207M | 02/26/2019 Table of Contents Index...
- Page 103 Never allow anyone near the drill when folding or Once set for a specific row spacing, this only needs unfolding the markers. periodic checking to ensure the clamp is secure. Great Plains | 166-207M | 02/26/2019 Table of Contents Index...
- Page 104 Tighten bolts Direction of Cut To have the marker throw dirt out, invert the disk on the spindle, and invert the disk assembly. Figure 108 11248 Marker Disk Inverted Great Plains | 166-207M | 02/26/2019 Table of Contents Index...
- Page 105 Treat as blockage. See “No material flow (some rows) hoses, towers, seed tubes (multiple rows)” on page 99 and “No mate- rial flow (one or two rows)” on page 99. Great Plains | 166-207M | 02/26/2019 Table of Contents Index...
- Page 106 Excessive bout/pass overlap. Adjust marker, page 162. Irregular shaped field. Oversize contact drive tire, or excess air Use correct tire size and air pressure, pressure, can increase rates. page 144. Great Plains | 166-207M | 02/26/2019 Table of Contents Index...
- Page 107 Replace scraper. Openers drill too deep Too much hydraulic down pressure on open- Reduce hydraulic down pressure on open- (Bulldozing) ers. ers. Incorrect press wheel adjustment. Readjust press wheel, page 97. Great Plains | 166-207M | 02/26/2019 Table of Contents Index...
- Page 108 Be sure retainer clip is facing in opposite Excess Wear direction of chain travel (page 106). Excess slack Adjust chain slack (page 106) Sprockets not aligned Adjust sprockets on shafts. Great Plains | 166-207M | 02/26/2019 Table of Contents Index...
-
Page 109: Service Brakes
Line(s) to tractor improperly connected Check connections. Trailer brake system disabled or malfunc- Check function with another trailer. tioning in tractor Tractor line pressure insufficient Have dealer check pressure at port. Great Plains | 166-207M | 02/26/2019 Table of Contents Index... -
Page 110: Psi
Flat spots on tires See ““Brakes always engaged, all wheels” Worn brake linings Check brakes. Replace worn linings Squealing from brakes (page 121). Distorted brake parts scraping Check brakes. Replace damaged parts. Great Plains | 166-207M | 02/26/2019 Table of Contents Index... - Page 111 5. Inflate tires as specified on “Tire Inflation Chart” on page 144. 6. Replace any worn, damaged or illegible safety decals. Order new decals from your Great Plains dealer. “Safety Decals” on page 6. Great Plains | 166-207M | 02/26/2019...
- Page 112 Refer to Figure 110 (arrow shows chain direction) Install clip with open end facing away from direction of Figure 110 26482 chain travel (shown by gray or striped arrows in chain Chain Clip Orientation routing diagrams). Great Plains | 166-207M | 02/26/2019 Table of Contents Index...
- Page 113 11. Shut off air. Clean door seals and meter box faces. 12. Close meter doors. Move drill to parking or storage site. 13. Follow normal Parking (page 68) Storage (page 69) instructions. Great Plains | 166-207M | 02/26/2019 Table of Contents Index...
-
Page 114: Silicone Sealant
When re-mounting the meter box, scrape off the old Figure 111 29341 silicone sealant and replace it with fresh sealant. Remove Meter for Cleaning Great Plains | 166-207M | 02/26/2019 Table of Contents Index... - Page 115 Designate a leader (who will not subsequently cleaned. Retain the MSDS information be the entrant) with authority to terminate the activity. for any medical treatment that might be required. Great Plains | 166-207M | 02/26/2019 Table of Contents Index...
- Page 116 11. Plan the work. Work the plan. Postpone the work if any team members, equipment or other resources are missing, or weather/lighting conditions are not favorable. Terminate and evacuate if any unexpected situations arise. Great Plains | 166-207M | 02/26/2019 Table of Contents Index...
-
Page 117: Hydraulic Maintenance
Check hydraulic fluid level in tractor reservoir and fill to QD (Quick Disconnect coupler) fittings. proper level. Add fluid to system as needed. System capacity for entire drill is about 38 liters (10 U.S. gallons). Great Plains | 166-207M | 02/26/2019 Table of Contents Index... -
Page 118: Road
2. With drill unfolded and monitor power on, leave MASTER and Wing Fold ON, and set hydraulic circuit to Float to relieve pressure in lines. Figure 114 29380 CFM Fold Enable for Bleed Great Plains | 166-207M | 02/26/2019 Table of Contents Index... - Page 119 4. Fully Extend hook circuit. Set circuit to Neutral. Loosen rod end JIC fitting 5. Slowly Extend circuit until fluid appears at cracked fitting. Set circuit to Neutral and secure fitting. Figure 116 29466 Hook Bleed Points Great Plains | 166-207M | 02/26/2019 Table of Contents Index...
-
Page 120: Down-Pressure
10. Use tractor circuit to re-position rod ends and re-pin. 11. If bleeding is complete, restore bypass, down- pressure and weight transfer valve settings per: “Opener Down-Force (Hydraulic)” on page 84. Figure 118 29484 Fold Bleed Points Great Plains | 166-207M | 02/26/2019 Table of Contents Index... - Page 121 9. If bleeding is complete, restore bypass, down- pressure and weight transfer valve settings per: “Opener Down-Force (Hydraulic)” on page 84. Figure 120 29474 Weight-Transfer Bleed Points Great Plains | 166-207M | 02/26/2019 Table of Contents Index...
- Page 122 12. Restore the Center, Wing and Transfer valves to their former settings. 13. Cycle the lift system several times. If there is any sign of air in the system, perform a bleed operation (page 114). Great Plains | 166-207M | 02/26/2019 Table of Contents Index...
- Page 123 Refer to Figure 124 (which depicts air brake system - tee for hydraulic brake system is similar) F. Disconnect center port of brake line tee . Cycle brakes until no fluid flows. Re-secure tee. Figure 124 29578 Brake Line Tee Great Plains | 166-207M | 02/26/2019 Table of Contents Index...
- Page 124 14. Cycle tractor brakes until no air bubble appear at connection. Tighten connection. 15. Top off master cylinder reservoir. Figure 127 29578 Brake Line Tee Great Plains | 166-207M | 02/26/2019 Table of Contents Index...
- Page 125 Brake Master Cylinder Handle the filter screen element very gently. Great Plains offers only complete replacement filters, and not screen elements. The inside diameter of the screen is the inlet side. The screen is entirely welded stainless steel.
- Page 126 United States. Procedures for Servicing Brakes Employers and workers employed outside of the United States should consult the regulations that apply to them for further guidance. Great Plains | 166-207M | 02/26/2019 Table of Contents Index...
-
Page 127: Run-Out
If you are unable to confirm that you are removing and information on page 119. Have necessary safety installing Great Plains approved parts, you may have linings equipment and tools on hand. Make sure workers that contain asbestos. Some aftermarket brake shoes may understand the hazards and how to avoid them. -
Page 128: Self-Adjuster
If no parts need replacing, skip to step 49. injury or property damage. Always re-assemble brakes with Refer to Figure 134 either the removed parts (if serviceable) or Great Plains parts 19. Remove self-adjuster cotter pins . Release self- as specified in the Parts Manual (166-207P). - Page 129 Plains recommends replacing all shoes on the drill. Cannot Re-Line: Original and replacement brake shoes supplied or recommended by Great Plains have bonded linings. They cannot be re-lined. Replace entire shoes, in pairs. Great Plains | 166-207M | 02/26/2019...
- Page 130 Re-install Brake Springs spindle. Secure with cotter pins 45. Tighten pivot bolts -18 torque specification. Leave self-adjuster relaxed. It self-adjusts at first use. Great Plains | 166-207M | 02/26/2019 Table of Contents Index...
-
Page 131: Shoe Surface
(not shown) with notches in nut. 55. Secure nut with cotter pin . Install dust cap Figure 139 29642 Re-mount Hub and Drum Great Plains | 166-207M | 02/26/2019 Table of Contents Index... - Page 132 67. Spin and test brake the other wheel on that side. 68. Repeat step 66 and step 67 for the other side of the drill. 69. Check tire inflation, set parking brakes, and lower drill onto its own wheels. Great Plains | 166-207M | 02/26/2019 Table of Contents Index...
- Page 133 8. Back out stop bolt until it contacts wing. Secure with jam nut . Re-tighten jam nuts and align other side as needed. Figure 143 29524 Section Alignment Check Great Plains | 166-207M | 02/26/2019 Table of Contents Index...
- Page 134 Whether adjusted or not, secure the 1-8 jam nut to torque spec (page 153). 13. Check and set all four (4) wing ends and eyebolts. Figure 145 29520 14. Pull forward and re-check height. Adjusting Wing Tool Bar Height Great Plains | 166-207M | 02/26/2019 Table of Contents Index...
- Page 135 Push new seed flap down through metal bracket until flap snaps into place with “T” top resting on top of bracket. Figure 147 31047 816-302C Seed Tube Flap Great Plains | 166-207M | 02/26/2019 Table of Contents Index...
- Page 136 If the shear bolt breaks, replace it with an equivalent -14x2in Grade 5 bolt (Great Plains part 802-589C). If that size is not available in your local market, substitute an M10x1.5 Class 8.8 metric bolt and nut.
- Page 137 Repack with grease and install a new seal or grease cap. Figure 151 18795 Marker Bearing and Cap Great Plains | 166-207M | 02/26/2019 Table of Contents Index...
- Page 138 3 grease banks, 1 pivot per coulter; 36, 48 or 60 total zerks Type of Lubrication: Grease Quantity: Until grease emerges Grease banks serve only the pivots. Coulter hubs must 29383 be greased individually (page 138). Great Plains | 166-207M | 02/26/2019 Table of Contents Index...
- Page 139 Quantity: Until grease emerges at pivot ends 29378 Wing Fold Pivots 2 zerks each wing pivot; 4 zerks total Type of Lubrication: Grease Quantity: Until grease emerges at pivot ends 29378 Great Plains | 166-207M | 02/26/2019 Table of Contents Index...
- Page 140 1 zerk each end of inner section, 1 zerk at mid-outer hinge, 2 markers per drill; 6 total Type of Lubrication: Grease Quantity: Until grease emerges at pivot ends 29433 Great Plains | 166-207M | 02/26/2019 Table of Contents Index...
- Page 141 Quantity: Until grease emerges Hopper Lid Pivot bar and Clamps 26345 1 pivot and 1 clamp each of 2 lids; 4 sites total Type of Lubrication: Spray Quantity: Coat thoroughly Great Plains | 166-207M | 02/26/2019 Table of Contents Index...
- Page 142 Auger Swing Arm: Mount Pivot 29477 1 zerk Type of Lubrication: Grease Quantity: Until Grease emerges Auger Swing Arm: Mid-Pivot 1 zerk Type of Lubrication: Grease Quantity: Until Grease emerges 29478 Great Plains | 166-207M | 02/26/2019 Table of Contents Index...
- Page 143 Type of Lubrication: Chain Lube Quantity = Coat thoroughly Lubricate chains any time there is a chance of moisture, and when being stored at the end of the planting season. 29379 Great Plains | 166-207M | 02/26/2019 Table of Contents Index...
- Page 144 These zerks only serve the coulter hubs. Coulter arm pivots are lubricated from the grease banks. 27067 Marker Disk Bearings (Option) Seasonal 2 races each marker; 2 or 4 total Type of Lubrication: Grease Quantity: Repack 18795 Great Plains | 166-207M | 02/26/2019 Table of Contents Index...
- Page 145 2 bearings each wheel, 8 wheels; 16 total bearings Type of Lubrication: Grease Quantity: Re-pack 29452 Wheel Bearings, Wing Gauge Seasonal 2 bearings each wheel, 2 wheels; 4 total Type of Lubrication: Grease Quantity: Re-pack 29435 Great Plains | 166-207M | 02/26/2019 Table of Contents Index...
-
Page 146: Markers
If ordered with a new NTA907/3007HD drill, markers are factory-installed. They may also be ordered later for field installation. Each kit equips one NTA907/3007HD drill. Description Part Number MARKER, NTA3007 & NTA907 113-826A 29433 Great Plains | 166-207M | 02/26/2019 Table of Contents Index... - Page 147 Order one kit per drill. Part Row Spacing Numbers 3N-30NT 7 1/2IN CLT TINE KIT 249-028A 3N-30NT 10IN CLT TINE KIT 249-029A 19679 Great Plains | 166-207M | 02/26/2019 Table of Contents Index...
-
Page 148: Scraper
A variety of single and dual press wheels are available, as bundle options at the time of initial NTA907/3007HD drill order. Kits are not presently available to convert these in the field. Parts may be ordered to do so. Great Plains | 166-207M | 02/26/2019 Table of Contents Index... - Page 149 550 kPa min. Provision to 1035 kPa max. Operating Air Brake Operating Pressure Transport Clearance 34 cm Opener Travel (Up - Down) +17.8 cm - 5.1 cm Opener Down Force 0 to 110 kg Great Plains | 166-207M | 02/26/2019 Table of Contents Index...
- Page 150 15-19.5 12-Ply SKID STEER NHS 414 kPa information, contact your nearest Authorized Farm Tire 60 psi Retailer. 13-5x6 4-Ply TURF SAVER Manufacturer Web site 275 kPa Firestone www.firestoneag.com 40 psi Gleason www.gleasonwheel.com Titan www.titan-intl.com Great Plains | 166-207M | 02/26/2019 Table of Contents Index...
- Page 151 NTA907HD and NTA3007HD Table of Contents Index Appendix A - Reference Information Dimensions (Transport) NTA907HD Export Model Transport Width 117.54in (2.99m) Transport Height 143.52in (3.65m) 137.04 (3.48 Transport Clearance 18.44in (0.468m) Hitch to Front Wheel Length: Hitch to Rear Wheel Length:...
- Page 152 Left Wing W1-07 Left Wing W1-08 Left Wing W1-09 Left Wing W2-01 Left Wing W2-02 Left Wing W2-03 Center W2-04 Center W2-05 Center W2-06 Center W2-07 Center W2-08 Center W2-09 Great Plains | 166-207M | 02/26/2019 Table of Contents Index...
- Page 153 Right Wing W3-09 Right Wing W4-01 Right Wing W4-02 Right Wing W4-03 Right Wing W4-04 Right Wing W4-05 Right Wing W4-06 Right Wing W4-07 Right Wing W4-08 Right Wing W4-09 Great Plains | 166-207M | 02/26/2019 Table of Contents Index...
- Page 154 NTA907HD and NTA3007HD Table of Contents Index Appendix A - Reference Information 48-Row Port Map, Left 29491 NTA907HD-4875 and NTA3007HD-4875 Port Map Drill Meter Tower Tower Hose Length WSMB Section Outlet Number Port Unit Inches Metric Input Left Wing 63 in.
- Page 155 NTA907HD and NTA3007HD Table of Contents Index Appendix A - Reference Information 48-Row Port Map, Right 29491 NTA907HD-4875 and NTA3007HD-4875 Port Map Drill Meter Tower Tower Hose Length WSMB Section Outlet Number Port Unit Inches Metric Input Center 135 in.
- Page 156 NTA907HD and NTA3007HD Table of Contents Index Appendix A - Reference Information 60-Row Port Map, Left NTA907HD-6006 and NTA3007HD-6006 Port Map Drill Meter Tower Tower Hose Length WSMB Section Outlet Number Port Unit Inches Metric Input Left Wing W1-01 Left Wing...
- Page 157 NTA907HD and NTA3007HD Table of Contents Index Appendix A - Reference Information 60-Row Port Map, Right NTA907HD-6006 and NTA3007HD-6006 Port Map Drill Meter Tower Tower Hose Length WSMB Section Outlet Number Port Unit Inches Metric Input Center W3-01 Center W3-02...
-
Page 158: Quick Start Guide
Material Defaults Seed 0.77 kg/l 60 lbs/bu Fertilizer 0.96 kg/l 60 lbs/ft3 Calibration Constants Seeding 3031 85831 Fertilizer 2931 82996 Channel Setup Input Filter Sensor Constant 360 pulses/rev Gear Ratio Great Plains | 166-207M | 02/26/2019 Table of Contents Index... - Page 159 = nominal thread diameter in mm x thread pitch 1180 2640 1950 4290 3160 d. ft-lb = foot pounds 1330 2970 2190 4820 3560 - 12 Great Plains | 166-207M | 02/26/2019 Table of Contents Index...
- Page 160 NTA907HD and NTA3007HD Table of Contents Index Appendix A - Reference Information Chain Routing Contact Drive Chains 117P Figure 152 29379 Contact Drive Chains Great Plains | 166-207M | 02/26/2019 Table of Contents Index...
- Page 161 NTA907HD and NTA3007HD Table of Contents Index Appendix A - Reference Information Gearbox and Meter Chains Figure 153 29392 Gearbox Chain Routing Great Plains | 166-207M | 02/26/2019 Table of Contents Index...
- Page 162 NTA907HD and NTA3007HD Table of Contents Index Appendix A - Reference Information Hydraulic Diagrams Transport Hook and Fold Hydraulics Figure 154 29466 Transport Hook and Fold Hydraulics Great Plains | 166-207M | 02/26/2019 Table of Contents Index...
- Page 163 NTA907HD and NTA3007HD Table of Contents Index Appendix A - Reference Information Wing Opener / Tilt Hydraulics Figure 155 29476 Wing Tilt Hydraulics Great Plains | 166-207M | 02/26/2019 Table of Contents Index...
- Page 164 NTA907HD and NTA3007HD Table of Contents Index Appendix A - Reference Information Marker Hydraulics (Option) Figure 156 29489 Marker (Option) Hydraulics Great Plains | 166-207M | 02/26/2019 Table of Contents Index...
- Page 165 NTA907HD and NTA3007HD Table of Contents Index Appendix A - Reference Information Opener Lift / Down-Pressure Hydraulics Figure 157 29484 Opener Down-Pressure Hydraulics Great Plains | 166-207M | 02/26/2019 Table of Contents Index...
- Page 166 NTA907HD and NTA3007HD Table of Contents Index Appendix A - Reference Information Weight Transfer Hydraulics Figure 158 29474 Weight Transfer Hydraulics Great Plains | 166-207M | 02/26/2019 Table of Contents Index...
- Page 167 NTA907HD and NTA3007HD Table of Contents Index Appendix A - Reference Information Fan (std.) and Auger (opt.) Hydraulics Figure 159 29464 Auger Hydraulics Great Plains | 166-207M | 02/26/2019 Table of Contents Index...
- Page 168 In the table above, the extension values are measured NTA3007HD-6006 6 in 181.9 in from the center-line of the outside wing rows, to the mark left by the marker disk. Great Plains | 166-207M | 02/26/2019 Table of Contents Index...
-
Page 169: Sequence Valve
Excessive [un]folding speed could damage markers and void the warranty. After adjusting the folding speed, tighten jam nuts on hex Figure 162 14048 adjustment screws to hold settings. Sequence Valve Adjustment Great Plains | 166-207M | 02/26/2019 Table of Contents Index... - Page 170 Note the pin hole orientation on the shaft and on the gears. The gears can only be pinned in 2 of the 6 possible ways they can be placed on the shafts. Figure 165 26335 Exchange Flute Shafts Great Plains | 166-207M | 02/26/2019 Table of Contents Index...
-
Page 171: Adjustments
4. Re-mount the removed disk blade. Figure 166 26460 Scraper Installation 5. Adjust the scraper blade per “Disk Scraper Adjustments” on page 95. Great Plains | 166-207M | 02/26/2019 Table of Contents Index... - Page 172 This Warranty is limited to the replacement of any defective part by Great Plains and the installation by the dealer of any such replacement part. Great Plains reserves the right to inspect any equipment or part which are claimed to have been defective in material or workmanship.
-
Page 173: Crank
........79 DOT5 ..........118 changing flutes .........164 crank, calibration ......56 DOT5.1 ..........118 Channel Width ........74 crank, gearbox ......56 Down Pressure Springs ......93 Channel 1 ...........74 crusts ....3 down-force, coulter ......91 Great Plains | 166-207M | 02/26/2019 Cover Table of Contents... -
Page 174: Fan
Gear Ratio ..........74 level drill ........... 127 NTA907HD-3610 ........15 gears, final range ....... 75 level sensor, hopper ......109 NTA907HD-4875 ........15 Gleason ..........144 leveling ..........22 NTA907HD-6006 ........15 Gran Fert Monitor .......73 Great Plains | 166-207M | 02/26/2019 Cover Table of Contents... -
Page 175: Table Of Contents
Sensor Constant ........ 74 models covered ......15 SMV ..........6 sensor, hopper level ......109 rate adjustment......72 reflectors, safety ........6 sequence valve ......61 row unit spring ......94 remove meter box ......108 Great Plains | 166-207M | 02/26/2019 Cover Table of Contents... -
Page 176: Transport
......85 818-622C, decal ......... 10 welding ..........5 818-623C, decal ......... 11 wheat ..........82 818-627C, decal ........7 wing height ........127 818-628C, decal ........9 WNRE-05-155-4 .......120 818-632C, decal ........9 Great Plains | 166-207M | 02/26/2019 Cover Table of Contents... - Page 177 Table of Contents Index Table of Contents Index...
- Page 178 Table of Contents Index Great Plains, Mfg. 1525 E. North St. P.O. Box 5060 Salina, KS 67402...
Need help?
Do you have a question about the NTA907HD and is the answer not in the manual?
Questions and answers